How to Fix Wireless Display Install Failed Error Windows 11?
You can use the Windows 10 Wireless Display feature to extend your visual workspace while also increasing the functionality of your computer. The wireless display feature allows you to use your PC as a wireless display to view video from tablets, smartphones, or other PCs. So in order to accomplish projects where you require additional screen coverage, you can turn your computer into an additional monitor.
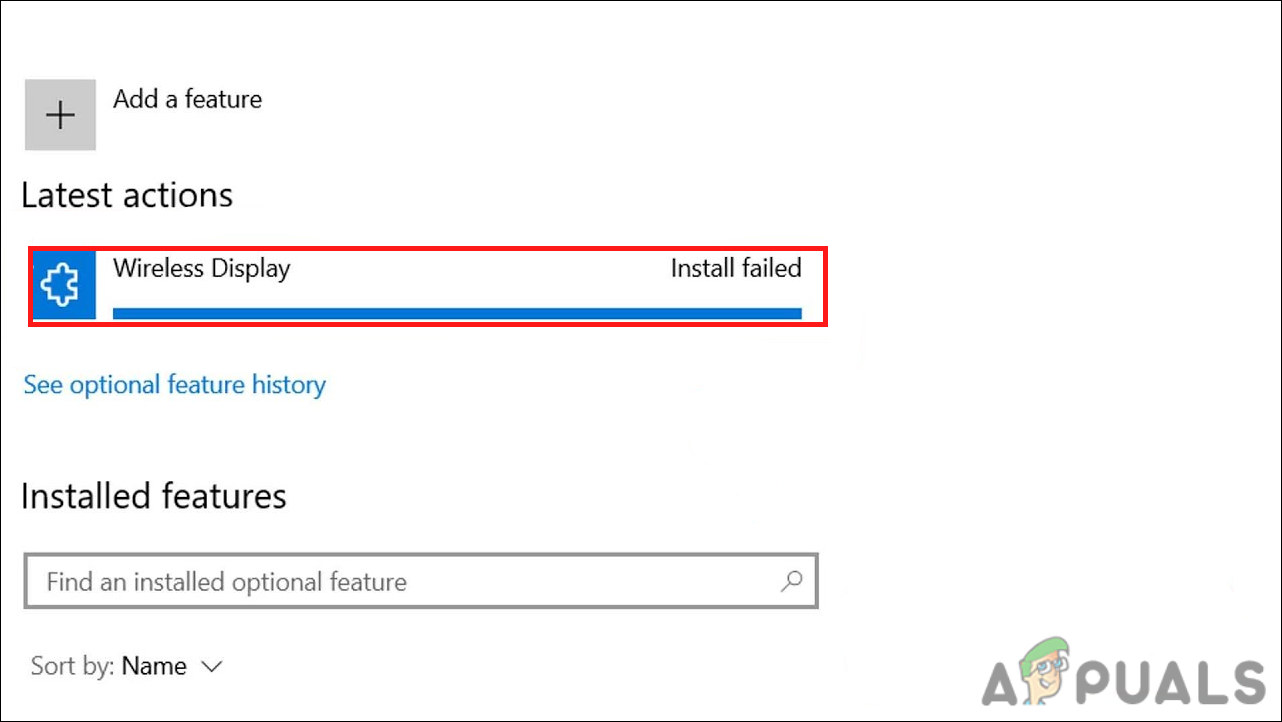
Recently, several users reported that the Wireless display fails to install on their Windows 11, despite numerous attempts. We had a look into the issue and discovered that the following causes might be resulting in the issue:
- Unstable internet connection – In case of an unstable internet connection, any file you are trying to install will either be slowly installed or not installed at all.
- Limited internet connection – If your system is only allowed to use a limited internet connection, you will not be able to install anything that requires more bandwidth. You can turn off the metered connection to resolve this issue.
- Generic inconsistency – Your system might also be infected by a generic corruption error or can be facing an inconsistency, leading to the problem at hand. If this scenario is applicable, you can try changing your approach and downloading the Wireless Display using another utility like Command Prompt.
Now that we know about the potential causes, let’s have a look at some effective troubleshooting methods that worked for several users.
Check Your Internet Connection
Installing Wireless Display requires a stable internet connection. If you are not connected to the internet or the internet connection you are using is not stable, you are likely to run into the error at hand.
This is why the first thing that we recommend is checking if you have a stable internet connection. You can also restart your router and see if that fixes the issue. Moreover, if you have more than one internet connection, try switching to the second network and see if that makes a difference.
If your connection is working fine, proceed with the troubleshooting method below.
Turned Off Metered Connection
Metered connections allow you to control how much data your system uses on a connection. Your system meters cellular data by default, while you can meter Ethernet and WiFi connections if you wish to.
If your internet connection is limited, you might not be able to install the wireless display on your Windows 11. Here is how you can turn it off:
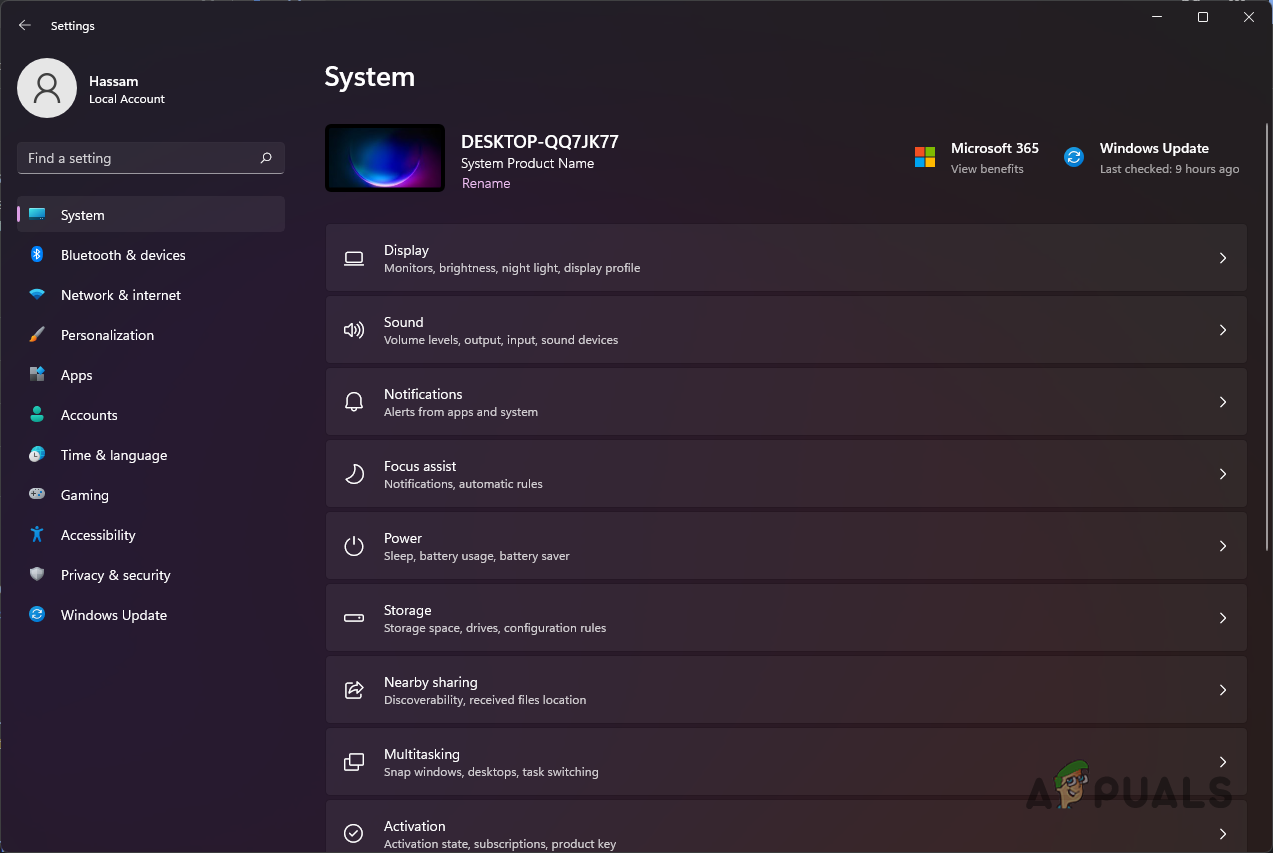
- Press Windows + I keys together on your keyboard to open Windows Settings.
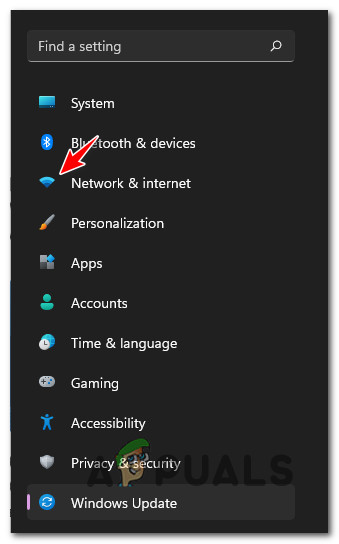
Navigating to Display Setting - In the Settings window, select Network & internet from the left pane.
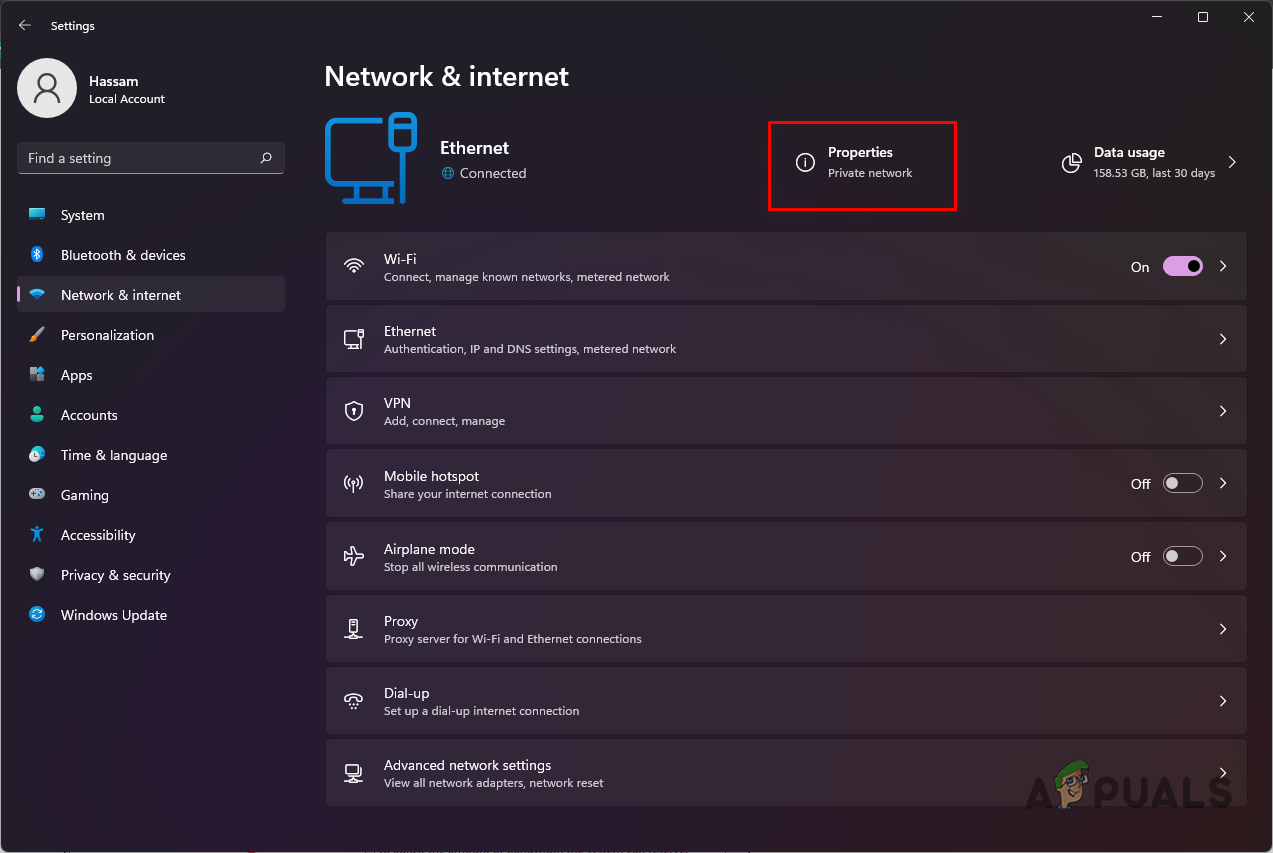
Open up the Network and Internet screen - Choose Properties on the right side of the window.
Navigating to Network Properties - Scroll down the window to locate the Metered connection and turn the toggle associated with it off.
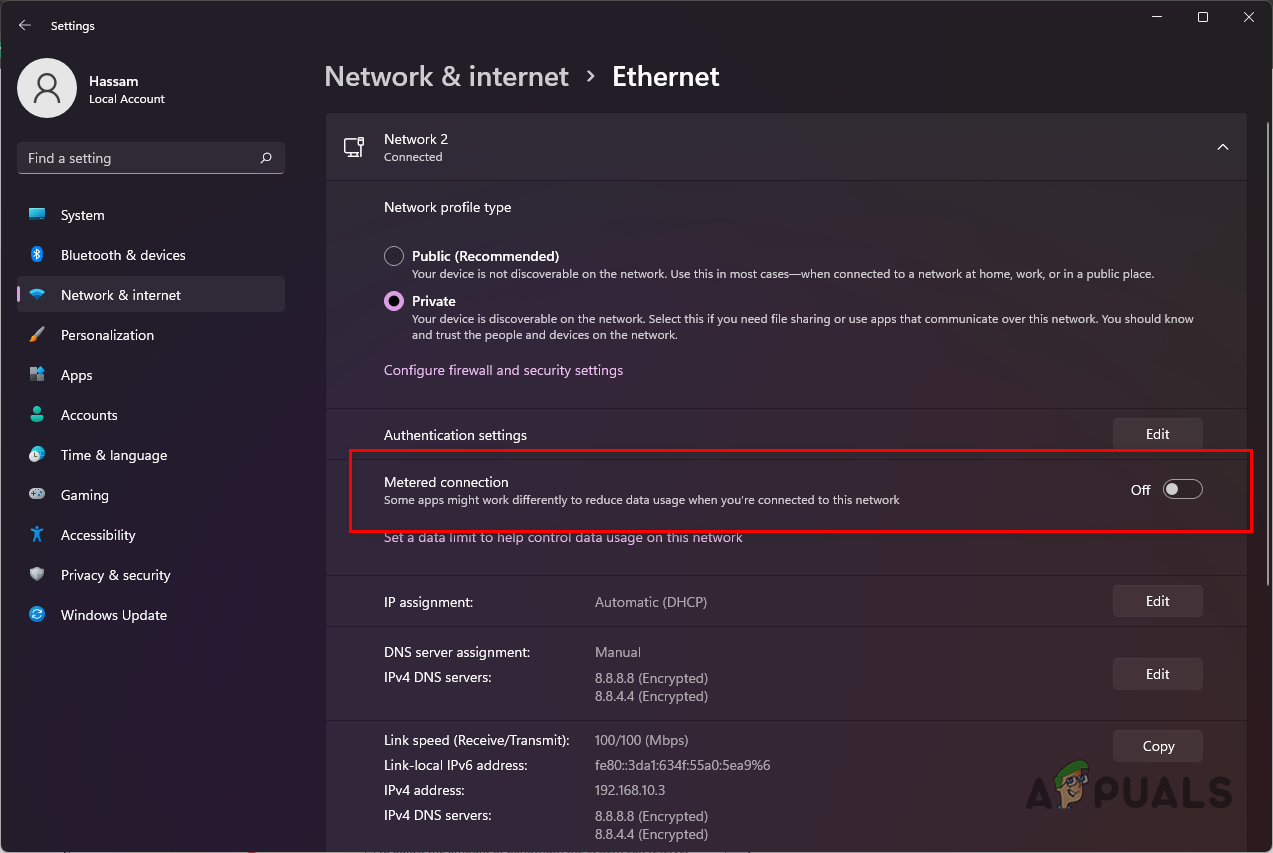
Disabling Metered Connection
Install Wireless Display from Command Prompt
It is not a troubleshooting step but rather an alternative. In this method, we will show you how to install the wireless display using the Command Prompt. If you don’t already know, the Command Prompt in Windows is a program that carries out the function of an input field in a text-based screen using the Windows Graphical User Interface (GUI).
You can use it to perform advanced administrative functions and execute entered commands. Also, you can use it for troubleshooting and solving several types of Windows issues.
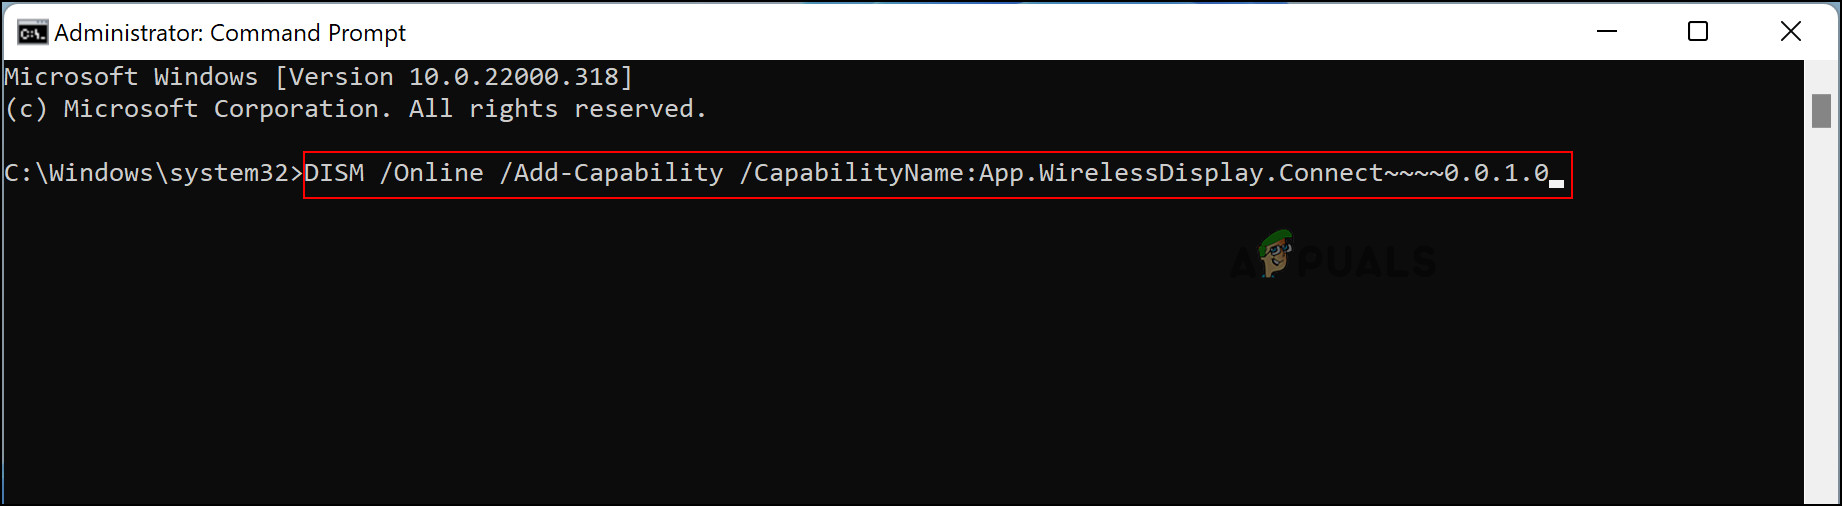
Here is how you can use the Command Prompt to install the wireless display:
- Type cmd in the search area of the taskbar and click Run as administrator. This will launch Command Prompt with administrative privileges.
- Click Yes in the User Account Prompt to proceed. Inside the Command Prompt window, type the command mentioned below and hit Enter to execute it.
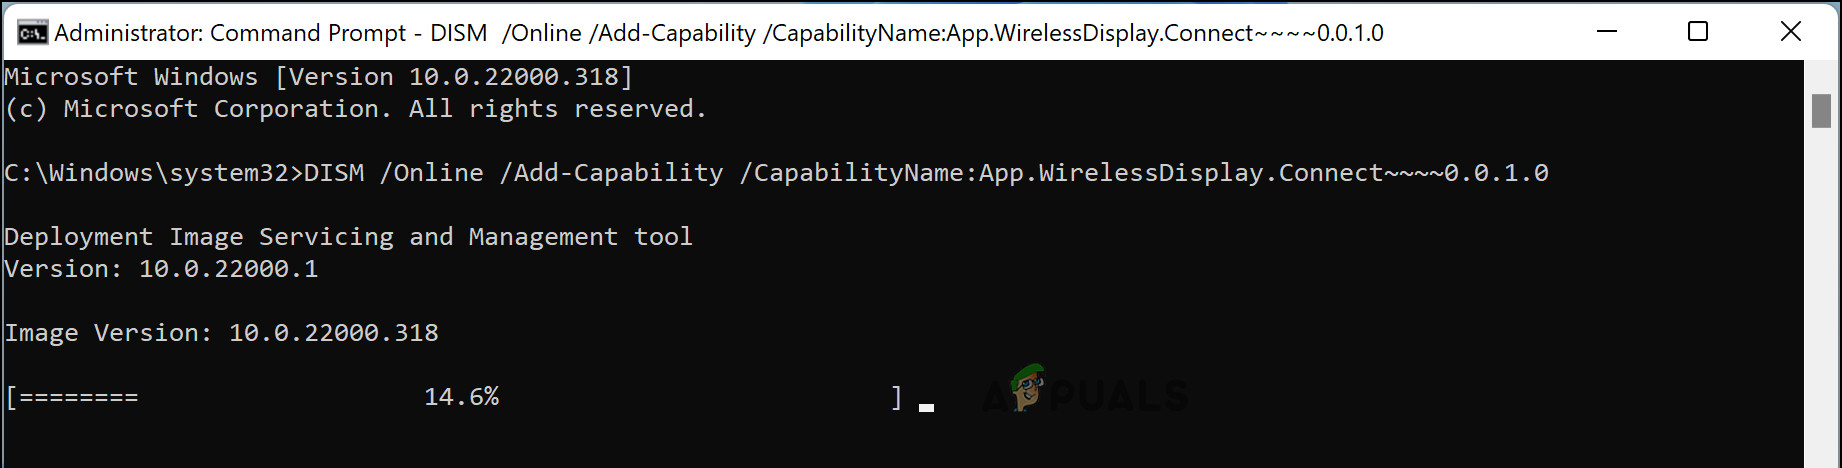
DISM /Online /Add-Capability /CapabilityName:App.WirelessDisplay.Connect~~~~0.0.1.0
install wireless display from cmd - A progress bar will appear in the command prompt window. Wait for the Command Prompt to complete the process and then close the window.
Alternatively, you can also use Windows Powershell to install the Wireless Display if you cannot use Command Prompt for some reason. Follow the steps mentioned below to do so:
- Right-click on the Windows icon on the taskbar and select Windows Powershell (Admin) from the context menu.
- Inside the Powershell window, type the command mentioned below and hit Enter to execute it.
DISM /Online /Add-Capability /CapabilityName:App.WirelessDisplay.Connect~~~~0.0.1.0
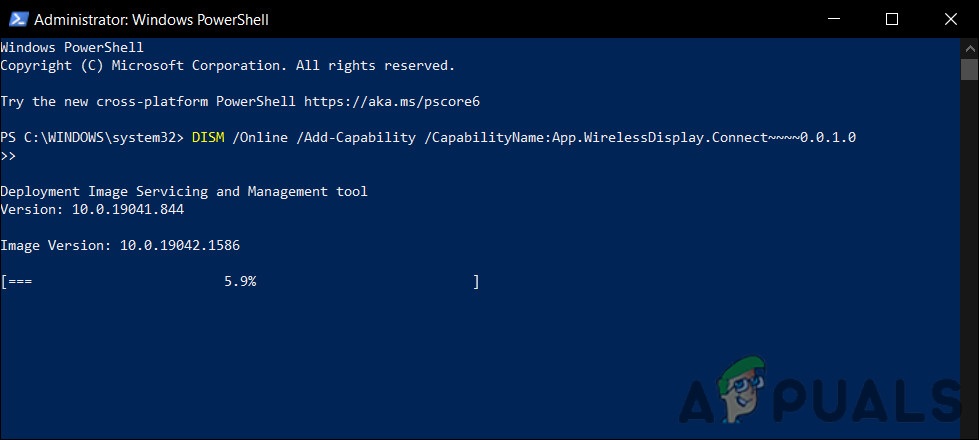
Install wireless display via Powershell - This should begin the installation of Wireless Display on your computer. You can see the progress of the installation via Windows Settings as well in the Powershell window.
Hopefully, the installation will be completed successfully via this method. However, if you have come this far without a viable solution, then this implies that the issue cannot be resolved using the conventional, simpler methods that we have described above. In such cases, we recommend you consider performing an in-place upgrade to fix the deep-rooted problem.
Sources: https://www.youtube.com/watch?v=UUDbfhQxtG4&ab_channel=MDTechVideos


