Fix: Windows Update Stuck at 0%
Seeing how there are a lot of security and compatibility issues on outdated programs and operating systems, it’s obvious we need to ensure that our operating systems are updated. It is an automated process unless you have changed the settings to prevent the updates. However, sometimes these updates get stuck during the process. In this specific case, your Windows update will be stuck at 0% and it will remain at 0% no matter how long you wait.
This lag can be due to a number of reasons. Sometimes, it can be due to a simple overloaded physical memory. And sometimes it’s because of software conflict or a preexisting problem that wasn’t visible until the Windows Updates initiated. Following are a few solutions to help you fix the issue and get the updates moving to completion:
Tips
- Restart your system and try again. Yes, sometimes the problem might simply be a no problem. A lot of the time restarting the system fixes this kind of issue.
- Try disabling your antivirus and then try to update the Windows. Sometimes, your antivirus might be blocking the update. Almost every antivirus has an option that lets you disable the program.
- Sometimes the problem might be because of malware. Try scanning your system with the antivirus. Make sure you do a full scan instead of a quick scan.
- Wait for a while. Sometimes your internet might be slow or there might be a problem in the update where your system isn’t showing the progress. So, leave your system for a couple of hours while it’s updating.
- Click here to download the Windows own Windows Update Troubleshooter. This might help solve the update issue.
- If you have multiple updates that are getting downloaded then try to download a couple of them. For example, if you have 20 updates then select just 2 or 3 and download them. If this works then select 2 or 3 again and so on.
Method 1: Disabling Background Services
Services running the background can definitely cause problems and conflicts with the Windows update. So, the very first thing that should be taken care of is disabling the background services.
Follow these steps to disable non-essential services.
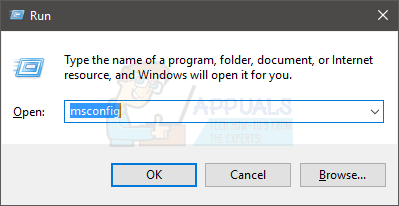
- Hold Windows key and press R
- Type msconfig and press Enter.
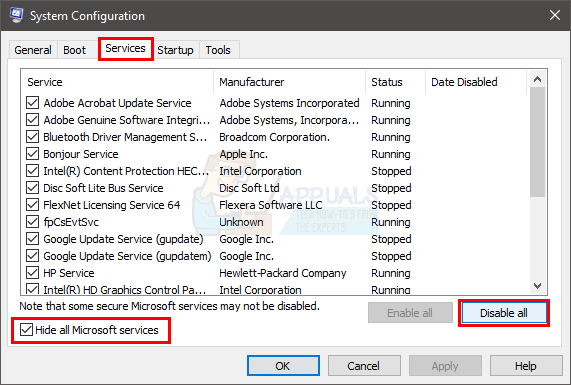
- This will open the System Configuration window. Click the Services tab in the window.
- At the bottom of the list, check the Hide all Microsoft Services option
- Then click the Disable All button at the bottom right of the list and click Ok.
- Restart your PC, by clicking the Restart button in your start menu, for the changes to take effect.
- Once your PC has restarted, launch your Windows Update again by following the steps given below
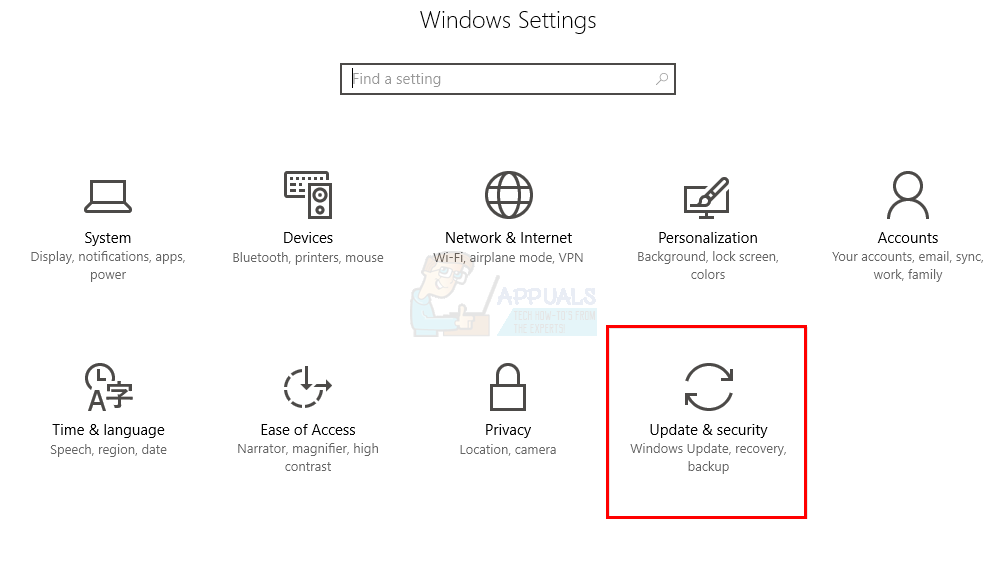
- Press Windows key once
- Click on Settings.
- Select Update & Security
- Click Check for updates
- Wait for the Windows to check and download the updates
After your system has updated, you need to Enable the disabled background services. To do so, do the following:
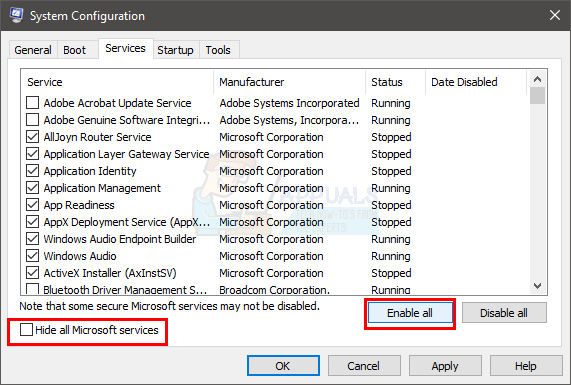
- Repeat the steps from 1-3 above
- Uncheck the Hide all Microsoft Services at the bottom of the list.
- Then click the Enable All button at the bottom right of the list and then click Ok.
Once done, your problem should be solved and other services should be working properly.
Method 2: Turn off Windows Firewall Temporarily
Sometimes, windows built-in features prevent updates; like the firewall. So you have to turn off the firewall for the updates and then turn it back on right after the updates are successfully downloaded and installed.
You can turn off the firewall by following these steps:
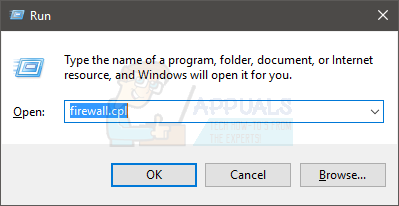
- Hold Windows key and press R
- Type firewall.cpl and press Enter

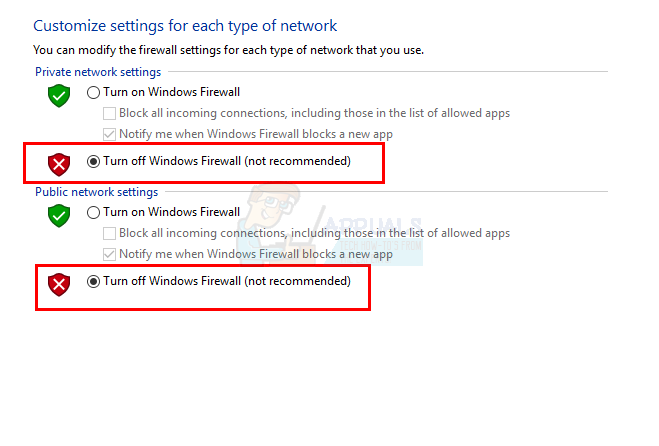
- In the Windows Firewall, select the Turn Windows firewall on or off option in the left hand pane.
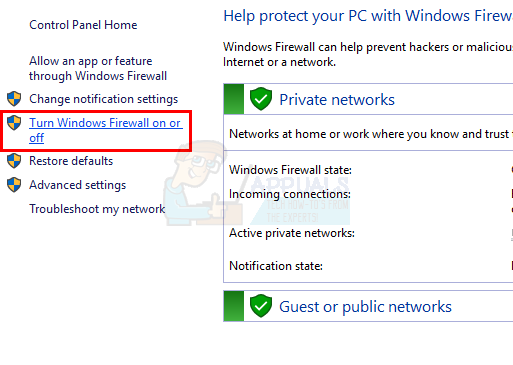
- Check the Turn off Windows Firewall (not recommended) option in both Public and Private network settings sections. Once done, click Ok at the bottom.
Now, check for the updates again
- Press Windows key once
- Click on Settings.
- Select Update & Security
- Click Check for updates
- Wait for the Windows to check and download the updates
Once your updates are completed, you have to turn the firewall back on. This is because the Windows Firewall is crucial for the security of your system. To do so:
- Hold Windows key and press R
- Type firewall.cpl and press Enter
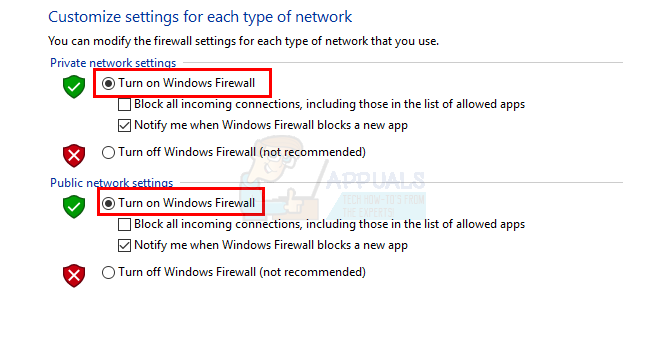
- In the Windows Firewall, select the Turn Windows Firewall on or off option in the left-hand pane.
- Check the Turn on Windows Firewall option and click Ok at the bottom.
Now you should be good to go.
Method 3: Restart your Windows Update
A lot of PC problems are fixed simply by restarting Windows Updates, so restarting Windows Update just might be the fix you need.
To restart your Windows Update, follow these steps:
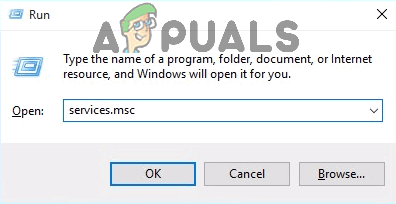
- Open the Run dialog box by holding Windows key and pressing R
- Type services.msc in the dialog box and press Enter.

- This will open the Services
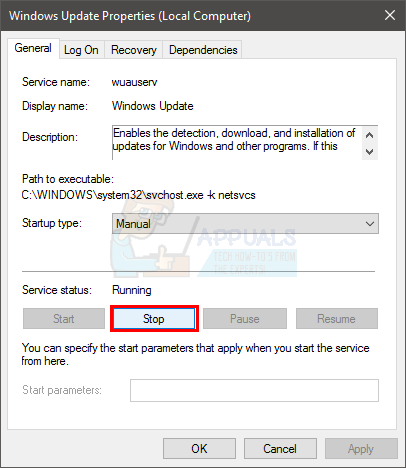
- Scroll to the very bottom of the services list and find Windows Update service in it.
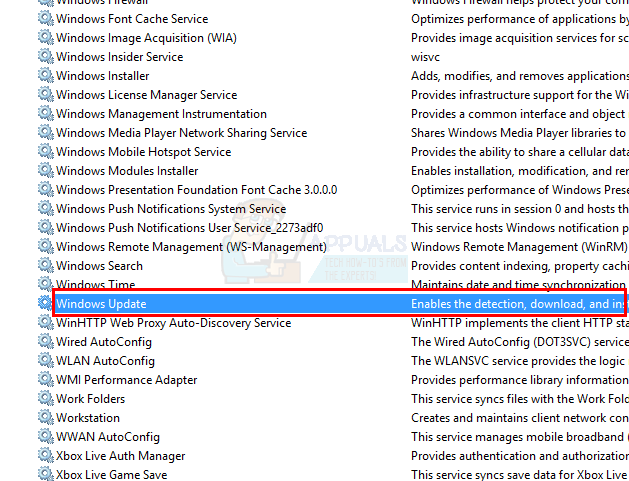
- Right-click Windows Update and select Stop.
- After stopping the Windows Update, simply press Windows + E keys to open the explorer.
- Go to the following directory: “C:\Windows\SoftwareDistribution”. Simply copy/paste the address (without quotes) in the address bar located at the top of the Windows Explorer
- Hold the CTRL key and press A to select all the files
- Press Delete key or right-click any one of the selected files and select Delete.
- After deleting these files, reboot your computer
- Open the Run dialog box by holding Windows key and pressing R
- Type services.msc in the dialog box and press Enter.
Type “services.msc” into the Run dialog and press Enter - This will open the Services
- Scroll to the very bottom of the services list and find Windows Update service in it.
- Right-click Windows Update and select Start.
Once done, you should be able to update your Windows. However, if this still doesn’t solve the problem then follow the steps from 1-4 then double click Windows Update service and select Disable from the drop-down menu. Click Ok and restart your computer. When your system is rebooted, follow the steps from 1-4 then double click Windows Update service and select Manual from the drop-down menu. Now, click Start then select Ok. This should solve the issue.
Method 4: Download the Windows Updates Manually
If the automatic Windows Update isn’t working and you don’t want to wait then you can download the updates manually. Manually downloading the updates is uncommon but not an impossible task. However, it is time-consuming.
The very first thing that you need to do is find the Microsoft Knowledge Base article number of the failed update. Once you have that article number, you can search and download the exact update from the Microsoft Update Catalog.
- Press Windows key once
- Select Settings
- Click Update & security
- Select Update History
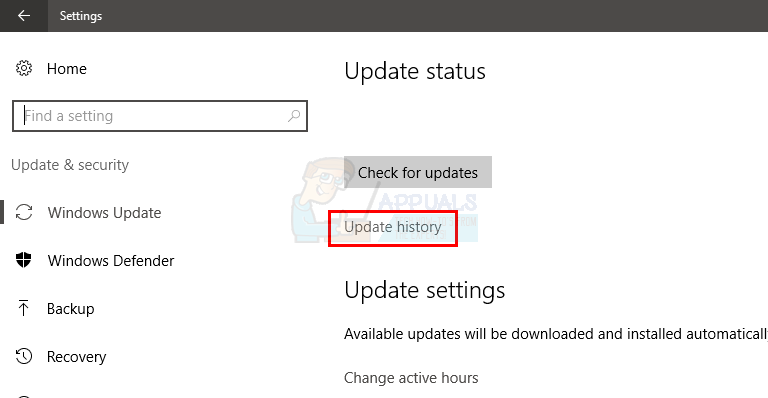
- You will be able to see the failed update in this window
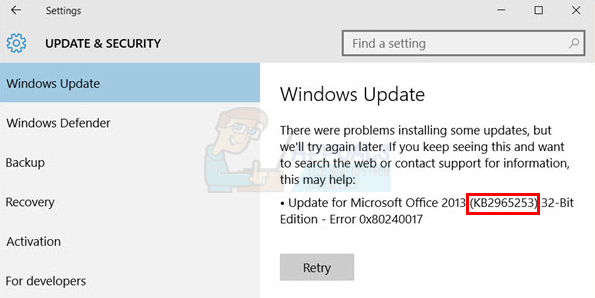
- Once you have the article number, it’s time to just search the update and download it
- Click here to go to the Microsoft update catalog
- Enter the article number in the search bar.
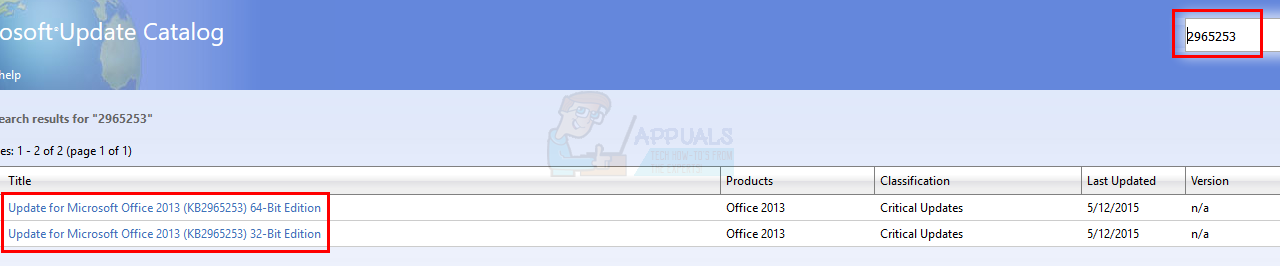
- Now, simply look at the results and download the update that you wanted
- Once downloaded, open the downloaded file to install the update.
That’s it. Do this for all the updates that are either failing or not getting installed.
Method 5: Delete Incorrect Registry Values
Deleting the incorrect registry values and then trying the Windows update solves the issue as well. So, follow these steps to delete the incorrect registry values
Note: Messing up registry keys can cause serious issues. So, it is advised to make a backup of your registry keys in case something goes wrong. Click here for a step-by-step guide on how to backup and restore your registry.
Now, follow the steps below to solve the original issue.
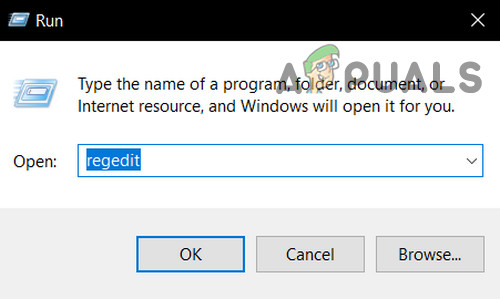
- Hold Windows key and press R
- Type regedit.exe and press Enter
Open Regedit - Locate and double click HKEY_LOCAL_MACHINE from the left pane
- Locate and select COMPONENTS
- Locate and right-click PendingXmlIdentifier then select Delete. Confirm any additional prompts. The PendingXmlIdentifier should be in the details pane
- Locate and right-click NextQueueEntryIndex then select Delete. Confirm any additional prompts. The NextQueueEntryIndex should be in the details pane
- Locate and right-click AdvancedInstallersNeedResolving then select Delete. Confirm any additional prompts. The AdvancedInstallersNeedResolving should be in the details pane
Once done, close the registry and restart your computer. This should fix the issue for you.