Fix: Windows Update Error Code 0x80244022
Error Code 0x80244022 occurs when you are trying to update your Windows but Windows can’t able to search for new updates and shows you this error instead. There are a lot of reasons for this issue to occur, but mostly it has to do with your Internet connection being unstable, or the Windows Update servers are overloaded and they are not responding at the moment.

It doesn’t really matter whatever the reason is behind this issue, we suggest you wait at least 2 hours and then try again. However, if that doesn’t work for you we have listed some solutions below.
1. Microsoft’s Servers Are Too Busy
Since your Windows Update service wasn’t able to communicate properly with Microsoft’s servers, it’s quite possible that their servers are experiencing heavy load, especially after the release of a new update.
If that is indeed the case, you can only wait for a day or two and try again until it works. Try visiting their official website or do an online search to see if Microsoft or someone else has ported something about the server issues.
2. Time and Date Settings
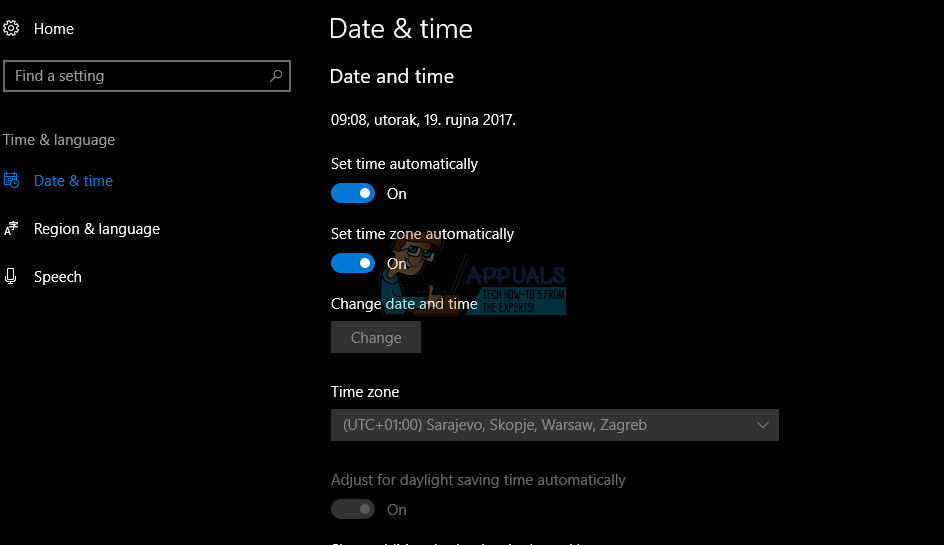
In order for everything on your computer to work well, you will need to adjust your time and date settings properly since you won’t be able to communicate with Microsoft servers if you have wrong time and date
- Right-click on the time and date at the right part of your taskbar and click on Adjust date/time.
- Make sure you keep the following options turned on in order for your computer to automatically register the correct time and date:
Adjust for Daylight Savings Time Automatically”
“Set Time Automatically”
“Set Time Zone Automatically”
- Try restarting your computer and running Windows Update again. Search online to see if the time on your computer really matches your time zone exactly.
3. Troubleshoot the Windows Update Service and Reset Internet Settings
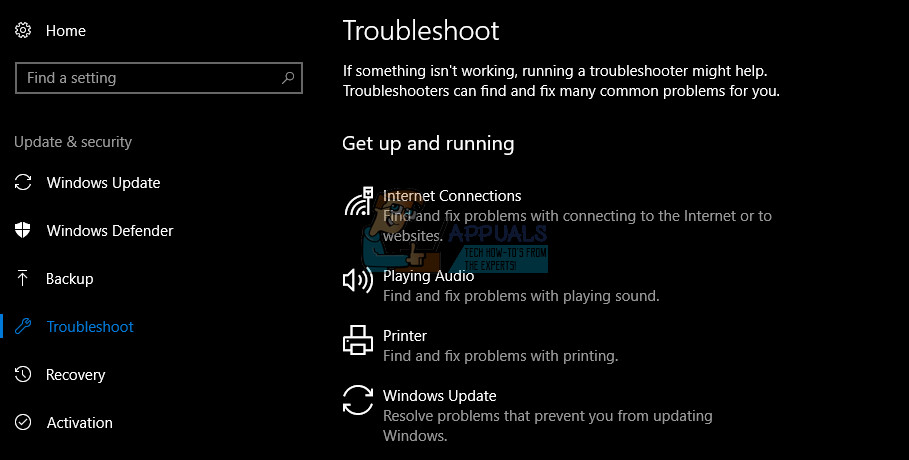
Each Windows 10 PC has a built-in troubleshooter which can detect your issues automatically as soon as you run it and fix them without your doing anything.
- Click on the Windows logo in the bottom left corner and click on the gear icon to open Settings.
- Open the Update and Security option and navigate to the Troubleshoot section.
- Under the Get up and running part, click on Windows Update and follow the instructions on screen.
In addition, it’s for the best if you proceed with this process by also automatically resetting and refreshing your Internet settings via Internet Explorer. This has helped a lot of people fix their Windows Update issues.
- Open Internet Explorer by searching for it in the Search menu which opens after you open your Start menu.
- Click on the gear icon at the top right part of the browser window and select Internet Options.
- Navigate to the Connections tab and open LAN settings.
- Look under the Automatic configuration option and check the box with the “Automatically detect settings” text in it.
4. Some More Troubleshooting
If the solution above failed to fix your problem, the issue may relate to your Internet connection so make sure you follow the instructions below in order to fix this.
- Follow the steps 1 and 2 from Solution 3 – Windows Update in order to open the Troubleshoot section in the Settings app.
- Under the Get up and running part, click on Internet Connections and follow the instructions on screen.
- Alternatively, you can use the network troubleshooter from Control Panel to check your network settings for errors.
- Open the Search bar and search for “Identify and repair network problems”.
- The troubleshooter should open immediately.
If you are using a proxy to connect to the Internet, make sure you disable it and then go through with the updating process.
- Open Internet Explorer.
- Click on the gear icon in the top right corner and open Internet Options.
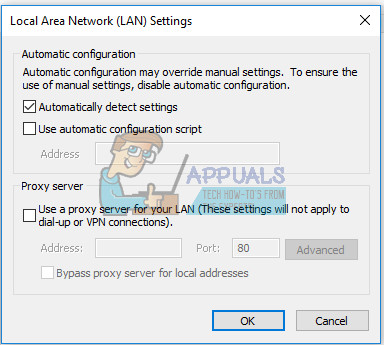
- Navigate to the Connections tab and open LAN Settings.
- Locate the “Use a proxy server for your LAN” option and uncheck the box next to it.
- Apply these changes and try updating your PC.
5. Resetting Windows Update Components
If all of the solutions we mentioned failed to help, you best bet may be to try and reset Windows Update components completely and then try to update. This solutions works for many different Windows Update errors besides this one and people have claimed that this worked for them regarding this particular error message.
- Search for “Command Prompt”, right-click on it, and select Run as administrator.
- Use the commands below in order to stop the BITS service, the Cryptographic service, and the Windows Update service. Click Enter after each command and wait for its task to finish.
net stop bits
net stop wuauserv
net stop appidsvc
net stop cryptsvc
- Use the command from below in order to delete qmgr*.dat files.
del “%ALLUSERSPROFILE%\Application Data\Microsoft\Network\Downloader\qmgr*.dat”
- Rename the folder named Software Distribution which can help you restart your entire updating process. You can achieve this by copying or typing the following commands one after another.
ren %systemroot%\SoftwareDistribution SoftwareDistribution.bak
ren %systemroot%\system32\catroot2 catroot2.bak
- Reset the Windows Update service and the BITS service to their default settings in command prompt by copying and pasting the following commands one after another. Don’t forget to click Enter after each one.
sc.exe sdset bits D:(A;;CCLCSWRPWPDTLOCRRC;;;SY)(A;;CCDCLCSWRPWPDTLOCRSDRCWDWO;;;BA)(A;;CCLCSWLOCRRC;;;AU)(A;;CCLCSWRPWPDTLOCRRC;;;PU)
sc.exe sdset wuauserv D:(A;;CCLCSWRPWPDTLOCRRC;;;SY)(A;;CCDCLCSWRPWPDTLOCRSDRCWDWO;;;BA)(A;;CCLCSWLOCRRC;;;AU)(A;;CCLCSWRPWPDTLOCRRC;;;PU)
- You will have to reregister BITS files along with Windows Update files in order for your computer to recognize and go through with the updating process. There are a lot of files to reregister and you will have to use a command for each one so make sure you don’t forget any of these
regsvr32.exe atl.dll
regsvr32.exe urlmon.dll
regsvr32.exe mshtml.dll
regsvr32.exe shdocvw.dll
regsvr32.exe browseui.dll
regsvr32.exe jscript.dll
regsvr32.exe vbscript.dll
regsvr32.exe scrrun.dll
regsvr32.exe msxml.dll
regsvr32.exe msxml3.dll
regsvr32.exe msxml6.dll
regsvr32.exe actxprxy.dll
regsvr32.exe softpub.dll
regsvr32.exe wintrust.dll
regsvr32.exe dssenh.dll
regsvr32.exe rsaenh.dll
regsvr32.exe gpkcsp.dll
regsvr32.exe sccbase.dll
regsvr32.exe slbcsp.dll
regsvr32.exe cryptdlg.dll
regsvr32.exe oleaut32.dll
regsvr32.exe ole32.dll
regsvr32.exe shell32.dll
regsvr32.exe initpki.dll
regsvr32.exe wuapi.dll
regsvr32.exe wuaueng.dll
regsvr32.exe wuaueng1.dll
regsvr32.exe wucltui.dll
regsvr32.exe wups.dll
regsvr32.exe wups2.dll
regsvr32.exe wuweb.dll
regsvr32.exe qmgr.dll
regsvr32.exe qmgrprxy.dll
regsvr32.exe wucltux.dll
regsvr32.exe muweb.dll
regsvr32.exe wuwebv.dll
- Use the following commands one after another in order to reset Winsock and to automatically configure proxy settings.
netsh winsock reset
netsh winhttp reset proxy
- Reopen the services we closed in the beginning of this solutions by using the following commands in the Command Prompt.
net start bits
net start wuauserv
net start appidsvc
net start cryptsvc
- Restart your computer in order to apply these changes and try running the update again and check to see if the error message reappears.
6. A Simple Registry Hotfix
This particular solution was posted online and it helped a lot of people easily so it’s worth giving this a shot if everything else fails to help you. Know that changes to the registry can affect your computer’s performance negatively so make sure you know what have you done and consider backing up your registry just in case.
- Type “regedit” in the search bar and click on the first option which appears.
- As soon as the Registry Editor opens, navigate to the following location:
HKEY_LOCAL_MACHINE >> SOFTWARE >> Policies >> Microsoft >> Windows >> WindowsUpdate >> AU
- Create a REG_DWORD key and name it “UseWUServer” without the quotation marks if a similar key does not exist.
- If you are using WSUS (Windows Server Update Services) set the value of the key to 1.
- If you are not using a Windows Server (if your computer is a regular PC), set the value of the key to 0.
- Try running the update now.
7. Use DISM Tool TO Check Your Image For Errors
Sometimes it’s not your Internet connection or your Windows Update service which is broken. Simple image errors can lead to malfunctioning in various different aspects when it comes to your computer’s performance. Luckily, the DISM (Deployment Image Servicing and Management) tool can recognize and fix these errors. We have a detailed guide on DISM at https://appuals.com/use-dism-repair-windows-10/
- Search for “Command Prompt” and run it as admin or right-click on the Windows logo located in the bottom left corner and choose Command Prompt (Admin). Make sure you have administrator privileges.
- Copy and paste the following command in order for DISM to start scanning your Windows image. Please be patient as the process may require some time to complete.
dism /online /cleanup-image /restorehealth
- It won’t hurt to run the SFC (System File Checker) tool as well. Its purpose it to check Windows for missing or corrupted system files and it can add missing ones or replace broken ones easily. Use the command below to start the process:
sfc /scannnow
8. Manually Update Windows
Sometimes, it’s simply Microsoft’s fault since the release of new Windows updates is often followed by a lot of users not being able to update their computers properly because of common updating errors. You can update Windows manually from their official site easily.
- Click on the Windows logo located in the bottom left corner and open the Settings app by clicking on the gear icon.
- Navigate to Update & Security >> Windows Update >> Update History.
- Look at the top of your update list and copy the Knowledge Base (KB) number from the last update on the list.
- Paste this number along with letters KB at the beginning in the search bar on Microsoft’s Update Catalog.
- Locate the update you have pending and clck on Add in order to add it to the download queue.
- Click on the “View Basket” option located right under the Search bar, verify your updates and click on Download. Accept the license agreement.
- Locate the folder where you have downloaded the update, double-click on it and follow the instructions on screen in order to install it.
Hopefully, you won’t have to repeat this for the next update.
9. Reset Windows
Unfortunately, this last fix on our list will require you to reset your Windows installation completely in order to be able to update your computer. This solution does work and countless users had to reset their PCs in order to fix this problem.
- Navigate to Settings >> Update & Security >> Recovery.
- Under the Reset, this PC section, click on Get Started.
- Follow the instructions and make sure you choose to keep your files. You will still lose your installed programs, though.
- Wait for the process to finish and update your PC immediately.