How to Fix Windows Update Error 8020002e?
The 8020002e error code typically occurs when the user tries to install a critical or security update using the WU component. Most affected users see it a few seconds after trying to initiate the download of a pending update. This particular error code signals that some vital component needed for the updating process is corrupted or unregistered.
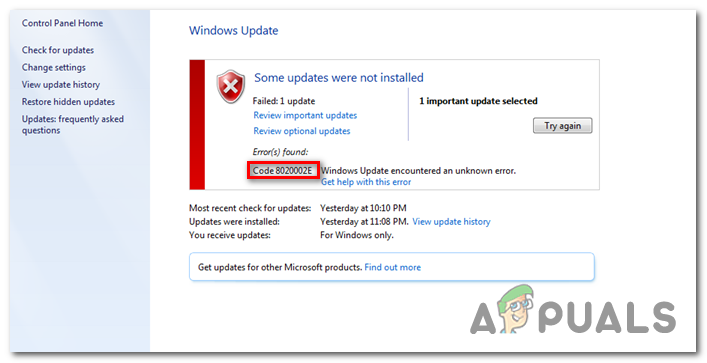
What’s causing the Windows Update Error Code 8020002E?
- Glitched Windows Update instance – The most common cause that will trigger this error code is when one or more WU components become stuck in a limbo state. In situations like this one, the best approach is to run the Windows Update troubleshooter (a utility capable of identifying most inconsistencies and applying the correct repair strategy automatically).
- Corrupted WU component – In more serious cases, this error code might occur due to a persisting WU bug that will not go away conventionally. If certain components become stuck in a limbo state, the only viable fix is to reset every WU component so that you eliminate the possibility of a paralyzed component. This can either be done by using the automated WU agent or by deploying a series of commands in an elevated CMD prompt.
- Overprotective AV suite – As it turns out, there are certain firewall suites that might end up blocking the connection between the end-user computer and the WU server. Comodo firewall is most commonly reported for being responsible by affected users (but there might be others). In this case, you will be able to fix the issue by uninstalling the overprotective suite and reverting back to the native firewall.
- System File Corruption – As several affected users have reported, this problem can also occur due to some type of underlying corruption issue that cannot be resolved conventionally. In this particular case, the only viable repair strategy is to use DISM or System File Checker Scan capable of dealing with corrupted system files. But in some rare circumstances, you might need to reset every OS component in order to fix it (via clean install or repair install)
Method 1: Running the Windows Update troubleshooter
Before we pursue other repair strategies that are capable of fixing this error code, let’s see if your Windows version is not capable of fixing the issue automatically. Every recent Windows version (Windows 7, Windows 8.1 and Windows 10) is equipped with a WU (Windows Update) troubleshooter that will automatically scan various Windows components for inconsistencies and automatically apply the appropriate repair strategy.
If the problem that’s actually causing the 8020002E error code is already covered by a repair strategy, the instructions below should allow you to fix the problem automatically.
Here’s a quick guide on running the Windows Update troubleshooter on Windows 7, Windows 8.1 and Windows 10:
- Open up a Run dialogue box by pressing Windows key + R. Next, type ”control.exe /name Microsoft.Troubleshooting” and press Enter to open up the Troubleshooting tab of the classic Control Panel interface.

Accessing the Troubleshooting option from the Classic Control Panel interface Note: If you’re prompted by the UAC (User Account Control) click Yes to grant administrative privileges.
- Once you’re inside the Troubleshooting screen, move over to the right-hand side section of the screen and click on Fix problems with Windows Update (under System and Security).
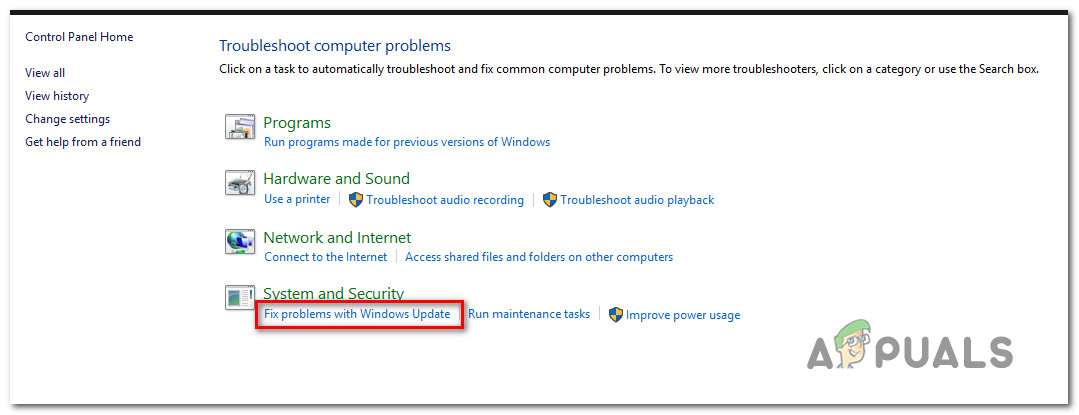
Fixing the problems with Windows update with the Windows Update Troubleshooter - At the initial Windows Update screen, click on Advanced, then ensure that the box associated with Apply repair automatically before clicking Next. This will ensure that the repair will automatically be applied if a viable fix is found.
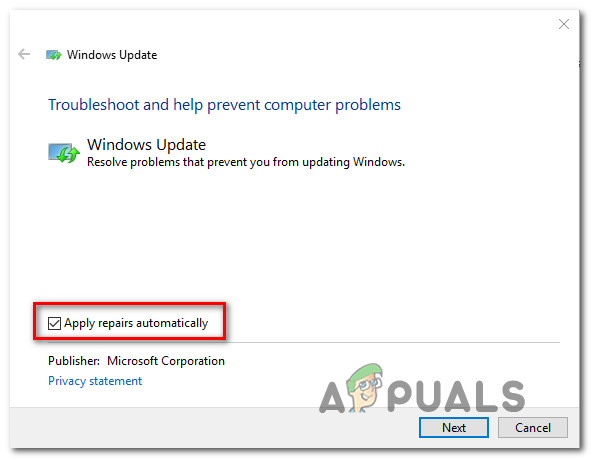
Apply repairs automatically using Windows Update - Wait for the analysis to complete. Once the operation is finished, you’ll see if any of the repair strategies included inside the Windows Update troubleshooter are applicable to your particular scenario.
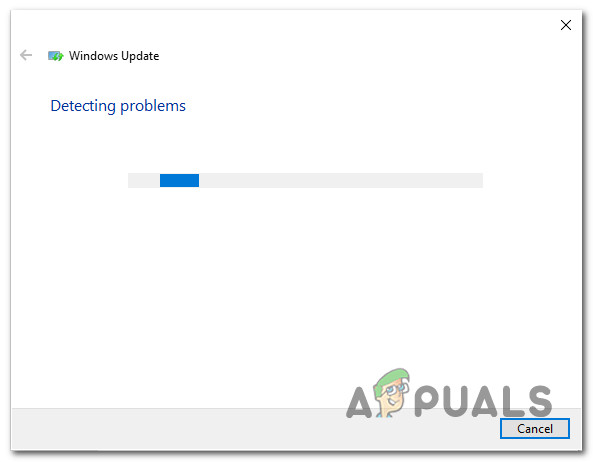
Detecting problem with Windows Update - If a viable repair strategy is identified, you will be presented with a different window in which you’ll be able to click on Apply this fix. Click that hyperlink, then follow the on-screen instructions to enforce the fix. But keep in mind that depending on the repair strategy that gets recommended, you might need to follow a series of additional steps.
- Restart your computer and see if the issue is resolved at the next system startup.
Method 2: Disabling 3rd party interference (if applicable)
As it turns out, this issue can also occur due to an overprotective AV suite that is somehow interfering with the Windows Update component. Whenever this occurs, communications with the Microsoft server are interrupted, which will cause some updates to fail.
According to affected users, there are several 3rd party suites that are known to cause this problem (Avast, McAfee, Sophos, and Comodo). If you’re using a 3rd party scanner that you suspect might be responsible for the updating issue, you should be able to resolve the issue either by disabling the real-time protection of your AV site or by uninstalling the 3rd party suite altogether.
First, start by disabling real-time protection and see if the issue is still occurring. Keep in mind that this procedure will be different depending on the security client that you’re using. But in most cases, you will be able to do so directly from the taskbar icon. To do this, simply right-click on your security suite’s taskbar icon and look for the option that disables the real-time protection.
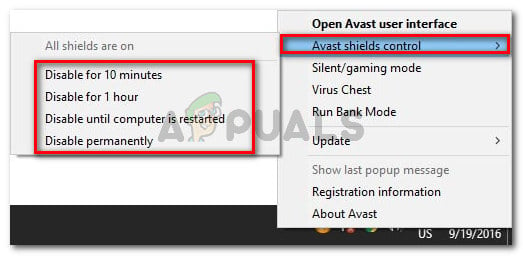
Once you manage to disable the real-time protection, attempt to install the Windows update again and see if you are able to do so without encountering the 8020002E error code.
If the same problem is still occurring, you should proceed by uninstalling the AV completely and remove any remnant files that are capable of enforcing the same security rules. In case you decide to go through with this, follow the steps outlined in this article (here) to uninstall the security program without leaving behind any leftover files that might still cause this behaviour.
Method 3: Resetting every WU component & dependency
If none of the methods above have allowed you to fix the issue so far, its probably due to some kind of WU glitch that has effectively stopped your PC’s ability to install new updates. If this scenario is applicable, you should be able to resolve the issue by resetting every relevant component and dependency involved in the updating process.
As some affected users have confirmed, you should be able to fix the issue by resetting every Windows Update component manually from an elevated CMD prompt. Here’s a quick guide with what you need to do:
- Open up a Run dialogue box by pressing Windows key + R. Once you’re inside the Run dialogue box, type ‘cmd’ inside the text box and press Ctrl + Shift + Enter to open up an elevated Command Prompt. Once you see the UAC (User Account Control), click Yes to grant admin access.
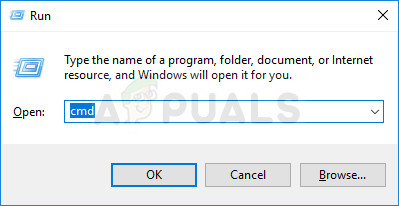
Running Command Prompt as an administrator - Once you’re inside the Command Prompt window, type the following commands in this same order and press Enter after each one:
net stop wuauserv
net stop cryptSvc
net stop bits
net stop msiserver
Note: These commands will effectively stop the Windows Update services, MSI Installer, Cryptographic service, and BITS services
- Once all relevant services are disabled, run the following commands in the same CMD window and press Enter after each command to rename the SoftwareDistribution and the Catroot2 folders:
ren C:\Windows\SoftwareDistribution SoftwareDistribution.old
ren C:\Windows\System32\catroot2 Catroot2.old
Note: These two folders are responsible for storing the update files that are being used by the Windows updating component. Since it’s a system folder, you can’t just delete them conventionally. But what you can do is rename them, which will force your OS to create new clean folders that will take their place.
- Once you are done with step 3, type these final commands in order and press Enter after each one to start the same services that were previously disabled:
net start wuauserv
net start cryptSvc
net start bits
net start msiserver
- Attempt to install the update that was previously failing with the 8020002E error code and see if the issue is now resolved.
Method 4: Running SFC and DISM scans
Another potential culprit that might be causing the Windows Update 8020002E error is some type of system file corruption. We managed to confirm this occurrence on Windows 7 and Windows 8.1. In all cases, affected users have pointed out that corrupted data ultimately ended up to breaking the WU component entirely.
In this case, you should be able to resolve the issue by running a couple of built-in utilities (Deployment Image Servicing and Management and System File Checker) that are designed to deal with those instances where the system file corruption ends up breaking important components.
Keep in mind that while SFC is a lot more efficient at repairing logical errors, DISM is much better at fixing dependencies that might affect the updating operation. Because of this, is highly recommended that you run both utilities in order to maximize your chances of getting the WU component back to a functioning state.
Here’s a quick guide that will show you how to run both the SFC and DISM scan from an elevated Command Prompt:
- Open up a Run dialogue box by pressing Windows key + R. Next, once you’re inside the newly appeared Run dialogue box, type ‘cmd’ and press Ctrl + Shift + Enter to open up an elevated Command Prompt. If you see the UAC (User Account Control) prompt, type Yes to grant admin access.

Opening the Command Prompt - Once you’re inside the elevated Command Prompt, type the following command and press Enter to initiate an SFC scan:
sfc /scannow

Running SFC Note: This SFC scan uses a locally cached copy that will replace corrupted instances with healthy copies that will not cause the same issue. But be advised that once you start this can, it’s important to ensure that it doesn’t get interrupted – Closing the CMD window prematurely might expose your system to additional logical errors.
- As soon as the process is complete, restart your computer and wait for the next startup sequence to complete. Once your computer boots back up, follow step 1 again to open up another elevated Command Prompt.
- Once you manage to return to the elevated Command Prompt, type the following command and press Enter to initiate a DISM scan:
DISM /Online /Cleanup-Image /RestoreHealth
Note: Keep in mind that DISM will require a stable internet connection. This is important because it relies on the WU component to download healthy copies that will be used to replace the corrupted instances.
- Once the scan is complete, restart your computer once again and see if the problem is resolved at the next system startup.
If the same 8020002E error code is still occurring, move down to the next method below.
Method 5: Refreshing every Windows component
If none of the methods below has allowed you to resolve the issue, there’s a high chance that the problem you’re dealing with is caused by some kind of system file corruption that cannot be resolved conventionally. In this case, your best chance of fixing the problem without a complete OS reinstall is to refresh every Windows component (including booting data).
When it comes to doing this, you have two options to choose from:
- Repair Install – This procedure (also known as in-place repair) is the more tedious approach. It requires you to provide an installation media, but the major advantage is that you get to keep all your personal files (including personal media, games, applications and even some user preference) without the need to backup them in advance.
- Clean install – This is the easiest procedure. You don’t need any installation media and you can initiate it directly from the menu of Windows 10. However, you will lose all your personal data if you don’t back it up before you initiate this procedure.


