Fix: Photos turning Black after Opening on Windows
In some cases, the Photos app showed a black screen for the JPEG images only. Some users reported that the black screen issue only occurred on images generated from a particular application (like CorelDraw) or a set of applications (like Adobe Photoshop, Illustrator, etc.).
Usually, the following are reported to cause the Photos to turn black after opening:
- Outdated PC’s Windows or Outdated Photos App: If the Windows of your system or the Photos app itself is outdated, then these become incompatible with other OS modules (especially, the Graphics driver) and may cause a black screen when the Photos app is launched.
- Corrupt Installation of the Photos App: The installation of the Photos app may become corrupt due to many factors like a partially applied update or sudden power failure. This corruption installation of the Photos app may lead to the black screen issue at hand.
- Outdated, Corrupt, or Incompatible Display Driver: If the graphics driver of your system is outdated or corrupt, then it may become incompatible with the updated Photos app and thus cause the issue.
1. Update Windows and Photos App to the Latest Build
If the OS of your system or the Photos app is outdated, then they may become incompatible with the other OS modules (especially, the display driver) and thus cause the Photos app black screen issue.
Here, updating the PC’s Windows and the Photos app to the latest build may solve the problem. Keep in mind if the issue is occurring on the images stored on a network location, then copying the file to your system (like Desktop) may clear the Photos app issue.
1.1 Update Windows to the Latest Release
- Click Windows, type, and open Check for Updates.

Open Check for Updates - Now, in the resulting window, click on the Check for Updates button, and if some updates are available, download and install the updates. Do not forget to install the optional updates as well.

Check for Windows Updates - Once updates are installed, reboot your machine and upon reboot, check if the Microsoft Photos is clear of the turning black issue.
1.2 Update Microsoft Photos App to the Latest Build
- Click Windows, search for Photos, right-click on it, and select Share.
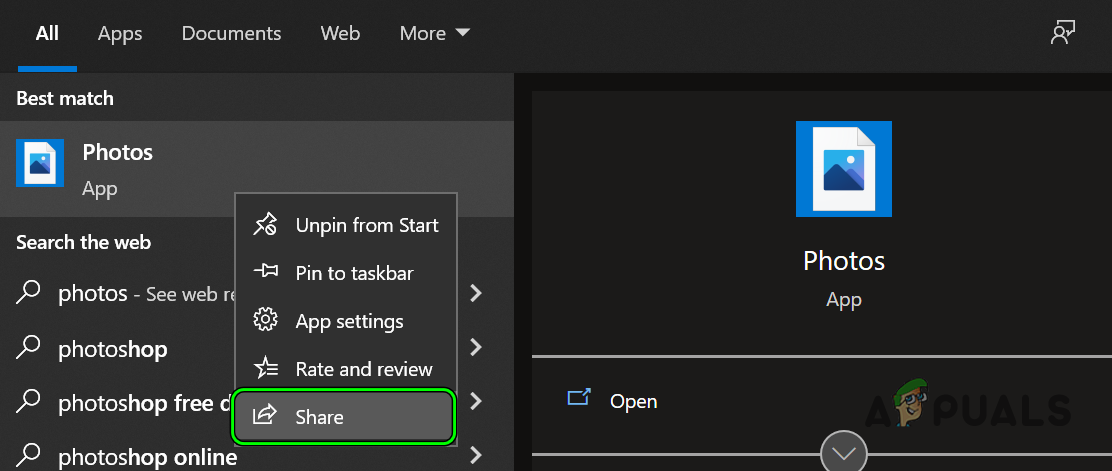
Share the Microsoft Photos App - Now, the Microsoft Store window will open with the Microsoft Photos app and if the Share window is shown, click Cancel.
- Then, check if an update of the Microsoft Photos app is available, download and install the update.
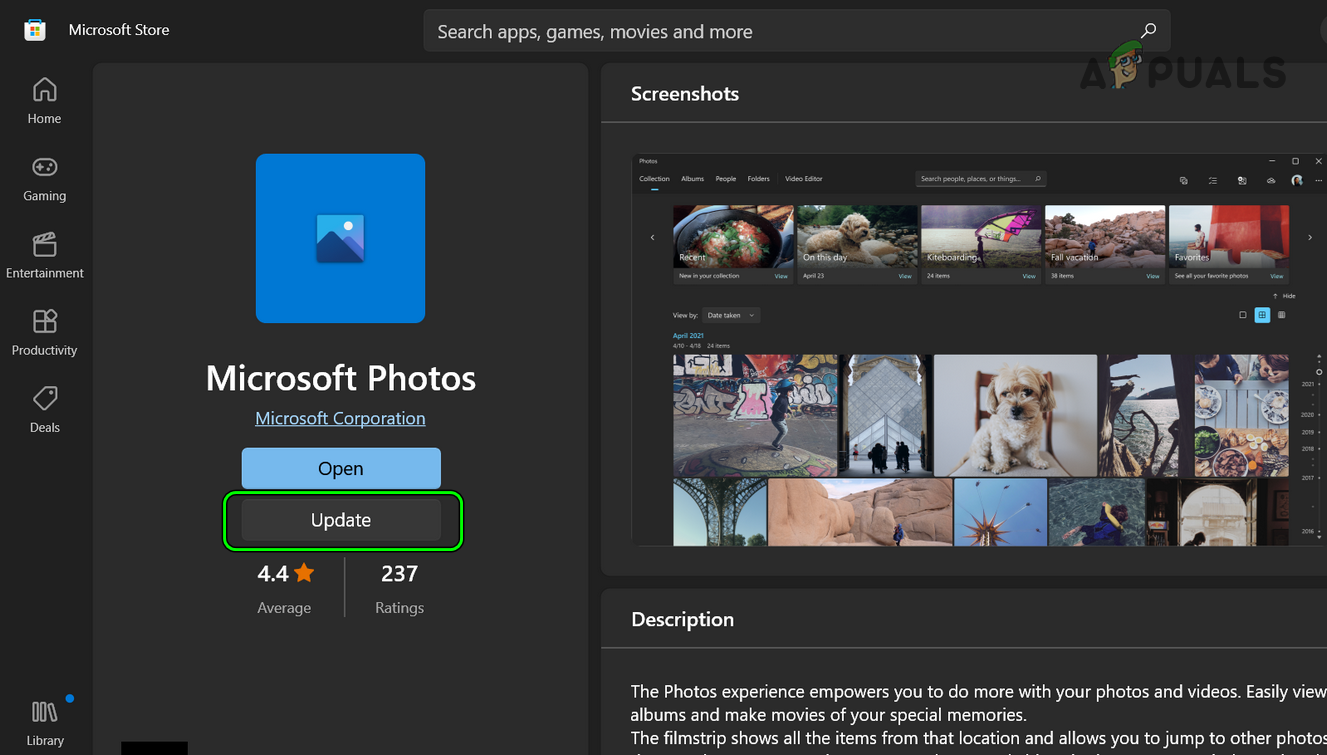
Update Microsoft Photos App - Once the Photos app is updated, check if the app’s turning black issue is resolved.
If that did not solve the problem, check if right-clicking one of the problematic images and selecting Edit clears out the issue (temporarily).
2. Perform a Repair of Photos or Reset it to Factory Defaults
If the installation of the Microsoft Photos app is corrupt, then it may turn black when opened. In such a case, performing a repair of the Microsoft Photos installation or resetting the App to the factory defaults may solve the problem.
- Click Windows, search for Photos, right-click on it, and select App Settings.
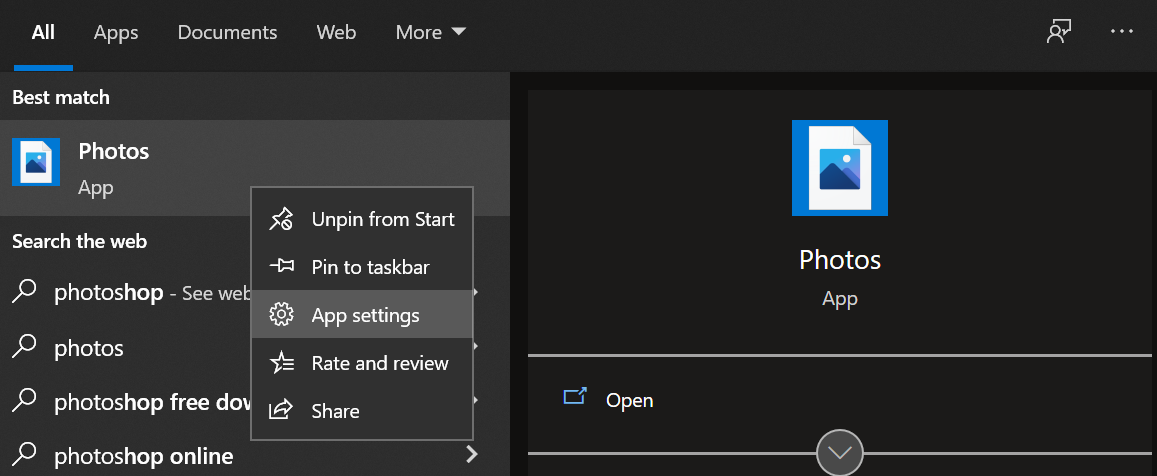
Open App Settings of Photos - Now scroll down to the Terminate section and click on the Terminate button.
- Then, click on the Repair button, and afterward, confirm to repair the Photos app installation.
- Now launch the Photos app and check if it is working fine.
- If not, repeat steps 1 to 2 and then click on the Reset button in the App Settings of Photos.

Terminate, Repair, and Reset the Microsoft Photos App - Now confirm to reset the Photos app to the defaults (keep in mind that the Photos app’s data and any customizations will be lost) and once done, check if it is operating normally.
If none of the above did the trick for you, then check if performing the DISM and SFC scans clears out the issue.
3. Update / Reinstall Display Drivers
The Photos app might turn black after opening if the display driver of your system is outdated or corrupt. In this scenario, updating the display driver of your system to the latest build may solve the Photos app problem.
3.1 Update the Display Driver
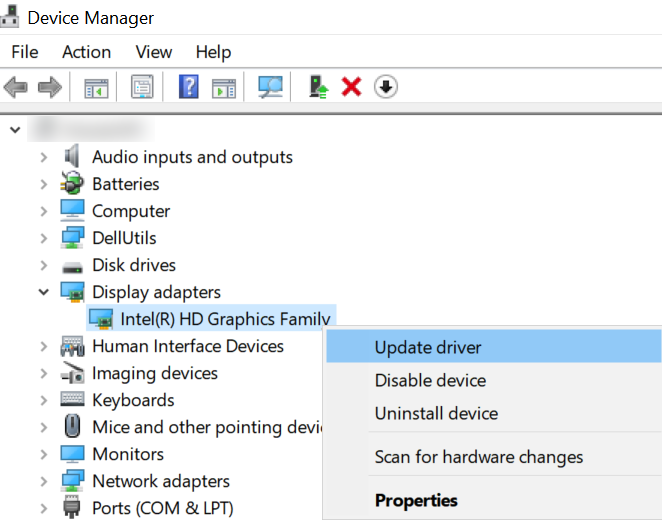
- Right-click Windows and select Device Manager.

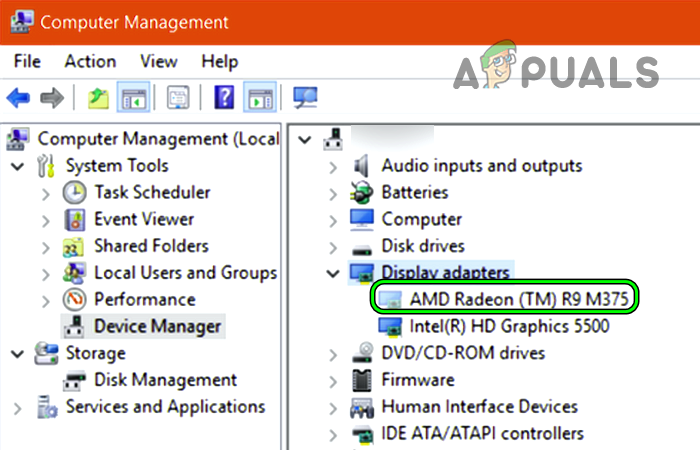
Open Device Manager Through the Quick Access Menu - Now, expand the Display Adapters and right-click on the graphics card.
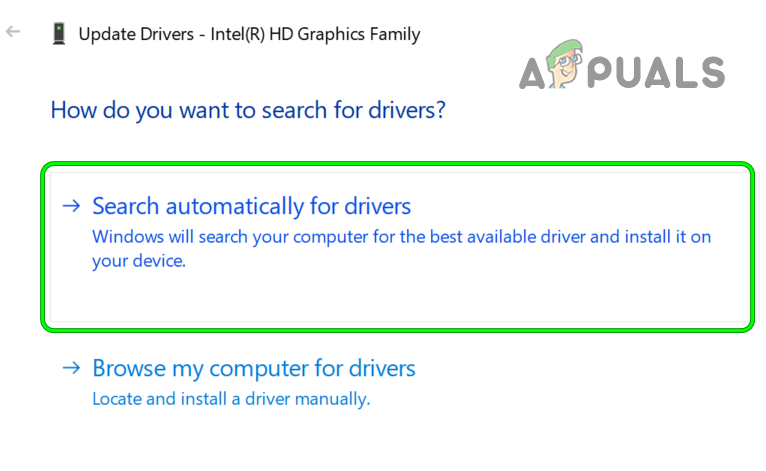
- Then select Update Driver and click on Search Automatically for Drivers.
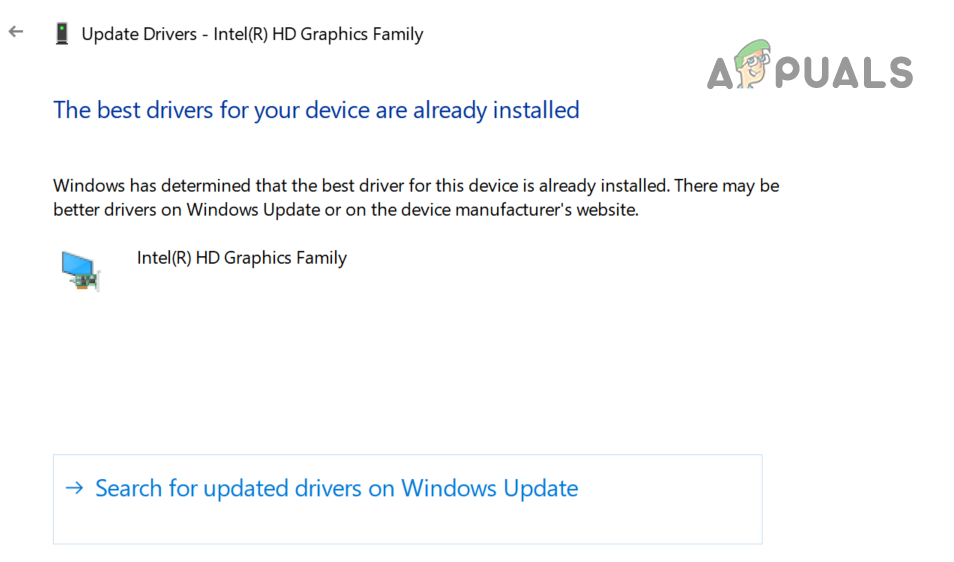
Update the Graphics Driver in the Device Manager - If no new driver is available, then on the next screen, select Search for Updated Drivers on Windows Update and wait till the updated driver is installed (if any).
Search Automatically for Updated Graphics Driver - Now reboot your PC and upon reboot, launch the Photos app and check if its black screen issue is resolved.
Search for Updated Drivers on Windows Update for the Graphics Card
If your system has an OEM utility like Dell Support Assist, then you may use that utility to update the display driver.
3.2 Uninstall the Phantom Display Drivers
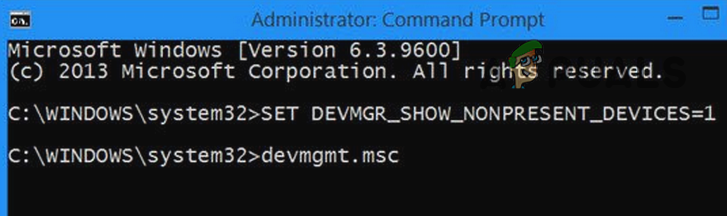
- Click Windows, type: Command Prompt, right-click on it, and select Run as Administrator.
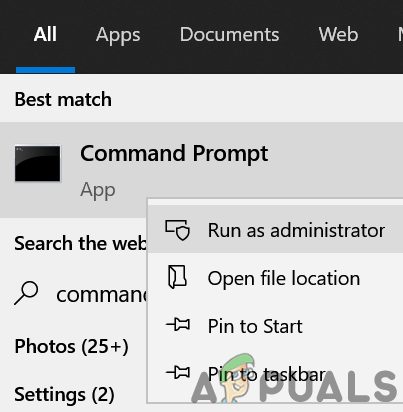
Open Command Prompt as Administrator - Now click Yes (if UAC prompt received) and execute the following:
set devmgr_show_nonpresent_devices=1

cd\ %SystemRoot% \System32

start devmgmt.msc
Show NonPresent Devices in the Device Manager Through the Command Prompt - Once the Device Manager is launched, expand its View menu and select Show Hidden Devices.
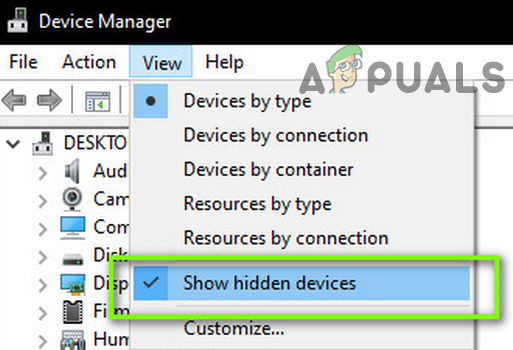
Show Hidden Devices in Device Manager - Now expand the Display Adapter option and right-click on a hidden graphics device (a bit of fade out or greyed out entry).
Uninstall Hidden Graphics Card in the Device Manager - Then, select Uninstall Device and if asked to, checkmark the option of Delete the Driver Software for This Device and click on Uninstall.
- Now, wait till the driver is uninstalled and repeat the same to uninstall all the phantom display devices (do not uninstall the display device in use).
- Afterward, reboot your system and upon reboot, launch the Photos app and check if it is working fine.
3.3 Reinstall the Display Driver
Do not worry about uninstalling the display driver as Windows will install a generic display driver and your display will not be blacked out.
- Right-click on your graphics device in the Display Adapter option of the Device Manager (as discussed above) and select Uninstall.
- Now, checkmark the option of Delete the Driver Software for This Device and click on Uninstall.
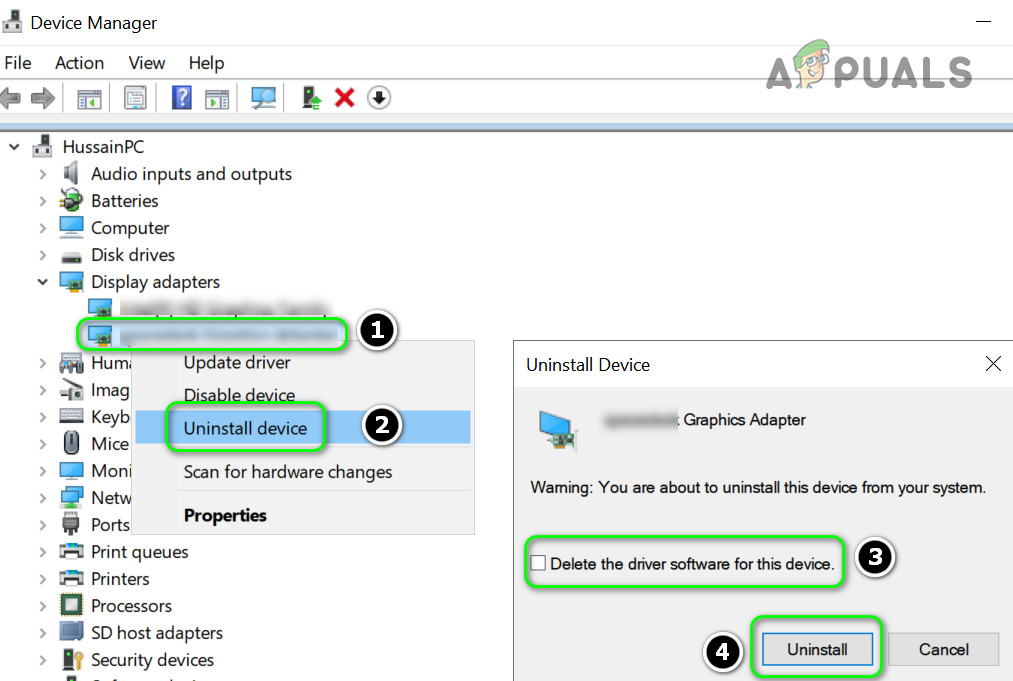
Check the Option of Delete the Driver Software for This Device for the Display Adapter and click on Uninstall - Once the driver is uninstalled, restart your system and upon restart, check if the Windows Photos app is working fine.
- If not, then open a web browser (like Chrome) and steer to the OEM website (like Dell).
- Now download the latest display driver of your system and then install the driver as administrator.
- Afterward, reboot your PC and upon reboot, check if the Photos app is clear of the turning black issue.
- If the latest driver could not resolve the Windows Photos app issue, check if installing an older display driver does the trick for you.
3.4 Disable JPEG Acceleration of Graphics Driver
If the Photos app is showing black pictures only for the JPEG extensions, we can try disabling the JPEG acceleration (AMD cards only).
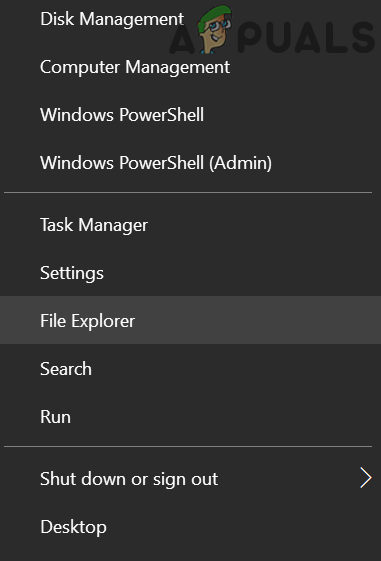
- Right-click on Windows and select File Explorer.
Open the File Explorer - Now, navigate to the following path (if using an AMD graphics card):
C:\Program Files\Common Files\ATI Technologies\Multimedia
- Then rename the following files:
amf-wic-jpeg-decoder32.dll

amf-wic-jpeg-decoder64.dll
- Now restart your system and upon restart, check if the Photos app is working fine.
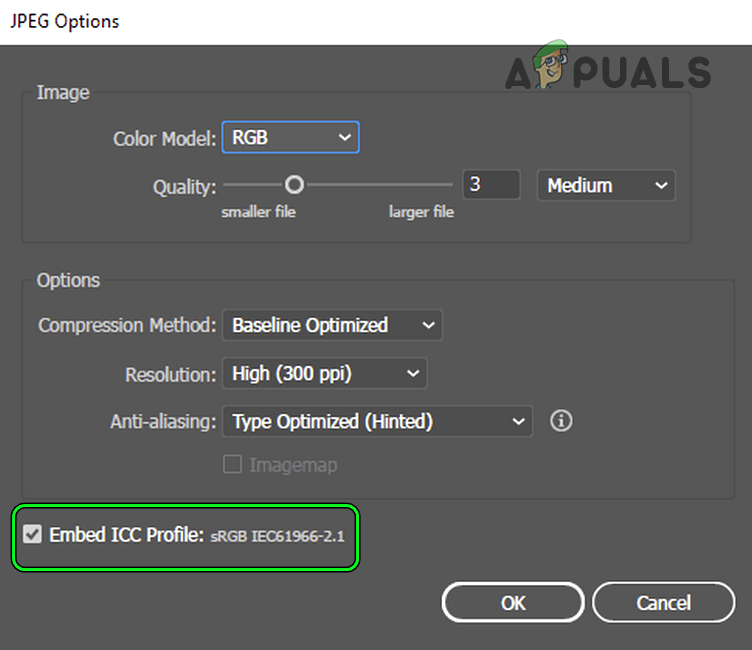
If the issue is occurring only with the images generated from a specific application (e.g., CorelDraw) or set of applications (Photoshop, Illustrator, etc.), then check the export settings of the applications like bit size (use 24-bit instead of 32-bit), uncheck Embed ICC Profile, or in some cases, reducing the file size solves the problem as well.
If the issue is still there, then check if using another user account on the machine solves the issue. If that did not do the trick, then you may have to use another photo viewing app or enable the old Windows Photo Viewer app.


