How to Fix Windows 11 Installation Assistant Automatically Closing?
Some Windows 11 users attempting to utilize the Windows 11 Installation Assistant are reporting that the program closes after a second or so. This problem seems to be prevalent with insider builds of Windows 11 (particularly with Dev insider builds)
Of course, this problem won’t affect a lot of Windows 11 users, since few of them will have much use with running the Windows 11 Installation assistant tool if they’re already on Windows 11.
Note: You can expect to face this issue if you’re looking to move away from an Insider Development build of Windows 11 to the official release version.
If this scenario is applicable and you find that the Windows 11 Installation assistant closes as soon as you open it, there is one potential workaround that you can use to make sure the window stays open.
Other affected users have discovered that you can ‘force’ the window to stay open by forcing the executable to run in compatibility mode with Windows 7. This method is confirmed to work by a lot of affected users.
How to Prevent the Windows 11 Installation Assistant window from Automatically closing
This method should work for you if you are currently using an insider dev build, but we couldn’t verify its effectiveness for stable releases of Windows 11.
It involves forcing the Windows 11 Installation Assistant window to remain open by forcing the main executable to run in Compatibility Mode with Windows 7:
Here’s what you need to do
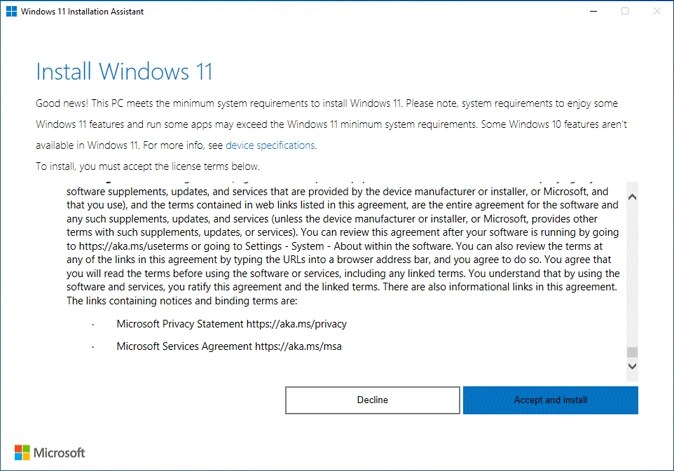
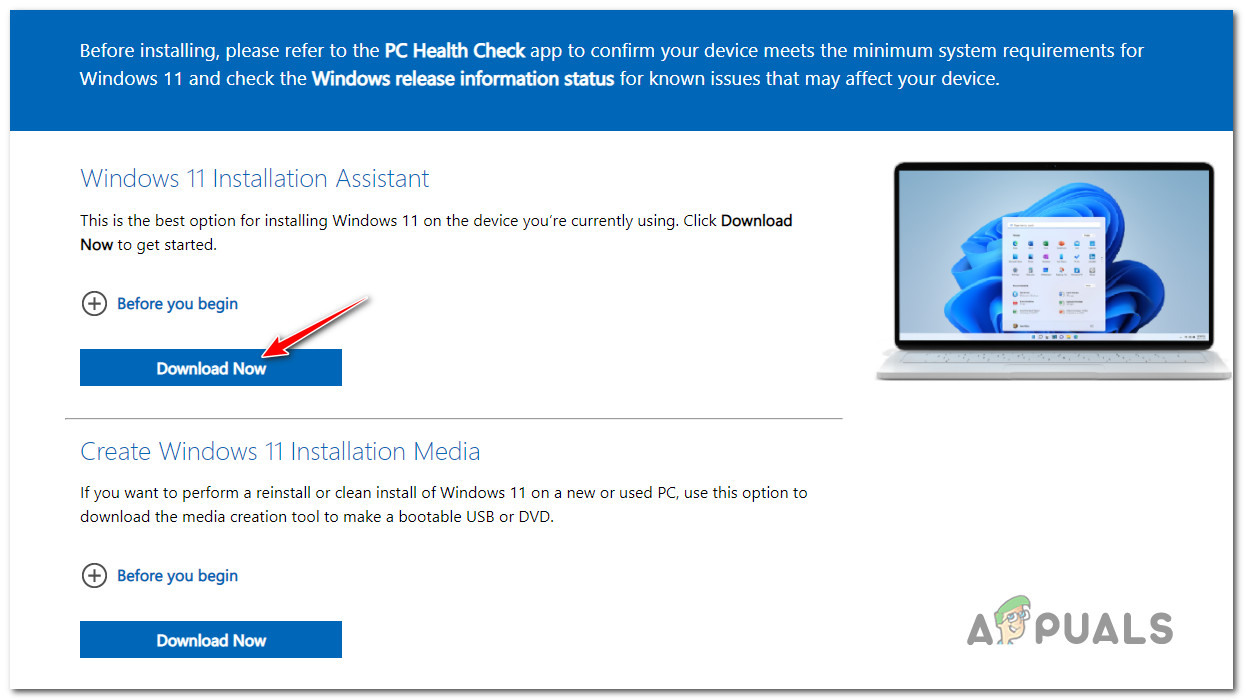
- To make sure you’re using the latest version available for Windows 11 Installation Assistant, open your default browser and visit the official download page for Windows 11.
- Once you’re inside, click on the Download Button directly under Windows 11 Installation Assistant.
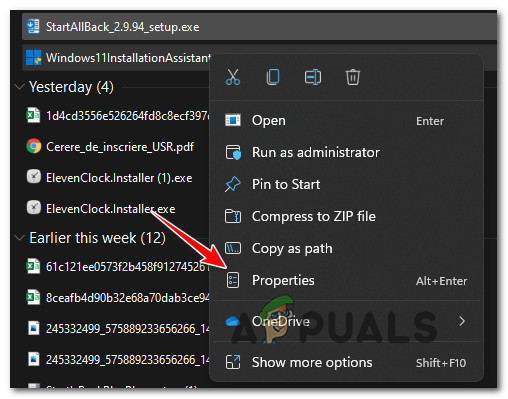
Downloading the Windows 11 Installation Assistant - Wait until the installer is downloaded locally, then navigate manually where the download is located. Most likely, you’ll find it inside the download folder.
- Next, once you manage to discover the executable, right-click on it and choose Properties from the context menu.
Accessing the Properties screen - Once you’re inside the Properties screen of Windows11 Installation Assistant Properties screen, select the Compatibility tab from the ribbon menu at the top.
- Next, check the box associated with Run this program in compatibility mode for, then select Windows 7 from the drop-down menu below.
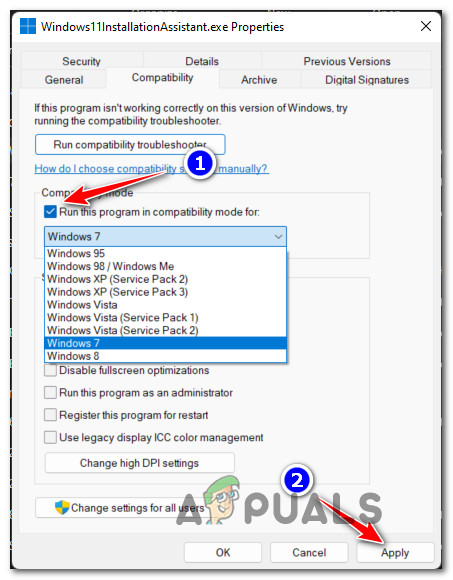
Configuring the executable to launch in Compatibility mode with Windows 7 - Hit Apply to save the changes, then run the executable normally and see if the window nor remains open long enough for you to perform your tasks.
Unfortunately for those of you that found this method to be ineffective, the only way is to go for a clean install or repair install procedure:
Note: In case you are looking to move away from an insider dev build, the only way really is to go for a clean install.


