Windows 11 Freezes and Crashes Randomly? Here’s How to Fix It
Windows 11 is out for everyone and we’re starting to discover issues that didn’t seem that common while the operating system was only available for the Insider Program. One of the most common issues that Windows 11 users face right now is a scenario in which the screen freezes before the OS eventually crashes.
Users affected by this issue are reporting that whenever this problem occurs, they have no other choice but to do a hard reboot in order to get their PC up and running once again.
If you’re dealing with the same issue on Windows 11, you’re certainly not the only one. And as it turns out, there are several different scenarios that might cause this type of behavior on the newest operating system from Microsoft.
We’ve put together a list of potential culprits that might be at the root of your random freezes and crashes on Windows 11:
- Unsustainable resolution – As it turns out, you can expect to face this type of issue on Windows 11 if you’re using a low-end GPU that’s not capable enough to handle the resolution you’re trying to enforce during resource-intensive tasks. In this case, you can resolve the freezes entirely by bringing your screen resolution down.
- Insufficient VRAM – In case you are only working with 4 GB of RAM, issues of this kind can also be encountered whenever your system has to move temporary data to your virtual memory because RAM is already full. If the freezing happens while your system tries to free up VRAM, you can fix the problem entirely by forcing your Windows 11 to work with a bigger paging file.
- Incompatible GPU drivers – Another reason why you might see this error is a scenario in which you recently upgraded to Windows 11 from an older Windows version and you’re still using the old GPU drivers that we’re migrated over. To fix the issue in this case, you need to update your GPU driver fleet to the Windows 11 equivalents either by using Device Manager, WU, or the proprietary software from Nvidia or AMD.
- Ultrawide bug – If you’re using an external ultrawide display, there’s a big chance you will experience the notorious bug where your screen freezes for a couple of seconds randomly. As of now, there is no official fix from Microsoft. The only workarounds for this bug are to switch the external display’s resolution to a 16:9 aspect ratio or disconnect the display entirely.
- Power Adapter bug – Certain laptop models (particularly ASUS and MSI models) seem to suffer from a Windows 11 bug where users start experiencing freezes and crashes as soon as the battery is fully charged. To avoid this issue, you can either unplug the AC adapter or disable the ACPI Battery Control functionality using Device Manager.
- Sonic Studio 3 conflict – There is one particular tool from ASUS that is known to cause freezes when installed on Windows 11 (Sonic Studio 3). Unfortunately, there is no official or unofficial fix that will allow you to deal with this issue while keeping the software installed. The only option available as of now is to uninstall the software altogether.
- Outdated BIOS or vBIOS version – BIOS-induced crashes and performance hiccups are to be expected until motherboard manufacturers begin to ship hardware running in the firmware that’s fully optimized for Windows 11. Until then, you can make sure that you’re running with the latest BIOS update available for your motherboard.
Now that we went over every potential culprit that might be responsible for this issue, let’s go over a list of fixes that other Windows 11 users have successfully used to fix these annoying occurrences where the PC randomly freezes before eventually crashing.
Change the screen resolution
As it turns out, an unlikely culprit but one that is often associated with random crashes and freezes on Windows 11 is an improper screen resolution.
Screen freezes on Windows 11 are often triggered by a screen resolution that is higher than what your GPU is capable of processing. Keep in mind that the available display resolutions on Windows 11 work differently than on the previous Windows versions.
For example, you will see the maximum resolution that your display is capable of supporting. But if you try forcing a 4k resolution on a capable display using a low-end GPU, you might expect to experience freezes that might eventually lead to sudden crashes on Windows 11.
If this scenario is applicable, the fix lies in reducing your screen resolution in order to take the stress off your GPU.
Follow the instructions below for a complete guide on how to do so:
- Right-click on the start icon and choose Settings from the context menu.
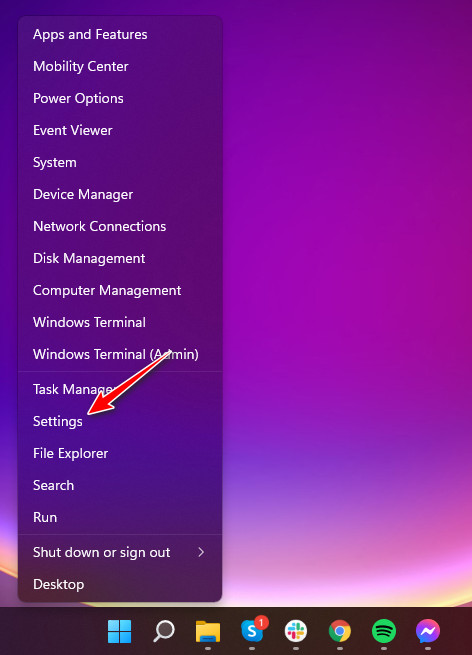
Accessing the Settings menu of Windows 11 - Once you’re inside the Settings menu, tap on System from the vertical menu on the left.
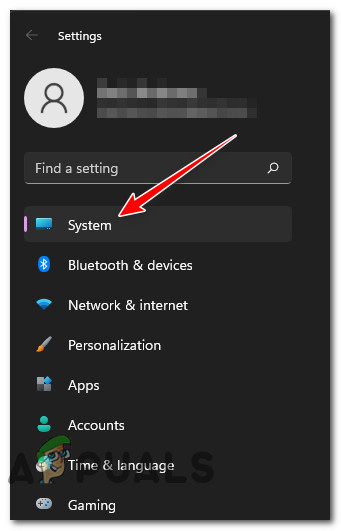
Accessing the system tab Note: If the menu is not visible by default, click on the action icon (top-right corner of the screen).
- Once you’re inside the System tab, move over to the right-hand section of the screen and click on Display.
- Inside the Display tab, scroll down to Scale & layout and adjust the Display Resolution to a lower value than the one that’s currently being used.
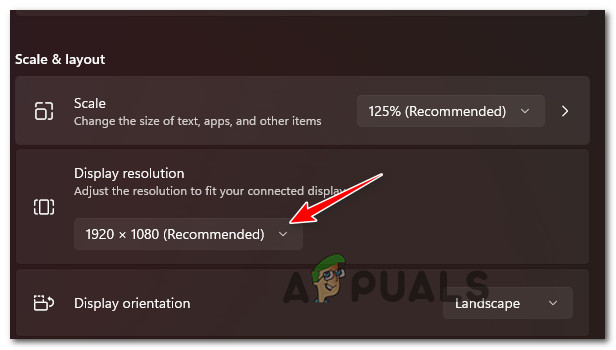
Change the resolution on Windows 11 Note: If you’re using multiple displays, make sure you modify the resolution of both by selecting each display individually at the top of the screen.
- When you’re prompted by the confirmation window, click on Keep changes to make the resolution change permanent.
Now that you modified the resolution, monitor the situation closely and see if the random freezes and crashes stop.
In case you’re still dealing with the same kind of issue, it’s clear that the problem is not related to an over-excessive strain on your GPU. In this case, move down to the next method below for an additional way of resolving this WIndows 11 problem.
Adjust the virtual memory
Most of the time, when you notice that your applications begin to slow down before freezing and becoming totally unresponsive, it’s because your Windows ran out of RAM memory.
This will not be a problem if you have a lot of RAM to work with (16 GB or more), but if you only have 4 GB at your disposal and you’re trying to complete resource-intensive tasks like video editing, rendering, gaming, or using RAM intensive apps like Maya or Unity, chances are you will experience a lot of freezes on Windows 11.
And due to the way Windows 11 does memory management, some of these freezes might transition to a Black Screen of Death (BSOD) that will forcibly restart your PC.
If this scenario is applicable and upgrading your system with more RAM, you can alleviate the problem by increasing the virtual memory (vRAM) instead.
Note: Increasing the VRAM will increase the empty space reserved for RAM overflow which will prevent situations where your app freeze due to insufficient memory.
Follow the steps below for instructions on how to increase the VRAM on Windows 11:
- Press Windows key + I to open up the Settings menu on Windows 11.
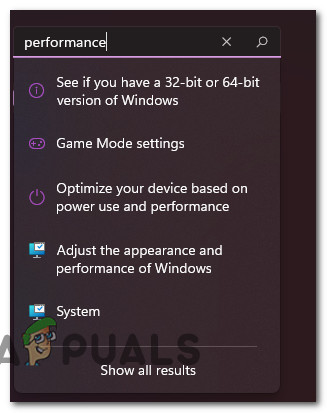
- From the Settings menu, use the settings box (top-left corner) to search for ‘performance’.
- Once the results are in, click on Adjust Appearance and Performance of Windows from the context menu that just appeared.
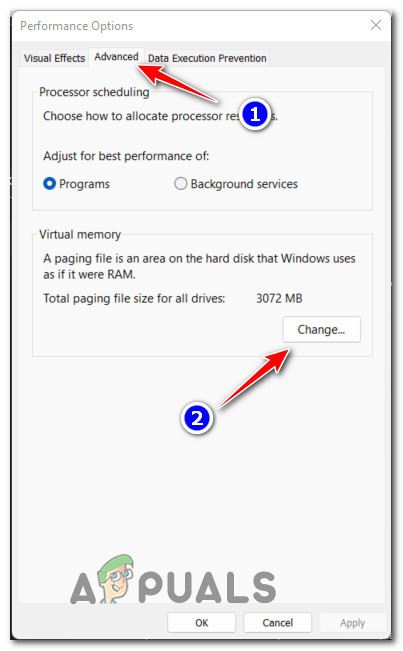
Adjust performance and appearance of Windows 11 - Once you’re inside the Performance Options menu, select the Advanced tab using the ribbon menu at the top.
- Next, click on the Change button (under Virtual Memory).
Changing the virtual memory allocation on Windows 11 - Next, in the Virtual Memory window, start by comparing the Recommended paging file size value with the Currently allocated now.
- If the value of Currently allocated is lower than the Recommended value, uncheck the box associated with Automatically manage paging file size for all drivers, select the C (OS drive) from the Paging file size for each drive, then select the Custom size toggle instead.
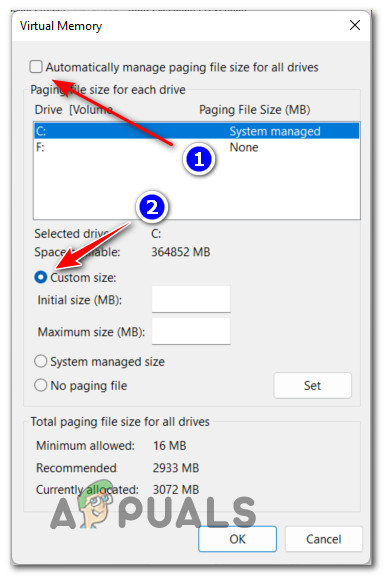
Custom paging file size Note: If the Currently allocated value is higher than the Recommended value, skip the remaining steps below and move directly to the next method.
- Next, enter the Recommended value into the Initial Size box and add an even larger figure into the Maximum Size Box.
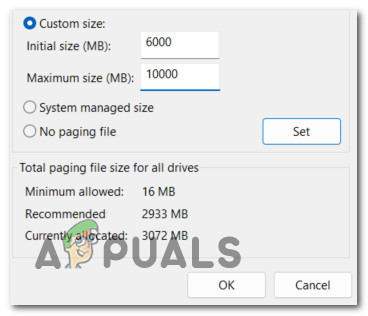
Modifying the paging file on Windows 11 Note: Feel free to go double the size of the recommended value if your storage space allows it.
- Finally, click Ok to save the changes, then restart your computer and see if the random freezes and crashes have stopped.
If this method was not applicable in your case or you already followed it with no improvements, move down to the next potential fix below.
Update the dedicated GPU drivers
Keep in mind that an outdated GPU driver can also produce these types of freezes on Windows 11. You’re almost certain to face this problem if you just upgrade to Windows 11 from an older Windows version and you’re still using the old GPU drives that we’re migrated over to the new OS.
Fortunately, both Nvidia and AMD have begun deploying custom drivers that we’re specifically designed to accommodate Windows 11.
If your computer doesn’t use them yet, you can probably use Device Manager to force their installation. Else, if this fails, you can use the proprietary software from Nvidia or AMD to install the latest available driver.
Follow the instructions below to ensure that you’re using dedicated GPU drivers that are fully compatible with Windows 11:
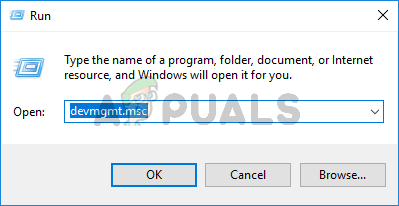
- Press Windows key + R to open up a Run dialog box. Next, type ‘devmgmt.msc’ inside the text box and press Enter to open up Device Manager.
Opening up Device Manager - When you’re prompted by the User Account Control, click Yes to grant administrative privileges.
- Once you’re inside Device Manager, scroll down through the list of installed devices and expand the drop-down menu associated with Display Adapters.
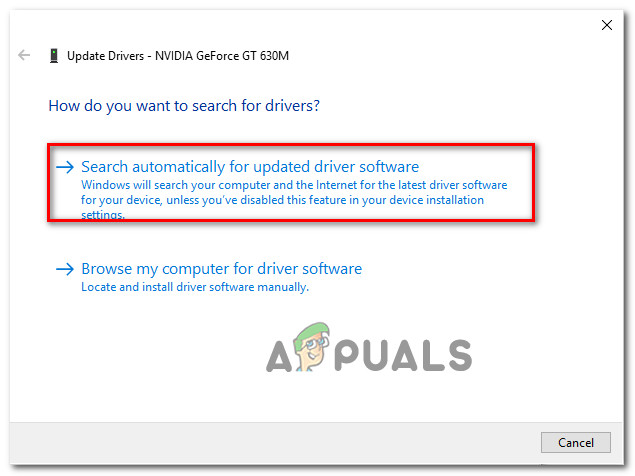
- Inside the Display Adapters drop-down menu, right-click on your dedicated GPU and choose Update Driver from the context menu that just appeared.

Update GPU driver from Device Manager - Once you get to the next screen, click on Search Automatically for updated driver software and wait for the initial scan to complete.
Search for updated GPU drivers - If a new driver version is discovered, follow the on-screen instructions to install it on your Windows 11 computer.
Note: In case the wizard fails to identify a new driver version, click on Search for updated drivers on Windows Update to see if the WU component is able to find a newer version.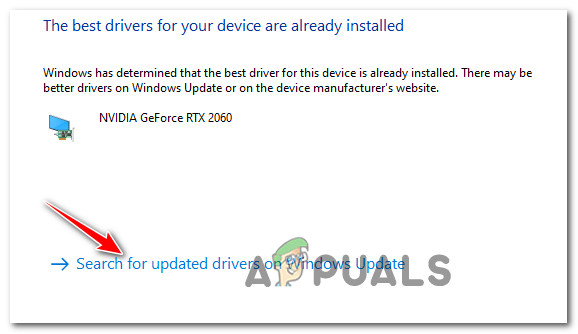
Search for newer GPU drivers using Windows Update - If a new GPU driver has just been installed, reboot your Windows 11 computer and see if the freezing issues have now been resolved.
On the other hand, if this scan has not revealed a new driver version, you should also take the time to use the proprietary driver updating software developed by Nvidia and AMD to see if you are actually running on the latest Windows 11-compatible drivers or not:
- GeForce Experience – Nvidia
- Adrenalin – AMD
If you just crossed off an incompatible GPU driver off your culprit list, move down to the next potential fix below for an additional fix that might allow you to resolve the freezing and crashing issues on Windows 11.
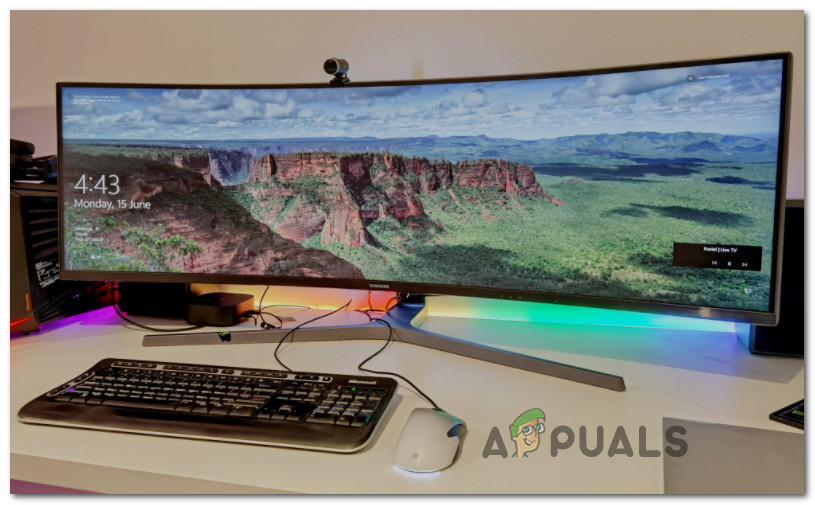
Switch External display to a 16:9 aspect ratio (if applicable)
As it turns out, this issue is much more prevalent among Windows 11 users that are using an ultrawide external display.
Note: You can test if your external display is causing the issue by temporarily disconnecting it from your laptop / PC. If the freezes no longer occur while you’re running on a single display, you’re most likely suffering from this bug too.
For some affected users, this problem went away on its own after they took the time to install the latest available drivers for their dedicated graphics card. However, if you already tried this (by following the method above) and you still have this issue, chances are your GPU manufacturer is still yet to release a proper fix for your particular graphics card model.
Fortunately, until that fix finally comes, you can most likely make the issue go away on its own by modifying the external display’s resolution to an option that maintains a 16:9 aspect ratio.
I know this is not ideal for ultrawide monitor users, but it’s really the only option we have right now to prevent random freezes and crashes brought about by the ‘ultrawide bug’ in Windows 11.
Here’s a list of resolutions that maintain a 16:9 aspect ratio:
- 1024×576
- 1152×648
- 1280×720
- 1366×768
- 1600×900
- 1920×1080
- 2560×1440
- 3840×2160
Note: Follow the instructions in the first method of this article (above) for the exact instructions for modifying your screen resolution.
In case this method was not applicable to your particular scenario, follow the next method below.
Unplug AC adapter or disable ACPI Battery control (if applicable)
According to some users that we’re also dealing with this issue, the problem can occur due to a bug affecting laptops running on Windows 11.
As it turns out, the issue only occurs when the battery of the laptop reaches full charge – when this happens, users start experiencing screen stutters that will lead to a BSOD in some cases.
As of now, the most popular fix to deal with this particular issue is to simply unplug the AC adapter once your laptop battery reaches full charge. Of course, this is less than ideal if you’re doing any resource-intensive task since it will mean that your laptop will run slower than usual.
There’s also an additional workaround to ensure that this bug doesn’t occur – to disable the Microsoft ACPI-Compliant Control Method Battery via device manager. But keep in mind that going this route also means that the battery tray icon will disappear.
To enforce this fix, follow the instructions below:
- Press Windows key + R to open up a Run dialog box. Next, type ‘devmgmt.msc’ and press Enter to open up Device Manager.
Opening up Device Manager - When you’re prompted by the User Account Control (UAC), click Yes to grant admin access.
- Once you’re inside Device Manager, expand the drop-down menu associated with Batteries.
- Once you’re inside the Batteries tab, right-click on Microsoft ACPI-Compliant Control Method Battery and choose Disable Device from the context menu that just appeared.
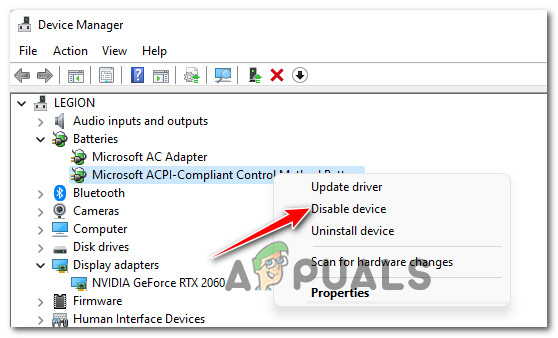
Disable ACPI-Compliant Control Method Battery - At the confirmation prompt, click Yes once again, then reboot your PC and wait for Windows 11 to boot back up.
If this method was not applicable in your case or it didn’t improve your situation, move down to the next potential fix below.
Uninstall Sonic Studio 3 (if applicable)
As it turns out, Windows 11 really doesn’t play with sound management suites like Sonic Studio 3 or older.
Some affected users have investigated the root cause of their freezing followed by the black screen of death and came to the conclusion that the event by caused by Volute.SonicStudio3\Modules\ScheduledModules\x64\AudioDevProps2.dl.
Upon digging deeper, it has been discovered that incompatibility between Sonic Studio 3 and the new Windows 11 operating system is causing general system freezing.
Unfortunately for those of you that are big fans of Sonic Studio 3, the only viable fix at this point to stop this behavior from occurring is to uninstall Sonic Studio 3 completely (at least until Microsoft patches the issue).
Follow the instructions below for step by step instructions on how to do this:
- Press Windows key + R to open up a Run dialog box. Next, type ‘appwiz.cpl’ and press Ctrl + Shift + Enter to open up the Programs and Features menu with admin access on Windows 11.
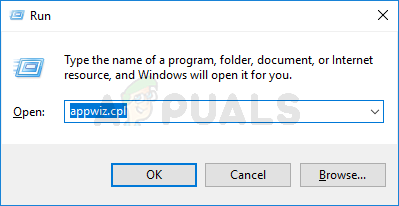
Opening the Programs and Features menu Note: At the User Account Control window, click Yes to grant admin access.
- Once you’re inside the Programs and Features menu, scroll down through the list of installed programs and locate the entry associated with Sonic Studio 3.
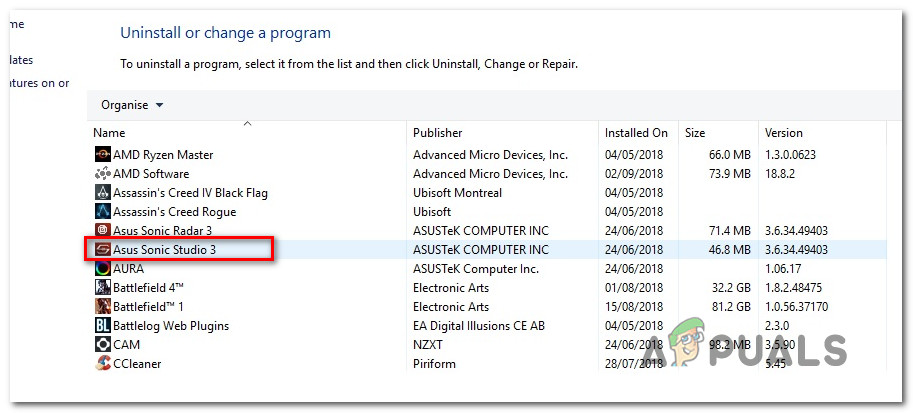
Uninstalling Asus Studio 3 - When you see the correct listing, right-click on it and choose Uninstall from the context menu.
- Inside the uninstallation screen, follow the on-screen instructions to complete the uninstallation of the conflicting software.
- After Asus Sonic Studio 3 has been completely uninstalled, reboot your PC and see if the problem is fixed at the next startup.
If you’re still experiencing the same kind of freezing issues on Windows 11, move down to the next method below.
Install the latest BIOS / vBIOS update
One of the most common issues that are currently causing freezes and unexpected crashes on Windows 11 is an outdated BIOS version. Keep in mind that Windows 11 is still in its early stages, so crashes caused by the system firmware are to be expected until motherboard manufacturers begin shipping hardware that is fully optimized for Windows 11.
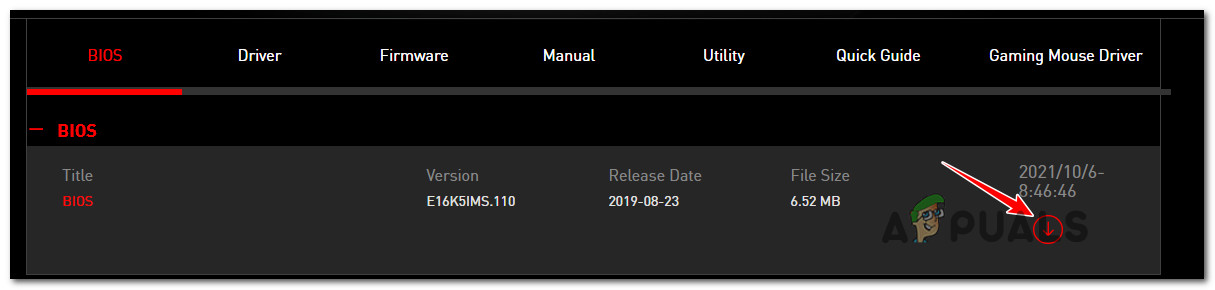
If you have a motherboard that is dated before the release of Windows 11, the first thing you should do is check to see if there is a pending BIOS update or vBIOS update for your motherboard.
If you’re using a laptop, go online and search for ‘laptop model +drivers‘ then access the official download page of your manufacturer and check the BIOS section for any BIOS update newer than what you’re currently using.
Note: If you’re using a PC, go online and search for ‘motherboard model + drivers’ to find the official driver fleet for your motherboard.
Keep in mind that most manufacturers have their own proprietary software that needs to be used to update BIOS. For example, ASUS has EZ flash and MSI has MFlash. Generally, is a good idea to take the time and read the documentation related to the BIOS update prior to downloading it so you know exactly how to install it.
Important: Some motherboard manufacturers are releasing BIOS updates that you can install directly from Windows, but stay away from them unless they mentioned that the installer is made compatible with Windows 11. We’ve discovered some user reports confirming that installing the BIOS update within windows made things even worse as the PC refused to boot afterward.
The ideal way to update your BIOS version is to use the proprietary BIOS updating utility and stick to the official instructions of installing the update from BIOS or UEFI (instead of directly within Windows).
If you already made sure that you have the latest BIOS version or you’ve just updated it and you’re still experiencing the same type of freezes and crashes on Windows 11, move down to the final potential fix below.
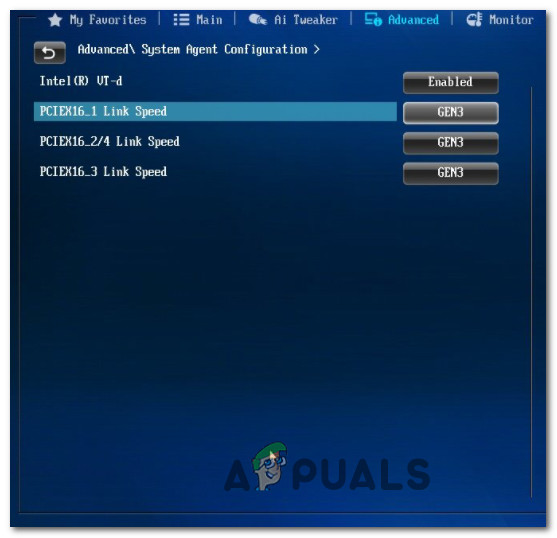
Change PCIe Settings to GEN 3
As it turns out if you’re already on PCIe 4 (Peripheral Component Interconnect Express), you can expect general system stuttering due to the way GEN 4 data related to your GPU is processed by Windows 11.
This issue is kind of under the radar as of now with only a handful of users reporting it. But until Microsoft becomes aware of it, you should be able to prevent the screen freezes on by changing your PCIe settings in BIOS or UEFI settings from GEN 4 to GEN 3.
This has reportedly fixed the issue for a lot of users running high-end PC configurations with a powerful GPU on Windows 11.
IMPORTANT: Consider going this route only after you already tried updating your BIOS version to the latest one available.
Boot into your UEFI or BIOS settings and look under the Advanced settings cluster for an option to switch back to Gen 3.


amazing bro