How to Restore the Classic Start Menu from Windows 10 into Windows 11
With every new Windows iteration that Microsoft releases, there’s bound to be two opposing camps. On one side, there are the people excited about the new UI changes, and on the other, there are those unhappy with how the new Windows UI is organized.
Now with the release of Windows 11, the most polarizing UI decision (by far) is the Start Menu. Microsoft decided to set a ‘new normal’ by re-designing the Start menu with a floating centered UI. It certainly gives Windows 11 a cleaner, modern look, but it also takes a while until you get accustomed to having your Start button in the middle of your screen.
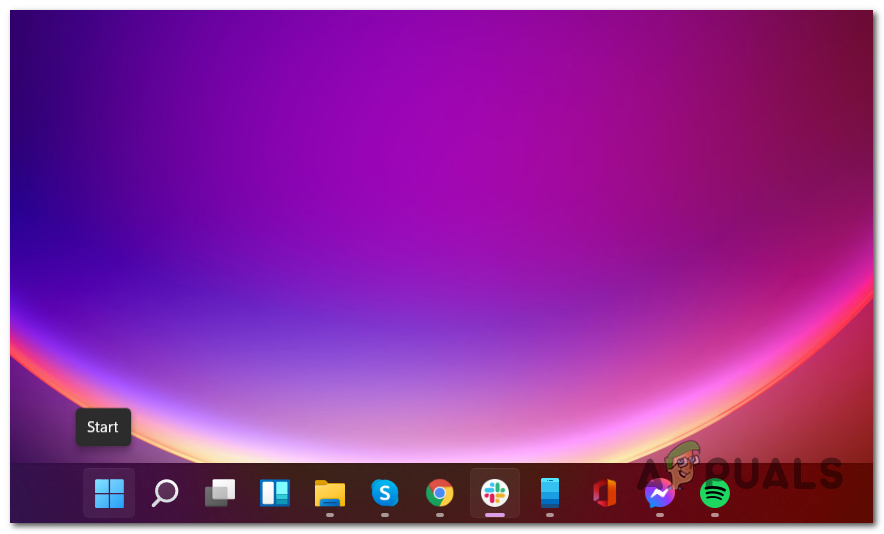
If you’re unhappy that Microsoft has decided to ditch the live tiles in favor of the pinned app icons and positioned the start menu in the center of the taskbar, I have good news – There is a way to switch back to the old Windows 10 Start menu even if you’ve already upgraded to Windows 11.
There’s no UI option that will allow you to do this yet, so you’ll have to go through a simple registry hack via Registry Editor. But worry not!
Even if you’re not technical at all, we’ll show you step by step how to enable the classic start menu on your Windows 11 installation.
Enabling the Classic Start menu in Windows 11
- Press Windows key + R to open up a Run dialog box. Next, type ‘regedit’ inside the text box and press Ctrl + Shift + Enter to open up the Registry Editor with admin access.
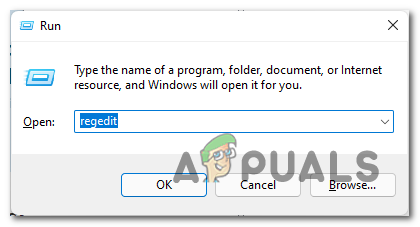
Open Registry Editor on Windows 11 via Run box Note: When you’re prompted by the UAC (User Account Control), click Yes to grant admin access.
- Once you’re inside the Registry Editor, use the left-hand side to navigate to the following location:
HKEY_CURRENT_USER\Software\Microsoft\Windows\CurrentVersion\Explorer\Advanced
Note: You can either navigate to this location manually or you can paste the full path inside the navigation bar at the top and press Enter to get there instantly.
- Once you arrive in the correct location and you ensure that the Advanced key is selected, move over to the right-hand side, right-click on an empty space and choose New > DWORD (32-bit) value.
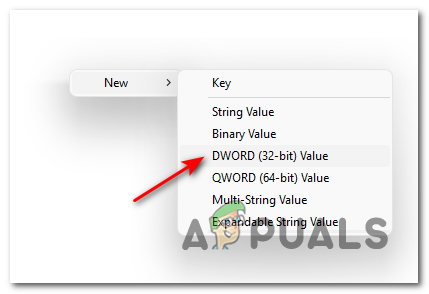
Creating a new DWORD value - Once the new DWORD value is created, right-click on it and choose Rename from the context menu. Then, rename the value to ‘Start_ShowClassicMode’ and press Enter to save the modification.
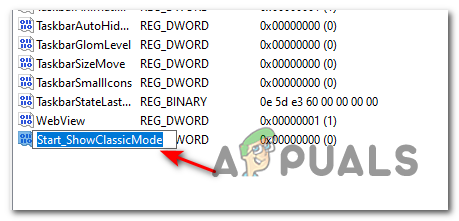
Configuring the registry key for classic mode on Windows 11 - After the new registry value has been created and renamed, double-click on it and set the base to Hexadecimal.
- The default value of Start_ShowClassicMode will be 0 (Disabled) – In order to actually enforce the classic start menu, you need to change the value data to 1 and click on Ok to save the changes.
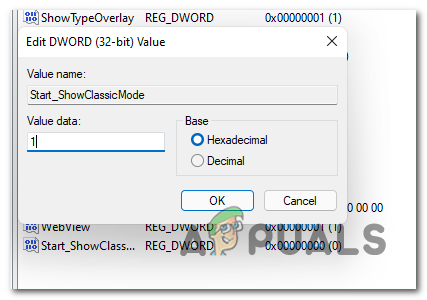
Enabling the Classic Menu - Once this modification has been operated, close the elevated Registry Editor and reboot your computer.
- After Windows 11 boots back up, you should see the old-style start menu back.
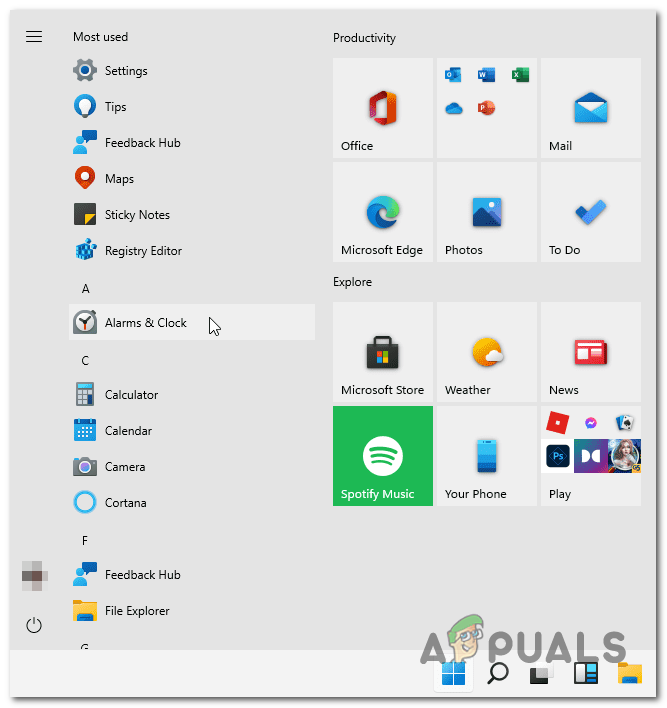
Classic menu enabled on Windows 11 As you can see, the classic start menu is back, but it’s still located in the middle of the screen.
If you want to move it to the left-hand side (the same way it was on Windows 10), move down to the next step below.
Moving the Taskbar Icons to the Left in Windows 11
- Press Windows key + R to open up a Run dialog box. Next, type ‘ms-settings:’ inside the text box and press Enter to open up the Settings app on Windows 11.
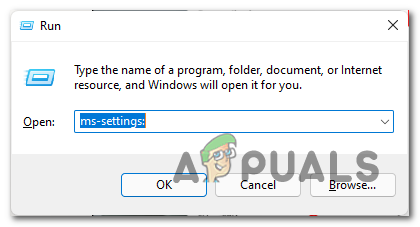
Opening the Settings screen of Windows 11 - Once you’re inside the Settings app, use the search functionality (top-left corner) to search for ‘taskbar’.
- Next, from the list of suggestions, click on Taskbar Settings.
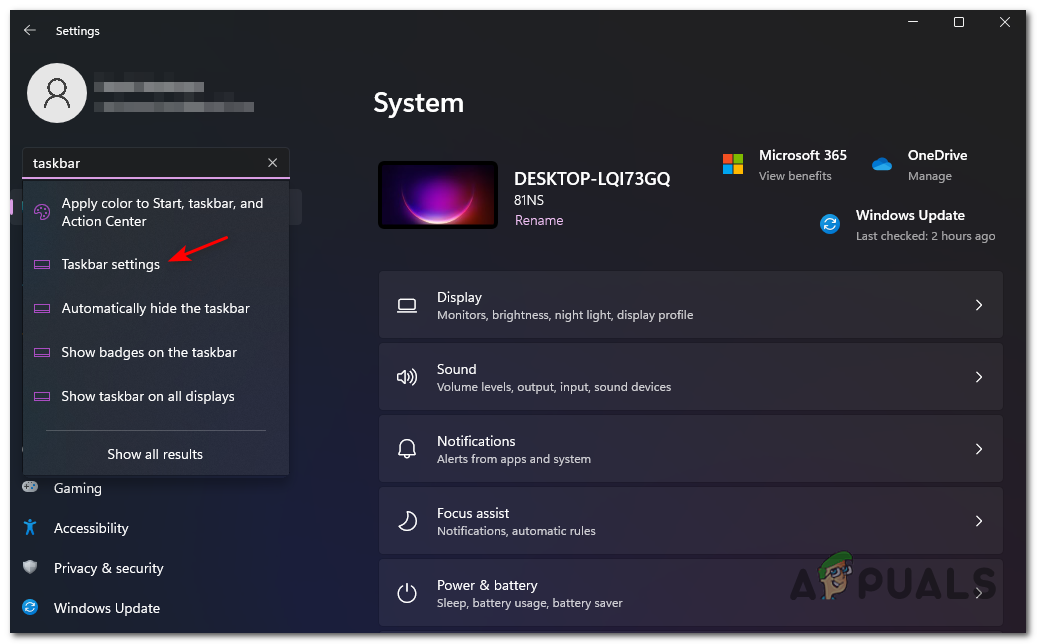
Accessing the Taskbar settings screen - Next, expand the drop-down menu associated with Taskbar behaviors and change the value of Taskbar alignment from Center to Left.
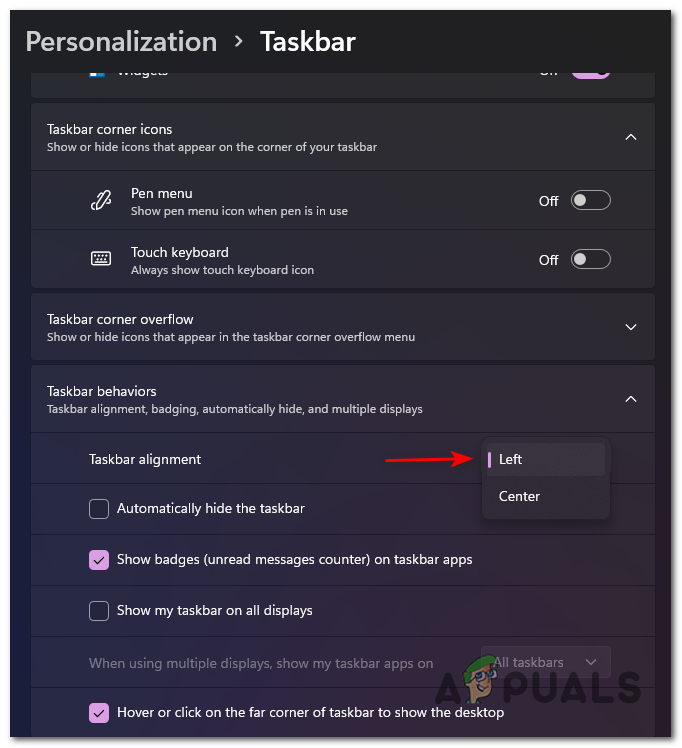
Change the Taskbar alligment
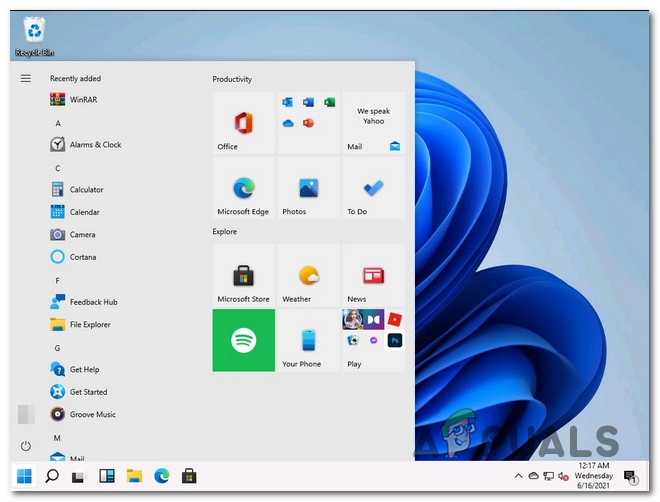
That’s it! If you went through all the steps above you have successfully transitioned back to the now ‘classic look of Windows 10’.
If Microsoft’s redesign eventually grows on you, you can simply reverse engineer the steps above to revert all the adjustments that we previously did to bring the classic look back.


