How to Fix Windows 10 Store Operation Failed Error 0x80073CF6?
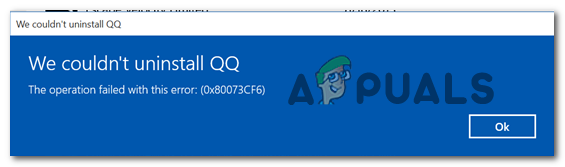
Some Windows 10 users are encountering the 0x80073CF6 error whenever they try to install or uninstall a program, or when they try to update an existing UWP app. In most cases, this error code is accompanied by ‘This operation failed with this error‘ or ‘*Application* cannot be installed‘.
Here’s a list of potential culprits that might end up causing this problem:
- Generic Windows 10 glitch – As it turns out, this issue can be caused by a generic Windows 10 glitch facilitated by long idle periods while Windows Store is performing background operations. In this case, a simple restart or running the Windows Store App troubleshooter should fix the issue for you.
- Windows 10 Anniversary update is not installed – A lot of Windows 10 users have confirmed that they managed to fix the issue after they installed a very pending update including the Windows 10 Anniversary update. This suggests that the Windows Store is reliant on data introduced with this update.
- Windows Store corruption – Another fairly common cause that might spam this problem is some type of corrupted file or dependency used by the Windows Store component. In this case, you should be able to fix the issue by resetting the Windows store via an elevated CMD or directly from the Settings menu.
- Corrupted user account – Corruption originating from the user profile can also be responsible for the apparition of this particular issue. In this case, some affected users have confirmed that creating a new local user account has allowed them to circumvent the 0x80073CF6 error.
- 3rd party interference – As it turns out, some 3rd party services or processes might also cause this problem. Since there are a lot of potential culprits to cover, the best way to eliminate this possibility is to achieve a clean boot state and see if the issue is still occurring.
- System File Corruption – In case the problem is being caused by an underlying cause of system file corruption, your first attempt at fixing the issue should be by running DISM and SFC scans. In case those two prove to not be effective, the last resort would be to reset every Windows component (via a repair install or in-place repair).
Method 1: Running the Windows Apps Troubleshooter
Before you try anything else, you should see if your Windows 10 computer is not capable of fixing the issue automatically. Several affected users have reported that they managed to fix the issue by running the Windows Apps Troubleshooter and applying the recommended fix.
Keep in mind that this built-in utility contains a selection of repair strategies that can be automatically applied in the event that a familiar scenario is discovered.
Here’s a quick step by step guide that will show you how to run the Windows App troubleshooter in order to fix the 0x80073CF6:
- Open up a Run dialog box by pressing Windows key + R. Next, type ‘ms-settings:troubleshoot‘ inside the text box and press Enter to open up the Troubleshooting tab of the Settings menu.
Accessing the Activation troubleshooter - Once you’re inside the Windows Troubleshooting tab, move down to the right section of the screen and scroll all the way down to the Find and Fix other problems section. Next, click on the Windows Store Apps entry and select Run the Troubleshooter from the newly appeared context menu.
- After you arrive inside the Windows Store Apps utility, wait patiently until the initial scan is complete. Once the results arrive, see if a viable repair strategy is discovered – if the answer is Yes, click on Apply this fix to enforce the potential fix automatically.
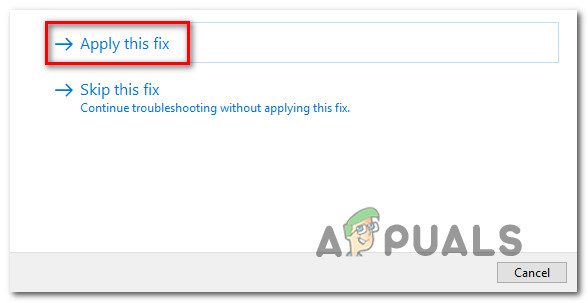
Apply this fix Note: Keep in mind that depending on the nature of the problem that gets discovered, you might be asked to perform a series of manual steps in order to fix the issue.
- After the fix is successfully applied, reboot your computer and see if the problem is resolved at the next computer startup.
In case you’re still seeing the same 0x80073CF6 error, move down to the next potential fix below.
Method 2: Installing every Pending Windows Update
According to some affected users, this particular issue is very common on Windows 10 builds that doesn’t yet have the Anniversary Update. It turns out that Microsoft already released a hotfix for this issue that’s included with the Anniversary Update.
If you’re encountering the issue on Windows 10 and the Anniversary update is not yet installed, you should be able to fix the issue by ensuring that every pending update is installed on your computer.
Follow the instructions below to install every pending Windows update on your Windows 10 computer:
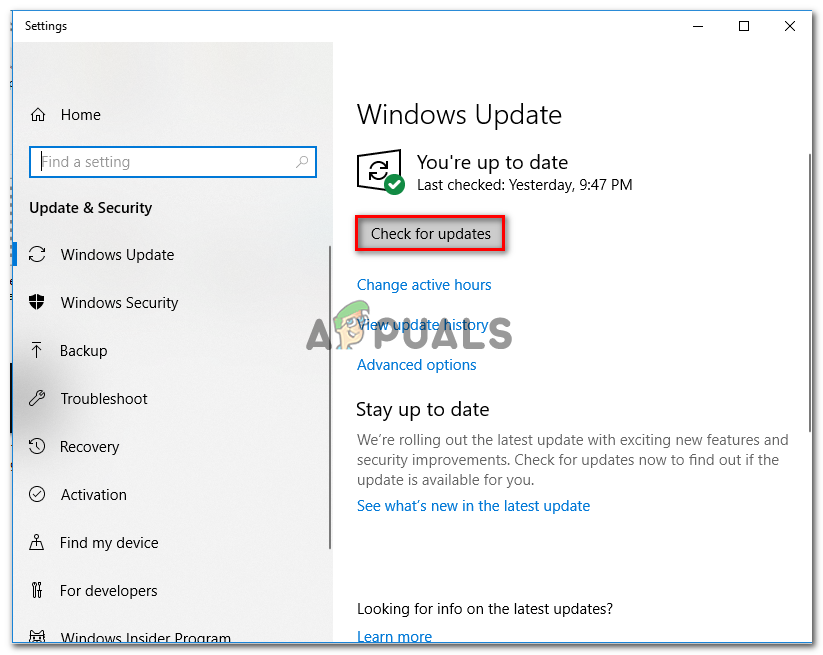
- Open up a Run dialog box by pressing Windows key + R. Next, type ”ms-settings:windowsupdate” and press Enter to open up the Windows update tab of the Settings app.
Opening the Windows Update screen - Once you’re inside the WIndows update screen, move to the right-hand section and click on Check for updates.
- After the initial scan is complete, follow the on-screen prompts to install every pending Windows update that is currently scheduled to be installed. Make sure that you install every pending update including cumulative and security updates (not just the one that adds the Anniversary update).
Installing every pending Windows update Note: Keep in mind that in case you have a lot of pending updates, you will be prompted to restart your computer before you’ll get the chance to install every pending update. If this happens, restart your computer as instructed, but make sure to return to the same update screen once the next startup is complete.
- Once you’re on the latest Windows 10 build, repeat the action that was previously causing the 0x80073CF6 error and see if the problem is now fixed.
In case the same problem is still occurring, move down to the next potential fix below.
Method 3: Resetting Windows Store
As it turns out, one of the most common causes that will end up causing this particular issue is some type of local corruption that ends up affecting the Windows Store component. This problem is most commonly caused after Windows Security (former Windows Defender) or a different 3rd party Antivirus ended up quarantining some items ore dependencies belonging to Windows Store.
If this scenario is applicable, you should be able to fix the issue by resetting Microsoft Store and cleaning its cache. This operation will end up replacing any problematic files with healthy copies and every bit of temporary data will be cleared.
When it comes to doing this, you have two options – You can either reset Windows Store and clear the cache via the Settings menu or an elevated CMD prompt. Feel free to follow whichever guide you feel more comfortable with:
Resetting Windows Store via CMD window
- Press Windows key + R to open up a Run dialog box. Next, type ‘cmd’ and press Ctrl + Shift + Enter to open up an elevated CMD prompt. When prompted by the User Account Control, click Yes to grant administrative privileges.

Running the Command Prompt - Once you’re inside the elevated Command Prompt, type the following command and press Enter to reset Windows Store along with every involved dependency:
wsreset.exe
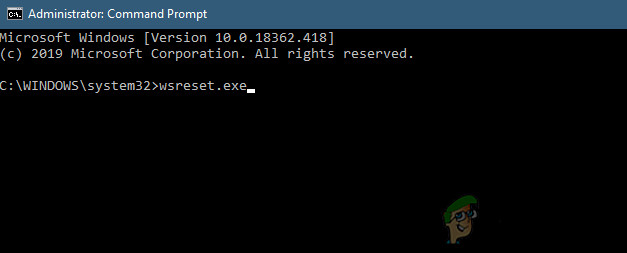
Resetting Windows Store - Once the command is successfully processed, reboot your computer and see if the problem is fixed at the next system startup.
Resetting Windows Store via Settings menu
- Open up a Run dialog box by pressing Windows key + R. Next, type ”ms-settings:appsfeatures” and press Enter to open up the Apps & Features menu of the Settings app.
- After you’re inside the Apps & Features screen, move down through the list of installed applications and locate Microsoft Store.
- After you manage to locate Microsoft Store, click on the Advanced Options menu associated with it (under Microsoft Corporation).
- Next, scroll all the way down to the Reset tab and click on the Reset button to initiate this process. After you start this operation, do not stop it prematurely until the process is finished.
- At the end of this process, restart your computer and see if the issue is resolved at the next system startup.

In case resetting the entire WIndows Store component didn’t fix the issue for you, move down to the next potential fix below.
Method 4: Using a Local Microsoft account
According to some affected users, this particular issue can also occur due to some type of corruption originating from your user profile. Several affected users that we’re encountering the 0x80073CF6 when installing, uninstalling or updating UWP apps through Windows Store have confirmed that the issue was resolved after they’ve switched to a local Microsoft account.
This operation will end up clearing any corrupted dependencies that are currently tied to your current user profile.
If you want to give it a try, follow the instructions below to create a new local user account on Windows 10:
- Open a Run dialog box by pressing Windows key + R. Next, type ‘ms-settings:otherusers‘ inside the text box and press Enter to open up the Family & other people tab of the Settings app.
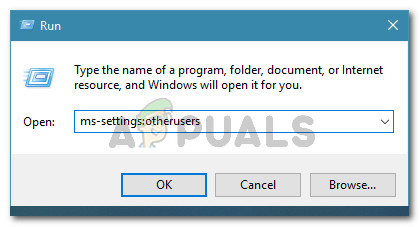
Running dialog: ms-settings:otherusers - Once you manage to get inside the Family & other users tab, scroll down to the Other users tab and click on Add someone else to this PC.
- After you get to the next screen, click on ‘I don’t have this person’s sign in information’ in order to create a local account.
- At the next screen, login with your Microsoft account and click on Add a user without a Microsoft account.
- Set a username and password for the new account, and assign a series of security questions that will be used for recovery before clicking Next.
- After the new account has been created, restart your computer and sign in with the newly created account at the next startup.
- Once you are signed with the new account, repeat the action that was previously causing the 0x80073CF6 and see if the problem is now fixed.
If the same issue is persisting, move down to the next potential fix below.
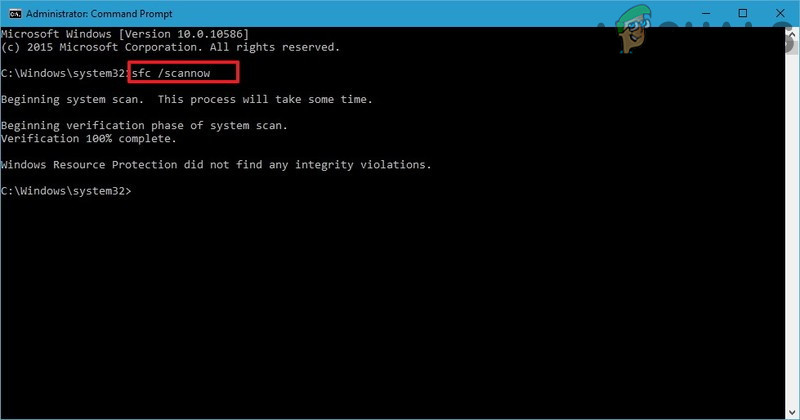
Method 5: Doing DISM and SFC Scans
If none of the methods above have helped you to fix the issue, you should start troubleshooting to see if you’re actually dealing with some time of system file corruption. Fortunately, Windows 10 is equipped with a set of very effective built-in tools (System File Checker and Deployment and Image Servicing and Deployment) that are able to fix low and medium-tier instances of corruption instances.
If this scenario looks like it could be applicable, you should initiate both scans in quick succession in order to identify and fix every instance of system file corruption that might be causing the 0x80073CF6.
Start off by running an SFC scan since this tool is 100% local and doesn’t require an internet connection. This operation will replace every corrupted system file with a healthy equivalent fetched from a locally stored archive.
Once the first operation is complete, restart your computer and check to see if the issue is now resolved.
If the same 0x80073CF6 error is still occurring, perform a DISM scan. But before you do this, ensure that your Internet connection is stable, since this repair tool uses a sub-component of Windows update to download healthy equivalents for the corrupted files that need to be replaced.
If you performed both scans to no avail, move down to the next potential fix below.
Method 6: Performing a Clean Install
By this point, you should also start considering some kind of 3rd party interference is actually causing the 0x80073CF6 error. Since the list of potential culprits that might cause this behavior is virtually endless, the most efficient way of testing out this theory is to achieve a clean boot mode and see if the problem is still occurring while only Windows processes and services are permitted to run.
To achieve a clean boot state, follow the instructions on this article (here). The steps should work regardless of your Windows version.
Once the clean boot state is achieved, attempt to uninstall, install, or update a UWP (Universal Windows Platform) app and see if the issue still appears.
In case you’re still seeing the same 0x80073cf6, move down to the final fix below.
Method 7: Resetting every Windows Component
If you’ve followed every potential fix above but none of the methods have helped your particular scenario, it’s clear that you are dealing with some kind of underlying corruption issue that cannot be resolved conventionally. If that’s the case, you only have two options left:
- Clean install – This operation is extremely easy to perform and it doesn’t require you to insert an installation media. But unless you have the means to back up your data in advance, expect a certain degree of data loss.
- Repair install – This procedure is also known as in-place repair and it should be the preferred approach if you have important data that you can’t afford to lose. You will need to insert a compatible installation media, but your applications, games, personal media, and user preferences will remain intact (only OS files will be replaced).


