What is ‘sedlauncher.exe’ and Should it be Disabled?
Windows Update is a Microsoft service that is supposed to improve the operating system’s performance. It is used to keep the Microsoft Windows operating system and Microsoft related programs updated. Updates include service packs, patches, and driver updates. However, these updates can bring issues that will affect the user experience. Sedlauncher.exe file comes with Windows Update that can cause high disk usage and other issues with Windows 10.

What is Sedlauncher.exe?
Sedlauncher.exe is a file used to improve Windows Update Service components. This file is copied to your system with the Windows 10 KB4023057 update patch. Location of the file will be in the system directory ‘C:\Program Files‘ within the folder ‘rempl‘. Sedlauncher.exe is included in Windows Remediation Service to safeguard and speed up the process of Windows 10 update. However, this can also cause the problem of high disk usage. Users can be quite disappointing for an update file consuming RAM and CPU usage. Where they should be used for other tasks, such as playing games or using the browser. Sedlauncher.exe has a digital signature of Microsoft and it is not a virus.
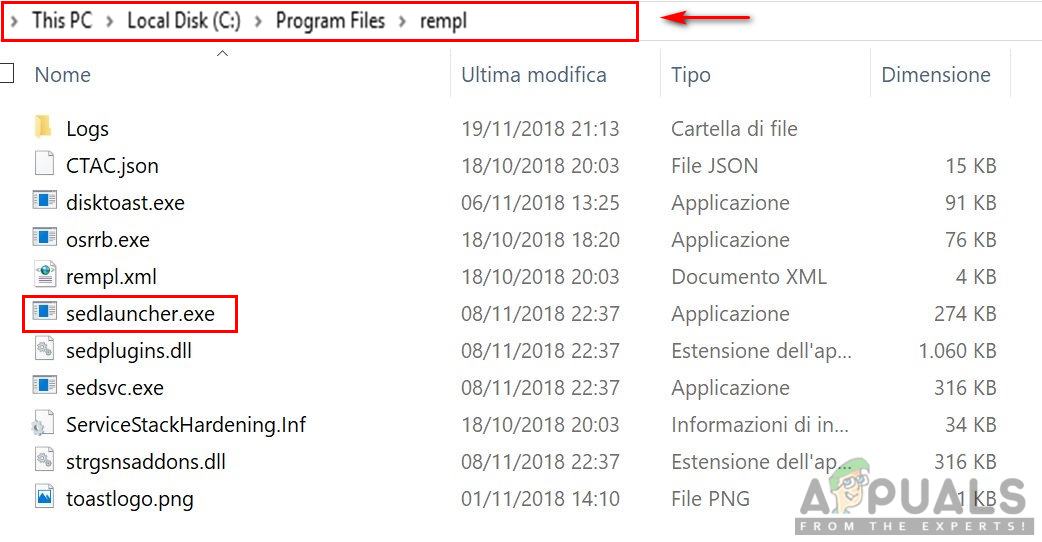
However, if this file is not located in the following location as mentioned above, you need to run a full system scan. Some malware camouflages itself as a legit process located in ‘C:\Windows‘ or ‘C:\Windows\System32‘ folder. You can try downloading the Malwarebytes for Windows and run it to scan your system.
How to Disable Sedlauncher.exe?
Now that we know that sedlauncher.exe is a part of KB4023057 update patch, so it is useful for updating Windows 10. However, if it is causing the issue of High CPU usage then you would want to disable it. You can stop it temporarily or disable it permanent. There are few methods to disable this executable from using system memory as mentioned below:
Method 1: Disabling Sedlauncher.exe from Task Manager
The most common and simple method to disable a process is doing it from Task Manager. You can find all the processes and services running on your system in Task Manager. To disable sedlauncher.exe follow the below steps:
- Hold Windows key and press R to open Run, type ‘taskmgr‘ and Enter to open Task Manager.
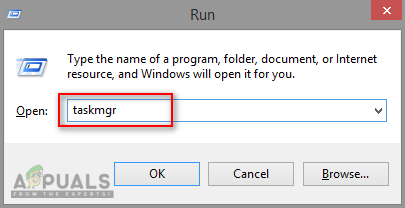
Opening Task Manager - Scroll down in Processes tab to find the Windows Remediation Service.
- Right-click on it and choose End Task option.
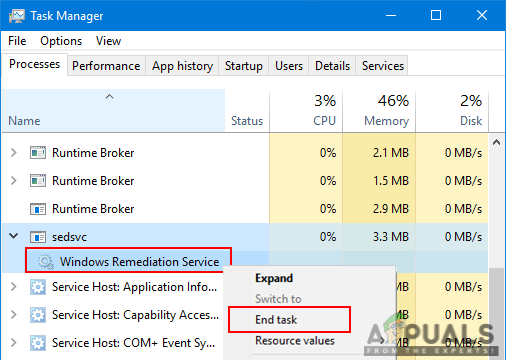
Closing the running process - Now check your system for a while to notice the improvement in speed and memory.
Method 2: Disabling Sedlauncher.exe from Services
Another method is to disable the service itself from services utility. You can do this by finding the Windows Remediation Service in the service utility and changing the properties of the service. To apply this method, follow the below steps:
- Hold Windows key and press R to open Run, then type ‘services.msc‘ and Enter.
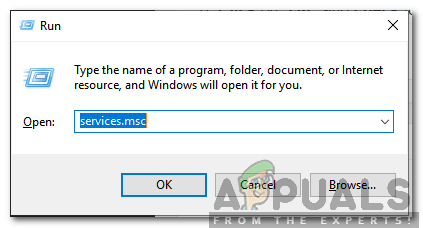
Typing in “Services.msc” and pressing Enter - Scroll down the list in Service utility window to find Windows Remediation Service.
- Right-click on it and choose Properties.
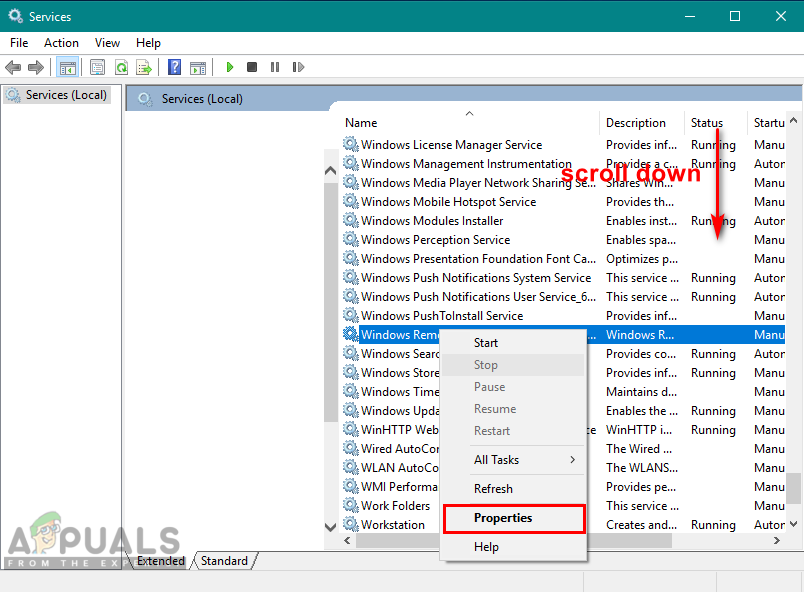
Opening Windows Remediation Service properties - In the General tab, click on the Startup type dropdown menu and choose Disabled, then Apply
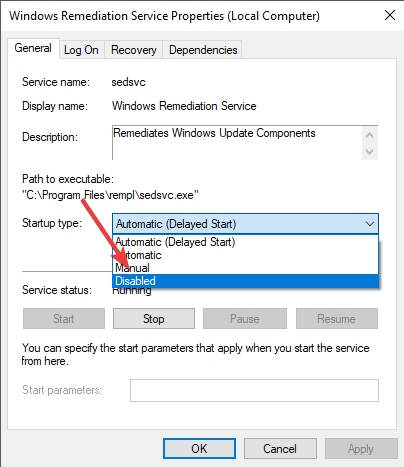
Disabling the startup type - Reboot your computer and this will fix the sedlauncher.exe issue.


