What is KFDOWI and How to Remove it from Showing up on your Network?
Nowadays, every computer is connected to some network especially the Wi-Fi. Now, it is easier to keep the wired networks secure as compared to the wireless ones. Since wired networks are in a closed-loop, it is harder to hack into them as a person has to be physically present. On the other hand, wireless networks are easily hacked in it. So, you must keep your Wi-Fi secured.
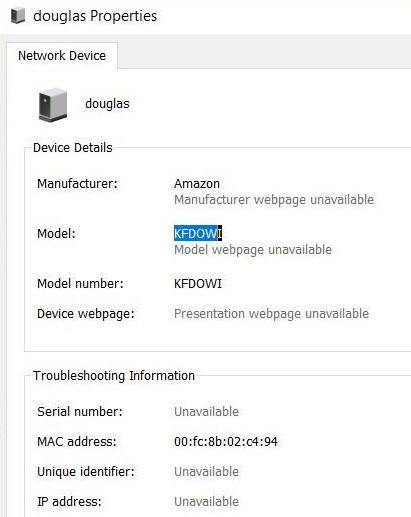
However, some users notice that they saw a KFDOWI network on their computer after the Windows 10 update. When the properties of this network are checked, there is no IP address. You would only see a few details associated with the MAC address. Just like the unavailable IP address, there is no unique identifier or model webpage.
What is KFDOWI?
KFDOWI is the motherboard of Amazon devices. In the Linux system, it identifies devices for the developers. So, when you are using a device such as Kindle, this system would identify the device. In many cases, it randomly appears on the network without any serial number, IP address, or unique identifier. This can happen even if you do not have your computer connected to any Amazon device.
How to Remove KFDOWI?
If you see KFDOWI under the Network Device on your computer even though you do not have an Amazon device, then you should remove it. There are two different ways to do so.
Method 1: Disable Windows Connect Now Service
This is the easiest method for removing KFDOWI from your computer effectively. You have to disable the connecting service on your system. The connecting service’s job is to connect your computer to other devices present on your existing network. If there is an Amazon device present, your computer will attempt to communicate with it and since there is a compatibility issue, you will not be able to connect successfully. Here, we will navigate to Windows services and disable the service.
- In the Command box, type in ‘services.msc’ to open the Services Manager.
- After this, look for Windows Connect Now on the right side of the window.
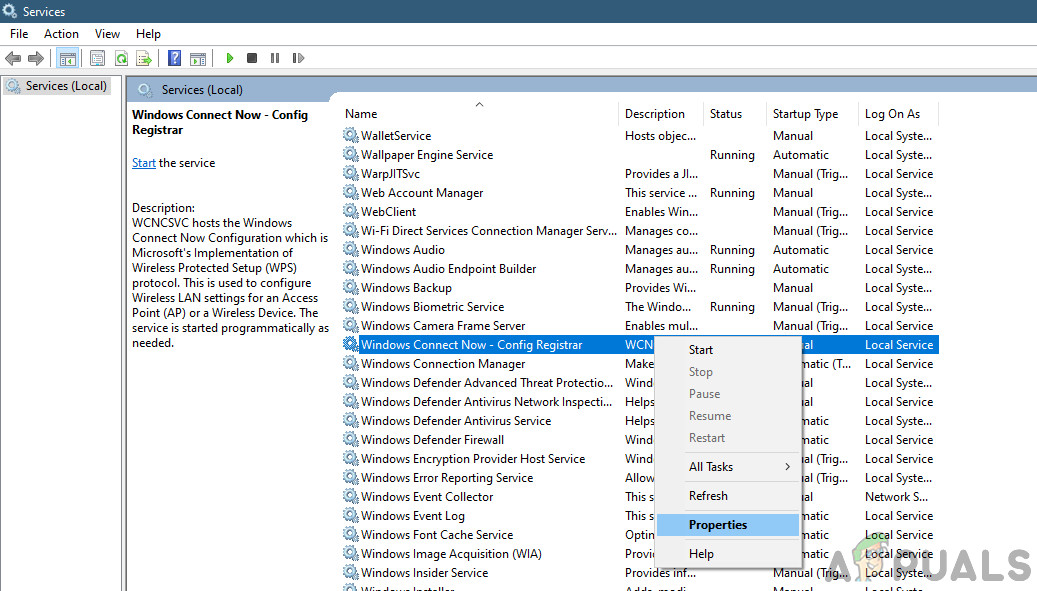
Windows Connect Now Service - Right-click on this option and choose Properties.
- Open the General Tap and change the Start-up type to Manual.
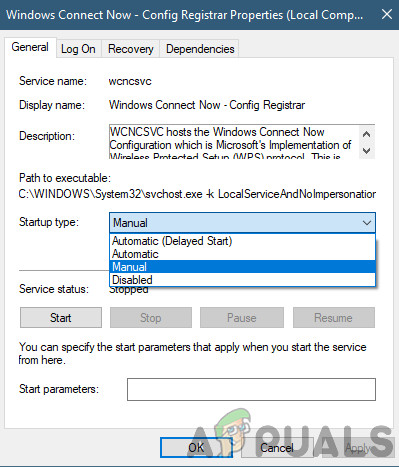
Setting Service to Manual - Then, click on Stop and Apply the settings.
This should remove the network from your settings. With this method, you disable the automatic connecting of networks so KFDOWI should disappear. If this does not work, you can try to reset the router.
Method 2: Reset the Router Settings
If you feel that your network has been compromised and you are vulnerable, you can always reset your router’s configurations. When you reset your router, everything gets defaulted back to the initial settings which the router came with and you will be able to reinitialize everything.
Before we start resetting the router, you need to note down your router’s configurations. Every ISP has specific settings saved on your router. If we reset the router, these configurations will be lost and you will have another issue at hand. Here, you need to navigate to the IP address associated with your router. This is either present at the backside of the device or in the box of your router. This can be something like ‘192.168.1.2’. If you are unable to find the address, Google your router model and get the information from the web.
- Search for a button at the back of your router and press it for ~6 seconds until the router turns off and back on signifying the reset.
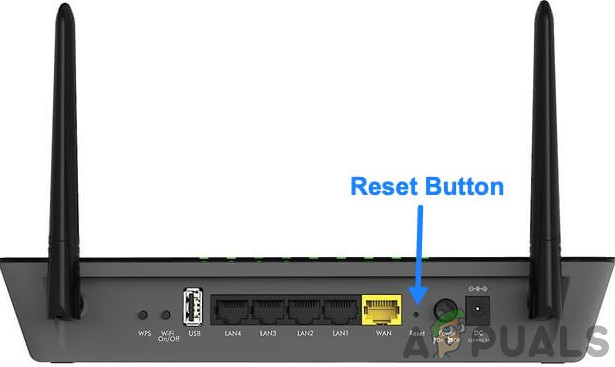
Resetting Router - After entering the configurations (if any), connect your console back to the network and check if the failure to initialize the network is solved for good.
After some time, turn it back on again and see if the problem is fixed. It is essential to restart the router. Keep your Wi-Fi network safe by changing the password now and then. Make sure you have changed the default admin information because this can easily be hacked. Also, do not log in to suspicious sites to keep your network safe.
Note: We also saw some cases where some devices were being registered on the network to communicate with the computer and were shown with different names that include KFDOWI. In this case, check existing connected devices and try to disconnect them after you perform the steps above.


The issue was installing and uninstalling AMAZON APPSORE on laptop. MS Support remote connected, located the service and disabled it. Should I do your fix instead and select manual?