What is Git Bash and How to Install it on Windows?
Git Bash is a command line through which users can use Git features. It emulates a bash environment on Windows and lets the user use most of the standard Unix commands. It is for the users that are familiar with the bash terminal of Unix operating systems. There is also Git CMD which is just like a regular Windows command prompt, where users can use all the Git features through the command line. Most users that are new to GitHub are unaware of the Git Bash and how it works. In this article, we will tell you what Git Bash is and how you can install or run it for the very first time.
What is Git Bash?
Git Bash is an application for Microsoft Windows environments which provides a bash emulation used to run Git from the command line. This is not a simple bash compiled for Windows, but a package that contains Bash, SSH, SCP, and some other Unix utilities compiled for Windows. It also contains a new command-line interface terminal window called minty. These utilities are bundled with this Bash package to create a usable software package.
In Windows, we tend to run commands in CMD but they are actually executable files that exist in the C:\Windows\System32 folder. The same case is for bash, it requires the utilities to make the commands work. In Unix systems, these utilities will be under /usr/bin directory. So, by installing the Git Bash these utilities will be installed in C:\Program Files\Git\usr\bin folder.
Downloading and Installing Git Bash for Windows
Installing Git Bash is simple just like installing any other software. You can download it from the official site. However, it has a few of the options in the installation that you can adjust depending on your requirements. We are going to show you the steps for each important option in the Git Bash installation.
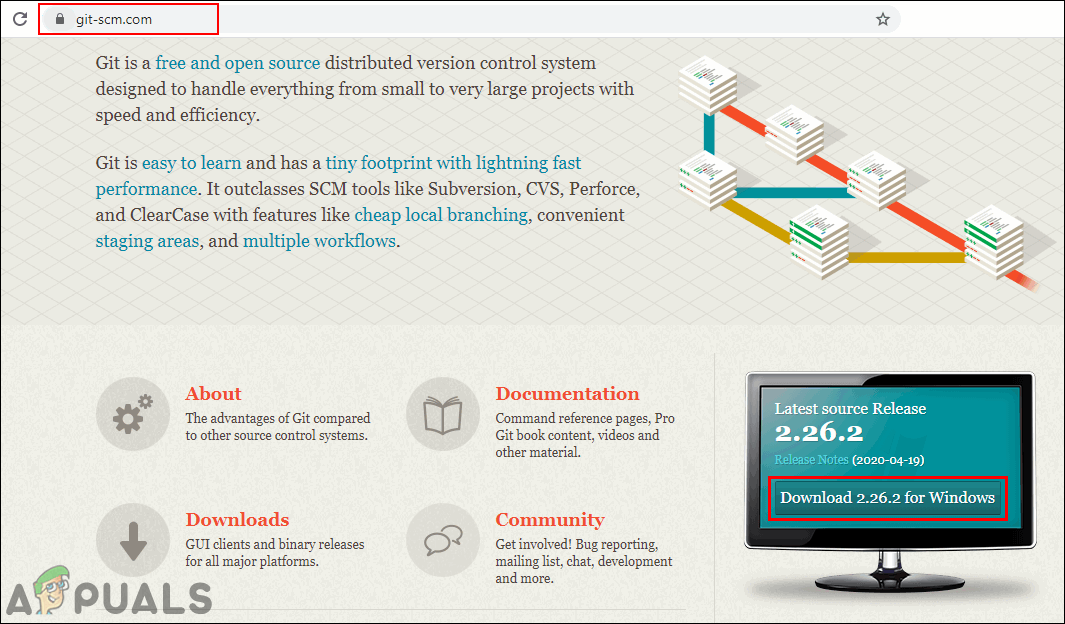
- Open your browser, go the Git Bash for Windows download page. Click on the Download button to start downloading the setup file.
Downloading the Git Bash - Open the downloaded setup file, click on the Next button and then provide the Installation directory for the Git. Click on the Next button to move to continue the installation.
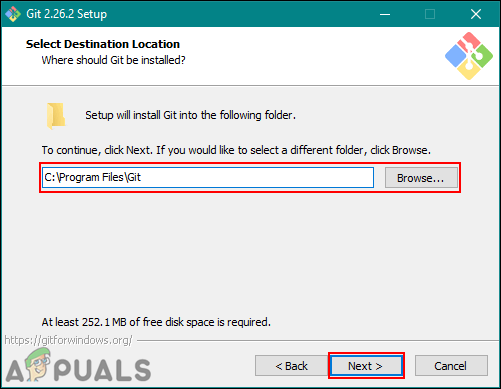
Providing a path for installation - Choose the components that you want to install, we recommend you to keep them as default. You can also tick the On the Desktop option to create a shortcut.
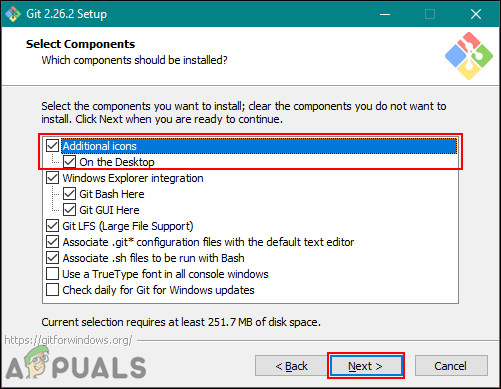
Selecting a shortcut option - Click the Next button for the start menu step. For the editor, you can choose the one that you are using on the system.
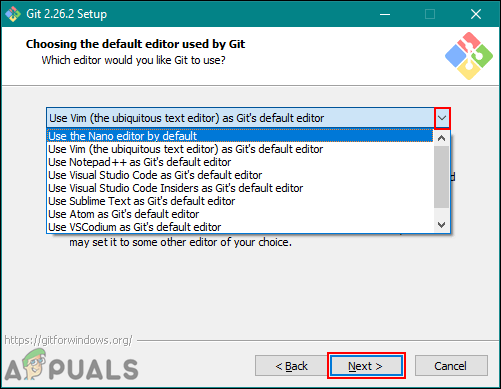
Choosing the editor - In the PATH environment step, you can choose to use Git from Git Bash only or use Git with command prompt and PowerShell. Also, the bash commands will work on the command prompt if only the third option is chosen.
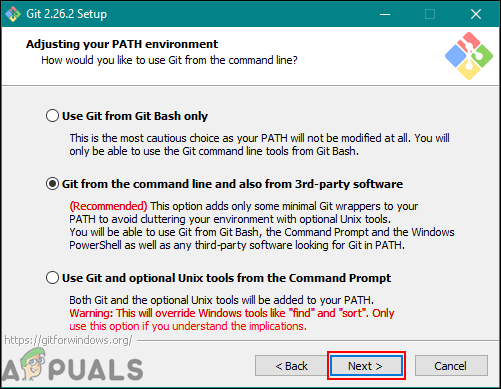
Choosing the command prompt option - For the remaining steps, you can leave the default options as they are. Install the Git and close the installation window.
Keeping the rest of the options as default
Running and Testing Git Bash
If you are familiar with working on the command line, then it will be much easier for you to get started with Git Bash. It is similar to the CMD in Windows, you can open it and change directory to the folder where you want to work or you can directly open it inside the folder. To connect your Git Bash to your GitHub account it requires a few steps and login to the GitHub account. Follow the below steps to get started:
Note: If you already have a repository, then skip step 2 and step 3.
- Open Git Bash by double-clicking the shortcut or search it through the Windows search feature.
Note: You can also open Git Bash in your project folder by right-clicking anywhere in the folder and choosing the Git Bash option.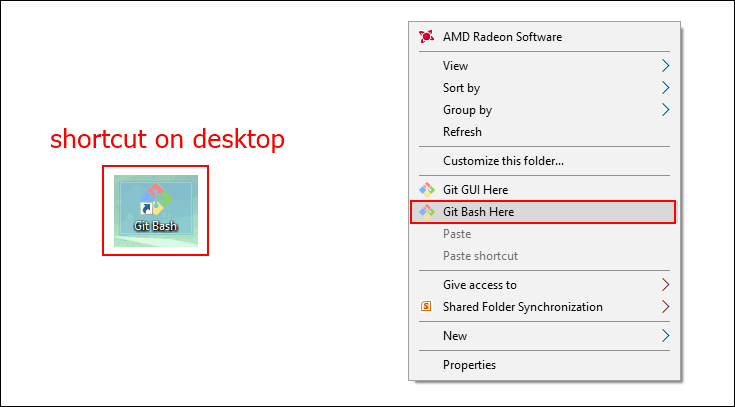
Opening the Git Bash - Go to the GitHub site and Log in to your account. Click on the + icon next to the profile icon at the top right corner and choose New repository.

Log in to GitHub account - Provide the name, select the Initialize this repository with a README option, and click on the Create repository button.
Note: You can also set the repository to public or private here. However, a private repository will require the key.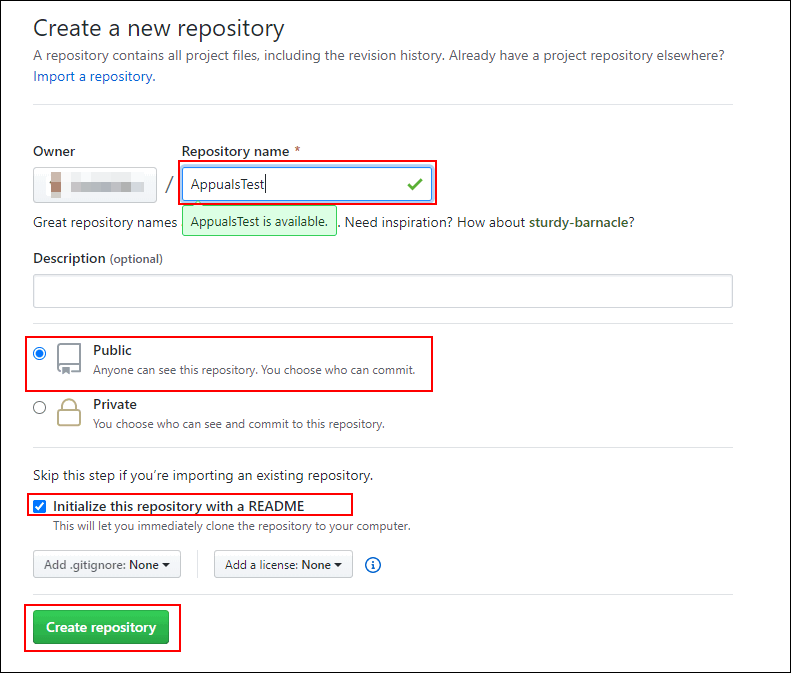
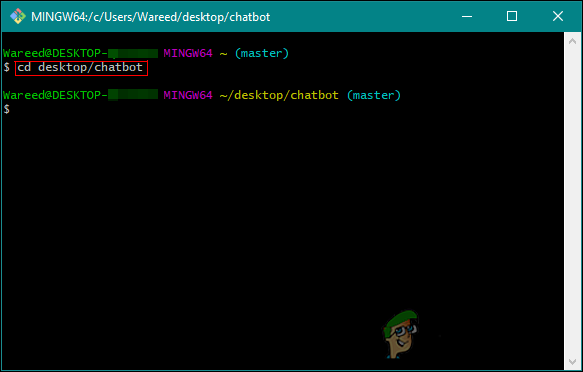
Creating a new repository - Type the change directory command to change the directory to your project folder. If you have opened the Git Bash in your project folder, then you don’t need to change directory.
Changing the directory - Type the following commands to provide your username and email of the GitHub account.
git config –global user.name "kevinarrows"

git config –global user.email kevinarrows@gmail.com

Adding email and username to config - Then you can type the command to clone your repository to the system. Make sure you copy the HTTPS clone link of your repository.
git clone git@github.com:bashluffy/AppualsTest.git
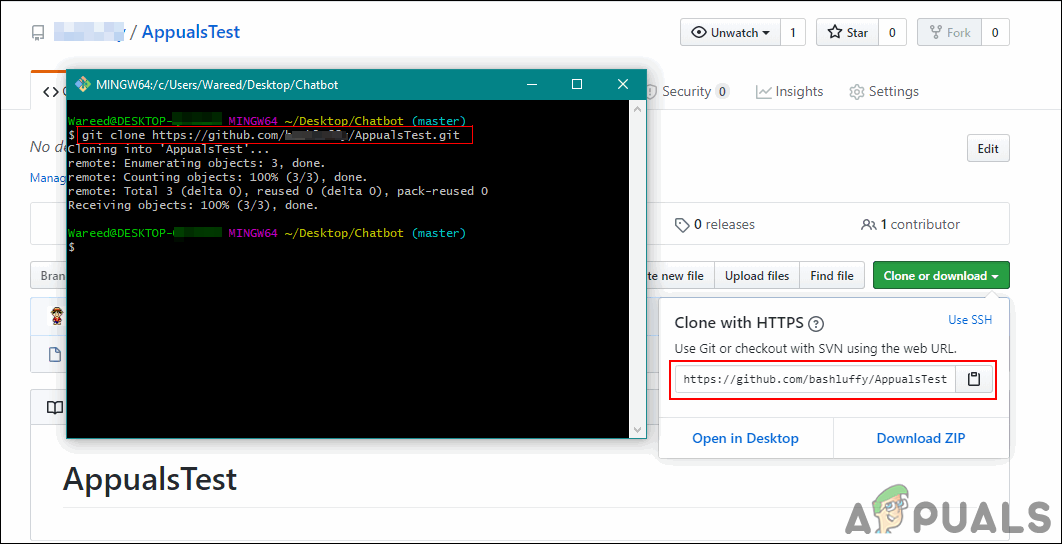
Cloning the repository - This will create the folder of your repository in the folder you are running Git Bash. Now type the change directory command to go to the repository folder.
cd AppualsTest

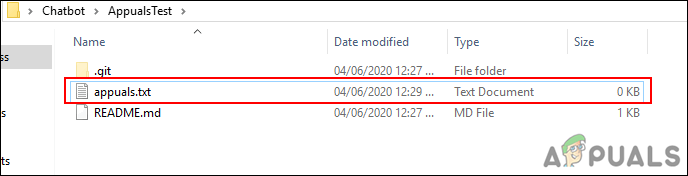
Changing directory - Now to upload the new files from this folder to your GitHub repository. Create or copy a file into this folder. In our case, we are creating an “appuals.txt” file.
Creating a text file - Type the following command to add the file.
git add appuals.txt
- Now you need to commit the file in order to upload to your GitHub account. Type the following command.
git commit -m "first commit" appuals.txt
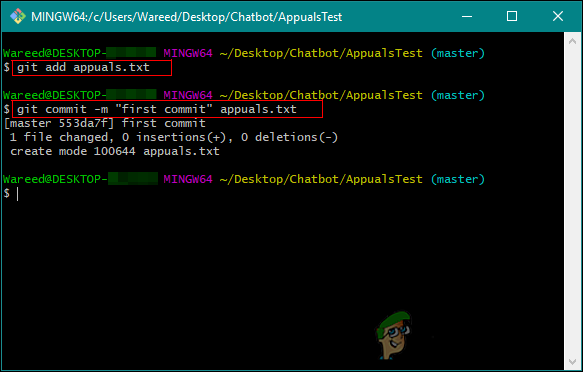
Adding the file and using the commit command - Finally, type the push command to move the file to your repository.
git push -u origin master
- If you are doing this for the first time, it will ask for your Git username/email and password to confirm the credentials.
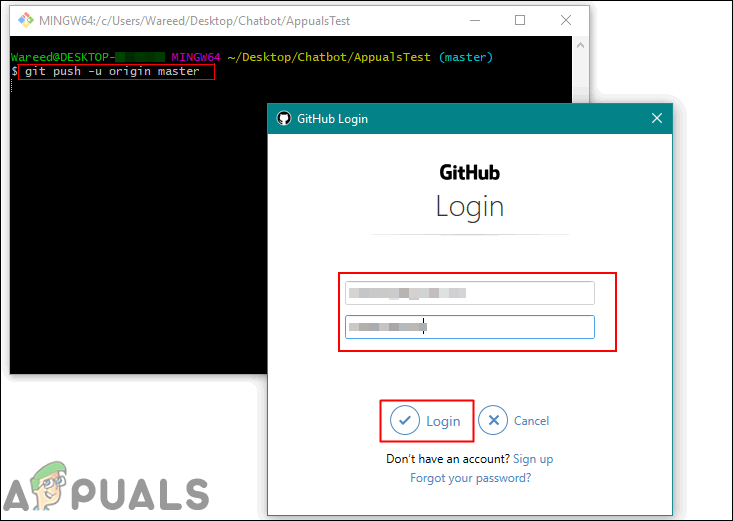
Using push command to upload file to GitHub - Go to your repository and refresh the page if it was already open. You will find the new file that you just uploaded.

Checking the new file in the repository - If you make any further changes to the file, you can use the commit and push commands to upload the new file over the old one. Just change the commit message.
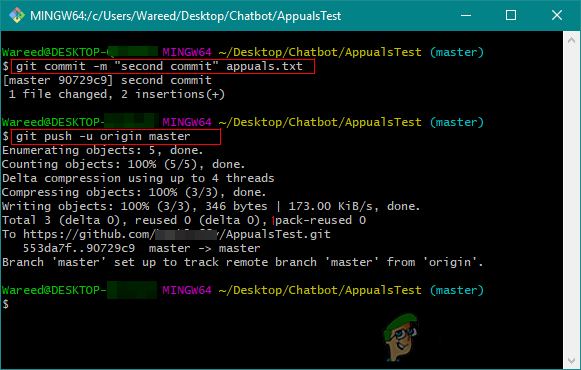
Can apply changes and update files


Thanks Kevin, it help!!