What are the Best OBS Settings for Recording
OBS (Open Broadcaster Service) is the leading software for recording and streaming game plays in the gaming industry right now. With numerous functions that are tweakable by the user, the software gives a unique experience where the user has control over almost all the aspects of the recording/streaming.
Every user might have searched for the best OBS settings for recording every now and then to make sure that his software generates top-notch quality recordings without taking a hit on performance. The thing about most ‘Best OBS Settings’ guides is that they don’t work for every case. They might work perfectly for some people but for others, they may cause additional problems.
In this article, we will go through all the technicalities on what to look for and what are variables which you can choose according to your hardware to provide an optimal result.
Navigating to Settings
First things first; we will be navigating to settings in your OBS Studio. First, you should make sure that you are running OBS as an administrator and should have all your recordings saved beforehand (which you have already made).
- Right-click on OBS Studio and select Run as administrator.
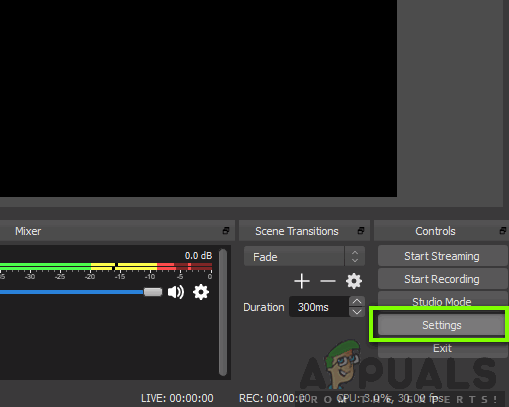
- Once in elevated OBS, click on the Settings button present at the bottom-right side of the screen.
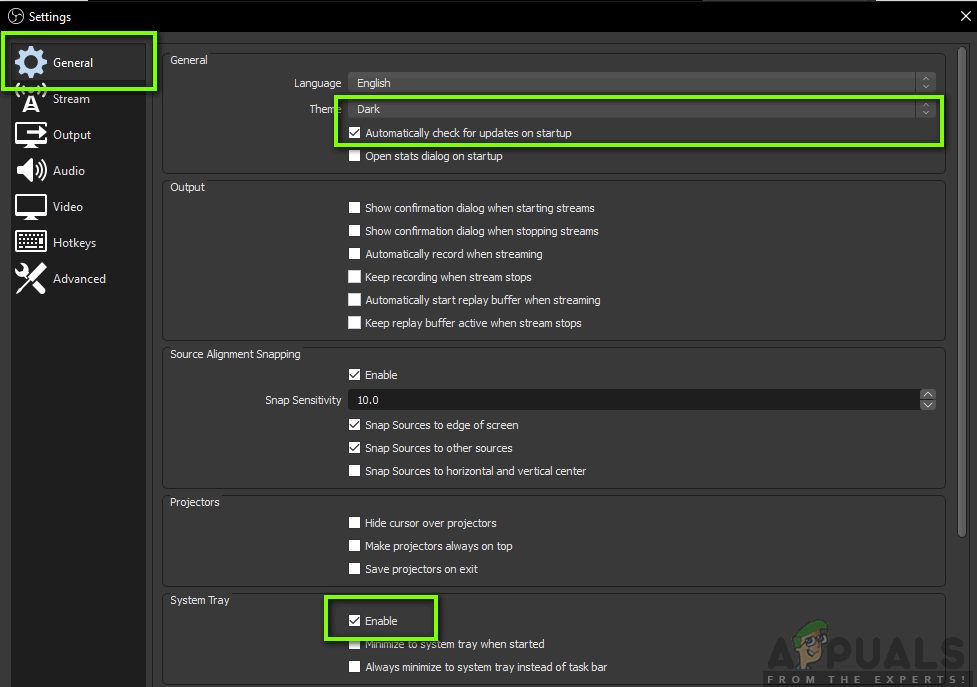
General Settings
There aren’t many options that you can change in the General settings of OBS. You can change the theme of your application (either light or dark). A noticeable thing that you should make sure is enabled is the System Tray. This option allows for great accessibility and enables you to launch the software instantly.
Output Settings
Let’s move on to the main module. Click on the Output tab present on the left side of the screen. There are two output options i.e. Simple and Advanced. In simple, we will change the format of the video file as well as decide the folder where the files are being saved. In advance, we will cover the encoding basics.
Recording path:
The recording path is the path where your recording will get stored after it is encoded and all. You should click on the browse button and navigate to a file location where you want your files to get saved.

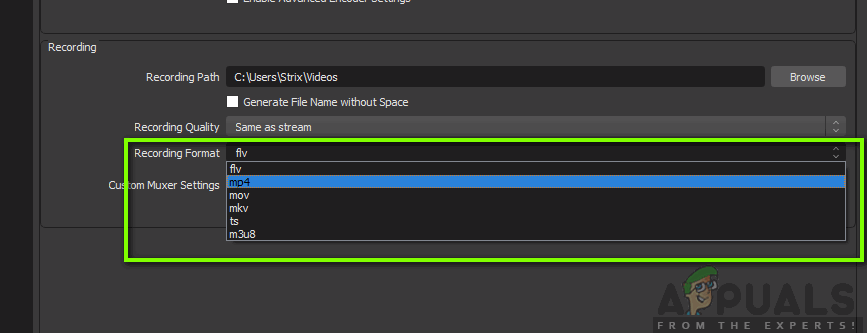
Recording format:
Let’s move on to the recording format. The flv format (which is the default one) is considered to be an okayish format used for recording. However, if you prefer any other specific one, you can easily change the option by clicking the drop-down.
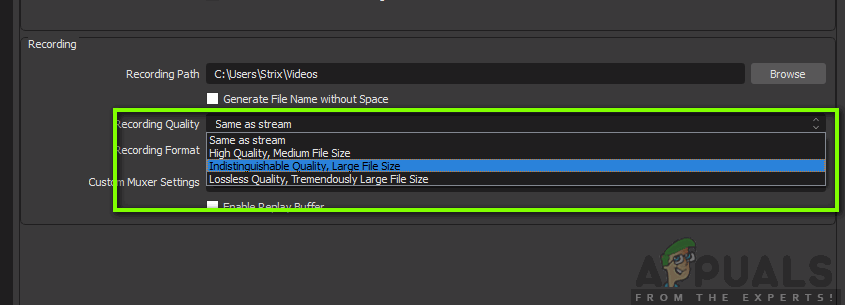
Recording Quality:
Recording Quality is an important factor in terms of the quality of recording which occurs in terms of size. There are namely 4 different qualities which you can preset. The default one is Same as stream. Below are listed more details onto which one suits you.
- Same as stream: This is the quality of the stream which you recording. The file size is somewhat medium with an okayish quality.
- High Quality, Medium File Size: In this option, you are specifying that regardless of the stream quality, the software should generate medium size files with not ‘too’ much accuracy but good enough to be viewed.
- Indistinguishable Quality, Large File Size: In this option, the file size will be very large and when playing the game and seeing the video, the user will not be able to distinguish between the two. This is a good option if you specifically require crystal clear and crisp quality recordings.
- Lossless Quality, Tremendously Large File Size: There is always the option of lossless quality. There will be absolutely no loss regarding the quality but the file will be extra-large so make sure that you have enough disk space.
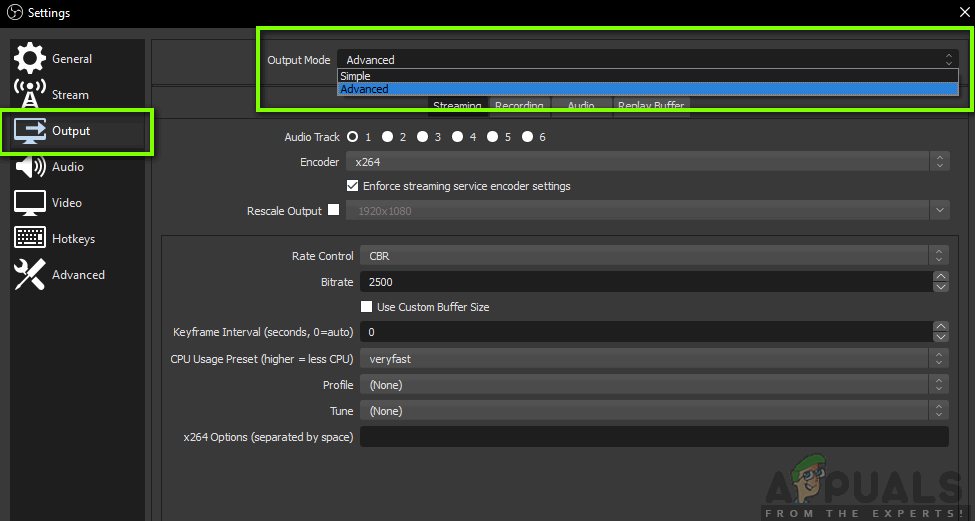
Advanced Settings
Now we will navigate to the Advanced settings to change the encoder and its settings. Click on the Output mode drop-down present at the top of the screen and select Advanced.
Encoder:
This is the game-changer that OBS introduced a while back. Before, users only had the option to use x264 encoding which is pure processor-based encoding. We also encountered several instances where people experienced high CPU usage when recording because of the amount of load the software placed on the computer.
The good thing is that OBS has introduced hardware supported encoding. This option allows users to make use of their dedicated graphics cards and use their power to encode the video.

Depending on the graphics card installed on your computer, you will either see NVIDIA encoder or an AMD. You should prefer dedicated encoders over the stock software ones every time.
Rate control
If we talk about recording, it is proven that VBR is way better than the default (CBR) in all instances. The truth is that most people don’t know that yet. If you are only recording using OBS at the time being, we recommend that you select VBR.
In bitrate, you should set the normal number to 40,000 and the Max Bitrate to 60,000. If you really want to push your quality to the max or you have extra resources lying around, you can set the normal bitrate to 50,000 and the max bitrate to 100,000.

The keyframe interval should be set to 2 but you can adjust it according to your needs.
Let’s talk about preset. There are usually two recommended presets i.e. Max quality or Normal Quality (The normal quality doesn’t have ‘normal’ in it). You can try checking both presets and see which one works for you without putting too much strain on the CPU.
The Profile should be set to High. There are two new options available i.e. Look-ahead and Psycho Visual Tuning. These were introduced in the near past and you can check both items.
In the GPU section, the default value should be set to 0. This is used for dual-GPU systems which are usually set up using Crossfire or SLI. If you have dual GPUs running, you can easily specify the number on which one you want to use. Otherwise, let it sit at 0.
Audio Settings
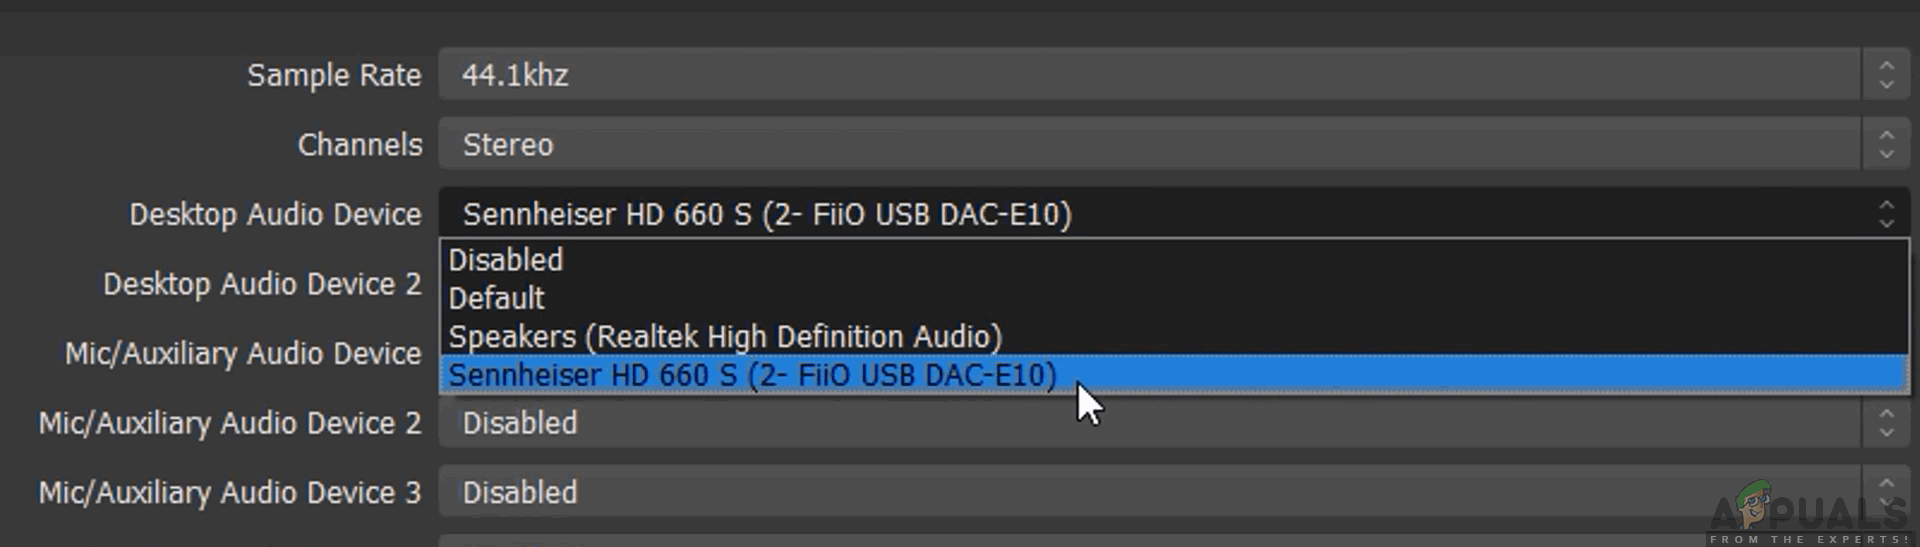
Now that we’re done with the Output settings, let’s move on to the Audio settings. Click on the Audio tab present at the left side of the screen.
The Sample rate and Channels should be set to default values i.e. 44.1 kHz and Stereo. The Desktop Audio Device is where the sound travels to so you can hear it. These are mostly speakers if you have a speaker system connected to your computer or you can select the headphones if you are listening from there.
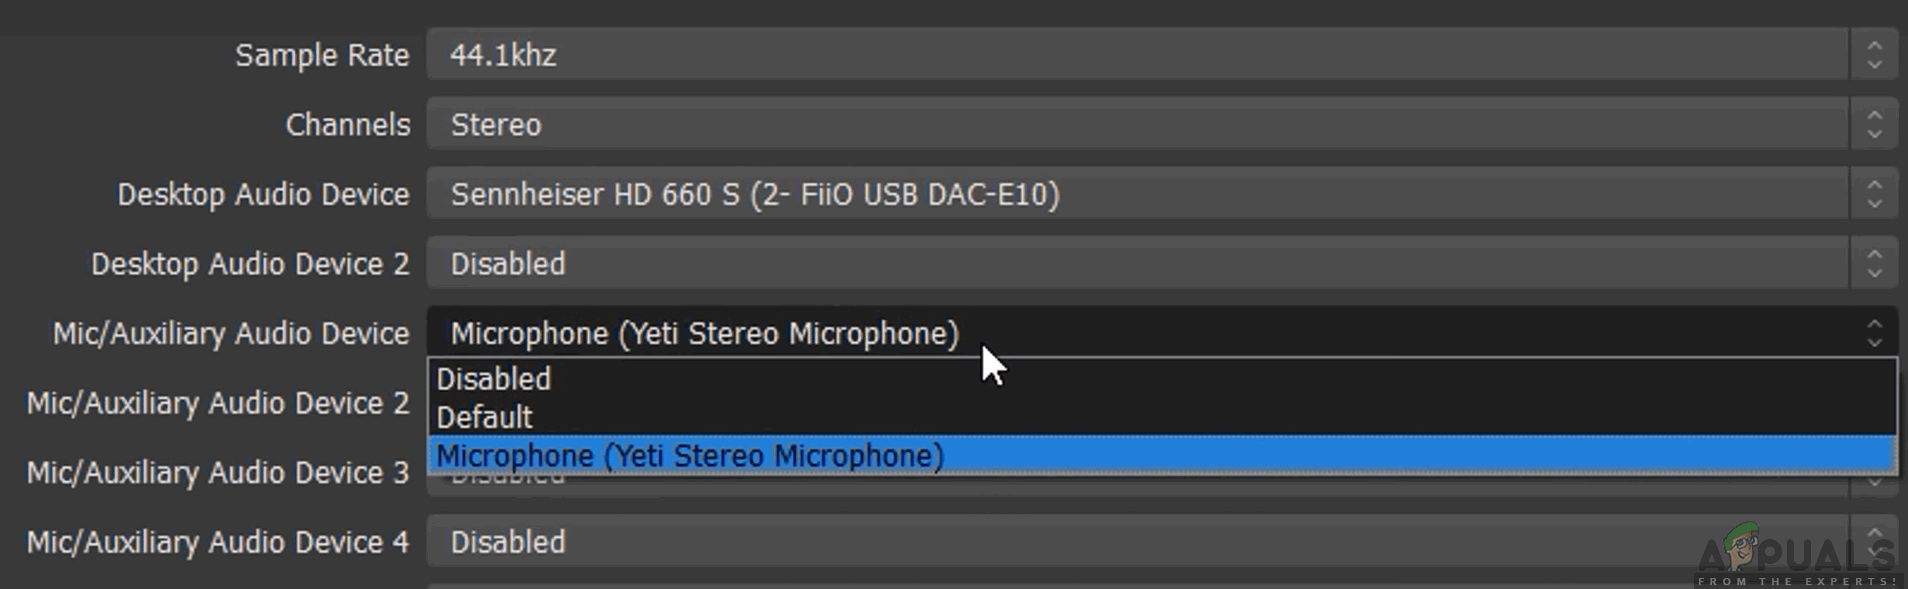
Next comes the Mic/Auxiliary Audio device. This is the microphone from which the voice will be transmitted. Here you should select the dedicated mic (if you are using any) or leave it at default.
This is all for the Audio settings. Let’s move on to the video settings on your computer.
Video Settings:
In video settings, let’s talk about the first two settings. The Base (Canvas) Resolution is the resolution of your monitor. The Output (Scaled) Resolution is the setting which allows you to downscale your resolution. For example, if you play at 1080p but want to record at 720p, you need to set this option to 720p.
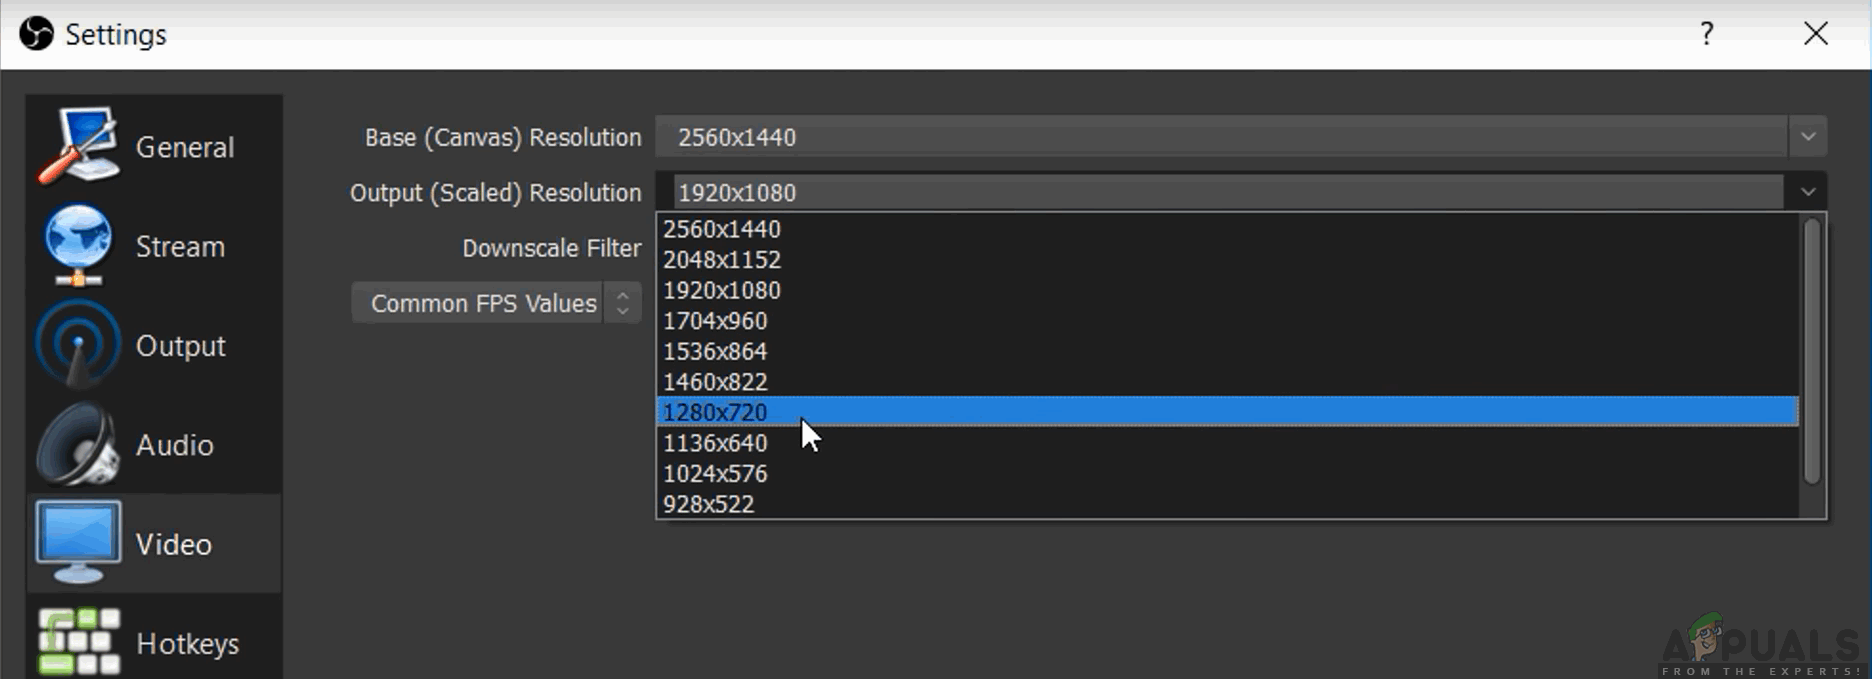
Now whenever you upload the video to YouTube, it will be in 720p. The Downscale Filter should be set to Lanczos (Sharpened scaling, 32 samples). This option will increase the sharpness of your video. Next comes the FPS value. This should be set to 60 if you are planning to record at a high definition but if you have an older computer with low specs, you should set 5it as 30 as this your only choice.
Advanced Settings
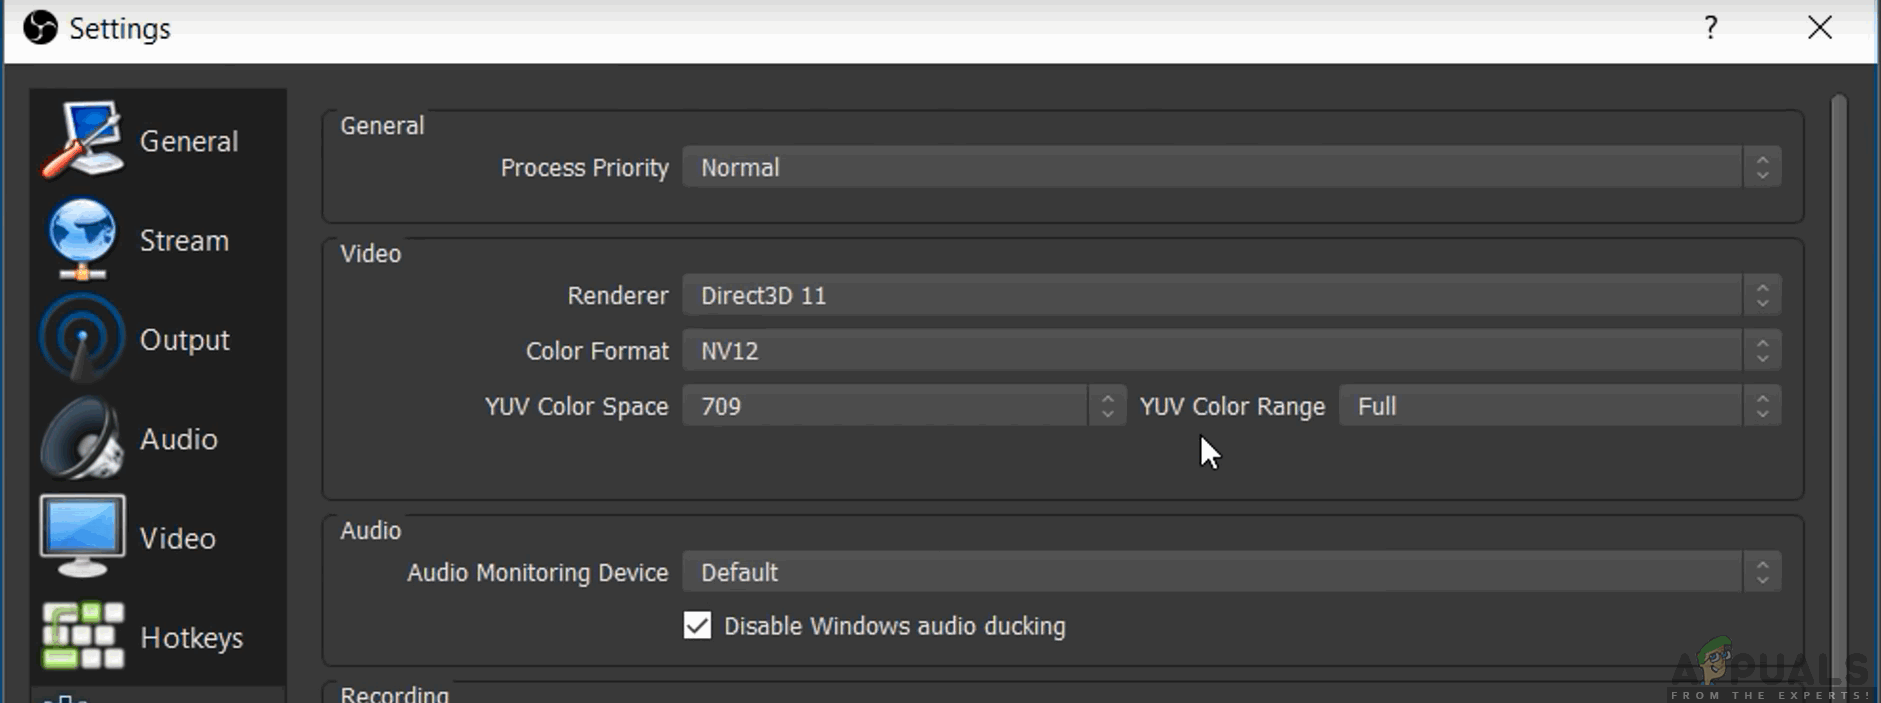
Another flaw in OBS which we observed for several users was that when the OBS recording is complete, the recording looks really washed out just as you are about to click the stop button. If the ending isn’t good, it might leave a bad impression on your viewer or when you project the video to a larger screen, it makes a lot of difference.
Set the YUV Color Space to 709 and the YUV Color Range to Full. You don’t have to worry about the other settings. Just leave them as is.
That’s it! Your OBS settings are set to the best to capture in the required quality. You can always make changes according to your will and tweak a little here and there to get a more personalized experience.


Where is that “recording quality” setting (In the left tab) please?