Webcam Not Working in Windows 11? Here’s How to Fix
Some Windows users have been encountering an annoying issue while trying to use their webcam. As it turns out, upon launching the Camera app in Windows or using the webcam on a browser, it fails to work and no video is displayed. This can usually happen when the drivers for the webcam are missing or corrupted which can be caused by a recent Windows update or in some scenarios, the third-party antivirus software can also result in the mentioned issue. In this article, we are going to show you how to resolve the problem in question so just follow through.
As it turns out, using a webcam at this age has become important as more work depends on your computer. There are quite a few reasons due to which the webcam that you have may not be working, some of which we slightly touched on above. However, to give you a better brief of the issue at hand, let us first go through the different causes of the problem before jumping into the various solutions that you can use to circumvent the issue for yourself. With that said, let us get started without any further delay.
Now that we have gone through the possible list of causes of the issue, let us get started with the different methods that you can use to fix the issue. Before you begin, make sure that you have tried the basic troubleshooting i.e. checked your camera for any switches as well as unplugged and plugged the camera back in. If you have done that, go ahead and start with the methods down below.
Run Camera Troubleshooter
The first thing that you should do when you encounter the problem in question is to run the Windows Camera troubleshooter. As it turns out, Windows comes with a bunch of built-in troubleshooters that you can use to diagnose certain issues with your system. To run the troubleshooter, follow the instructions that are given down below:
- First of all, open up the Windows Settings window by pressing Windows key + I on your keyboard.
- On the Settings window, on the System tab, scroll down and click on Troubleshoot.
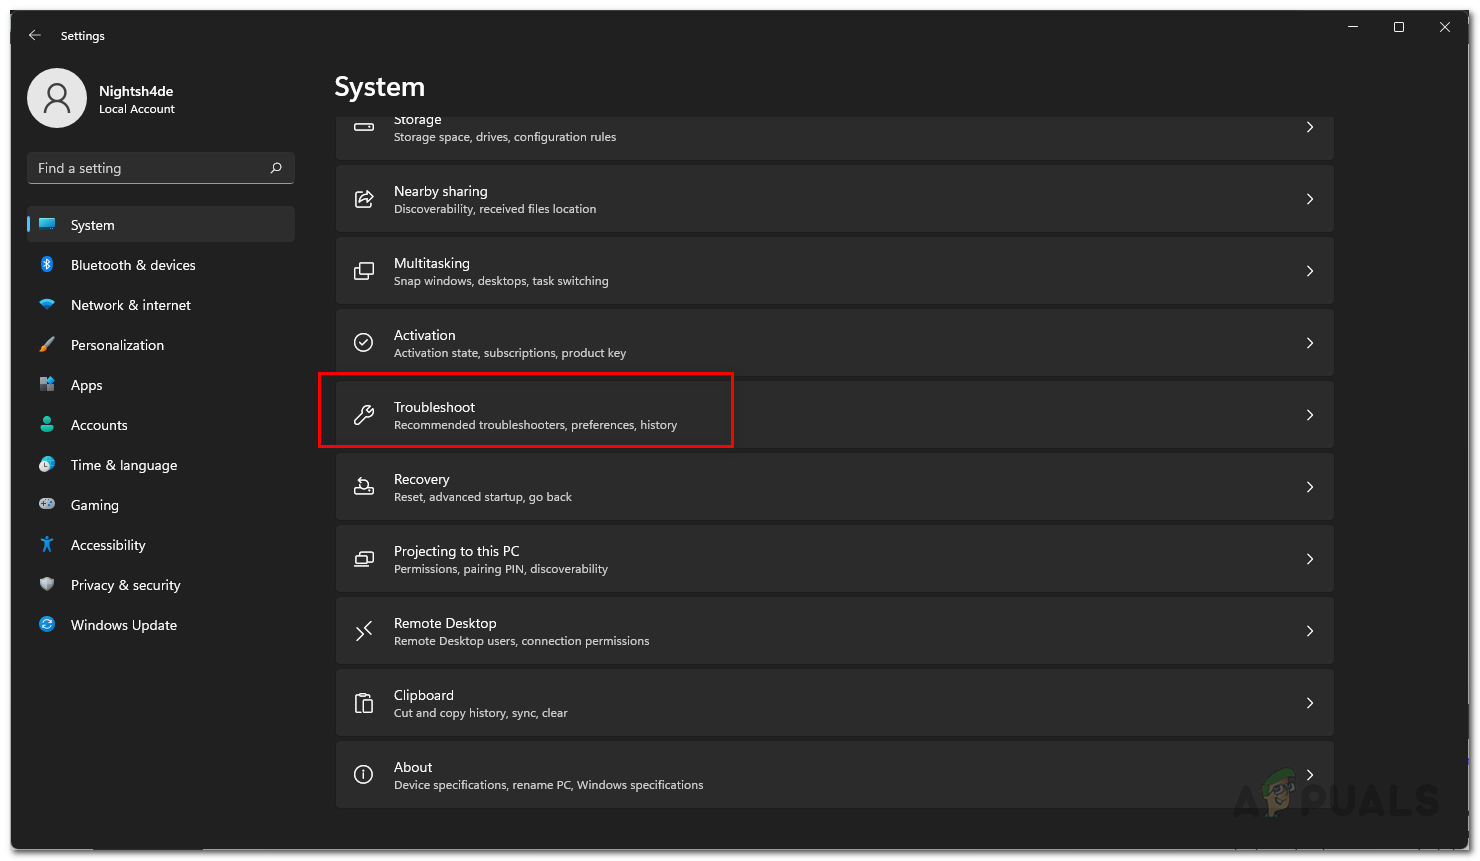
Navigating to Troubleshoot - There, click on the Other troubleshooters option provided.
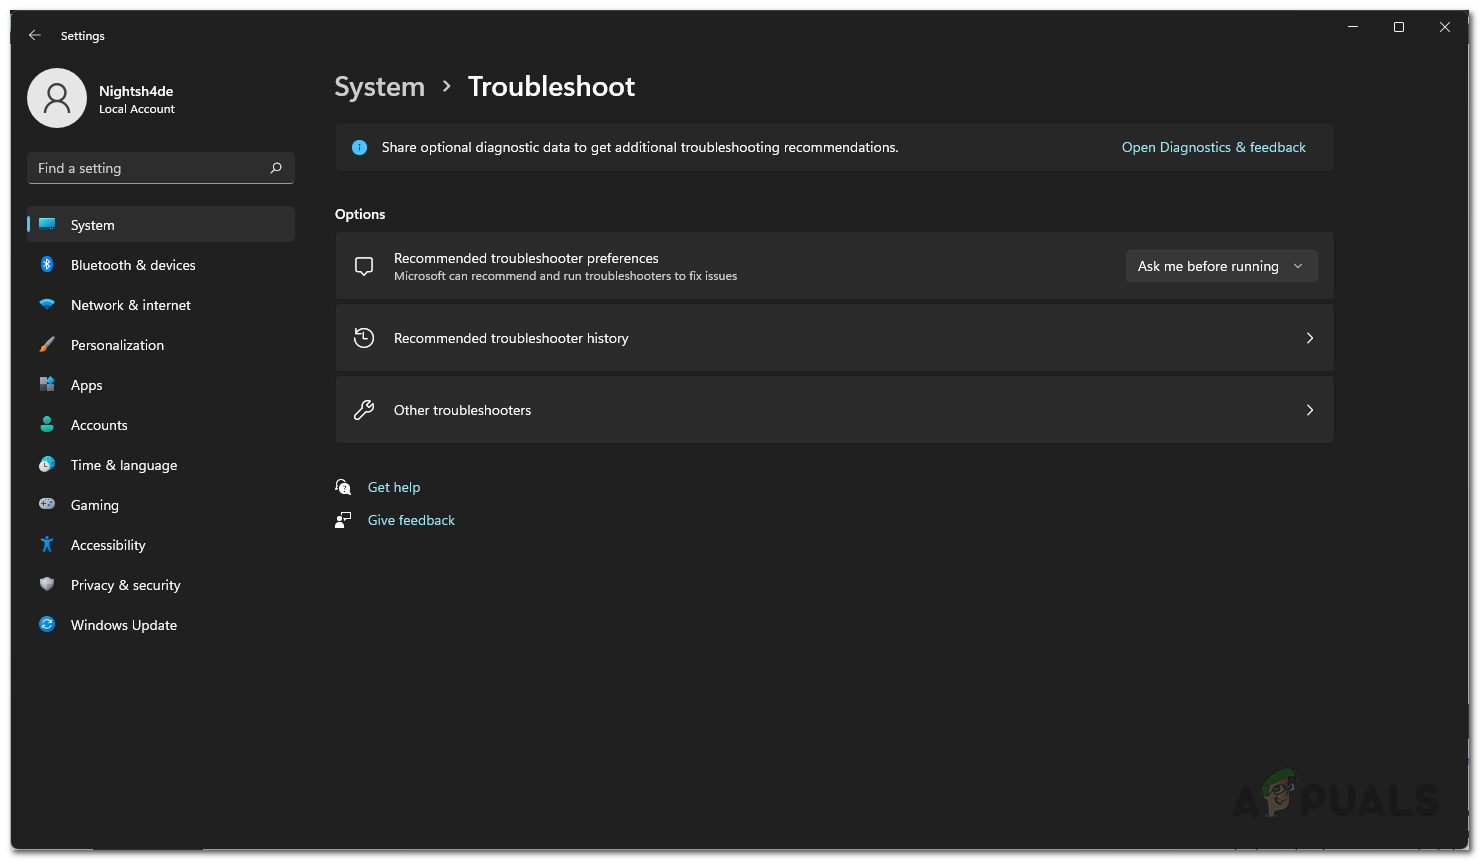
Navigating to Other Troubleshooters - From the list of troubleshooters provided, click on the Run button next to the Camera.
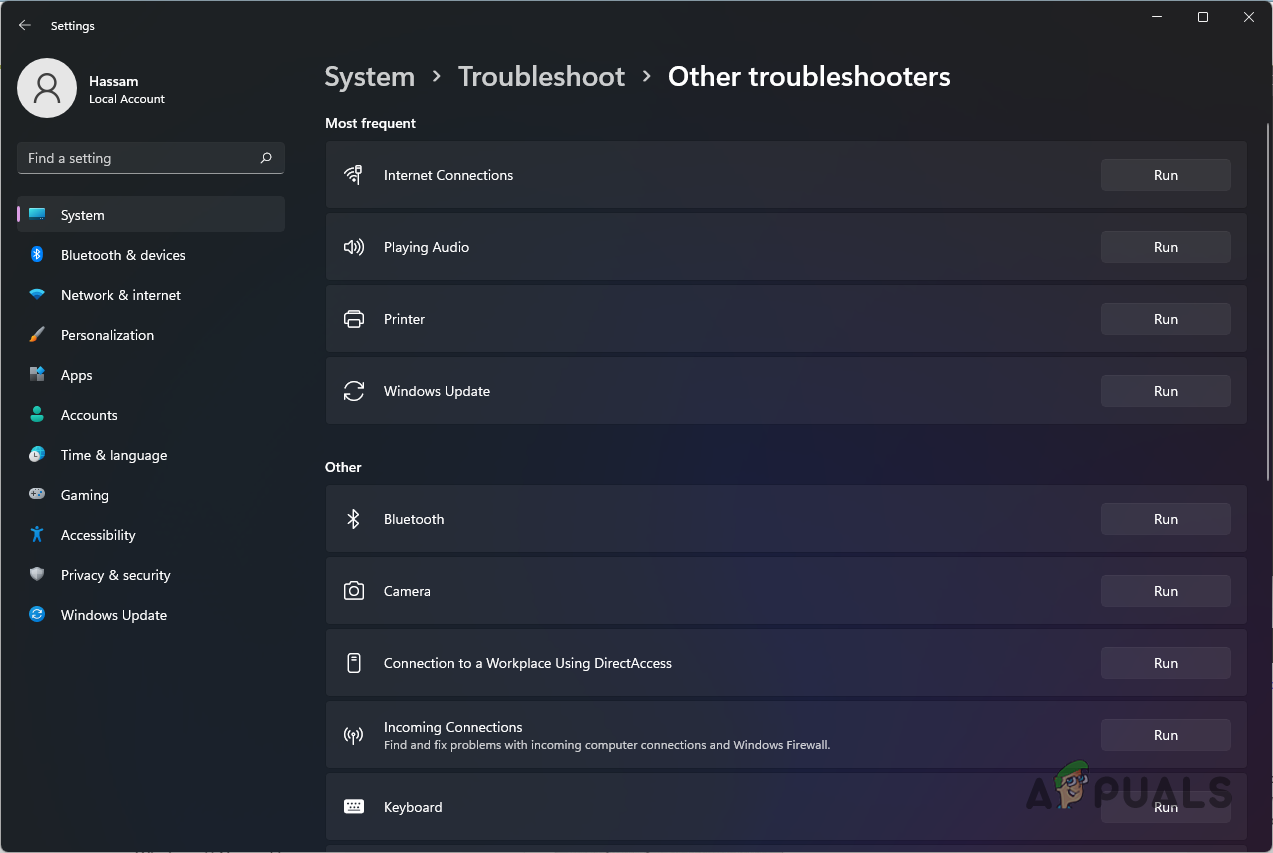
List of Troubleshooters - Wait for the troubleshoot to finish running. Check the diagnosis results to see if the issue has been detected or fixed.
Allow Camera Access
As we have mentioned, one of the reasons that the problem may occur is when the apps that you are trying to use your webcam on do not have access to do so. This happens when you have not allowed camera permissions to other apps in the privacy settings of your Windows machine. In such a case, you can resolve the issue pretty easily by changing the privacy settings. To do so, follow the instructions below:
- To start, open up the Settings window by pressing Windows key + I.
- On the Settings window, switch to the Privacy & Security tab on the left-hand side.
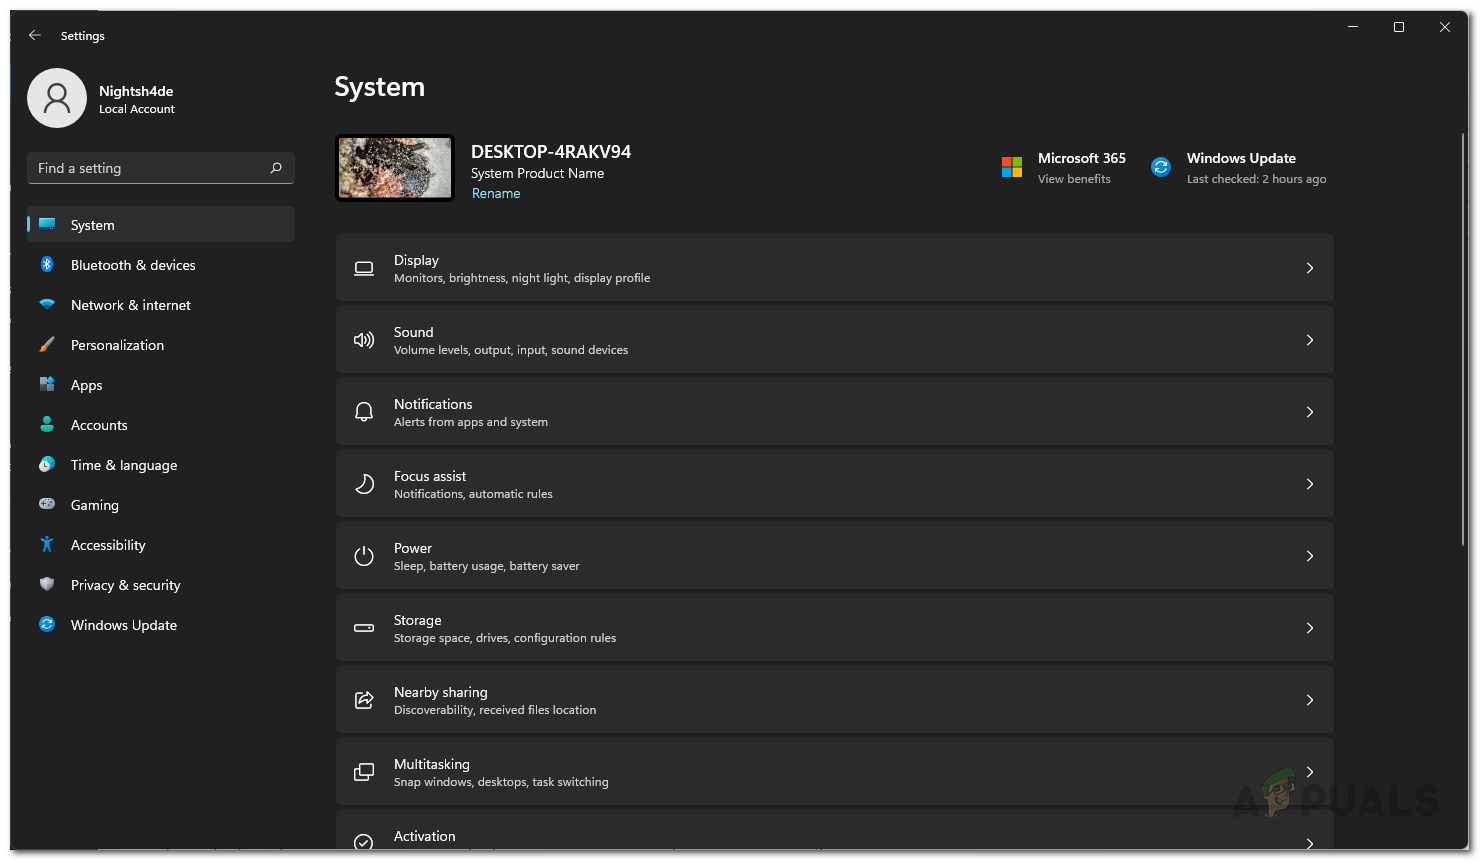
Windows Settings - Scroll down to App permissions and then click Camera.
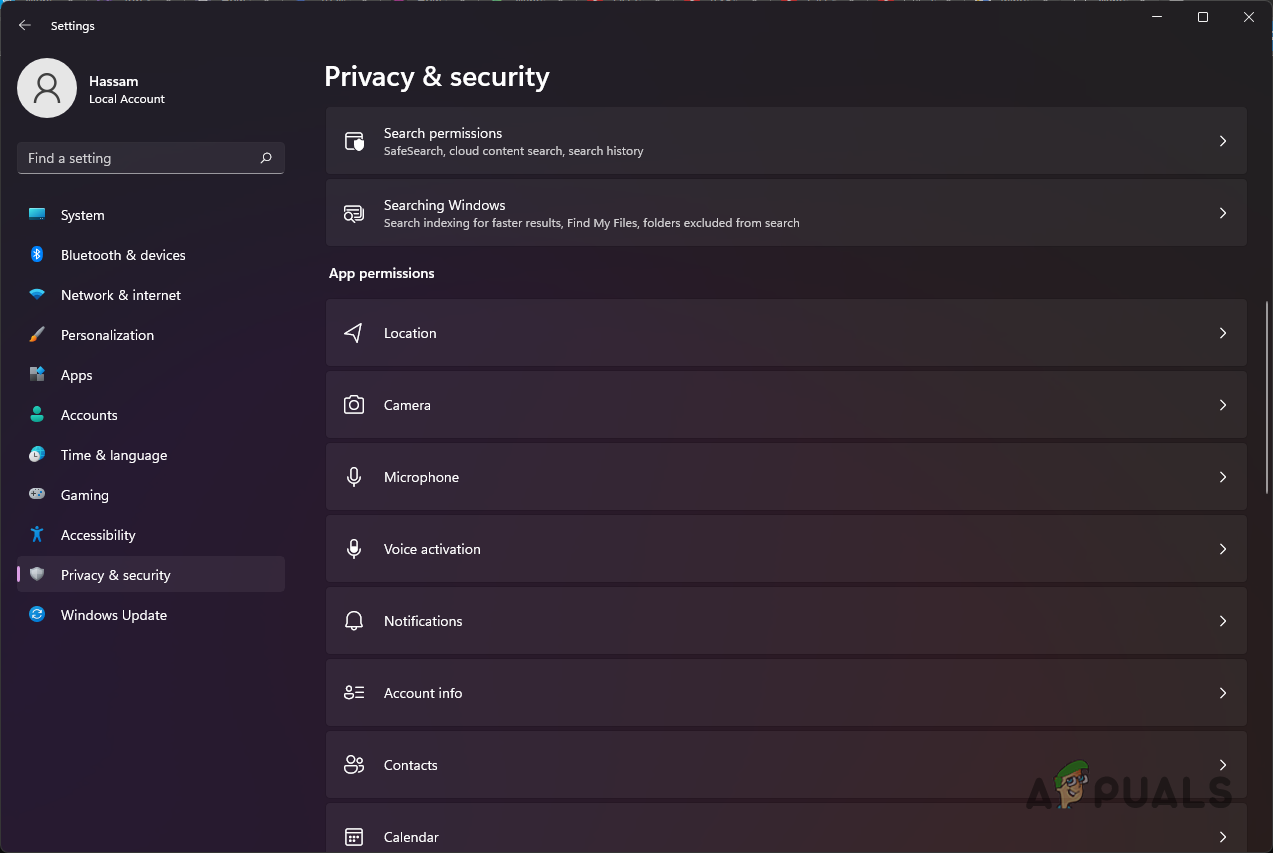
Navigating to Camera Permissions - Make sure the Camera access slider is set to On.
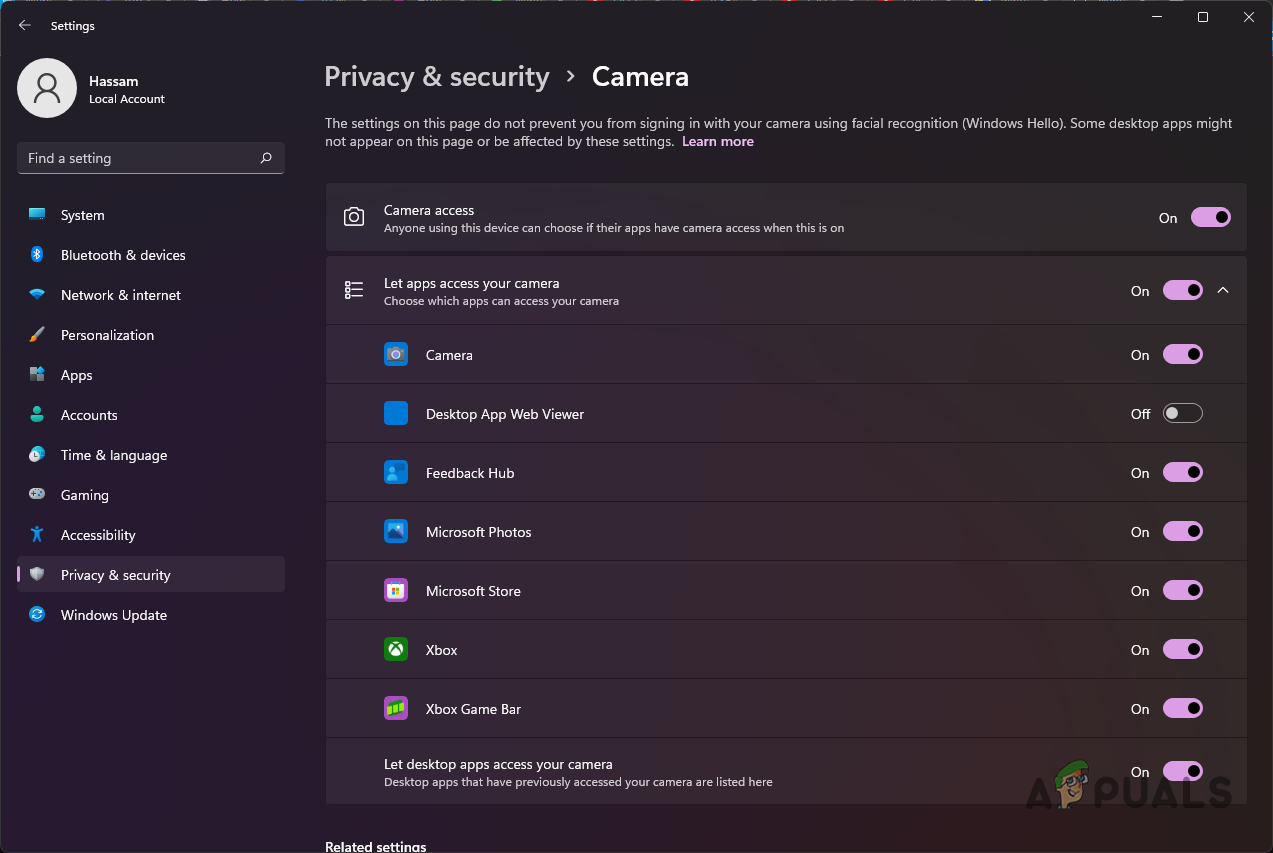
Checking Camera Permissions - In addition to that, look for the app that you are trying to use the webcam on under Let apps access your camera and make sure it has the permission.
- With that done, see if the problem persists.
Disable Third-Party Antivirus
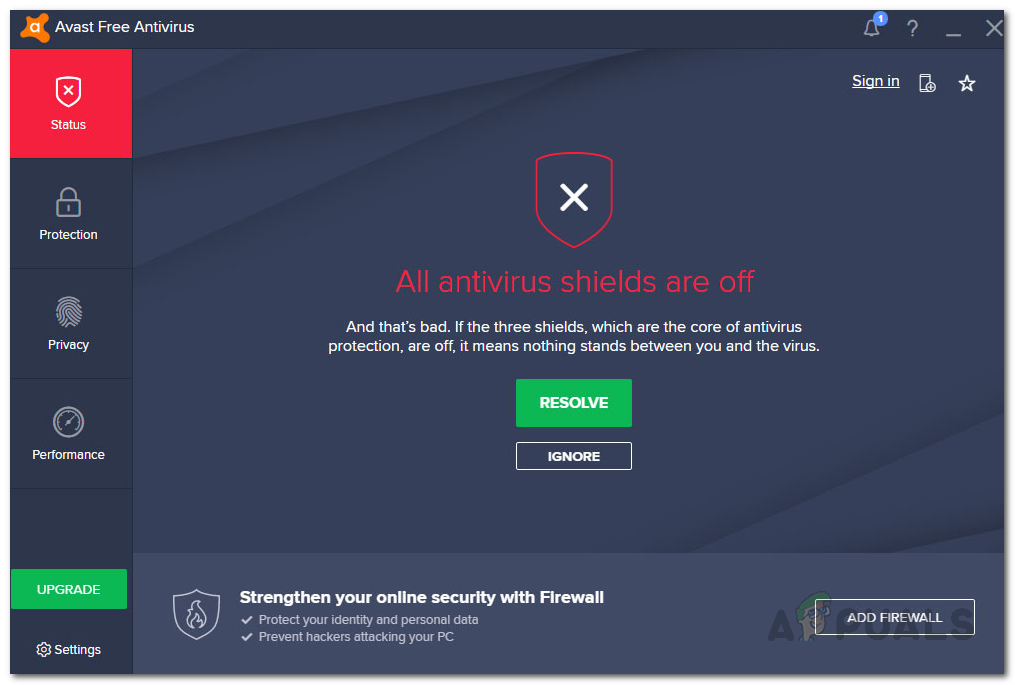
As it turns out, security programs are pretty common and as such, they are widely used for security purposes. While the programs do a job at that, there are various scenarios where they can cause issues with your system by preventing access or blocking certain apps. If you have a third-party antivirus installed, the security program might likely be blocking the camera app due to which the webcam does not work.
If this case is applicable, you will have to disable the third-party antivirus program on your computer and then see if the problem persists. Windows Defender has gotten good over the years and we would even recommend simply relying on the built-in defender instead of going for a third-party option.
Reinstall Camera Drivers
Another reason that your webcam may not work is when it is missing the drivers required on your system. In addition to that, corrupted or damaged drivers are no good either and as such, you will have to reinstall them to fix the issue. Device drivers are really important as they are used by the operating system to communicate with the devices installed on your motherboard.
In this case, we would recommend uninstalling the generic drivers that are installed by Windows automatically and then download the specific drivers for your webcam from your manufacturer’s website. If you have a built-in webcam, you can check the drivers page on your manufacturer’s website and see if there are any drivers listed. In case there aren’t, you can simply reinstall the generic drivers. Follow the instructions given down below to do this:
- First of all, open up the Device Manager by searching for it in the Start Menu.
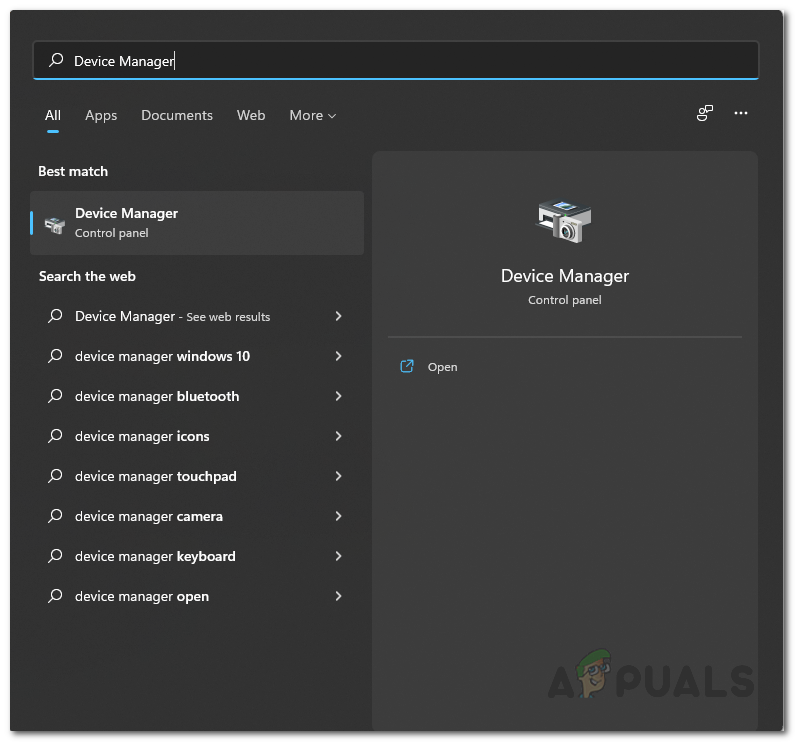
Opening up Device Manager - On the Device Manager window, expand the Cameras list.
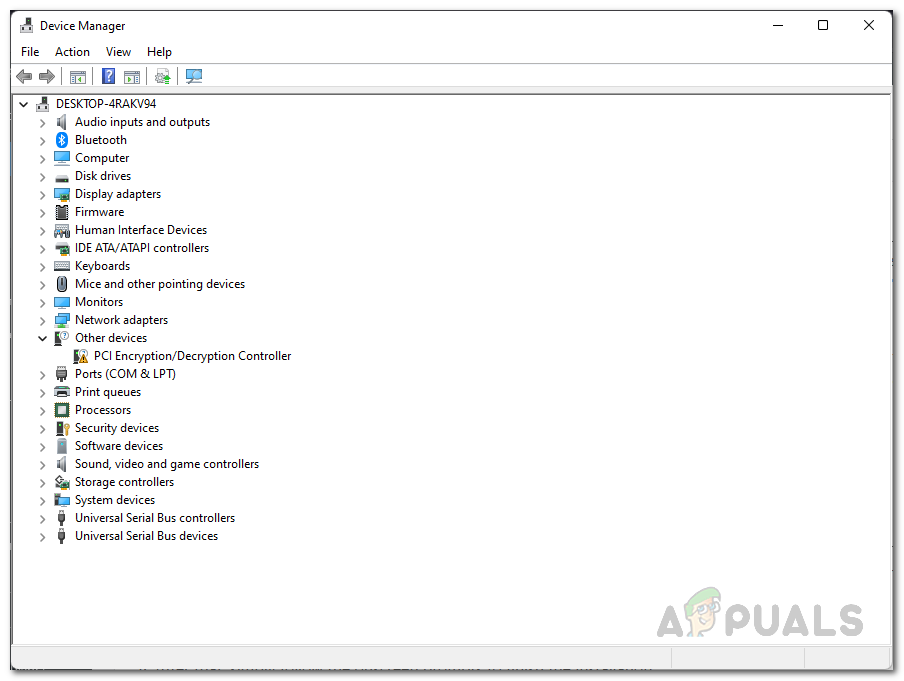
Device Manager - Right-click on your camera driver and from the drop-down menu, choose the Uninstall device option.
- Once you have done that, head to your manufacturer’s website and download the appropriate drivers for your webcam. Then, go ahead and install them.
- After that, restart your computer.
- When your PC boots up, see if the problem is still there.
Reset and Repair Camera App
Finally, if none of the methods above have fixed the problem for you, then it is very likely that the problem is being caused by the Camera app that comes with Windows. This can happen when the app is running into some issues which can be due to the cache or the app files themselves. In such a scenario, you can simply reset and repair the app from the Settings window to resolve the problem. To do this, follow the instructions down below:
- To start, press Windows key + I on your keyboard to open up the Settings window.
- There, navigate to Apps on the left-hand side.

Windows Settings - On the Apps page, make your way to Apps and features.
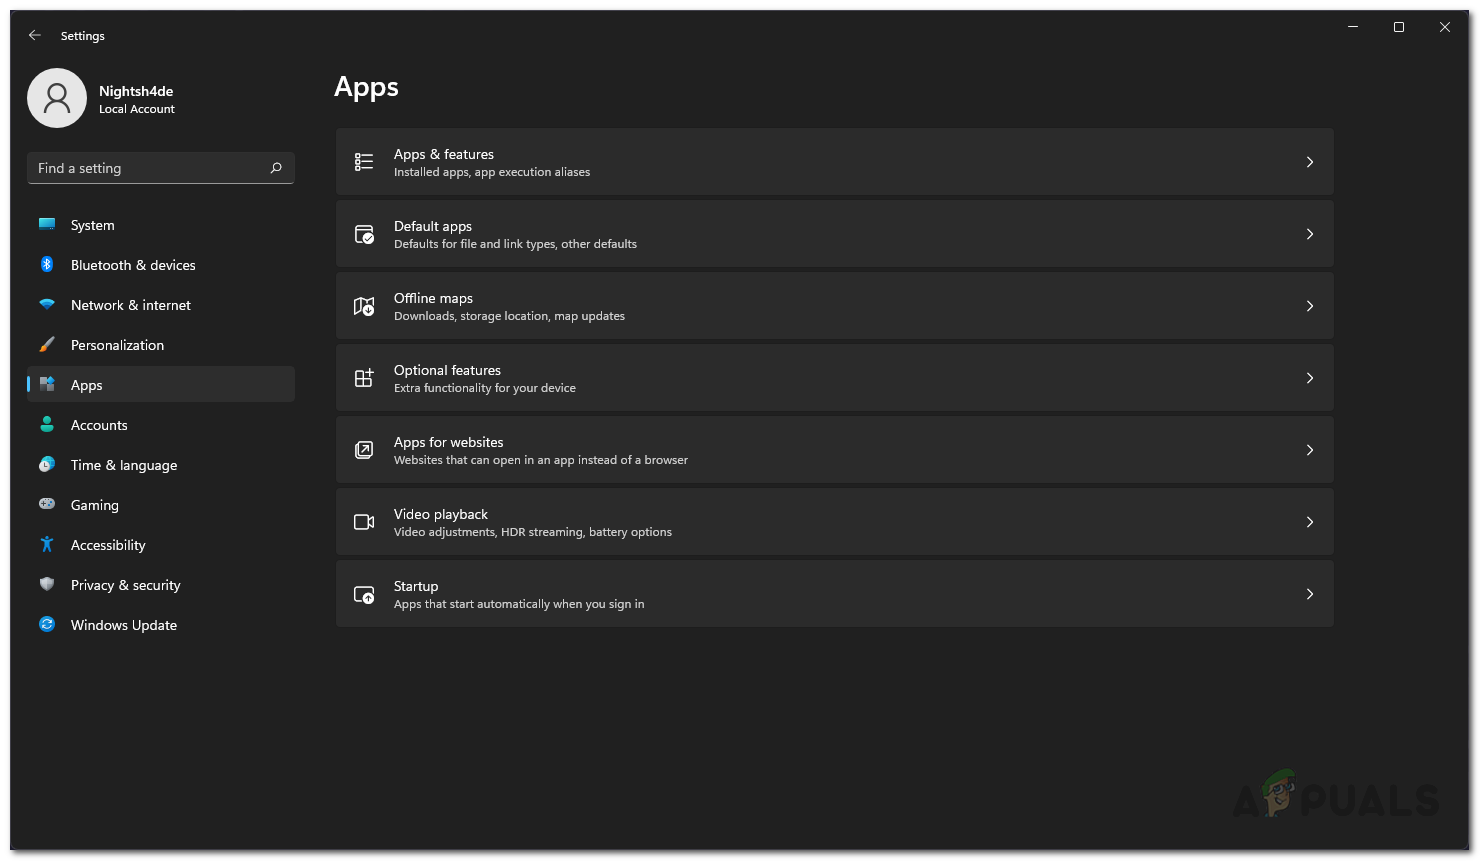
Apps Settings - Once you are there, search for the Camera app.
- Next to the Camera app, click on the three vertical dots and choose Advanced options from the drop-down menu.
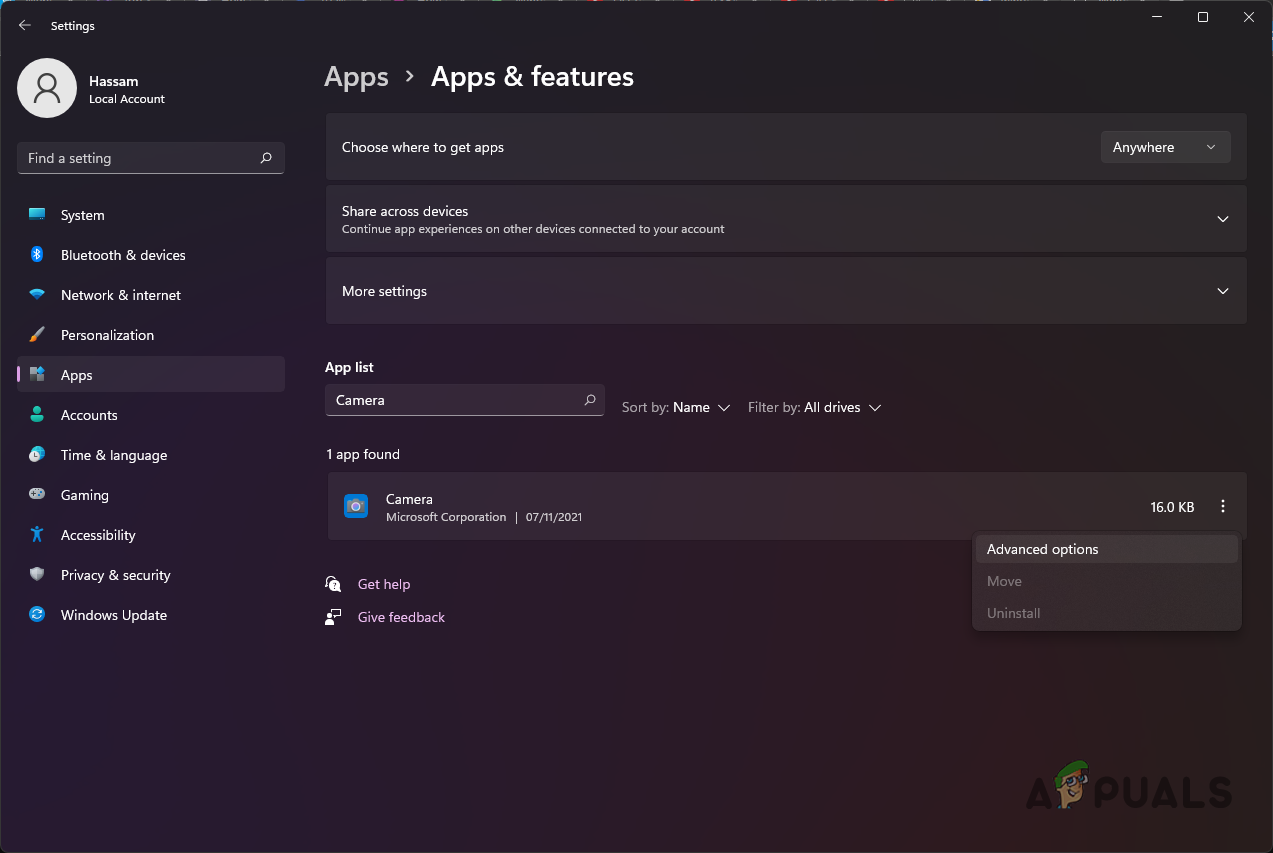
Navigating to Advanced Options - After that, on the Advanced options page, scroll down and click the Reset button provided.
- Once you have done that, click the Repair button to repair the app.
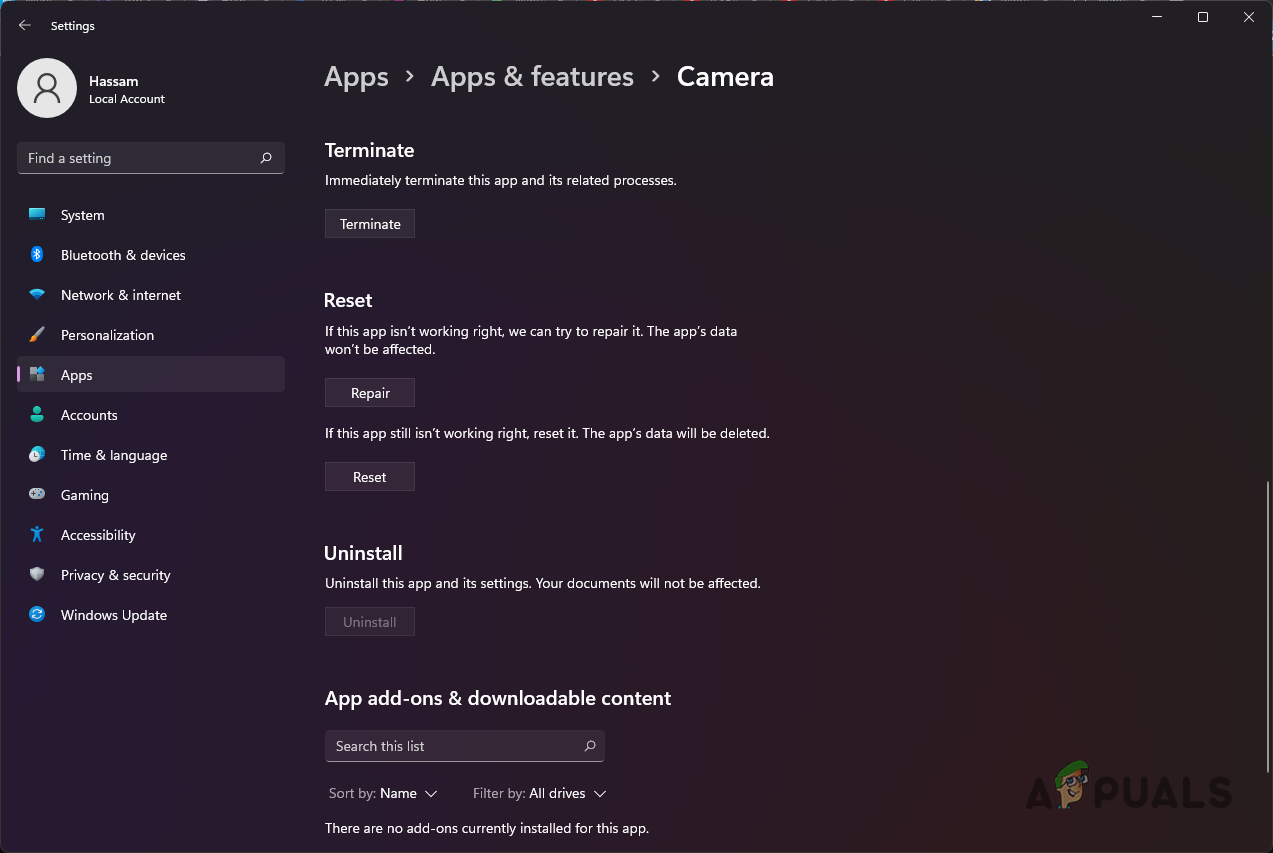
Resetting and Repairing Camera App - With that done, go ahead and run the app again to see if the problem persists.


