How to Fix VPN Error 807 on Windows?
Some Windows users are getting the Error 807 ‘The network connection between your computer and the VPN server was interrupted. This can be caused by VPN transmission due to internet latency or capacity” when trying to browse on their machine while their VPN solution is active. This particular VPN error is reported to occur with different VPN clients (typically with VPNs that use the PPTP protocol)
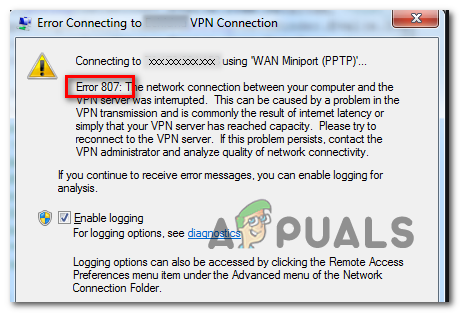
If you’re using a free VPN, you should start the investigation by seeing if you surpassed the allocated quota. Most free plans will stop working after you reach 10 GB (or so). In this case, you can get rid of the issue by buying a premium plan or by uninstalling your current VPN program and using a different client.
In case you started to experience this issue after a failed upgrade process, it’s possible that you are dealing with a partially broke VPN component originating from some type of system file corruption. In this case, a DISM scan should allow you to take care of the issue.
It’s also possible that you’re just dealing with a fairly common network inconsistency. In this case, all you need to do is to either reboot or refresh your networking device (modem or router).
However, certain 3rd party firewalls and AV suites tend to be overprotective and block some ports used by a few popular VPN clients. If this scenario is applicable, you should be able to fix the issue either by disabling real-time protection or by uninstalling the 3rd party firewall altogether.
Method 1: Running a DISM scan
As it turns out, this particular issue can occur after a failed upgrade process. As some users have reported, certain VPN clients might end up interfering with Windows OS ability to upgrade itself. But if this happens, you can expect the VPN component to break by itself and trigger the 807 error at random intervals.
If this scenario is applicable, you should be able to fix the issue by running a built-in utility – DISM (Deployment Image Servicing and Management). This utility is widely used to repair corrupted or modifies system files.
And as a lot of affected users have reported, it’s very effective in fixing the 807 in case the problem is being caused by some type of corruption that ends up affecting the VPN functionality on Windows 7, Windows 8 or Windows 10.
Keep in mind that the steps of performing a DISM scan are universal and will work regardless of the Windows version that you’re encountering the problem on.
In case you’ve already performed a DISM scan and you’re still encountering the same problem, move down to the next potential fix below.
Method 2: Checking if VPN server has reached capacity
As the error message states, this error code can also be the result of a VPN transmission issue facilitated by the fact that the VPN server has reached capacity or due to Internet latency.
If you’re using a free VPN client, take a look at your account usage and see if you have reached your daily or monthly quota.
Most VPN clients will offer a limited monthly quota for a free account, and once you go over that, you can expect to see errors like the 807 error in case your VPN client is installed locally.
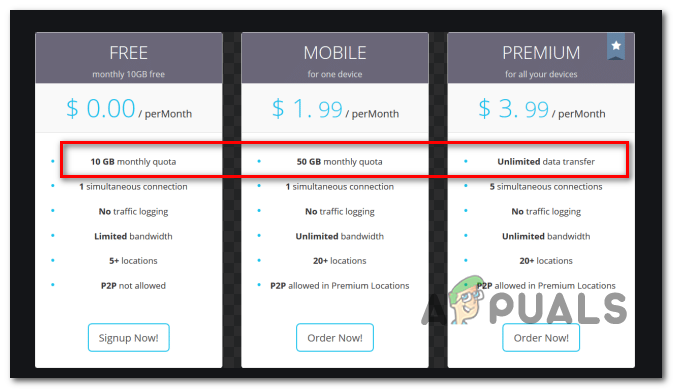
If your investigations reveal that you already surpassed your quota, you have two options:
- You can upgrade to the Premium version of your VPN plan.
- You can uninstall your current VPN client and move to a different free plan from another VPN client for which you haven’t reach your monthly or weekly quota.
In case you’re looking to uninstall your current VPN client, here are some steps that will help you do it:
- Press Windows key + R to open up a Run dialog box. Next, type ‘appwiz.cpl’ inside the text box and press Enter to open up the Programs and Features menu.
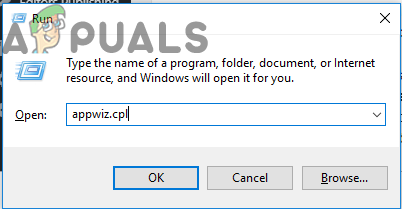
Typing in “appwiz.cpl” in the Run prompt - Once you’re inside the Programs and Features screen, scroll down through the list of installed applications and locate the VPN client that you wish to uninstall.
- After you manage to locate it, right-click on it and choose Uninstall from the newly appeared context menu.
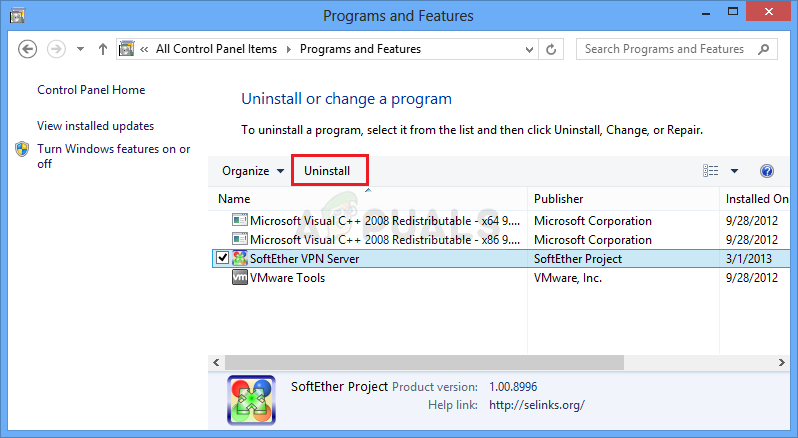
Uninstalling a VPN tool - Inside the uninstallation screen, follow the on-screen prompts to complete the uninstallation process, then restart your computer. Once the next startup is complete, install the newer client and see if the issue has been resolved.
In case this method was not applicable or you’re certain that you didn’t go over your quota, move down to the next potential fix below.
Method 3: Disable AV real-time protection (if applicable)
As some users have pointed out, certain VPN clients have a tendency to conflict with Avast, Comodo and a couple of other 3rd party security suites that are actively doing port management. Most of the time, this behavior is caused by an overprotective service that ends up flagging the port used by the VPN client for being intrusive and blocks communications with the VPN server.
If this scenario is applicable, you can fix the issue swiftly by disabling the real-time protection of your 3rd party AV suite. Of course, the steps of doing so are specific depending on the security solution that you’re using.
However, most AV suites will allow you to disable the real-time protection directly from that taskbar menu. Try right-clicking on the taskbar icon associated with your AV suite and look for an option that disables the real-time protection.
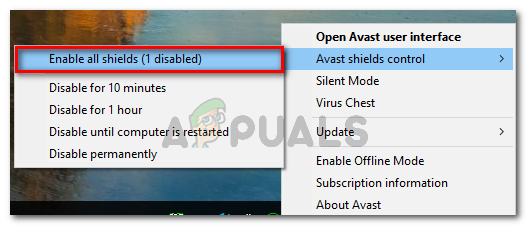
Note: The name of this option will be different depending on the client that you are using.
If you’ve already done this and you’re still encountering the Error 807 or this particular scenario is not applicable, move down to the next potential fix below.
Method 4: Resetting or Rebotting router/modem
A network inconsistency can also be the root cause of the 807 VPN Error. If this scenario is applicable, you should be able to resolve the issue by forcing a network reboot. In more severe cases (if you altered your router/modem settings, you might need to go for a reset.
The ideal way to start is with a simple network restart. This is the less intrusive method that will not make any changes to your network credentials or any custom settings that you previously established for your network.
The simplest way to perform a router reboot (refresh) is to use the dedicated On / Off button twice. Press it once to interrupt the power, wait for 30 seconds or more (in order to ensure that the power capacitors are drained, then press it again in order to restart your network.
Additionally, you can simply disconnect the power cable from the power outlet and wait for 30 seconds before plugging it back.
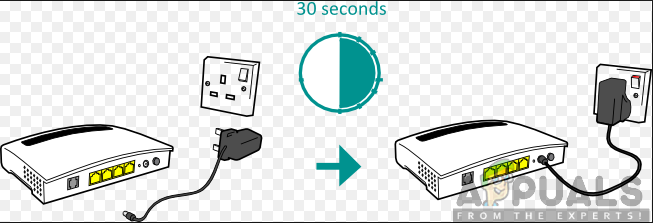
After you do this, see if you are able to use your VPN client without encountering the same issue.
In case the problem is persisting, the next logical step to ensure that you’re not dealing with a network inconsistency is to perform a router reset. But before you do this, keep in mind that this operation will reset any custom login credentials (to your modem/router settings) that you previously established.
To perform a reset to your networking device, simply press the reset button on the back of your modem or router and keep it pressed for about 10 seconds (until you see that the front LEDs start flashing all at once).
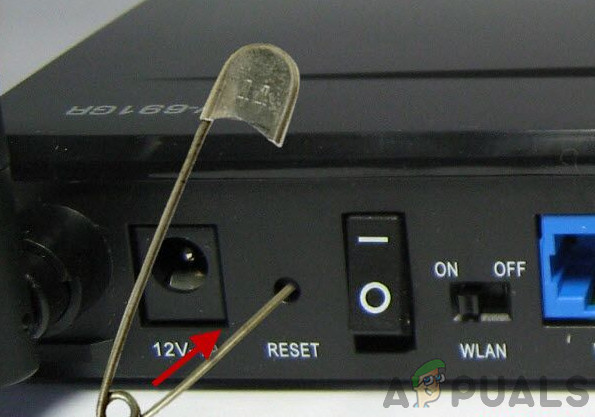
Note: Keep in mind that most models will require you to use a sharp object like a needle, toothpick or a similar object in order to reach that button.
After you manage to reset your router or modem, attempt to re-establish the VPN connection and see if you’re still encountering the same problem.
Method 5: Resetting the network adapter
Under certain circumstances, the Error 807 can occur due to a network inconsistency. Several affected users that have encountered this issue with their VPN clients have managed to get the issue resolved by resetting their adapter software to the default configuration.
This procedure is also known as Winsock reset or comms reinstall.
If you suspect that your network adapter might be responsible for this VPN problem you’re having, follow the steps below. It will help you reset the network adapter on your computer.
Note: This operation is universal and should work regardless of the Windows version that you’re using.
- Press Windows key + R to open up a Run dialog box. Next, type ‘cmd’ and press Ctrl + Shift + Enter to open up an elevated CMD prompt.
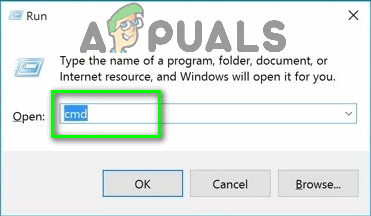
Type “cmd” into the Run dialog Note: When you’re prompted by the UAC (User Account Control), click Yes to grant administrative privileges
- Once you’re inside the elevated CMD prompt, type the following command and press Enter to reset your network adapter driver:
netsh winsock reset
- After the command has been successfully processed, restart your computer and see if the issue has been resolved at the next startup.
In case you’re still encountering the Error 807 while trying to connect to your VPN client or when trying to
Method 6: Uninstall 3rd party firewall (if applicable)
As it turns out, certain 3rd party AV suites have the potential of conflicting with VPN clients that are installed locally. If this scenario is applicable, the issue is harder to solve since disabling or turning off the firewall will not fix the issue.
Even if you do, the same set of security rules will remain firmly in place. So the only option that will resolve the issue, in this case, is to simply uninstall the 3rd party firewall altogether and look for a different option that doesn’t conflict with your VPN client.
If you are prepared to go through with this, follow the instructions below to uninstall your 3rd party firewall:
- Press Windows key + R to open up a Run dialog box. Next, type ‘appwiz.cpl’ and press Enter to open up the Program and Features menu.

Type appwiz.cpl and Press Enter to Open Installed Programs List - Once you’re inside the Programs and Features menu, scroll down through the list of installed applications until you find the entry associated with your 3rd party AV.
- Right-click on your 3rd party AV and choose Uninstall from the newly appeared context menu.
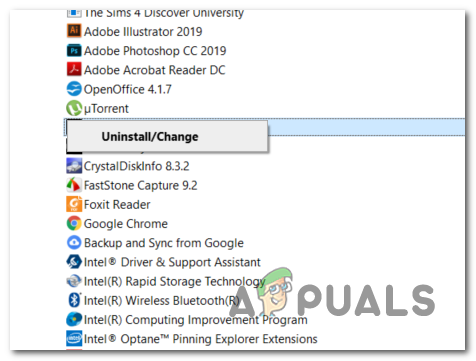
Uninstalling Avast Firewall - Inside the uninstallation screen, follow the on-screen prompts to complete the uninstallation, then restart your computer.
- After the next startup is complete, use your VPN client normally and see if the same issue is still occurring.
In case the same issue is still persisting, move down to the next potential fix below.


