How to Fix Valorant “Error Code: VAN 9001” in Windows 11?
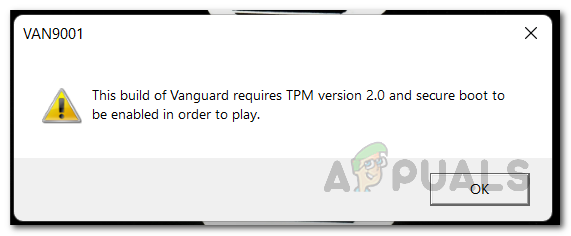
Fix: This build of Vanguard requires TPM version 2.0 and secure boot to be enabled in order to play.
Multiple users have been experiencing the “This build of vanguard requires tpm version 2.0 and secure boot to be enabled in order to play” error message which is represented by the error code VAN9001 while trying to open up Valorant. The error message is specific to Windows 11 which is due to the fact that Windows 11 requires you to have TPM 2.0 and Secure Boot enabled on your BIOS. The reason you experience the issue in question is obvious from the error message itself. Fortunately, there is a really easy fix to the problem here so don’t worry as we will take you through the process in this article.
As it turns out, Valorant is enforcing the TPM 2.0 and secure boot requirements of Windows 11 in order to ensure a trusted platform. Thus, if you are running Windows 11 on your system, the Vanguard anticheat system will be using the TPM module to further ensure the competitive integrity of the game. In addition to that, a Windows update i.e. KB5006050 apparently changes some BIOS settings on your computer which as a result turns off secure boot. Therefore, often users think they have enabled secure boot from their BIOS configuration without knowing that a Windows update has actually disabled it in the background. When this happens, Valorant is not able to start as the Vanguard anticheat application requires secure boot to be enabled.
In addition to that, TPM may have been disabled in which case you will have to enable that. To resolve this problem, you will have to make sure that both Secure Boot and TPM are enabled in your BIOS. In some cases, if your hard drive is partitioned in MBR, your BIOS will be set to CMS while you need to have UEFI in order to enable secure boot. In such a scenario, you will have to convert your MBR hard drive to GPT before being able to enable secure boot. If you enable secure boot without converting your partition table, you might experience issues where your computer will not boot up. In such a scenario, you will have to reset your CMOS battery and then start over. With that said, we can finally get started with showing you the solutions available to resolve the problem in question. So, without further delay, let us get right into it.
Enable Secure Boot
As it turns out, the first thing that you should do when you encounter the error message in question is to make sure that secure boot is enabled from the BIOS. There has been a recent Windows update KB5006050 which apparently disabled secure boot in the BIOS configuration. Now, knowing this, users may try to simply uninstall the Windows update via the Control Panel, however, that does not work as the update is installed automatically again on a restart. The fix here would be to simply head to your BIOS configuration and then enable Secure Boot from there. Secure boot is essentially a security feature that protects your computer from malware and virus infections. It does that by looking for any changes in the boot loader or important system files by validating the digital signatures of the files.
The process of enabling secure boot on your BIOS may vary a little depending on your motherboard manufacturer. However, the changes are usually very slight as the main procedure remains the same.
Before we begin, it is important to note that you need to enable UEFI mode in order to enable Secure Boot. In case you aren’t using UEFI mode, it is likely that your hard drive is also not partitioned in GPT but rather MBR. If that is the case, you might experience issues booting up after enabling Windows UEFI mode. In case you are on CMS, we would recommend switching to UEFI mode and then exiting out of your BIOS configuration while saving the changes. Perform a restart and then get into BIOS config again to enable secure boot. The option for changing to UEFI mode can be usually found under Advanced > Windows OS Configuration. It is usually referred to as BIOS UEFI/CSM Mode while on older BIOS versions, it may be labelled as Windows 10 WHQL Support. Make sure to perform a reboot after enabling this before you enable secure boot.
To enable secure boot on your computer, follow the instructions down below:
- First of all, go ahead and restart your computer.
- As your computer is restarting, press the respective key for getting into BIOS setup. This can vary depending on the motherboard’s manufacturer. However, usually the keys are DELETE, F9, F2 etc.
- Once you are in BIOS config, make sure you are not in EZ Mode. This especially applies to ASUS motherboards as it takes you to EZ Mode by default. Tap the F7 key on your keyboard to switch to Advanced Mode.
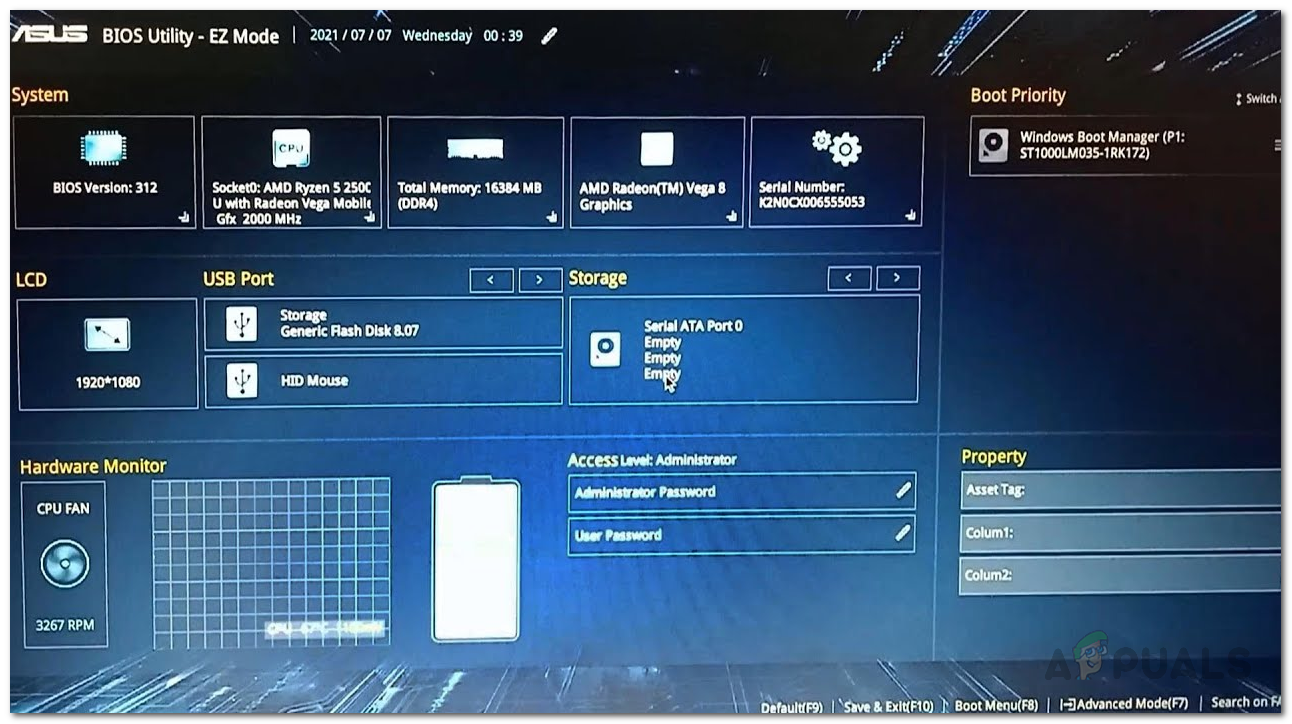
ASUS EZ Mode - Now, on some motherboards, the Secure Boot option can be found under the Boot tab. For example, on ASUS motherboards, you will find the Secure Boot option under the Boot tab.
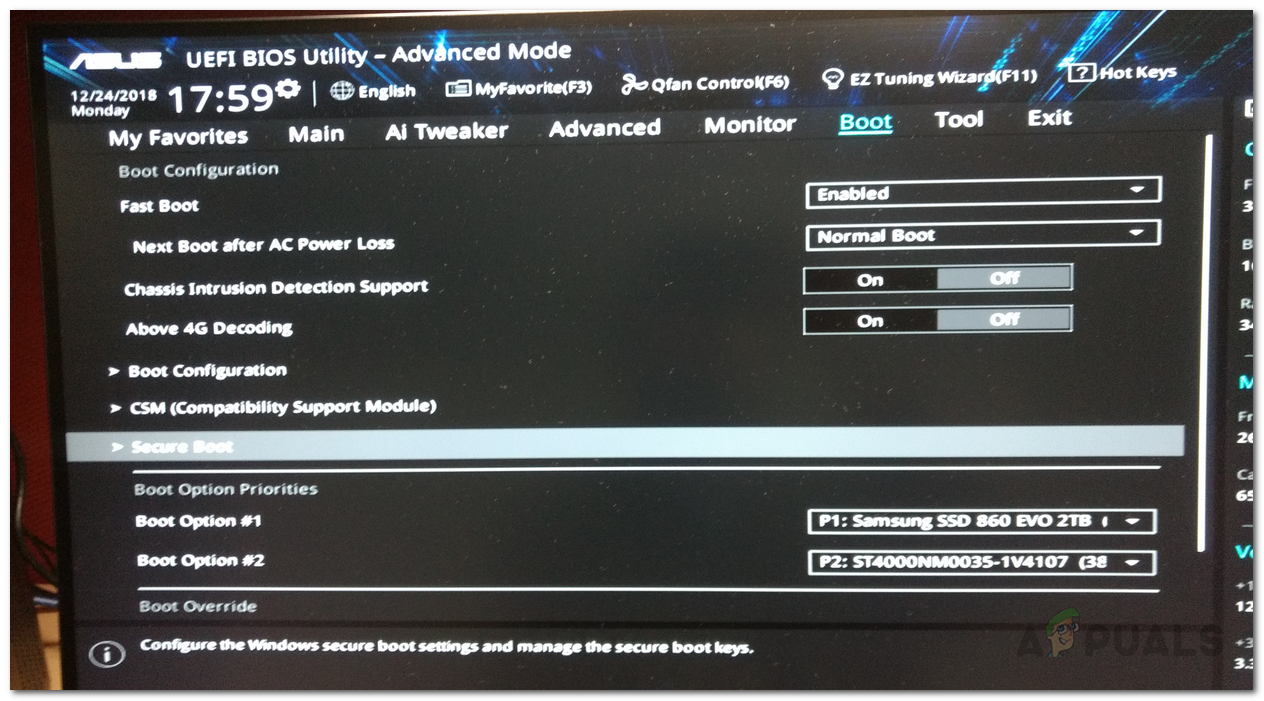
Accessing Secure Boot Option on ASUS Motherboards - However, on other motherboards like MSI, the Secure Boot option may be located under Advanced > Windows OS Configuration.
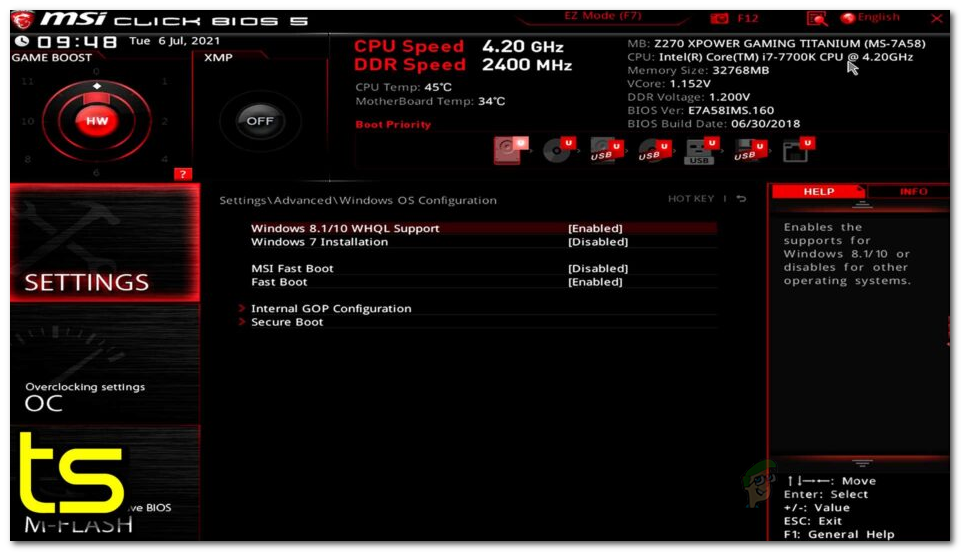
Enabling Secure Boot on MSI Motherboards - Once you have located the option, make sure it is set to Windows UEFI instead of Other OS and Secure Boot is Enabled.
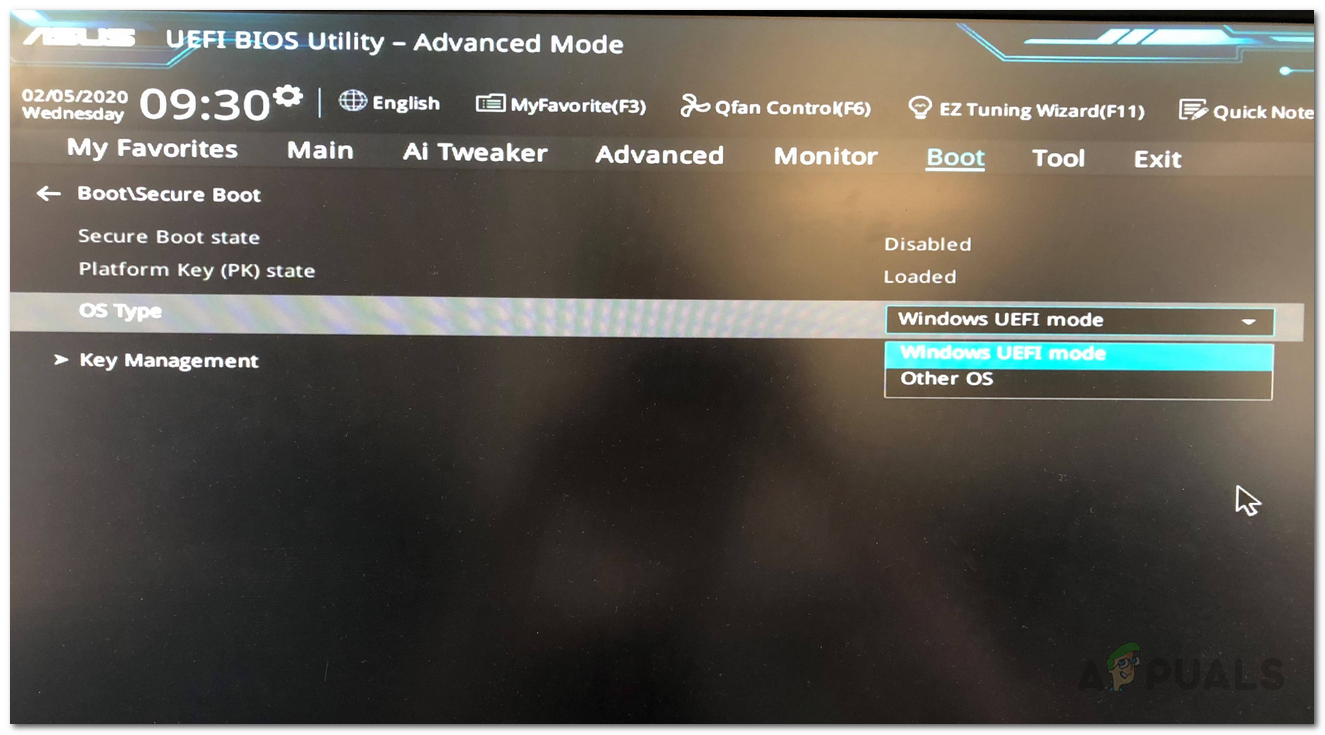
Secure Boot on ASUS Motherboards - You may not have these options depending on your motherboard again. Instead, you might have Standard or Custom options. Keep it on standard and perform a reboot.
- After your computer starts up, login into your account and open up Valorant to see if the error message is still there.
Enable TPM
In addition to TPM, you will have to also make sure that TPM is enabled in your BIOS configuration in order to play Valorant. This is important as the Vanguard anticheat system enforces TPM on Windows 11 machines for keeping the competitive integrity of the game. If you have bypassed Windows 11 requirements, and you don’t have a TPM module on your computer, then, unfortunately there is no workaround for you just yet and you will have to go back to Windows 10 if you wish to keep playing Valorant.
The TPM option can usually be found under the Security tab on your BIOS configuration. If you are using an AMD processor, TPM will be known as fTPM for you. Do not worry about the slight change in name as it is basically the same thing. Once you have enabled TPM, perform a restart to see if the error message still appears.
Restore Factory Keys
In some cases, users experience the error message in question even when they have Secure Boot and TPM enabled in their BIOS configuration. In such a scenario, you will have to restore your secure boot keys in your BIOS config and then see if the issue has been resolved. As it turns out, secure boot uses public and private keys that are used to digitally sign and verify the authenticity of the code. This method can resolve the issue for you especially if you are using a laptop.
The option to restore secure keys is located right under the Secure Boot option in your BIOS configuration. It may be hidden under the Key Management list on newer motherboards and BIOS versions. Once you have reset the keys, save the changes and perform a restart. Check if the problem is still there after your computer boots up.


I have an asus tuf f15 laptop in which i have issue with my keyboard that when i play games with my in build laptop keyboard when i press the key “W” for forward the character keeps moving for some distance and stops but if i hold down the ‘shift’ key and press the ‘w’ key for movement the character moves completely fine and response to all the movement correctly