How to Fix USB Ports Not Working Issue in Windows Computer?
In modern computing, USB ports allow for the easy transfer of data and power between devices. It is possible, however, for USB ports to stop working, which can be frustrating and disrupt productivity. There are several reasons why this issue may occur, and both hardware and software-related issues can cause it.
On the hardware side, a damaged or disconnected connection between the USB port and motherboard, power supply issues, or physical damage can cause the port to malfunction. On the software side, outdated or missing drivers, viruses or malware, or configuration issues can cause the USB port to stop working. Below, we have discussed different troubleshooting methods that you can try to resolve the issue.
1. Check if the issue is hardware related
The first thing that we recommend doing is checking if the problem is hardware related.
We recommend trying different ports using the device. If the device doesn’t work on multiple USB ports, it’s likely a problem with the device itself. You can also try plugging in another device in the port to check if that works.
Inspect the USB port for physical damage or debris. If the port is physically damaged, it’s likely a hardware issue. If none of these steps resolve the issue, it may be a software-related issue, and you should try troubleshooting software-related causes as we have described below.
2. Perform a clean boot
This issue can occur when one or more services or programs in the system are causing a conflict, resulting in issues with the USB port. To check if this scenario is applicable, you can perform a clean boot.
It starts Windows with a minimal set of drivers and startup programs. A clean boot will disable non-essential services and programs, eliminating the possibility of software conflicts or compatibility issues that could be causing the USB port to malfunction.
Here is how you can perform a clean boot:
- Press Windows key + R to open the Run dialog box.
- Type msconfig in the text field of Run and press Enter.
- In the System Configuration window, click on the Services tab.
- Checkmark the box associated with Hide all Microsoft services box and hit the Disable all button.
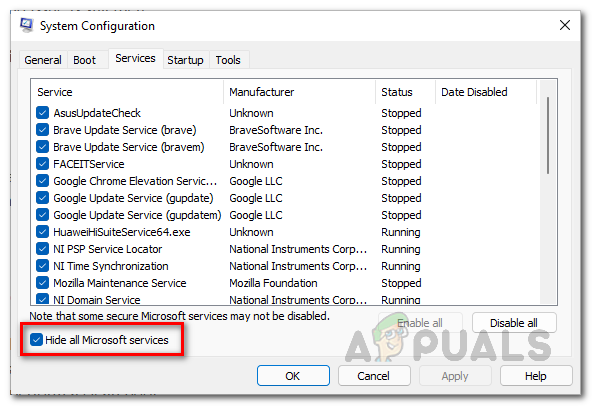
Click on Hide All Microsoft Services - Now, head over to the Startup tab.
- Click on Open Task Manager.
- In the Task Manager window, click on the Startup tab.
- Here, disable all startup programs by right-clicking on each one and selecting Disable.
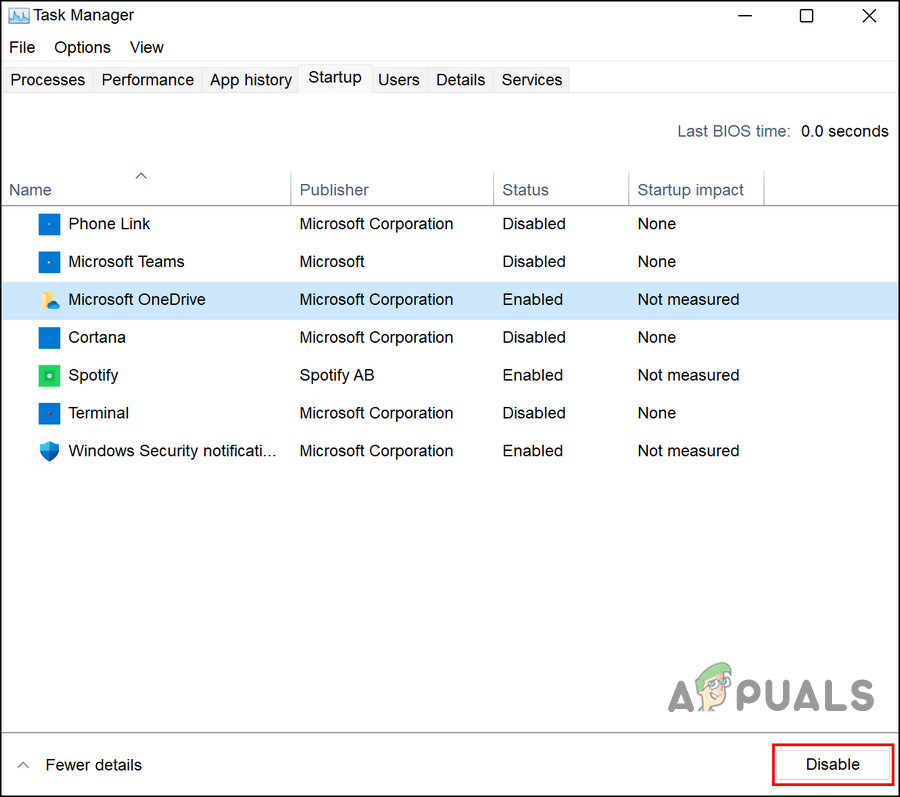
Disable the startup items - Once done, close Task Manager and go back to the System Configuration window.
- Click on OK to apply the changes and restart your computer.
After your computer restarts, check if the USB port is working. If it is, then one of the disabled services or startup programs was causing the issue. You can try enabling them one by one to determine which one is the culprit.
3. Update USB drivers
Drivers are software programs that allow the operating system to communicate with hardware devices, including the USB port. If the USB drivers are outdated, corrupt, or incompatible with the operating system, it can cause the USB port to malfunction.
If outdated drivers are causing the problem, then the easiest way to fix the issue is by updating them in the Device Manager.
Here is how you can proceed:
- Press the Win + S keys together to open the Windows Search utility.
- Type Device Manager in the search area and click Open.
- Once you are inside the Device Manager window, expand the Universal Serial Bus controllers section.
- Right-click on the USB controller that you want to update and select Update driver.
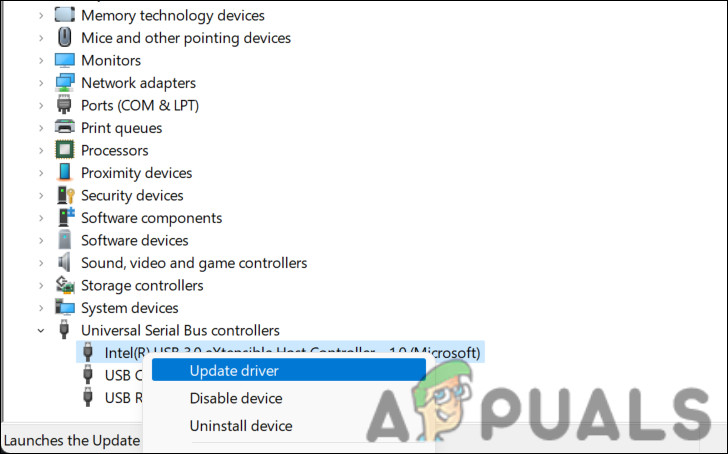
Update the USB driver - Choose Search automatically for updated driver software and wait for the computer to search for the latest driver software.
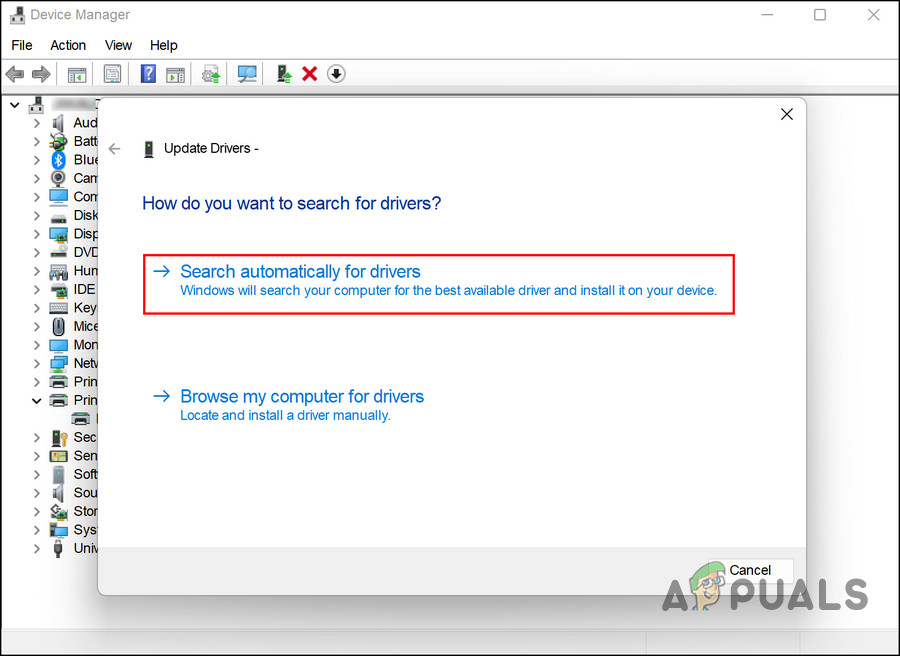
Update the driver - If a new driver is found, follow the on-screen instructions to download and install it.
- Restart your computer and check if the USB port is working.
If this does not fix the issue, you can also try to manually update the USB driver. For that, follow these steps:
- In your browser, open the official website of your manufacturer and download the latest USB driver from there.
- Now, follow steps 1-4 from above.
- This time, choose Browse my computer for driver software.
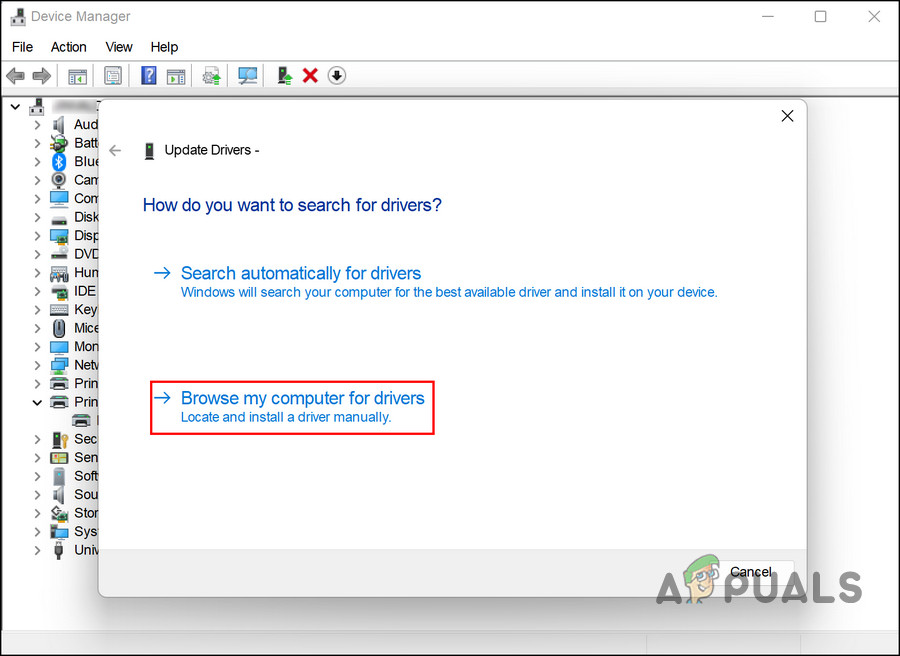
Browse your computer for drivers - Click on Let me pick from a list of available drivers on my computer and navigate to the location where you saved the downloaded driver file.
- Click Next and wait for the installation process to complete.
- Restart your computer and check if the USB port is working.
4. Adjust the power settings
You might also be facing the problem because of the USB Selective Suspend setting being enabled on your computer.
It is a power-saving feature that in Windows uses unused USB ports to conserve energy by putting them in a low-power state. However, this feature can cause issues with the USB port, especially if the USB device requires a continuous power supply.
Disabling the USB Selective Suspend setting will prevent Windows from putting the USB port into a low-power state, helping you fix the issue with the USB port.
Follow these steps to proceed:
- Press the Win + R keys together to open Run.
- Type control in Run and click Enter.
- In the Control Panel window, expand the View by category and choose Large icons.
- Click on Power Options > Change plan settings in the following window.
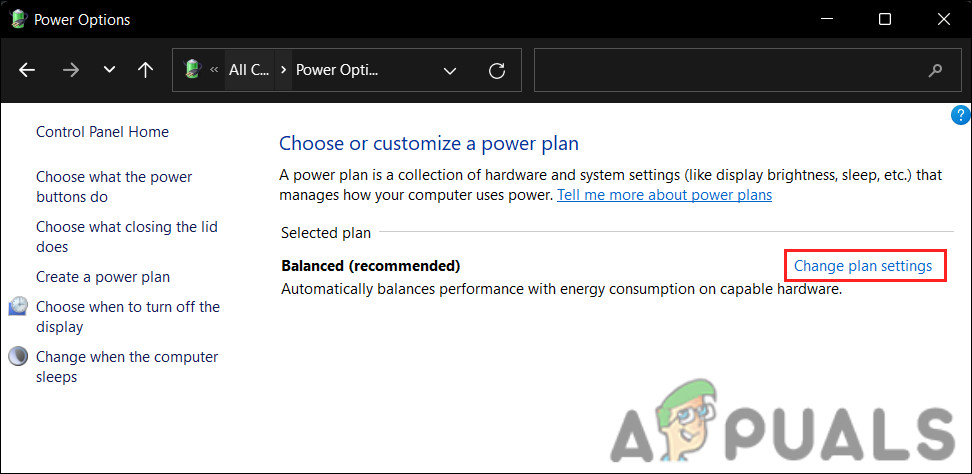
Change plan settings - Now, click on the Change advanced power settings options.

Choose the Advanced power settings option - Next, locate the USB settings option and click on the arrow to expand the list.
- Expand the USB selective suspend setting option.
- From the dropdown menu, click on Disabled.
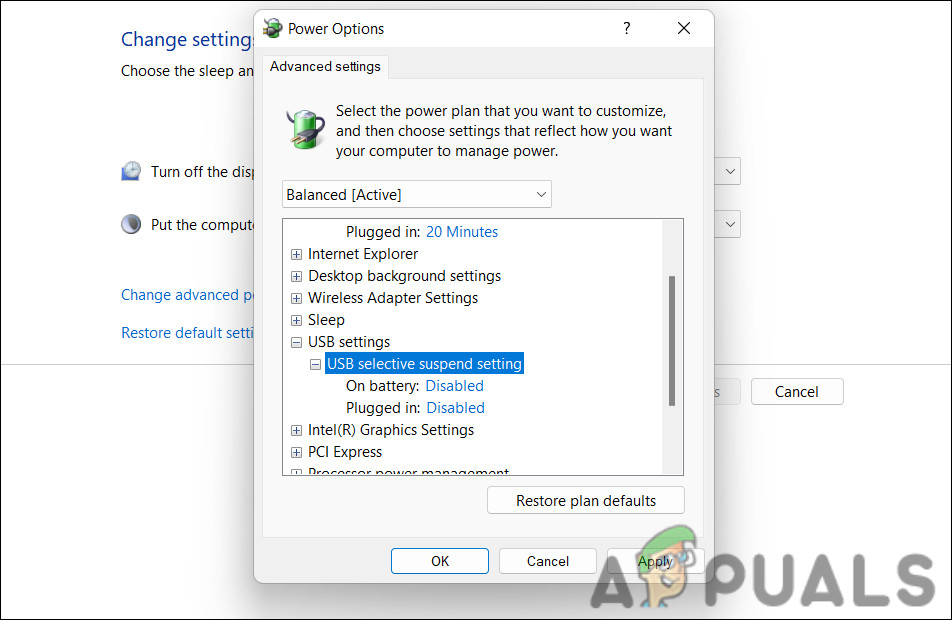
Disable the USB settings - Click Apply > OK to save the changes.
- Restart your computer and check if the USB port is working.
Alternatively, you can also make this change using the Device Manager. Here is how:
- Press the Win + S keys together to open the Windows Search utility.
- Type Device Manager in the search area and click Open.
- Inside the Device Manager window, expand the Universal Serial Bus controllers section.
- Right-click on the targeted USB controller driver and choose Properties from the context menu.
- Head over to the Power Management tab and uncheck the Allow the computer to turn off this device to save power option.
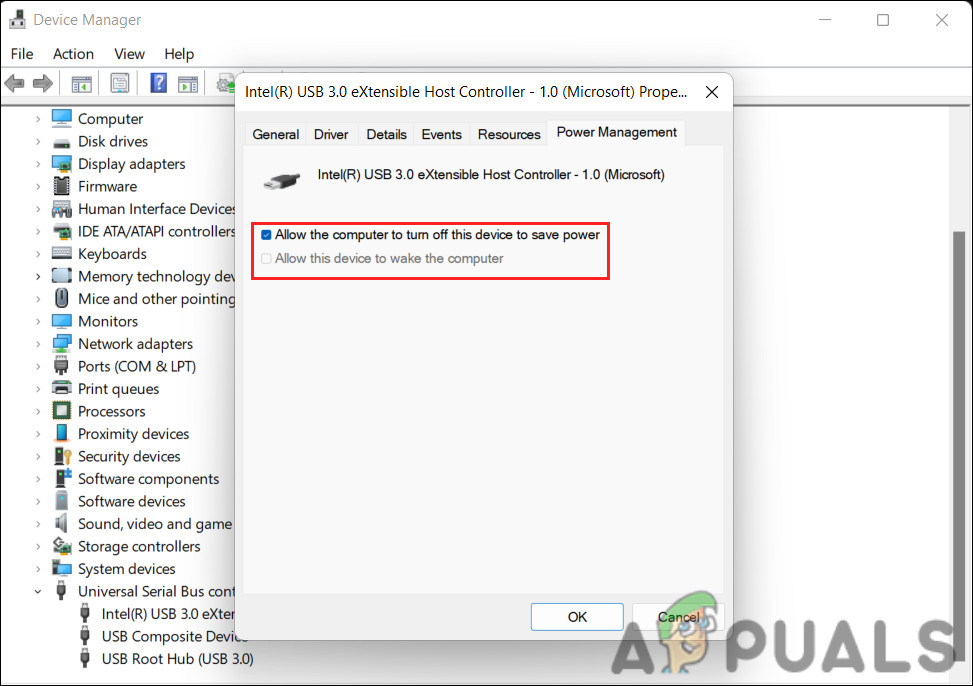
Disable the power management option - Click OK to save the changes.
- Do the same for each USB Root Hub device within the Universal Serial Bus controllers section.
- Once done, close the Device Manager and restart your computer. Hopefully, you will not face the error again after the reboot.
Hello , Thanks for help,
I have a Dell 5521 laptop,Windows 10 operating system, there is 4 USB port , two of them are not working
I tried all the previous methods, unfortunately didn’t resolve