How to Fix “Unsupported Processor” Blue Screen of Death?
The UNSUPPORTED_PROCESSOR blue screen of death error occurs when you are trying to boot Windows on an unsupported processor or CPU. This can primarily occur when you are trying to install Windows 11 on hardware that does not meet the minimum system requirements of the new operating system.
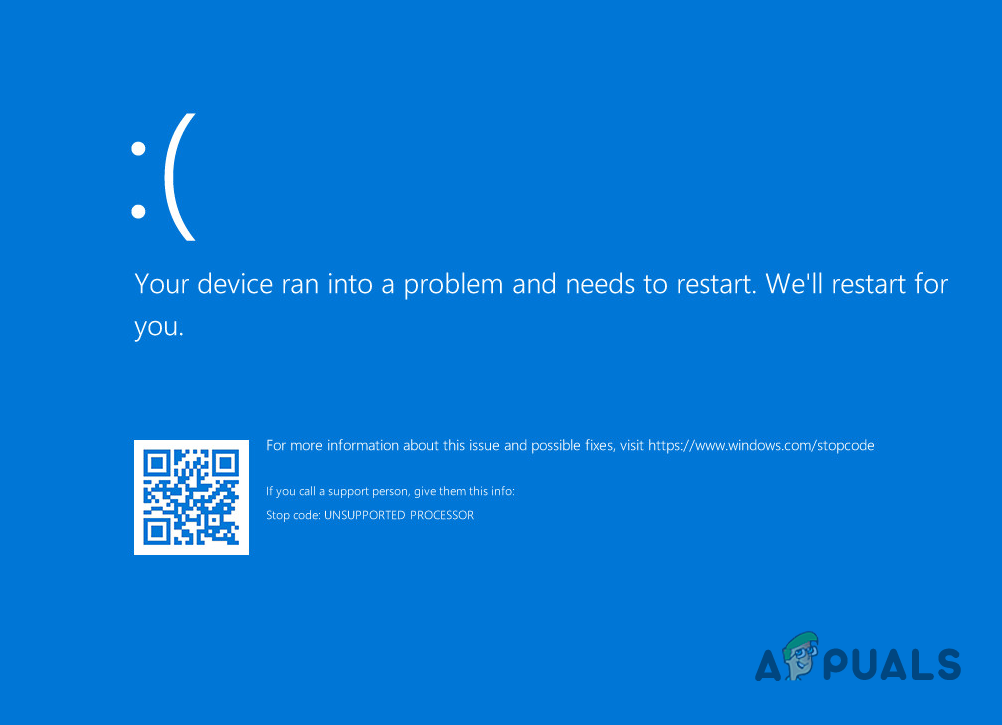
In addition, the unsupported processor BSOD error has also recently surfaced more prominently on Windows 11 machines due to an optional update from Microsoft. The error occurs when users are trying to boot into Windows and cannot do so. The optional update in question is KB5029351 which happens to be the root cause of the issue, affecting mainly MSI motherboard users on the Intel chipset.
The optional update KB5029351, which was recently released in the preview channel, has affected a bunch of users. In addition to this, the unsupported processor error can occur in other cases as well, where the BIOS firmware of your motherboard is usually the suspect. We will take you through a number of methods in this article that you can use to resolve the issue in question.
1. Restart PC Multiple Times
If you have started encountering the issue recently due to the optional update KB5029351 pushed by Microsoft to Windows 11, you’re in great luck because you can easily solve the issue by restarting your computer a few times. This is because Microsoft is aware of the issue that is affecting MSI users and is automatically uninstalling the update on their systems.
The company has published a health update regarding this officially on their website acknowledging the issue and temporarily retracting the update until the problem is fixed. Therefore, if you are encountering the issue on an MSI motherboard, go ahead and restart your computer multiple times when the error occurs to automatically uninstall the update.
If the issue persists even after multiple restarts, move on to the next method below.
2. Uninstall Update via WinRe
In case the issue does not resolve itself after multiple restarts, you’ll have to manually uninstall the problematic update on your computer. Again, this is only applicable to users who are facing the issue due to the optional update KB5029351.
To manually uninstall the update, you will have to access the Windows Recovery Environment on your computer. This can be done automatically when your computer fails to boot up properly. As such, you will need to restart your computer a couple of times until the system boots into the Windows Recovery Environment.
In the Windows Recovery Environment, you can use the Command Prompt window to uninstall the update manually. Follow the instructions below to do this.
- First, access the Windows Recovery Environment by force restarting your computer during the boot-up phase.
- After that, on the WinRE screen, go to Troubleshoot > Advanced Options.
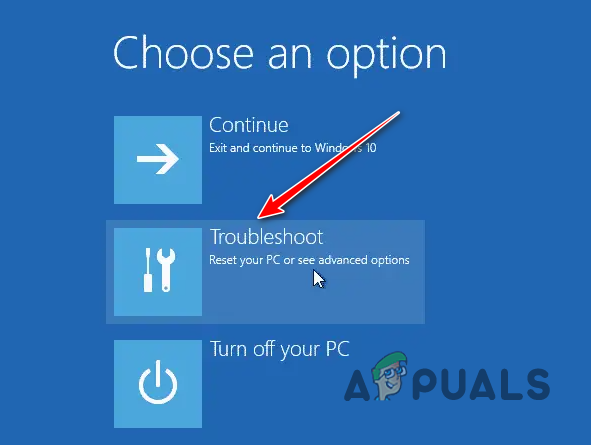
Navigating to Troubleshoot - Then, click on the Command Prompt option.
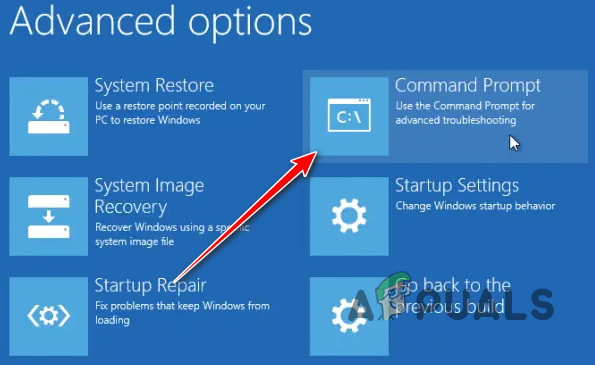
Opening Command Prompt - In the command prompt window, type in the following command to uninstall the KB5029351update:
- wusa /uninstall /kb:KB5029351
- Once you do that, restart your computer.
3. Repair Windows Bootloader
In some cases, the issue can also be due to the Windows bootloader on your computer. If your boot loader is running into issues due to any inconsistency, the BSOD error can occur. In such a scenario, you will have to repair the Windows bootloader.
Repairing the Windows boot loader requires you to boot into the Windows Recovery environment. Using the recovery environment, we’ll use a command prompt window to utilize the boot manager utility to repair the EFI bootloader.
Follow the instructions below to do this:
- First, force restart your computer a few times to go to the Windows Recovery Environment.
- After that, navigate to Troubleshoot > Advanced Options.

Navigating to Troubleshoot - In the Advanced Options menu, click on the Command Prompt option.

Opening Command Prompt - Then, open the diskpart utility by typing the following command and Enter:
- diskpart
- Make sure that you have not plugged in any external drives to your computer. Then, enter the following command:
- select disk 0
- This will select your hard drive where Windows is installed.
- Now, to locate your EFI partition, enter the following command:
- list vol
- Find the EFI partition from the list by looking at the Fs and Info table. The EFI partition will be FAT32 and System respectively.
- Note the number and type in the following command:
- select vol <number of EFI partition>
- After that, enter the following command:
- assign letter=K
- Once you do that, exit diskpart by typing in the following command:
- exit
- Now, to repair the boot record, enter the following commands one by one:
- cd /d K:\EFI\Microsoft\Boot
- bootrec /FixBoot
- ren BCD BCD.bak
- bcdboot c:\Windows /s K: /f ALL
- bootrec /rebuildbcd
- With this, you should be able to repair the EFI bootloader. Restart your system to see if the issue is still there.
4. Bypass TPM Requirement
Windows 11 has strict system requirements that have been enforced by Microsoft which can prevent certain systems from installing the operating system. If you have an older machine that does not meet the system requirements of Windows 11, you’ll have to bypass the restrictions in order to install the OS.
There are two ways you can go about bypassing the TPM requirement on Windows 11. One would be to use the Rufus tool while creating a bootable Windows USB drive to bypass the requirements. This would require you to have Windows installation ISO on your computer.
Alternatively, you can use the Windows Recovery Environment to edit the Windows Registry to bypass the TPM requirements. The former is an easier approach, however, we will be covering both of them below. You can follow whichever suits you more.
Using Rufus
- First, open the Rufus tool on your computer. If you don’t have it, download it from the official website here.
- Then, plug in your USB drive and select it from the Device menu.
- After that, click the Select button and open the Windows installation ISO.
- Once you do that, click on the Start button below.
- A pop-up box will appear. Here, tick the Remove requirement for 4GB+ RAM, Secure Boot and TPM 2.0 box.
- In addition, tick the Remove requirement for an online Microsoft account and Disable data collection (Skip privacy questions) boxes as well.
- Finally, click OK and wait for Rufus to create the bootable USB drive.
- Once done, use the USB drive to install Windows 11.
Using Windows Registry
- First, open the Command Prompt by pressing the SHIFT + F10 shortcut on the Windows Setup screen.
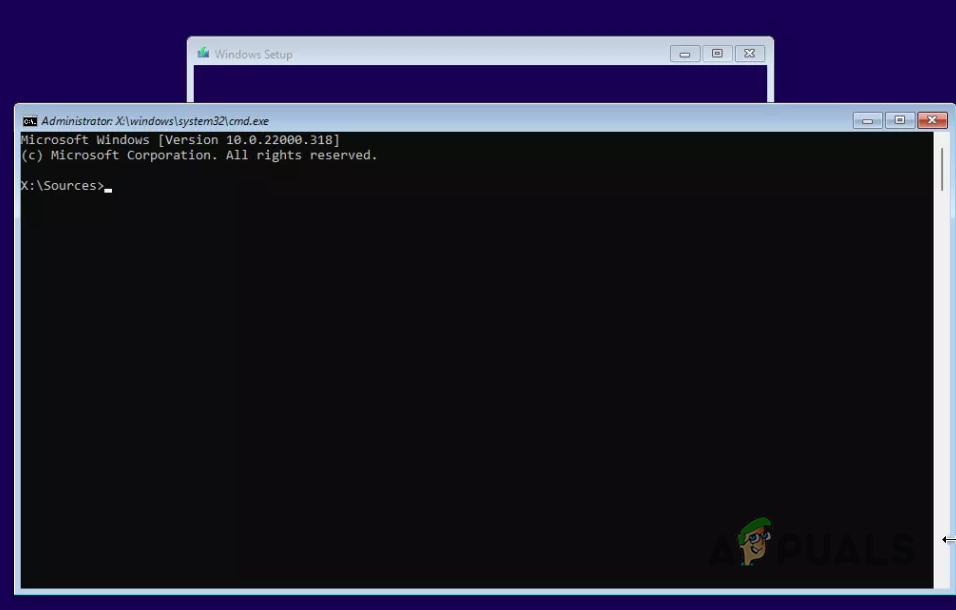
Windows Setup Command Prompt - In the Command Prompt window, type in regedit and hit Enter.
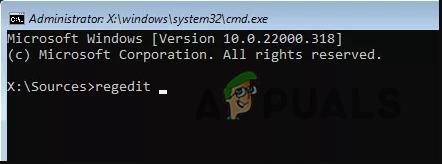
Opening Windows Registry - Then, navigate to the following path in the Windows Registry:
- HKEY_LOCAL_MACHINE\SYSTEM\Setup
- Right-click on the Setup key and choose New > Key.
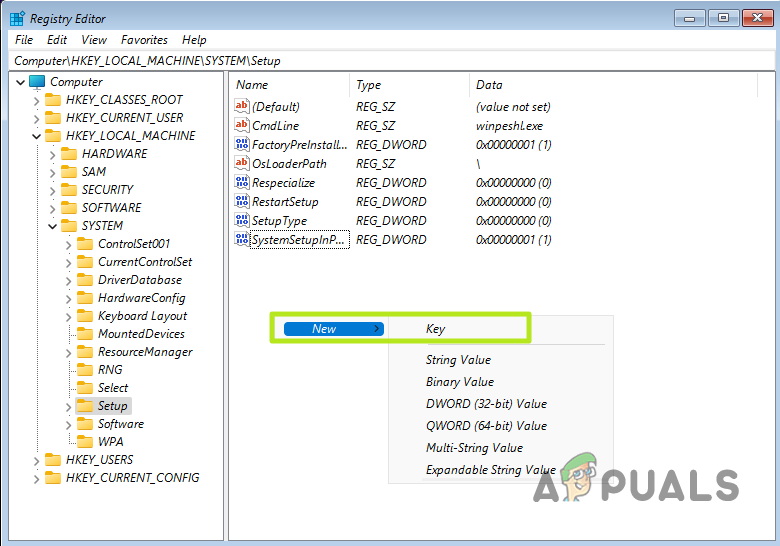
Creating New Key - Name the new key LabConfig.
- Then, double-click on the LabConfig key and on the right-hand side, right-click and choose the New > DWORD (32-bit) Value option.
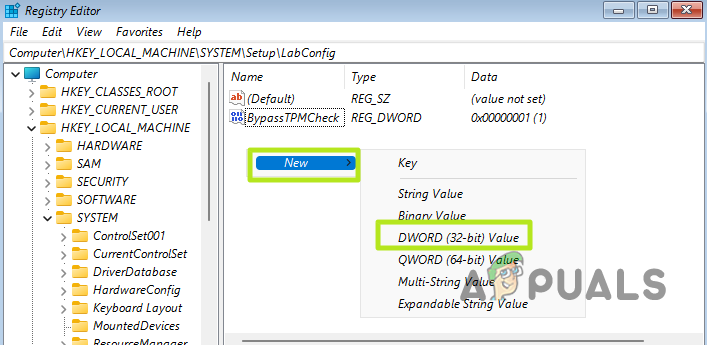
Creating New DWORD Value - Set the name of the new key to BypassTPMCheck.
- After that, double-click it and set the value to 1.
- Then, create another key, namely BypassSecureBootCheck and set its value to 1 as well.
- Close the Registry and command prompt window.
- Go through the Windows installation.
5. Update BIOS
In some instances, the unsupported processor BSOD error can also occur due to the BIOS firmware that is installed on your motherboard. This mostly occurs due to a conflicting issue with the BIOS, in which case, you will need to update the BIOS firmware to resolve the issue.
Updating the BIOS firmware can vary slightly depending on the manufacturer of your motherboard. Most motherboard manufacturers provide a utility that allows you to update the BIOS automatically. However, in case of BSOD errors, you will need to do so manually.
To do this, find the model and make of your motherboard. After that, navigate to the manufacturer’s webpage for the motherboard and download the latest BIOS update available. Once you do that, you will need to copy the BIOS file to a USB drive, and then boot into your BIOS. From there, you should be able to update the BIOS via the menu.
You can also find detailed instructions for each motherboard on your respective manufacturer’s website.
With that, you should be able to subside the UNSUPPORTED_PROCESSOR BSOD issue on your computer. Keeping your BIOS updated and installing verified updates only should help you prevent the issue in future occurrences.
Still facing the Unsupported Processor Error?
In case you are still facing the BSOD error on your computer after the above methods, you will have to reach out to the official support for Windows on Microsoft’s website. They will be able to help you in more detail and guide you through your scenario individually.
 Reviewed by


