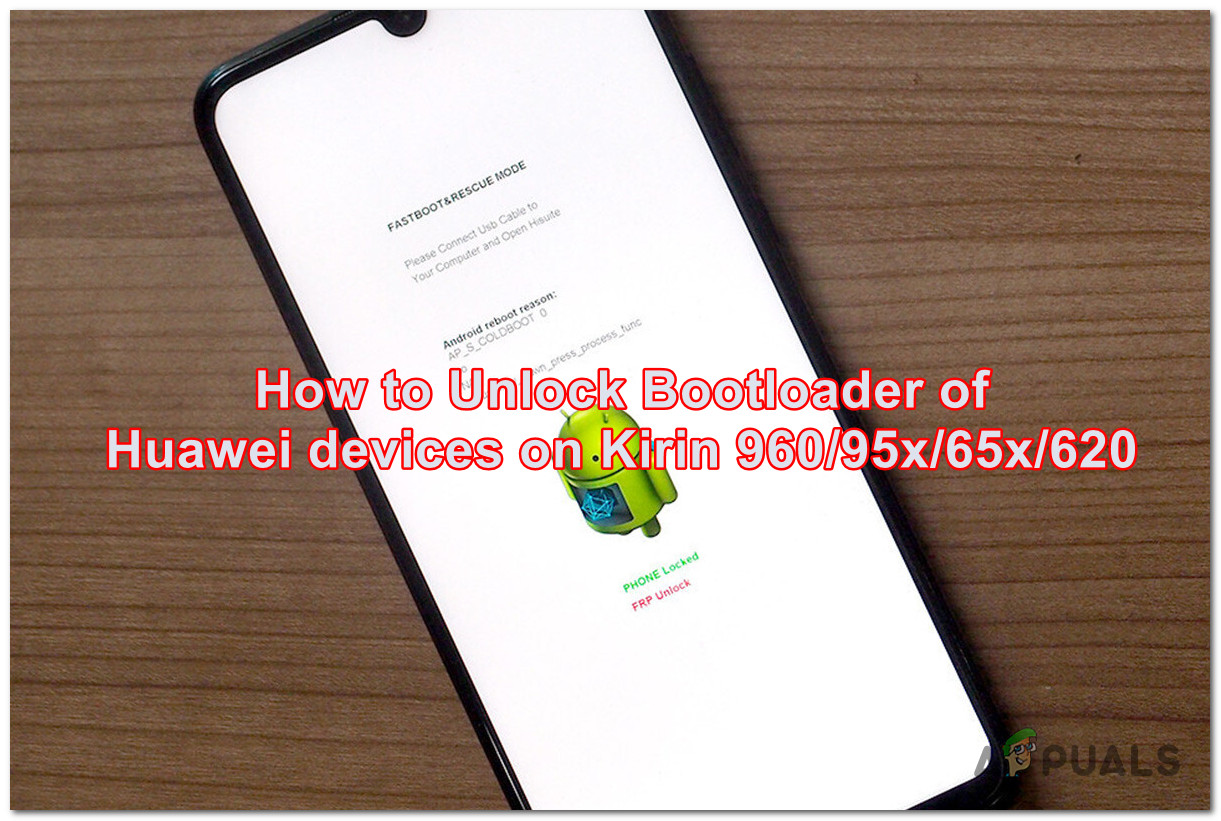
How to Unlock the Bootloader of Huawei Mobile Phones?
Unlocking the Bootloader of Huawei devices is a thing that many people are considering in order to improve the performance of their phones. This is a procedure that is recommended to be done only if your phone is old and the performance has reduced in time. If you do this, you will lose the warranty on your phone.
What does unlocking the Bootloader of Huawei devices do?
Unlocking the Bootloader of your Huawei device gives you the option to install custom firmware on your phone and provides you with full access to the phone’s settings. Such changes could include modifying part of the pre-installed software or even replacing the complete operating system. Developers and interested Android users root their devices in order to experiment with applications or custom Android builds.
The Bootloader is locked by default to prevent users from damaging their phones. To unlock the Bootloader and access the special system functions, you will need a Bootloader unlocker.
Unlocking Bootloader Process:
This Bootloader unlock is only available for Huawei phones that use the following HiSilicon Kirin processors:
- Kirin 620
- Kirin 650
- Kirin 655
- Kirin 658
- Kirin 659
- Kirin 925
- Kirin 935
- Kirin 950
- Kirin 960
In case your phone has a different processor that doesn’t appear inside this list, this Bootloader is unavailable for you.
Here is a guide that will show the exact steps on how to unlock the Bootloader on your Huawei device:
Step 1. Download the Bootloader Unlocker
Step 2. Extract the Bootloader
Step 3. Enable developer mode on your device
Step 4. Enable the OEM unlock and USB debugging mode
Step 5. Prepare your phone
Step 6. Install the Bootloader
Step 7. Reassemble the phone
Let’s go to each step one-by-one to properly unlock the bootloader of your Huawei device.
Step 1: Download the Bootloader Unlock
The first thing you need to do is to download the Bootloader unlock. This is a file that contains the Bootloader file that you need in order to unlock it.
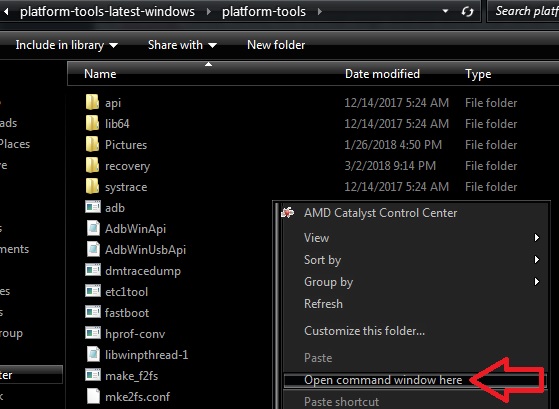
Access the GitHub site and download the latest version of the Potato NV (this is a custom bootloader unlock developed by a community member). You can do this by clicking on the Download button.

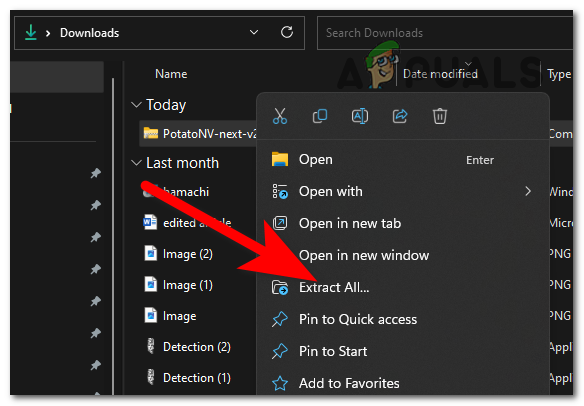
Step 2. Extract the Bootloader inside a folder
The Bootloader will be downloaded in a compressed folder that will appear on your screen. Extract the folder anywhere, recommended is on your desktop because you can access it easily.
Step 3: Enable developer mode on your phone
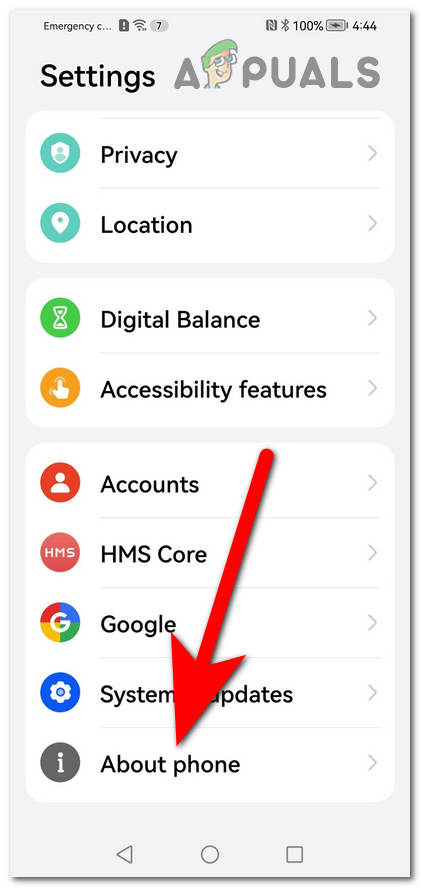
You need to have the developer mode activated on your phone to be able to install the Bootloader. Open your phone and access Settings, then select About phone.
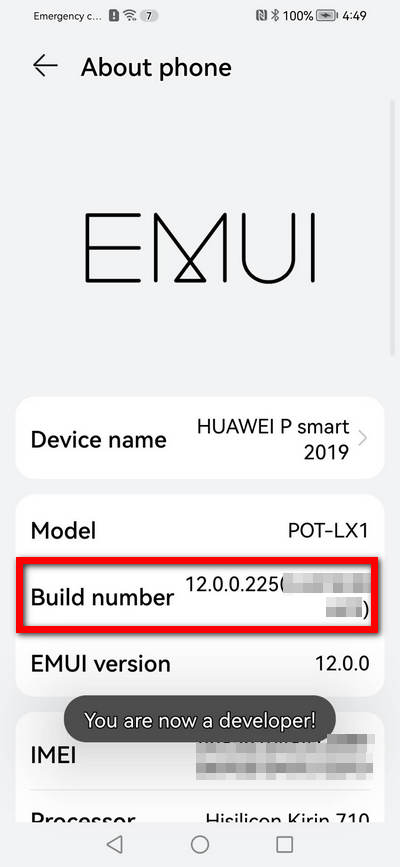
Now tap the Build number repeated times until you see the You are now a developer message on your screen.
Note: In case you have a password set to your phone, you will need to insert it before the developer mode will be enabled.
Step 4: Enable the OEM unlock and USB debugging mode
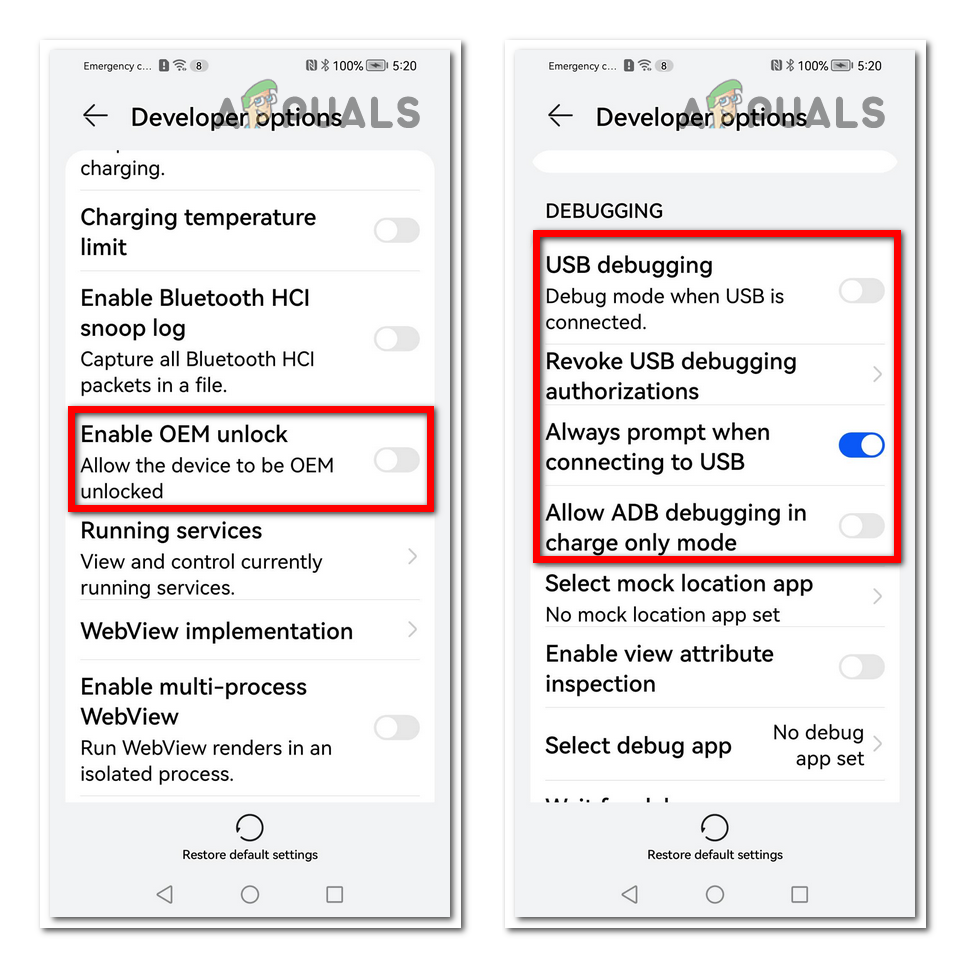
To be able to install the Bootloader from your PC, you need to have some options enabled on your phone. Access the Developer options.
First, you need to press the toggle next to the Enable OEM unlock to turn on this option. Scroll down until you see the Debugging settings. Enable the USB debugging, Revoke USB debugging authorizations , and Allow ADB debugging in charge only mode options to be able to complete the installation of the Bootloader.
When you are done, turn off your phone completely and remove the SIM card and SD card in case you have one.
Step 5: Disassemble your phone
This step is a bit harder because you could easily damage your phone if you are not careful. You will need a screwdriver or a sharp tool to open the phone, but it depends on your specific phone.
Note: The following steps are for a Huawei P10 phone. If you use a different phone, you better search online for the exact instructions to not cause any problems to your phone.
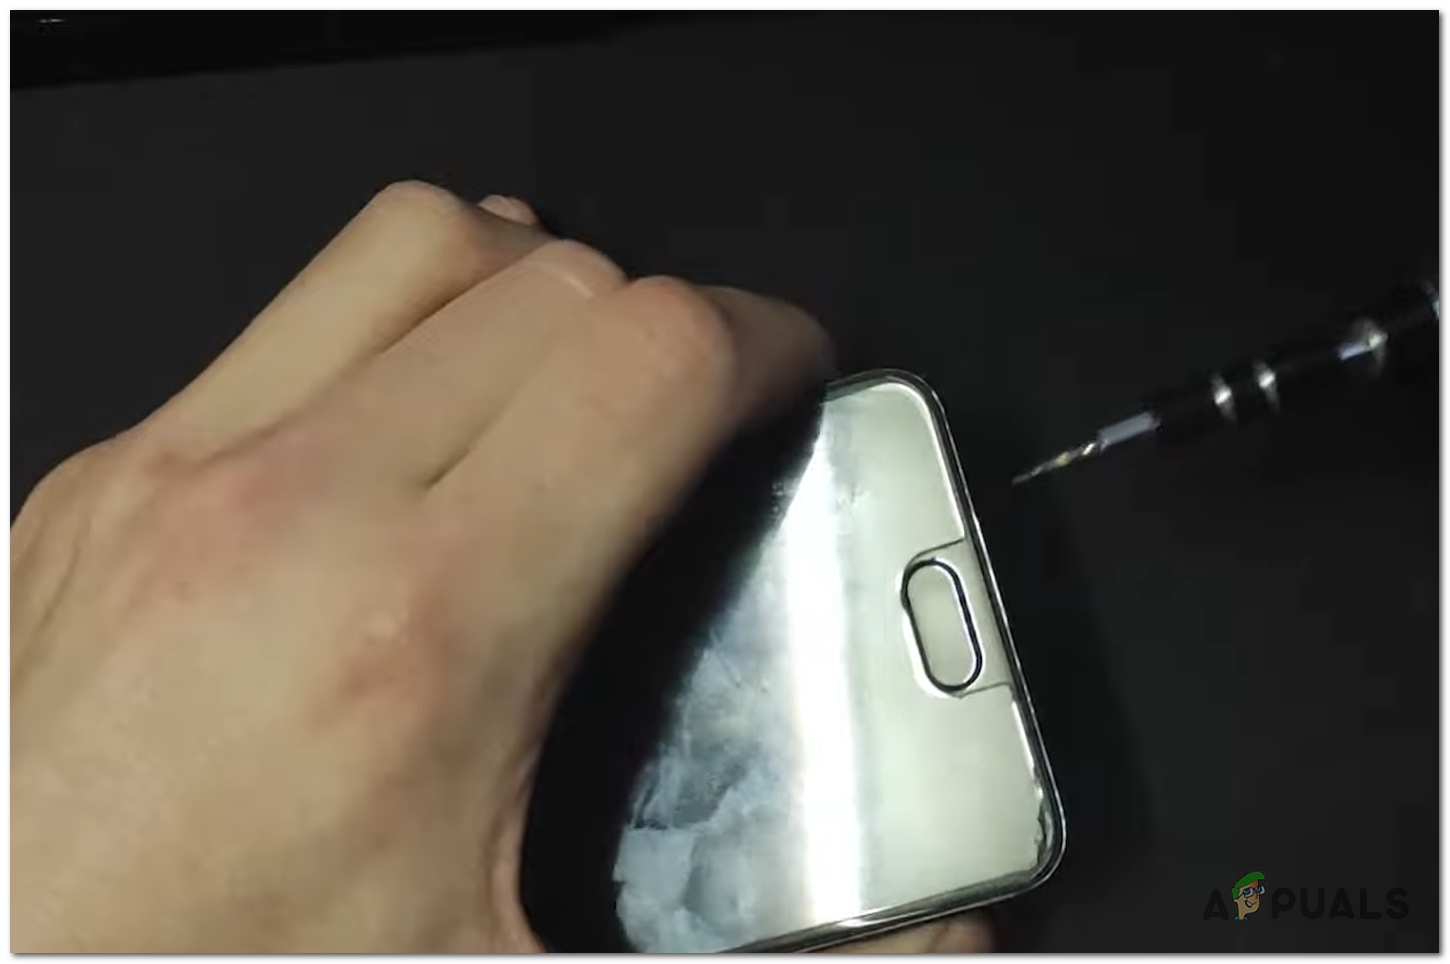
Ensure that your phone is turned off completely and the SIM and SD socket is removed from the phone. Take a screwdriver and unscrew the two nails that are located at the bottom of the phone.
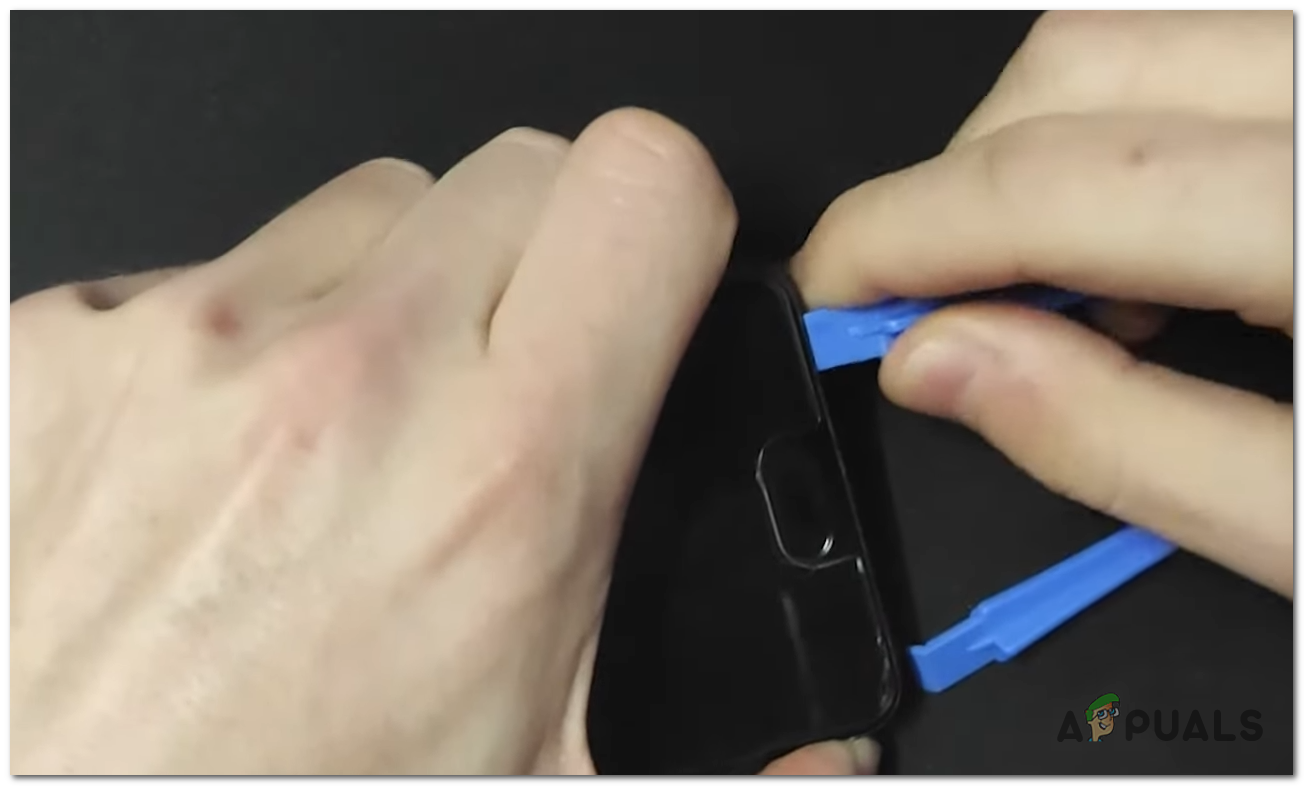
Now you need a tool to separate the screen from the phone. Use it gently and apply a bit of force to the bottom of the phone to separate the screen. Make sure you move gently to not broke the interior cables of the phone.
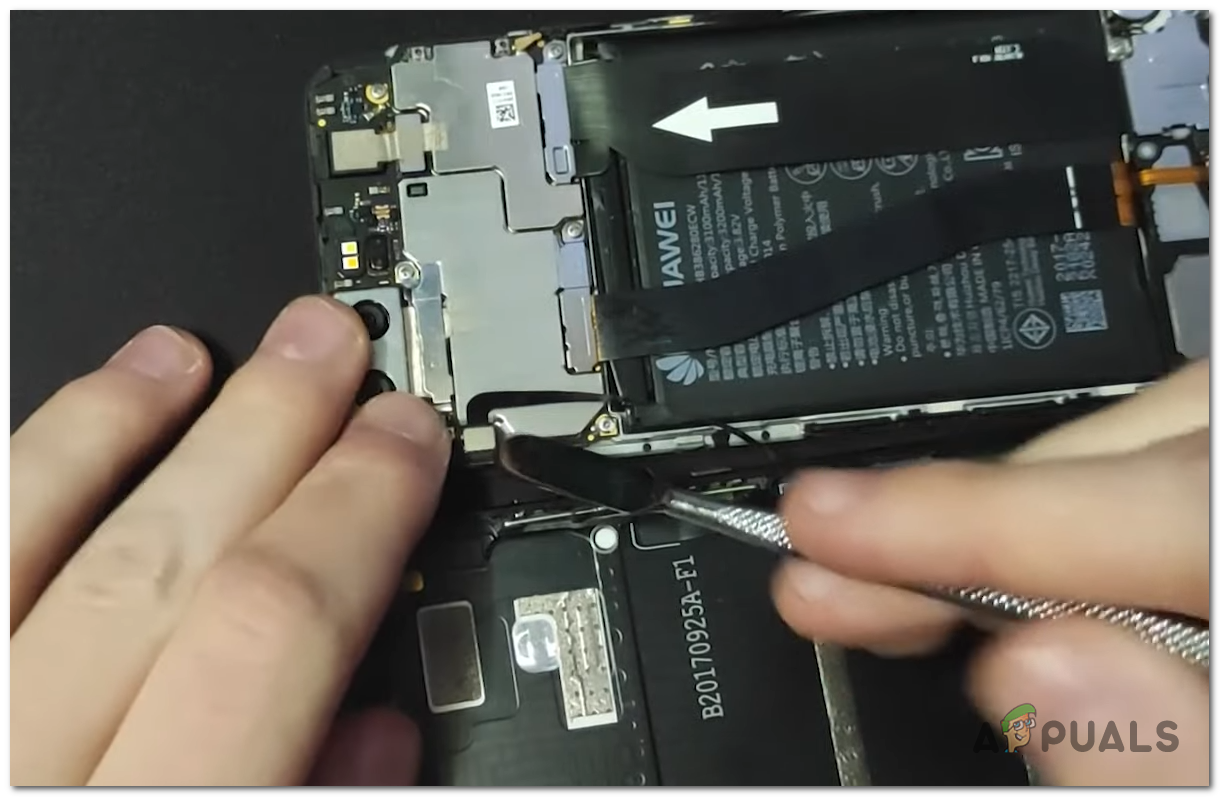
You need to remove the cable that connects the screen to the phone. Use any tool that can do this.
You can put the other piece to the side because you only need the phone piece.
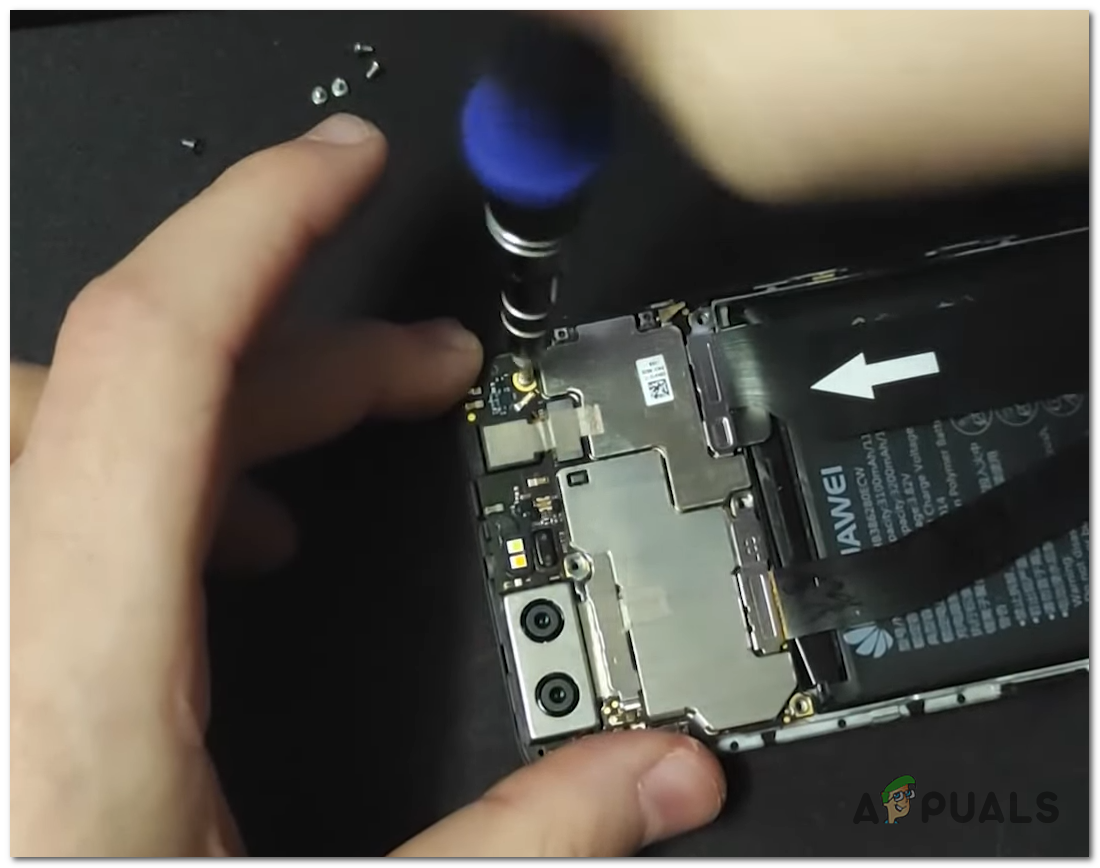
Use your screwdriver again to remove the nails from the upper side of the phone. Make sure to unscrew all the nails. You need to do this to be able to access the test point.
Note: Search online for more instructions to ensure that the test point is there. The location for it could differ from phone to phone.
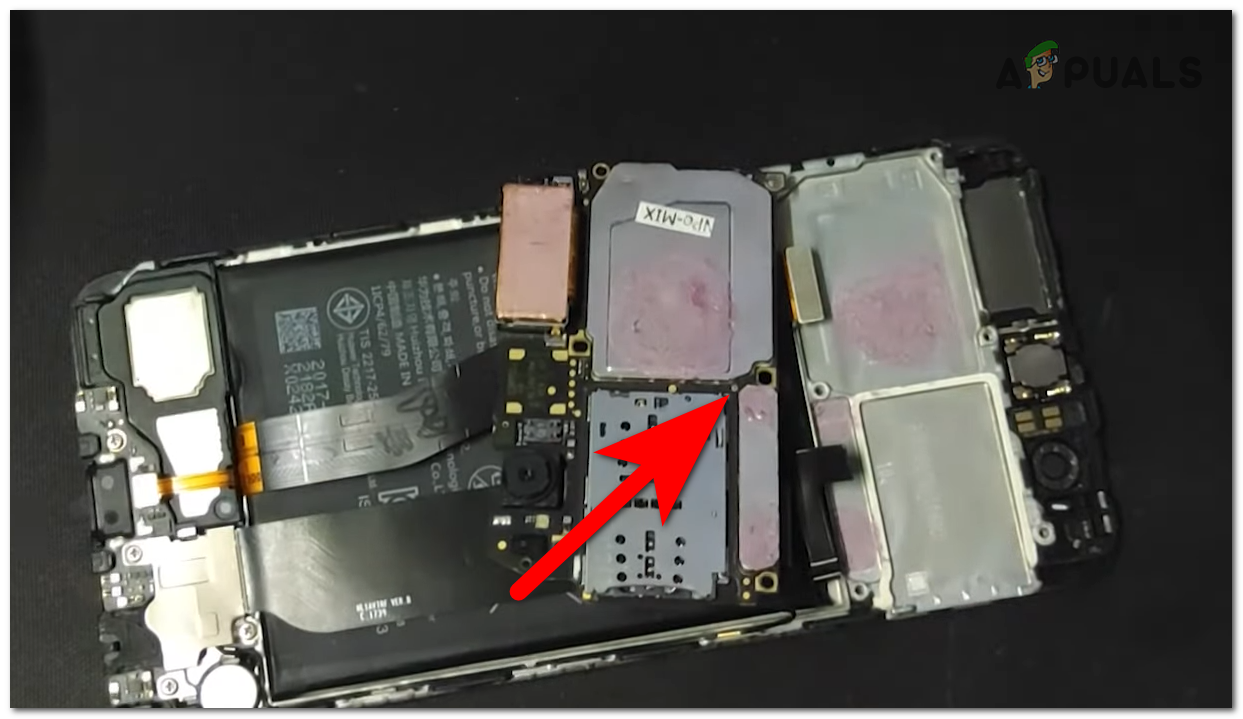
When you remove all the nails, you need a tool to remove the cables and the upper piece. Remove the cable that is directed by a red arrow. Make sure that you don’t remove the cable that is directed with a green arrow.

Remove the upper piece gently without disconnecting it completely. You should be able to see the test point.
Step 6: Install the Bootloader
Go to your computer and open the PotatoNV app. Set the settings that you want for the Bootloader.
You need a tweezer or something very sharp to be able to press the test point button. When you have the tool ready, with one hand you need to press the test point and keep it pressed until the process is complete. With your other hand, you need to connect a USB cable from your computer to your phone. Ensure that the cable is connected properly.
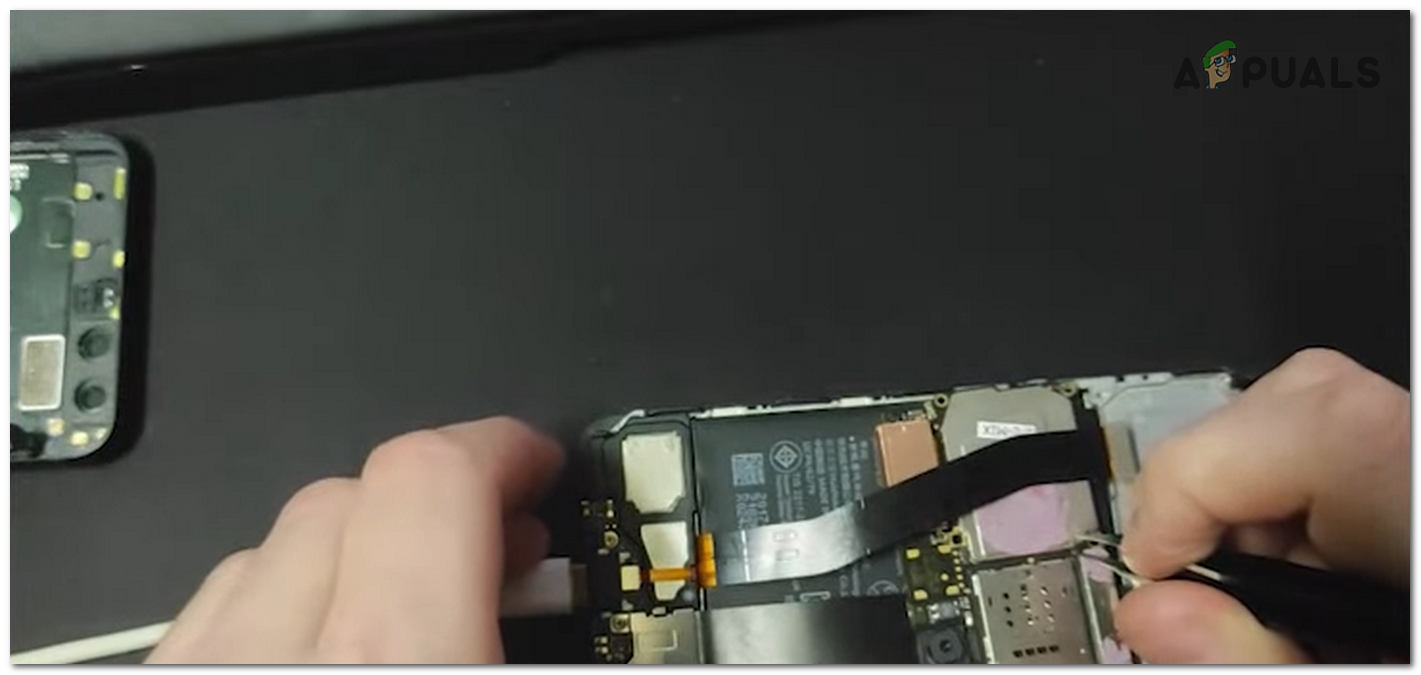
When you are sure that the phone is connected to the PC, keep the test point pressed while you use your other hand to click the Start button.
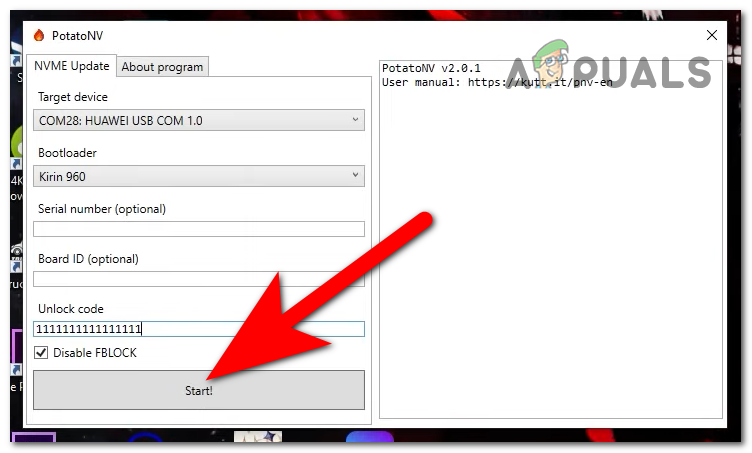
Once the process is complete, the Bootloader has been installed. You can now remove the tweezer from the test point.
Step 7: Reassemble the phone
The last thing that is left to do is to reassemble the phone back. Make sure you put the pieces how they were initially and screw all the nails in the places where they were located.
When you are done, you can now insert the SIM and SD socket back into the phone and turn it on. The Bootloader should be installed and ready to use.