How to Fix “Unable to Load Persistent Data’ Error on BattleField 2042
Battlefield 2042 is officially out and available on both PC and consoles. But akin to every recent EA multiplayer launch, the game is riddled with dozens of bugs that are severely affecting the experience. But while cosmetic and gameplay bugs can easily be forgotten, there’s one issue (Unable to load persistence data) that returns players back to the start menu after the game fails to connect to EA’s online services.
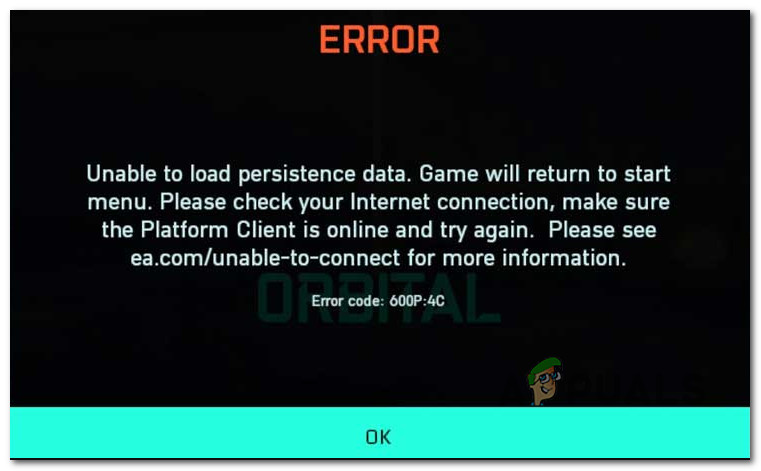
Note: The error code associated with this error typically varies a lot depending on the platform and the type of NAT.
After we’ve investigated this issue, it turns out that the problem is much more widespread than we originally imagined.
Both EA (the publisher) and Dice (the developer) have confirmed that they’re working on a fix, but so far the issue has not been contained. However, there are a couple of workarounds that you can try to temporarily fix or at least alleviate the problem by making some modifications.
Here are some fixes that are typically reported to be effective by other affected users:
- Changing the current DNS – As it turns out, one of the most common issues that might be the underlying cause of this particular issue is an inconsistent DNS range. Depending on your ISP, you might be successful in fixing the issue by migrating your current DNS range to the range supplied by Google.
- Crossplay is Enabled – Ever since EA started the early access program for Battlefield 2042, there are a lot of underlying issues associated with crossplay matchmaking. Unless you are explicitly making use of this feature, you’ll be probably better off by disabling crossplay completely (regardless if you’re on consoles or PC).
- Clearing the temporary files – If you’re experiencing this issue on a console and disabling the crossplay integration wasn’t effective in your case, the next thing you should try is power cycling your console. But keep in mind that the steps are a bit different on each console.
- Forwarding the ports used by BattleField 2042 – If you’re using an older router that doesn’t support UPnP (or UPnP is disabled), chances are the connectivity with the EA servers is being inhibited. To fix this problem, you’ll need to either enable UPnP or forward the required ports manually.
- Fix the Node 3 ISP interference – If your ISP is using level 3 nodes, it’s possible that you’re experiencing this problem due to a network inconsistency that is preventing your console or PC from establishing a connection with the EA servers. In this case, it should help if you filter the connection through a VPN network.
Now that we went over every potential fix for this particular issue, let’s go over the actual steps of fixing the ‘Unable to load persistence data’ error for Battlefield 2042:
1. Change DNS to Google’s Equivalents
Since one of the most common underlying scenarios that might cause the Unable to load persistence data is an inconsistent DNS range that makes connecting to the game server harder than it should be.
Fortunately for those affected by this problem, you can easily eliminate the problem and allow your PC or console to communicate with the EA game server by migrating your default DNS (Domain Name Address) range to a range supplied by Google.
But since this operation will be different depending on your platform of choice, we’ve created a series of sub-guides that will guide you through this process on PC, Xbox One, Xbox Series, PS4, and PS5.
Follow the guide below applicable to your platform of choice to make the transition to the DNS range supplied by Google.
Change the default DNS on PC
To change the default DNS range on PC, you’ll need to access the Network Connections window from the classic Control panel menu and establish a custom DNS range for the network that you’re currently connected to.
Note: Keep in mind that if you’re using IPV6, you will also need to establish custom DNS values for this protocol too.
Follow the instructions below to change the default DNS to Google equivalents on PC:
- Open up a Run dialog box by pressing Windows key + R.
- Next, type ‘ncpa.cpl’ and press Enter to open up the Network Connections window.
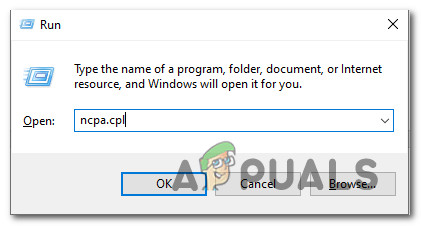
Accessing the Network Connections menu Note: If you see the User Account Control (UAC) prompt, click Yes to grant administrative privileges.
- Once you’re inside the Network Connections tab, locate the connection that you’re currently using as the gateway to the internet. When you manage to identify it, right-click on it and choose Properties from the context menu.
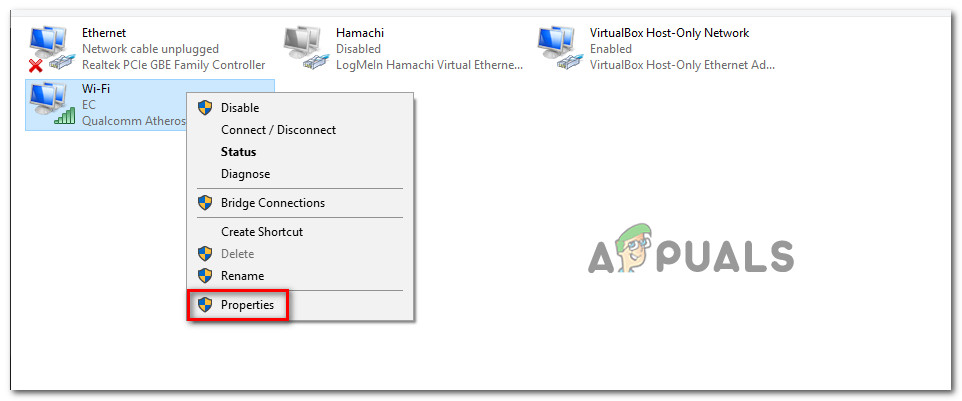
Accessing the Properties screen of the active network - Inside the properties screen for your Wi-Fi or Ethernet connection, go to the Networking tab and then turn your attention to the settings under This connection uses the following items.
- From there, choose Internet Protocol (TCP / IP4) and click on Properties.
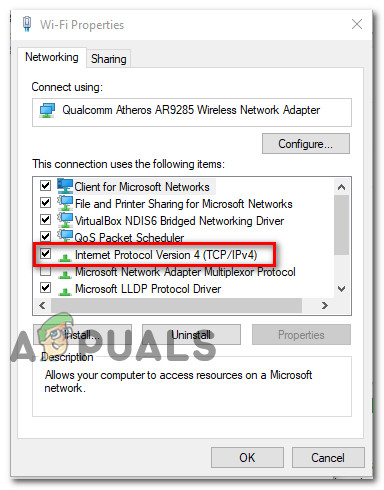
Accessing the IPv4 settings - Once you’re inside the next settings, go to the General tab, then check the toggle associated with Use the following DNS server address.
- Replace Preferred DNS server and Alternate DNS Server with the following values:
 8.8.8.8
 8.8.4.4
- Once the values for IPv4 have been modified, it’s time to change the values for IPV6. To do this, return to the previous menu and access the Properties screen of Internet Protocol Version 6 (TCP/IPv6).
- Next, replace the Preferred DNS server and Alternate DNS server with the following values:
2001:4860:4860::8888
2001:4860:4860::8844
- Save the changes that you just enforced, then restart both your PC and your router before you attempt to launch Battlefield 2042 once again and see if the error is fixed.
Change the default DNS on Xbox One / Xbox Series X
Regardless of whether you’re on the last-gen console from Microsoft (Xbox One) or on the next-gen, the instructions for changing the default DNS are almost identical.
You’ll need to access the Advanced Settings menu of the network that you’re currently connected to and go for the manual configuration approach to be given the option to set a Custom DNS.
Here’s what you need to do:
- Make sure you’re on the main dashboard of your Xbox One menu, then press the guide menu.
- From the side menu that just appeared, choose All Settings.

Accessing the All Settings menu - From the Settings menu, cycle down to Network and press A to access the setting cluster.
- Once you’re inside the Network menu, tap on Advanced settings from the list of available options.
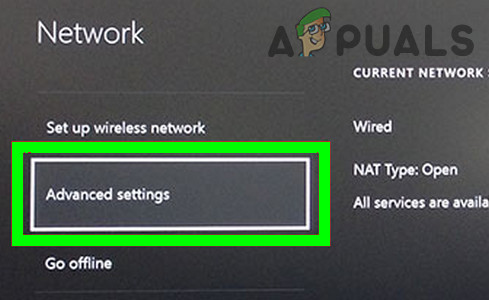
Open Advanced Network Settings of Xbox - From the next menu, choose DNS settings, then select Manual from the next cluster of menus.
- Next, set 8.8.8.8 as the Primary DNS and 8.8.4.4. as the Secondary DNS and then hit Save the changes.
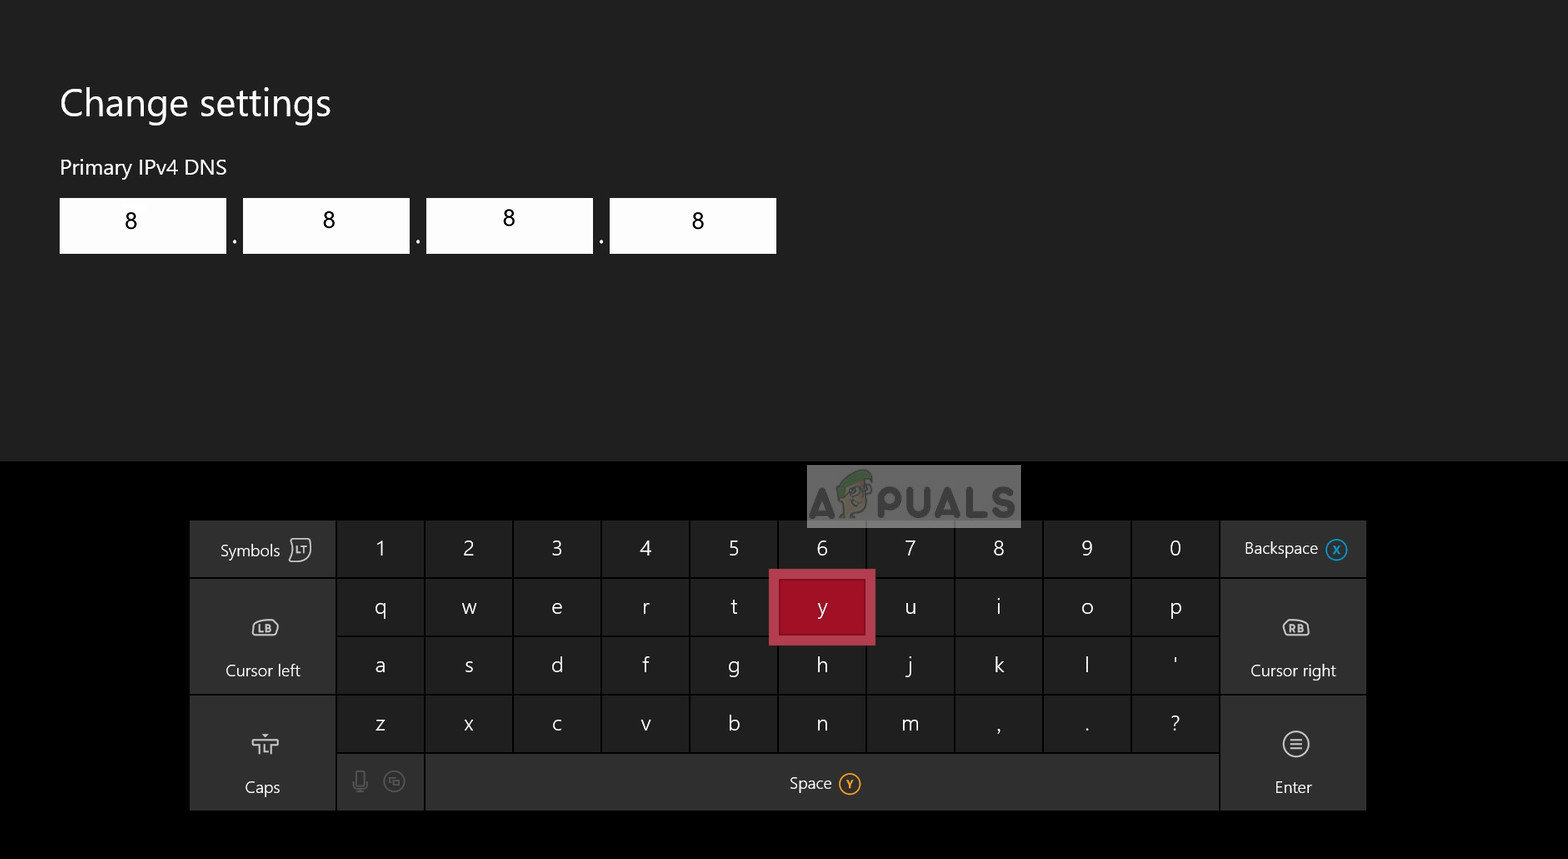
Changing the DNS settings - Finally, save the changes before restarting both your Xbox console and your router.
- Once your console boots back up and is connected to the Internet, launch Battlefield 2042 once again and see if the Unable to load persistence data error is now fixed.
Change the default DNS on PlayStation 4
The PlayStation operating system won’t allow you to change the currently used DNS unless you choose to Set up a new Internet connection and select Custom when asked if you want to go for the automatic settings.
Follow the instructions below for step-by-step instructions on changing the default DNS settings with equivalents from Google:”
- From the home screen of your PlayStation 4 system, cycle through the vertical menu at the top to Settings.
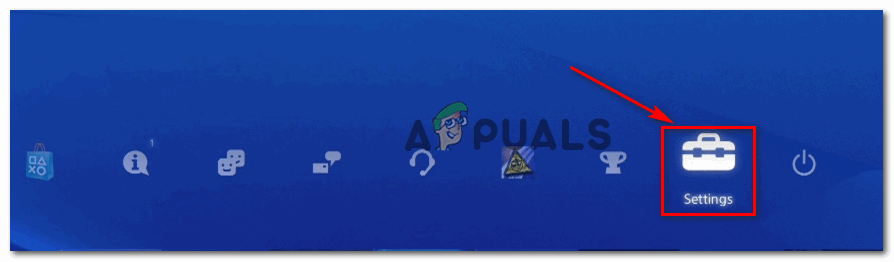
Accessing the Ps4 settings - Next, once you’re inside the Settings screen, access the Network menu from the list of available options.
- Once you’re inside the Network settings, choose Set up Internet Connection.
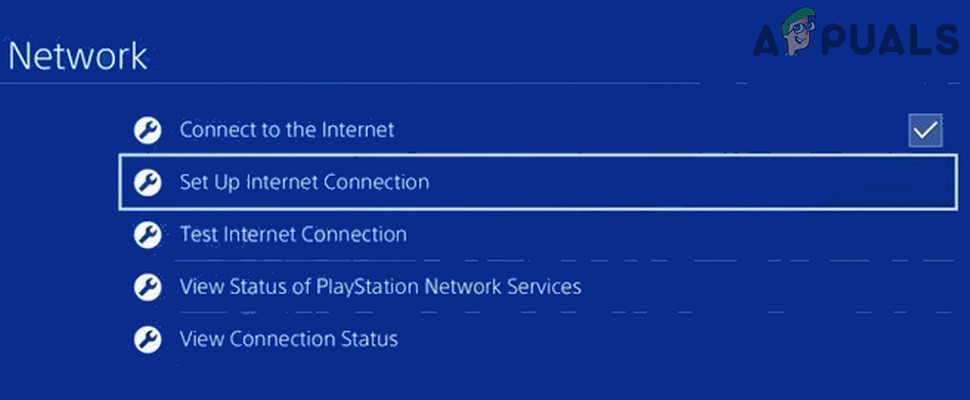
Set up Internet Connection - Next, choose either Wi-Fi or LAN (depending on the type of connection that you’re using), then select Custom to avoid receiving a default DNS.
- When asked about the address you want, choose Automatic.
- Once you get to the next prompt, select the DHCP Host Name to Do not specify.
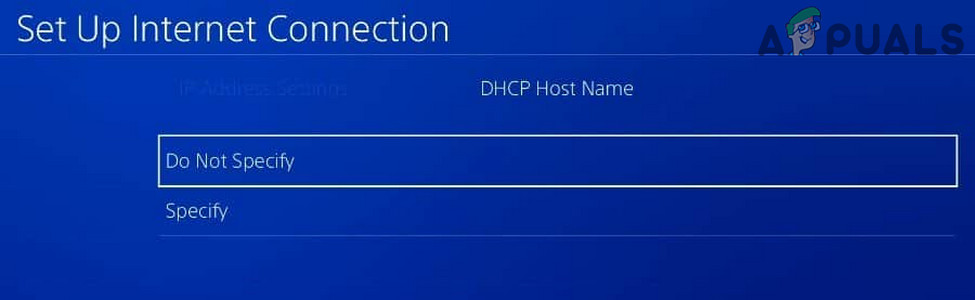
Do not speciffy - When you finally arrive at the DNS Settings prompt, choose Manual, then change the Primary DNS to 8.8.8.8. and Secondary DNS to 8.8.4.4.
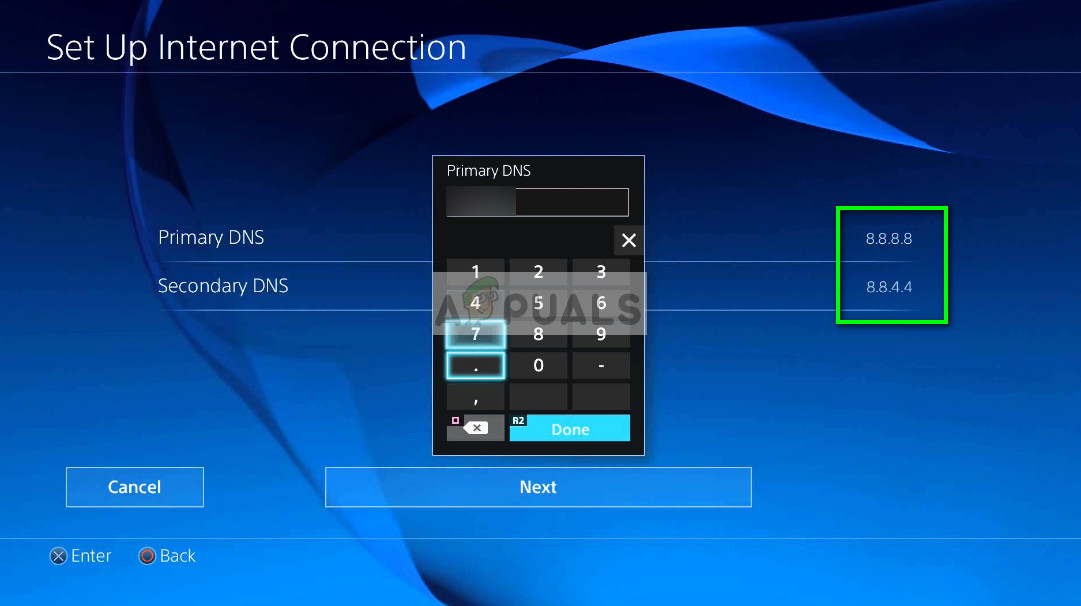
Changing Primary and Secondary DNS on PS4 Note: If you want to use IPV6 instead, use the following values instead:
Primary DNS – 208.67.222.222
Secondary DNS – 208.67.220.220 - Save the changes, then restart both your console and your router to see if the problem is now fixed.
Change the default DNS on PlayStation 5
If you’re experiencing this issue on Playstation 5, you’ll need to change the DNS settings by accessing the Settings menu and modifying the Network settings by opting for the setup of a new Internet Connection.
Follow the instructions below for complete steps on how to do this:
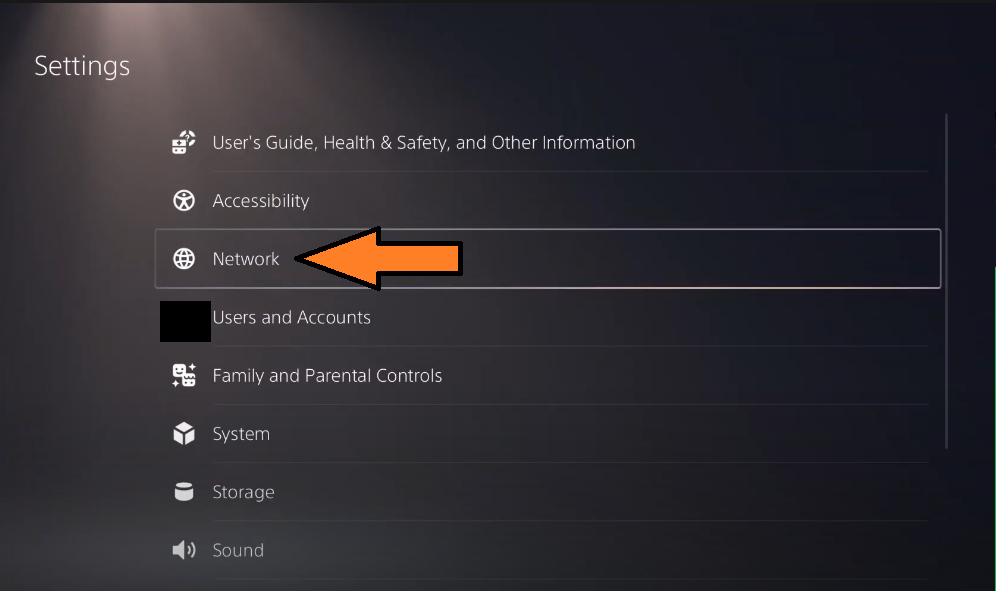
- From the home screen of your PS5 Home screen, select the Settings icon (top-right section of the screen) and press the X button to access the settings.

Accessing the PS5 settings - Once you’re inside the Settings menu, access the Network settings, then choose Settings once again.
Accessing the Network settings on ps5 - From the next menu, choose Set up Internet Connection, then choose Set Up Manually from the next cluster of options.
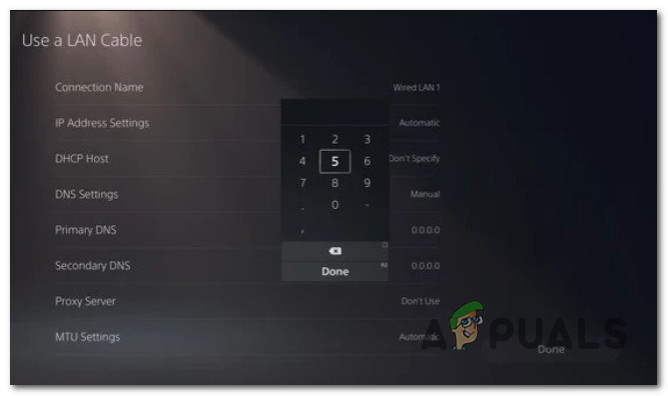
- Next, choose Wi-Fi or LAN Cable (depending on the type of connection that you’re using) and choose DNS at the next prompt.
- Once you are asked to supply the required values, set the Primary DNS to 8.8.8.8 and the Secondary DNS to 8.8.4.4. and hit Done to save the changes.
Setting the DNS on PS5 - Once the connection has been re-established and the DNS changed, launch Battlefield 2042 once again and see if the ‘unable to load persistence data is still occurring.
If the same kind of issue is still occurring, move down to the next potential fix below.
2. Disable CrossPlay
As it turns out, a lot of these issues originate from the industry push to make crossplay games allowing games to play on the same servers regardless if they come from PC, Xbox, or Playstation.
This sounds good in theory, but in reality, there are a lot of problems arising from crossplay integration (including the ‘Unable to Load Persistence data’).
Fortunately, you can avoid most of these issues by choosing to disable crossplay from your game settings.
This can be done on every console or PC, but the instructions are slightly different for Xbox Series X and Xbox One.
Follow the sub-guide below that’s applicable to your platform of choice:
Disable Crossplay on PC and Playstation
If you’re experiencing this issue on PC, PS4, or PS5, you might get away with just disabling the Cross-Play integration from the in-game settings. However, you will still need to restart your system in order to be certain that the game doesn’t matchmake you with games from other platforms
Here’s how to disable the crossplay integration of Battlefield 2042 on PC and Playstation:
- Open the game normally and wait until you get past the initial login screen.
- Next, access the Options menu from the bottom-left section of the screen.
- Once you’re inside the Options menu, use the vertical menu at the top to select the General tab.
- Inside the General tab, scroll down to the Other section and then disable the toggle associated with Cross-Play.
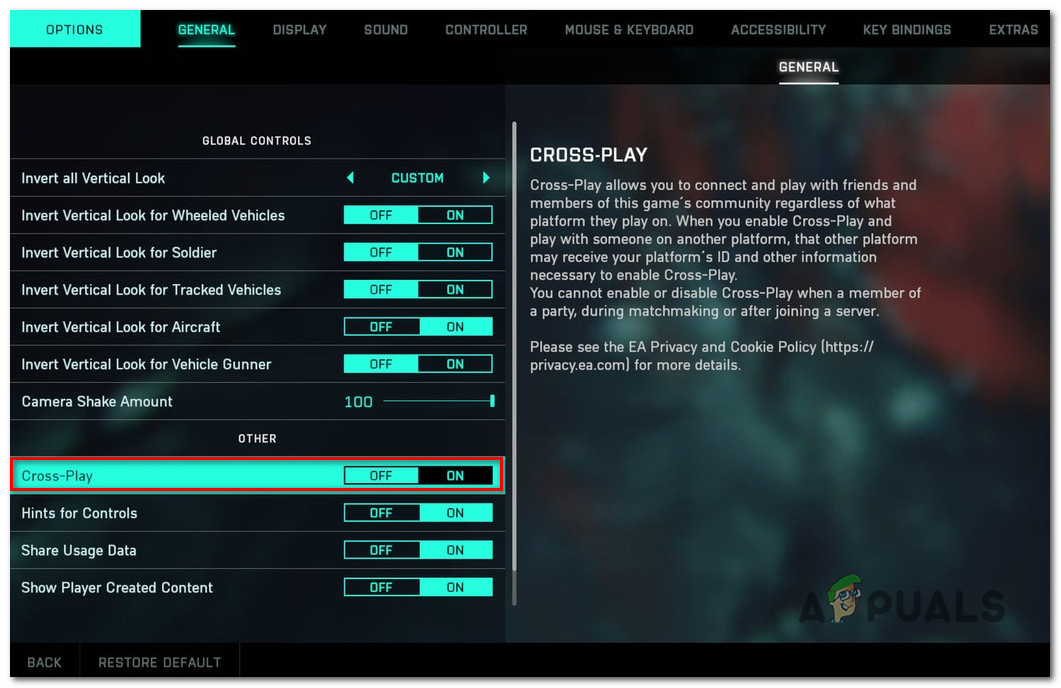
Disable the CrossPlay integration - Save the changes, then close the game and start the game once again before checking if the same kind of error is still occurring.
Disable Crossplay on Xbox One / Xbox Series X
On Xbox consoles, it seems like you will not be able to disable the cross-platform integration completely just by disabling it from the in-game settings. Other users are reporting that they are still getting matched with users playing from other platforms despite the fact that they specifically disabled the crossplay integration.
To avoid this problem, you will need to disable CrossPlay at a console level (from the Online Safety and Family menu).
Here’s what you need to do:
- Access the Xbox Guide menu by pressing the Xbox button on your controller.
- Once you see the menu on the side appearing, access the Settings menu.
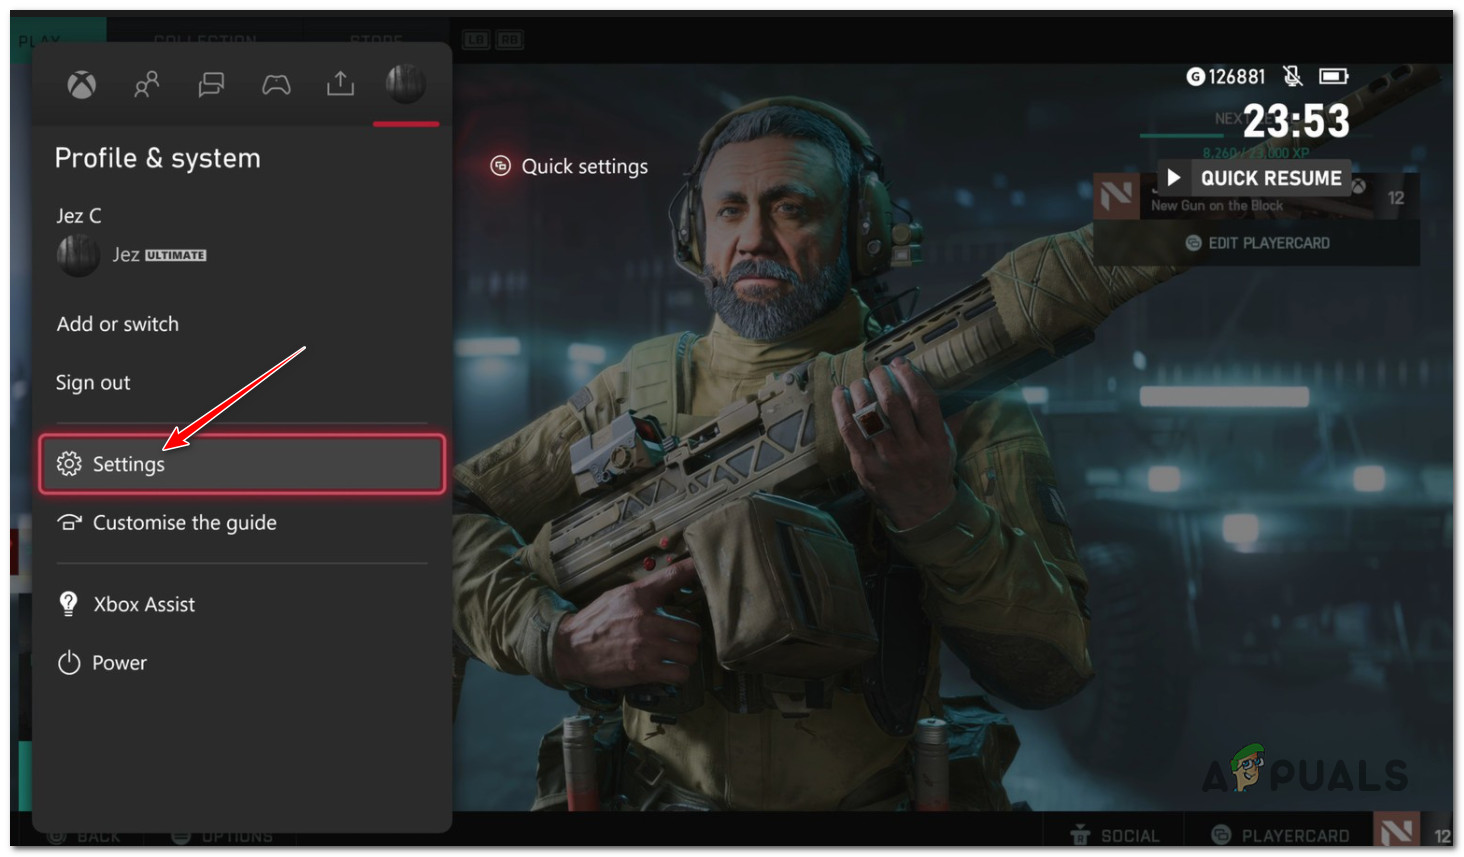
Accessing the Settings menu - Once you’re inside the Settings menu, access the General tab from the menu on the left, then access the Online safety & family menu.
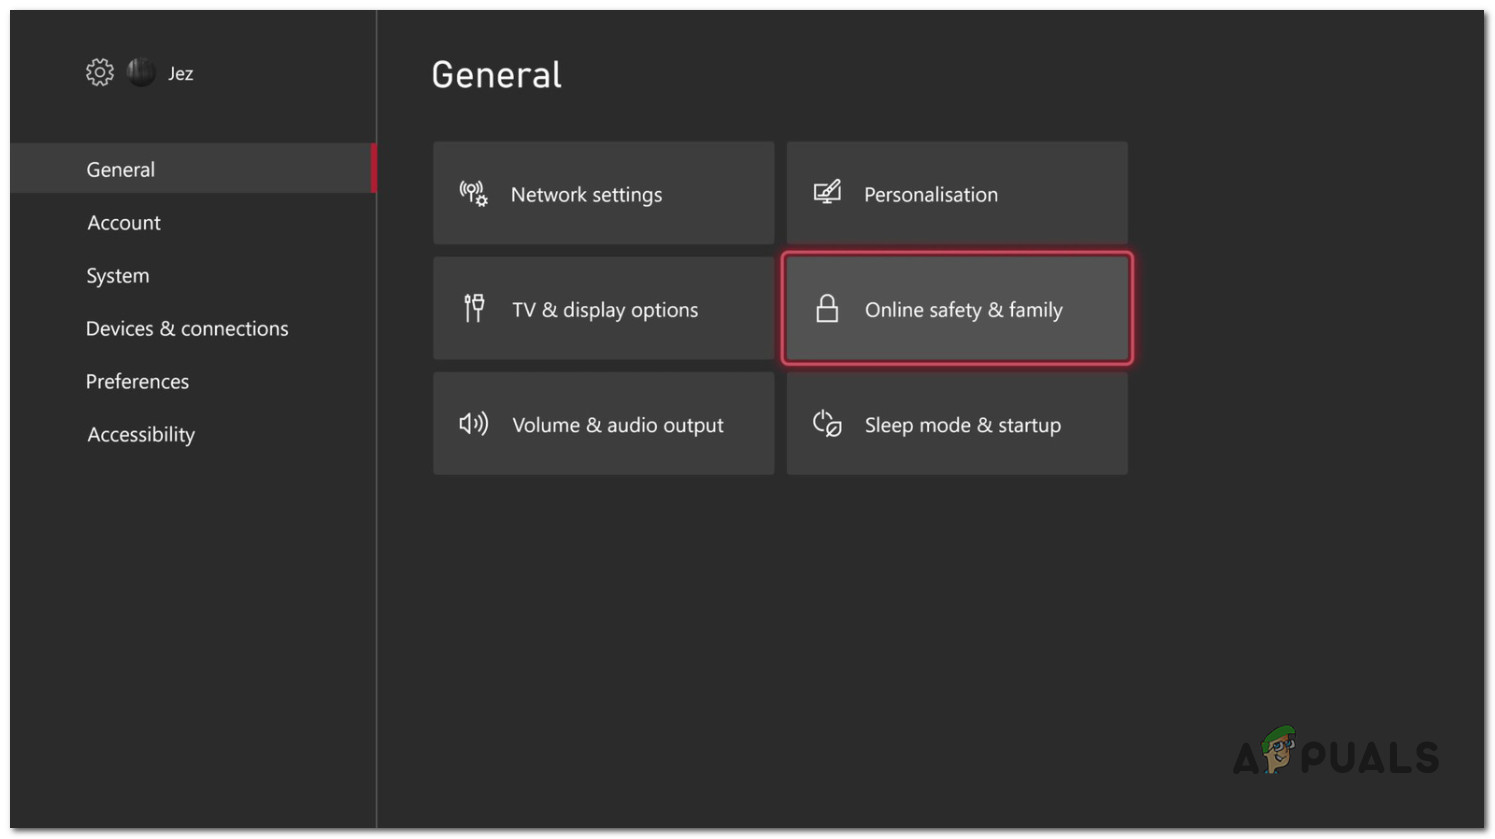
Accessing the Online Safety and Family menu - From the next menu, select Privacy and Online Safety, then choose Xbox privacy from the list of available options.
- Next, use the menu on the left side to access the View details & customize menu.
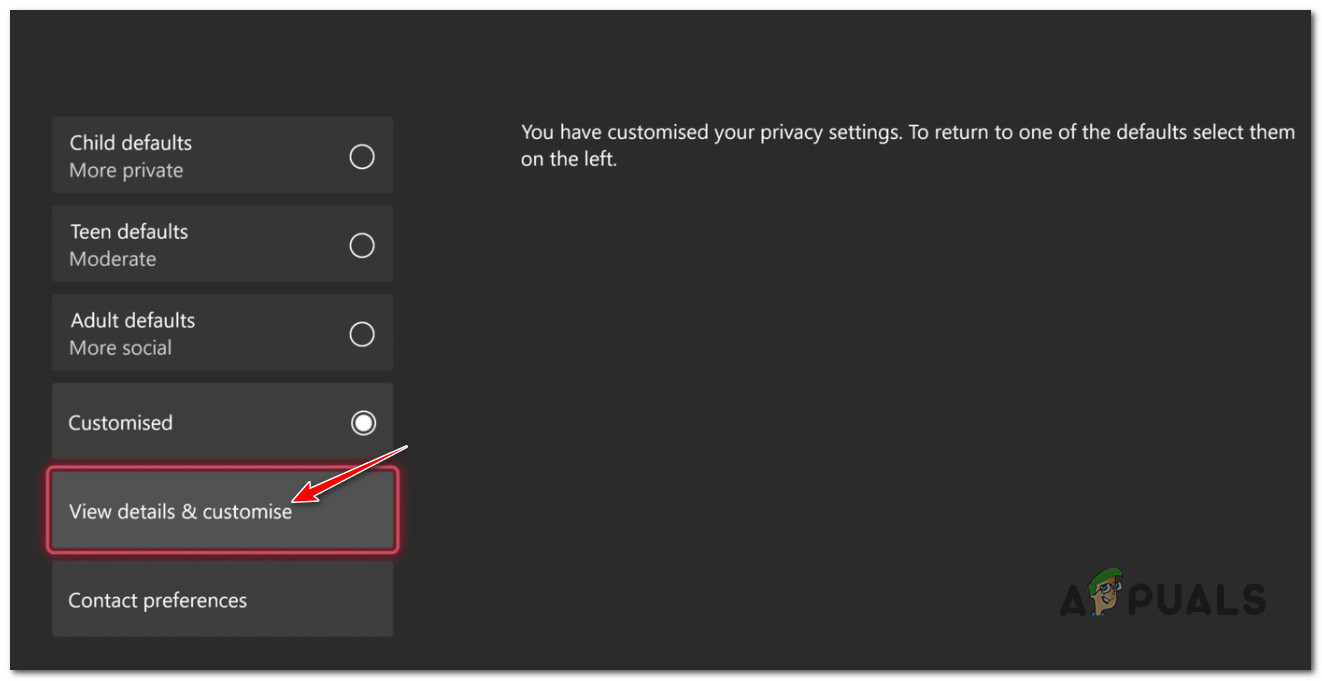
Accessing the View Details & Customize menu - From the next menu, choose Communication and Multiplayer, then change the You can join cross-network play toggle to Block before saving the changes.

Blocking the cross-network play - Once you’ve made these modifications, reboot your console before launching Battlefield 2042 once again and see if the problem is now fixed.
3. Power cycle your console
If none of the methods above have proven to be effective in your case and you’re experiencing this problem on a last-gen or current-gen console, you should also take the time to investigate if the temporary file cache is causing this problem.
This particular fix was mostly reported to be effective on Xbox Series X and Xbox One, but you can also power-cycle your PlayStation 4 or PlayStation 5 console if necessary.
Since the exact instructions of deploying a power-cycle procedure will vary from console to console, we’ve created a series of sub-guides that will walk you through this procedure on the latest console from Sony and Microsoft.
Follow the guide that is applicable to the console that you’re using:
Power Cycle Playstation 4
An essential part of power-cycling a PlayStation 4 console is to give the power capacitors enough time to clear themselves. To make sure you do this procedure properly, follow the instruction below:
- While your Playstation 4 console is fully turned on, press and hold on the power button (on your console) and keep it pressed until you can physically hear the console fans turning off.
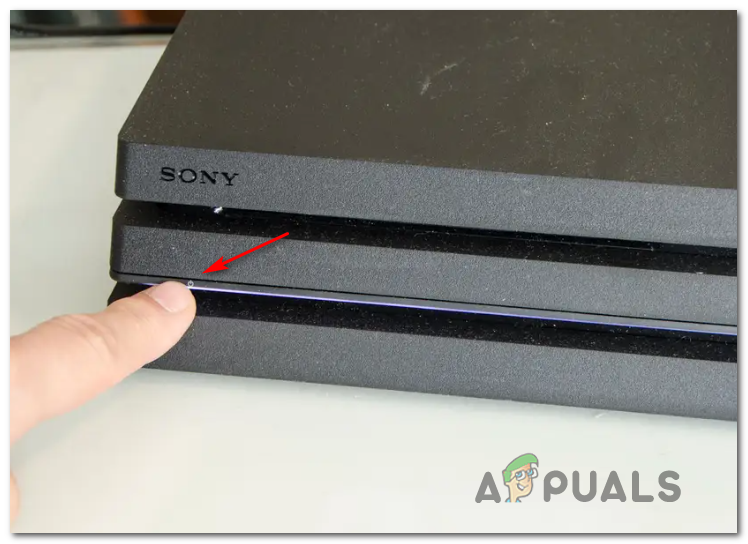
Power cycling PS4 - Once the console is fully turned off and you can’t hear any sound coming from your console, physically unplug the power cord from the outlet and wait for a minute or so before allowing the power capacitors to drain completely.
- After this period is over, connect your console back to the power source and boot it up conventionally.
- Once the next startup is complete, launch Battlefield 2042 once again and see if you’re still experiencing the same error code while the game attempts to connect to the EA servers.
Power Cycle Playstation 5
Power-cycling your Playstation 5 console is simpler than most of the other equivalents. All you have to do is press and hold on to the power button until the console is fully turned off, then disconnect the power cable to allow the power capacitors to drain themselves.
Follow the steps below:
- With your console turned off, press and hold on your Playstation 5 power button (on your console) and keep it pressed until you no longer hear any sounds coming from the machine.
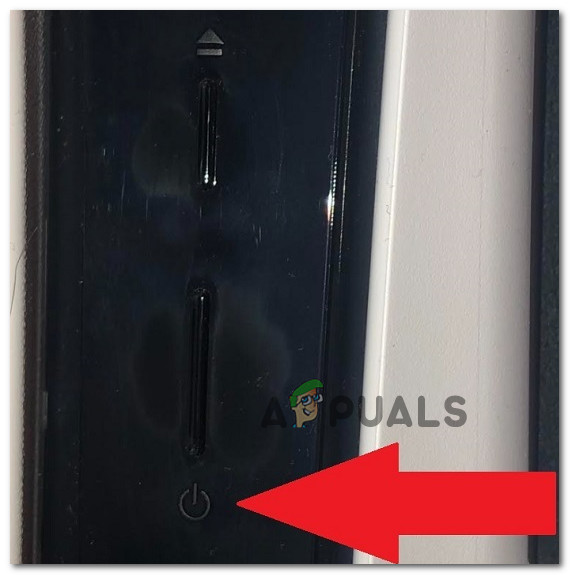
Turning off your Playstation 5 Note: Short pressing the power button will trigger a sleep cycle instead, so make sure you keep this button pressed.
- Wait until the power light stops flashing, then remove the power cable and leave the system like this for 20 minutes in order to drain the power capacitors.
- Once this period has passed, connect the power cable once again and start the system once again to see if the problem is now fixed.
- After your console boots back up, launch Battlefield 2042 once again and see if the problem is now fixed.
Power Cycle Xbox One and Xbox Series X
Triggering a power cycle procedure on Xbox one is different than most of the other consoles since you will be required to hold a physical button pressed for 10 seconds or more in order to trigger a power cycle procedure.
Follow the instructions below for specific instructions on how to do this:
- Start by making sure that your console is fully-powered on, then press and hold on the power button (on your console, not your controller). Keep that button pressed for about 10 seconds or until you notice that the front LED starts flashing intermittently.
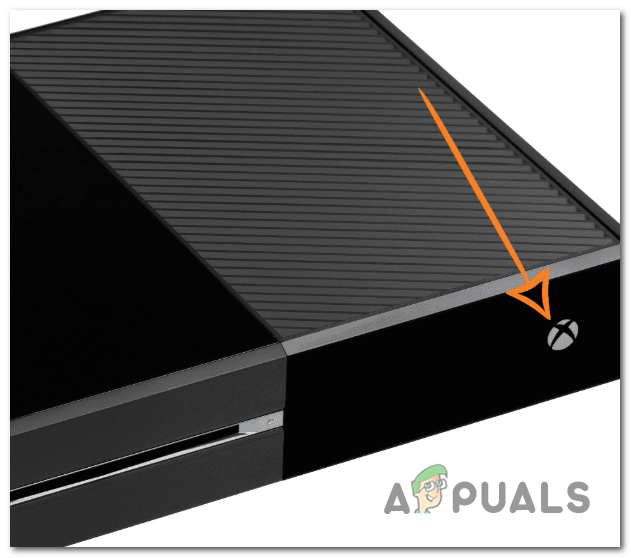
Pressing the power button on Xbox One - Next, wait for a full minute in order to give the power capacitors enough time to drain themselves before you attempt to start your console back conventionally.
Note: While you wait, you should also take the time to physically disconnect the power cord from the power cord. - Start the console once again and see if you spot the longer startup animation sequence. If you do get to see it, it’s confirmation that the power-cycling procedure was successful.

Xbox Startup animation - Once your console boots back up, start Battlefield 2042 once again and see if the problem is now fixed.
4. Forward the required ports
Another underlying issue that might be responsible for the “Load persistence data‘ error is a scenario in which the ports that the game is attempting to use are not actually opened so the connection with the game server cannot be established.
In most cases, the ports used by the games should be automatically handled by your router if UPnP is supported and enabled.
Note: If your router supports UPnP but you previously disabled it, follow this guide to re-enable Universal Plug and Play from your router settings. Once UPnP is enabled, reboot your network and the required ports should be automatically formatted.
On the other hand, if you’re using an older router model that doesn’t support UPnP, you’ll need to forward the required ports manually (depending on which platform you’re using to play Battlefield 2042).
Follow the instructions below to learn how to do it:
- Open your browser of choice and type one of the following addresses inside the navigation bar at the top and press Enter to access your router settings:
192.168.0.1
192.168.1.1
- Once you get to the initial login screen, enter the login details to access your router settings.
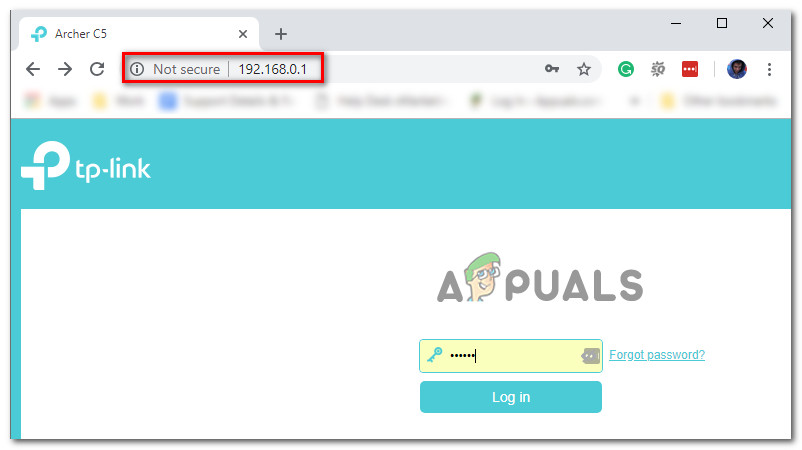
Accessing your router settings Note: Unless you established custom login credentials to your router, you should be able to complete the login process by using admin as username and 1234 as password. If these generic equivalent doesn’t work, click on Forgot password and recover your credentials or search online for specific router settings login credentials according to the router model that you’re using.
- Once you’re inside the router settings menu, expand the Advanced / Expert menu, then look for an option named Port Forwarding / NAT Forwarding.
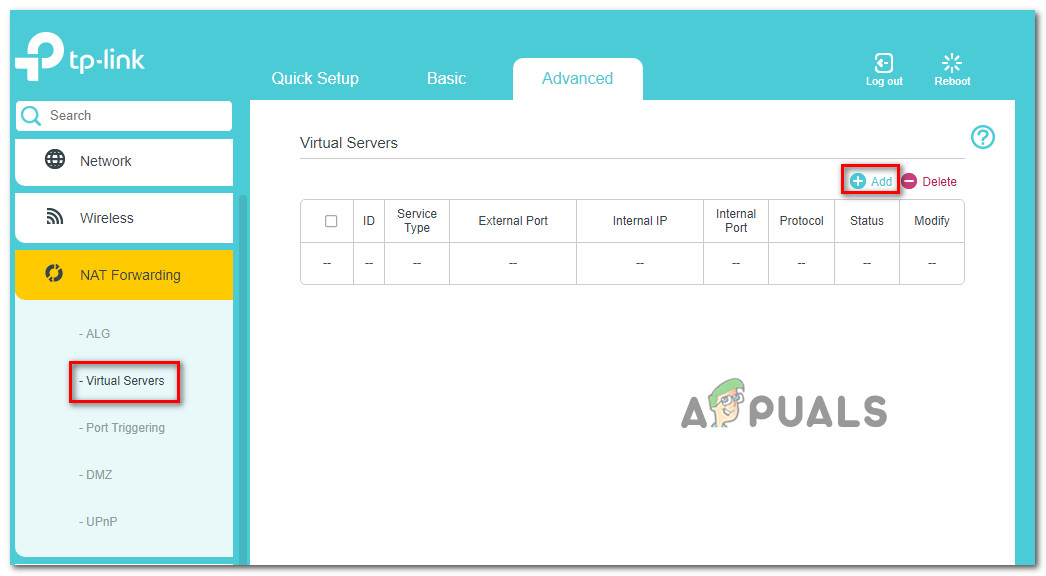
Port forwarding Note: Depending on your router model, your particular menu might look entirely different than the screenshots featured in this method.
- Once you successfully find the option that allows you to manually forward the ports used by Battlefield 2042, forward the following ports depending on the platform that you’re currently using:
Xbox One and Xbox Series X|S
TCP: 3074
UDP: 88, 500, 3074, 3544, 4500

PC
TCP: 5222, 9988, 17502, 20000-20100, 22990, 42127
UDP: 3659, 14000-14016, 22990-23006, 25200-25300

PS4 and PS5
TCP: 1935, 3478-3480
UDP: 3074, 3478-3479, 3659, 14000-14016
- Once you manage to forward the required ports, save the changes, then reboot your router before launching Battlefield 2042 once again and see if the problem is fixed or not.
If the same kind of issue is still occurring even after you forwarded the ports, move down to the final potential fix below.
5. Use a VPN network (PC Only)
If you’re experiencing this issue on PC and none of the methods above have proven to be effective in your case, one other thing you should try is to install and use a VPN to resolve a potential connectivity issue.
Keep in mind that there are situations where the connectivity to the EA server is affected by a level 3 ISP node. In this case, installing a VPN client should alleviate the connectivity problem (especially if you’re experiencing this issue on or off)
If you don’t have a favorite VPN client, we’ve made you a list of shortlisting VPN services that you should consider installing on your Windows PC:
Note: There are other tools that will do the same thing, but the options mentioned above include a trial program or a free account version so you can try them for free before making an investment.


