Fix: Unable to Change Priority in Task Manager
Often, having a PC or laptop that doesn’t have high specifications can lead to sub-par performance in several intensive games. You might get low frame rates and crashes if the game is demanding. A solution that users have applied is changing the game or program’s process priority to High from the Task Manager, which tells Windows to reserve a larger portion of its power for that process.
However, it sometimes happens that the Task Manager doesn’t allow you to change the priority. You will either get a message saying Access Denied, or the priority simply won’t change. This can occur with all processes on your system or with a specific process on all systems. If one process has this issue on multiple systems, it is the process’ fault and not much can be done. But if all processes on your system result in the same outcome, read on to see what you can do.
NOTE: For all the steps below, “make sure” you are logged in as Admin.
Method 1: Select “Show processes from all users” in the Task Manager
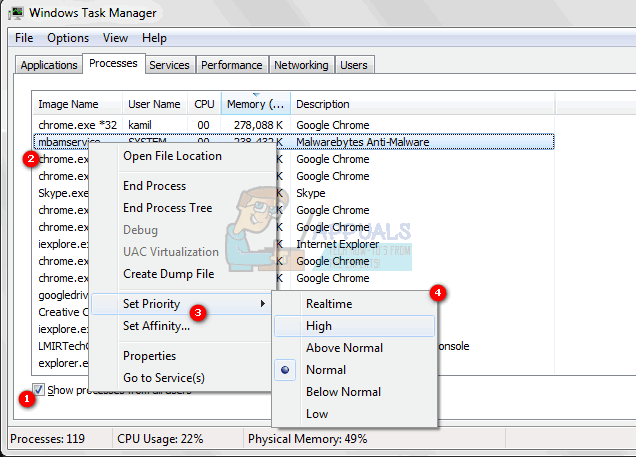
- Make sure you’re logged in as Admin.
- Start your program and open the Task Manager, as you did previously.
- Click on Show processes from all users to ensure processes are running as Admin.
- Try changing the priority now and see if that fixes the issue.
OPTIONAL: To split the load, set each instance to its own core by right-clicking the process, select “Set Affinity” and ensure only a single core is selected. Select the other core for the second instance. If you have a second hard drive, running the second instance from the second hard drive should also increase performance.
Changing the priority in the Task Manager can sometimes do more harm than good, as it may not leave enough CPU power for other processes on your system. You would be much better off upgrading your system to support the demanding games you’re trying to play. If, however, you still want to use your current system, use the aforementioned steps to change the game’s priority.
Method 2: Check if User Account Control is turned on
User Account Control is in place to ensure programs don’t damage your system. It will give you several prompts when you’re trying to install something or make a modification to your system to prevent you from accidentally doing something wrong.
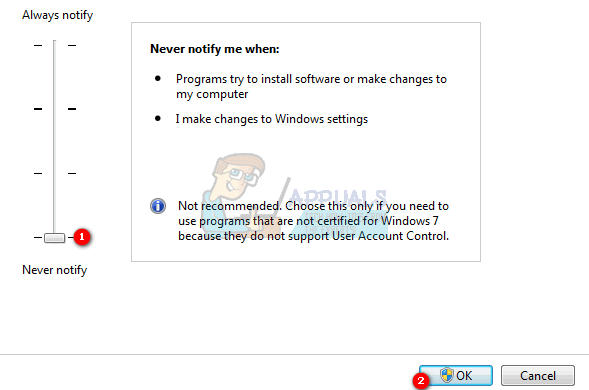
- Press the Windows key on your keyboard and type User Account Control, and open the option to change User Account Control settings.
- Set the bar to Never Notify to turn off the prompts. This should give you more control over your system, and you will be able to change the priority of your game.
Method 3: Boot into safe mode and check if the problem reoccurs
Booting into safe mode will disable numerous Windows services and features, but it will give you a clean slate that can help you get to the root of the problem more easily.
- Reboot your device.
- Before Windows boots, press F8 to boot into Safe Mode. On a PC running Windows 8/10, follow steps here.
- Choose Safe Boot and let Windows boot up.
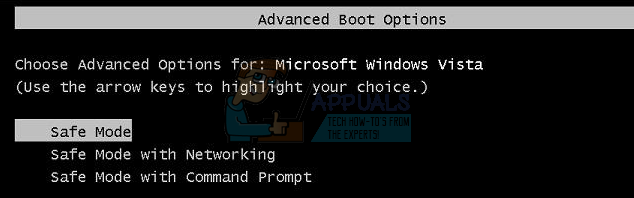
- Try switching the priority in the Task Manager.
- Then, reboot your PC and test.
thanks, working