Fix “Unable to Access Online Services” Error in Black Ops 6
When trying to launch the multiplayer mode in Black Ops 6, the game may get stuck on the “Connecting to online services” screen before displaying the error:
“Unable to access online services.”

This issue typically occurs due to internet connectivity problems that prevent the game from reaching Call of Duty’s servers. Most of the time, this error is linked to your side—such as a weak Wi-Fi signal, ISP-level restrictions, DNS failures, or network misconfigurations.
Some players have also reported that creating custom weapon loadouts with rare or bugged attachments in Zombie Mode can corrupt save data or configs, which then interfere with the Multiplayer server handshake by sending malformed configuration data that fails validation during connection initialization.
This is most common after recent patches where multiplayer and co-op modes share partial config files. Since most server connection errors are caused by network issues, you should begin with basic checks.
1. Check Call of Duty’s Server Status
Before troubleshooting locally, verify if Activision’s servers are online:
- Visit the official Activision Online Services page to see if Black Ops 6 servers are down or undergoing maintenance.
- You can also monitor server status via Activision’s X (Twitter) account for live outage updates.

If servers are down globally, you’ll have to wait until the issue is resolved by Activision. However, if the servers are up and restarting your router didn’t help, continue with the advanced solutions listed below.
2. Restart Your Router and Internet Equipment
Temporary ISP issues, DHCP conflicts, or router problems can interfere with game server connections by causing misrouted traffic, IP conflicts, or failed handshakes. ISPs may throttle or misroute data, while routers can overload with corrupted DNS or NAT cache. Restarting the router clears these issues and often restores a stable connection.
Tip: Use a wired Ethernet connection instead of Wi-Fi if possible to reduce packet loss or NAT conflicts.
- Turn off your router using the power button (if available).
- Wait 30–60 seconds to allow capacitors to discharge and memory to reset.
- Turn the router back on and wait for all lights to stabilize.
- Reconnect to the internet and try launching Multiplayer again.
3. Switch DNS and Flush Network Cache
Flushing your network cache and switching to a reliable DNS can fix issues where your system fails to resolve game servers correctly. Your system may retain old or incorrect address data for servers, which can block proper communication with game services.
Flushing the DNS clears this cache, and switching to public DNS servers like Google (8.8.8.8) or Cloudflare (1.1.1.1) ensures faster and more reliable name resolution. This is especially useful if your ISP’s DNS is slow, unstable, or blocking certain game traffic.
- Press Windows + S, type cmd, then right-click Command Prompt and select Run as administrator.
- In the Command Prompt, enter the following commands one by one, pressing Enter after each:
⚠️ These commands will reset all network configurations. If you’re using a VPN or custom proxy setup, you may need to reconfigure it afterward.
ipconfig /flushdns
netsh int ip reset
netsh winsock reset
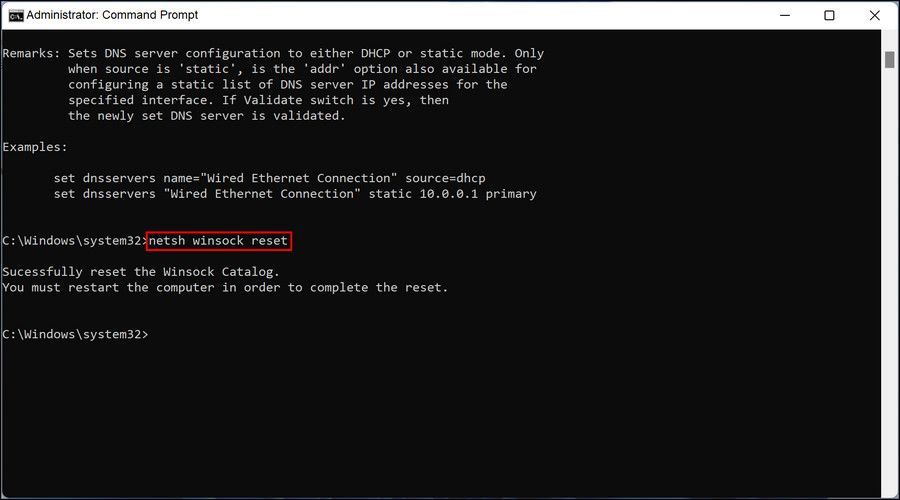
- Restart your PC after running these commands.
Next, change your DNS settings:
- Go to Control Panel > Network and Internet > Network and Sharing Center.

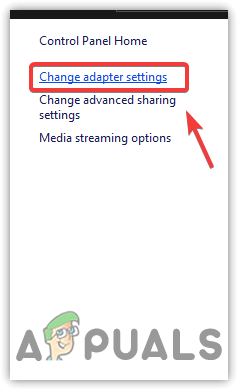
- Click on Change adapter settings from the left panel.
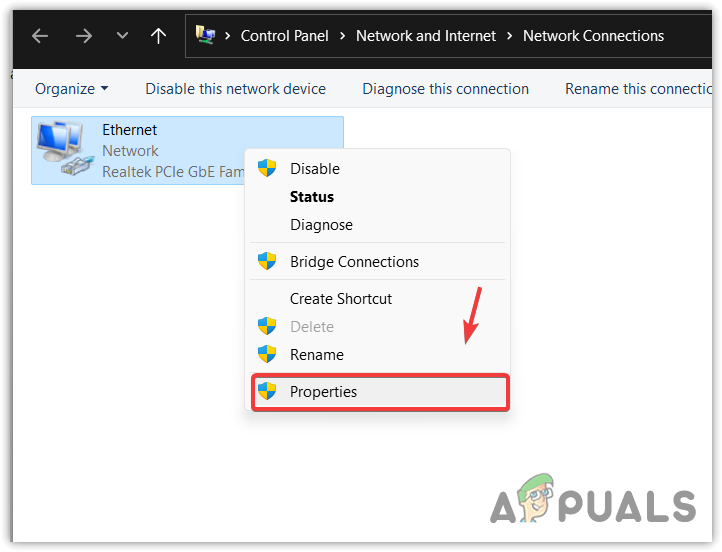
- Right-click your active network connection > Properties.
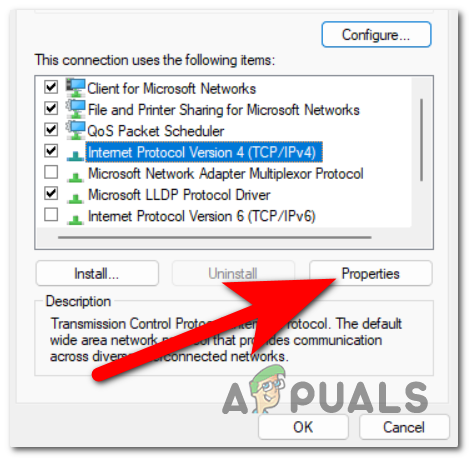
- Select Internet Protocol Version 4 (TCP/IPv4) and click Properties.
- Choose Use the following DNS server addresses and enter:Preferred DNS server: 8.8.8.8Alternate DNS server: 8.8.4.4
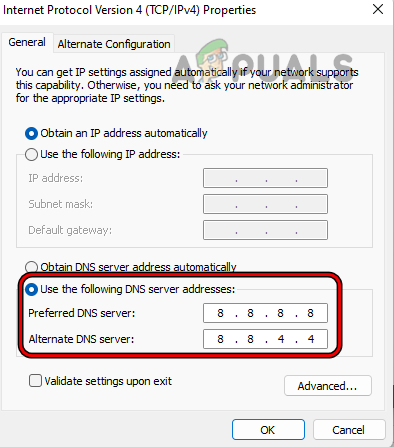
- Click OK to apply the changes.
4. Delete Custom Weapon Loadouts in Zombie Mode
If you’re struggling to connect to the Black Ops servers despite having a stable internet connection, the issue might be linked to a known bug involving custom weapon loadouts in Black Ops 6: Zombie Mode.
Based on player reports, some custom loadouts created in Zombie Mode can interfere with multiplayer connectivity, preventing the game from connecting properly. While the exact weapons or attachments causing the problem aren’t yet identified, deleting these loadouts has consistently fixed the issue.
The only confirmed solution right now is to delete your custom Zombie Mode loadouts and reset them to default. Though this might be frustrating, it has worked for everyone who’s tried it.
Note: Your loadouts are saved to the cloud, so reinstalling the game or switching consoles won’t remove them. To fix the problem, you’ll need to manually delete the custom loadouts from within the game.
- Launch Call of Duty: Black Ops 6 and navigate to the Zombies mode from the main menu.
- In the Zombies lobby, locate and select the Weapons tab at the top of the screen.

- Choose Loadouts to view your customized weapon setups.

- The system will display all your saved loadouts. Begin with your first loadout in the list.
- Select your primary weapon, then choose Build Options from the weapon customization menu.
- From the available actions, click Reset to Default to clear all modifications.

- This will strip all attachments, skins, and upgrades from your weapon, returning it to a clean, unmodified state.
If the game still fails to connect, go ahead and repeat the steps for all remaining loadouts.
5. Allow Black Ops 6 through Firewall
Windows Firewall controls how games connect to the internet securely. If your Black Ops 6 is connected via a public network in firewall settings, it will have specific restrictions when accessing the internet, leading to connection failure. When set to private, Black Ops 6 will communicate with your connected network and explicitly allow traffic over all ports efficiently.
- Search Firewall & Network Protection in the Windows search bar.

- Click Allow an app through firewall.

- This will open another window of Allowed Apps.
- Select to Change Settings and find Black Ops 6 in the apps and features tab.
- If Black Ops 6 is only allowed on Public networks, it may be restricted.
- Ensure the Private checkbox is also selected to allow full access.

- Click OK to close this window, reboot your system, and launch the game.
6. Exclude Black Ops from Windows Defender
Windows Defender often flags game anti-cheat applications as viruses or malware. In rare cases, Ricochet (Call of Duty’s anti-cheat) may be mistakenly flagged by Defender due to aggressive heuristics. To fix this, you need to exclude the Black Ops 6 game folder from the Windows Defender’s threat protection. When excluded, Defender will no longer detect Ricochet as a harmful application and let the game run its processes smoothly.
- Open Windows search with Window Logo Key + S, and type Windows Security.
- From the sidebar, go to the Virus and threat protection tab.
- Under the Virus & threat protection settings section, click on Manage Settings.

- Now scroll down until you find the Exclusions section, then select Add or remove exclusions.

- Once you are in the exclusion manager, press Add an exclusion button and choose Folder from its drop-down menu.

- Select the folder where your Black Ops 6 is installed, which will be named as COD HQ if downloaded through the Steam client.

- When you are done with the steps mentioned, launch the game and check if you load into multiplayer mode successfully.


