How to Turn Off Windows 11 Upgrade Screen in Windows 10?
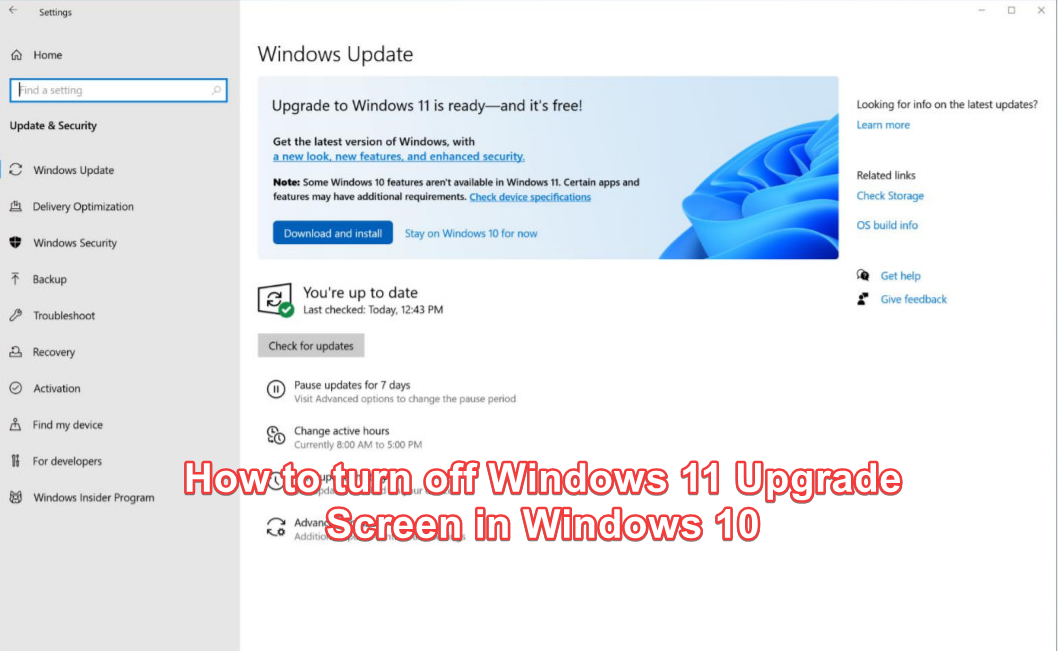
If you are running Windows 10, you might be seeing annoying popups, which Microsoft uses to force users to upgrade to Windows 11. Whether you meet the Windows 11 requirements or not, you will get annoying popups along with the Windows 11 update or upgrade screen in the Windows Update settings.
This article will help you remove the upgrade screen and ad popups without disabling the security updates. This means that by following the methods below, you will still receive security updates, but you won’t receive any feature updates, including the Windows 11 upgrade.
There are many ways to remove the Windows 11 upgrade screen and notification popups. You can use third-party applications for this purpose. However, we believe the following methods are enough to disable the Windows 11 upgrade screen without involving any third-party applications.
1. Modify the Registry Editor
By modifying the specific registry keys, you will be able to get rid of the Windows 11 upgrade screen and popups. This involves editing or creating registry entries to prevent the Windows Update utility from recommending upgrading to Windows 11.
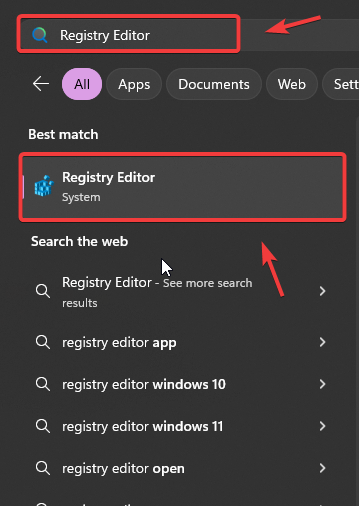
- Click the Start Menu and type Registry Editor.
- Navigate to the following path:
HKEY_LOCAL_MACHINE\SOFTWARE\Policies\Microsoft\Windows
- Right-click Windows, hover over New, and select Key. Name it as WindowsUpdate.
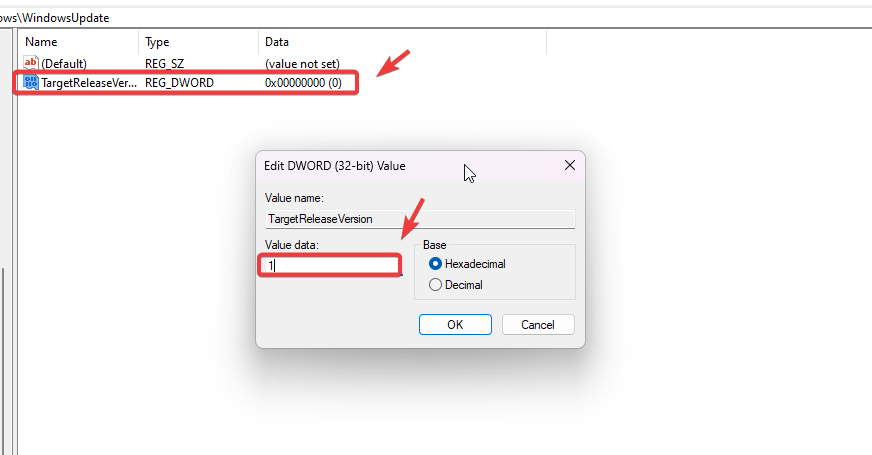
- In the right pane, right-click the empty space, hover over New, and select DWORD (32-bit) Value. Name it TargetReleaseVersion and change its value data to 1.
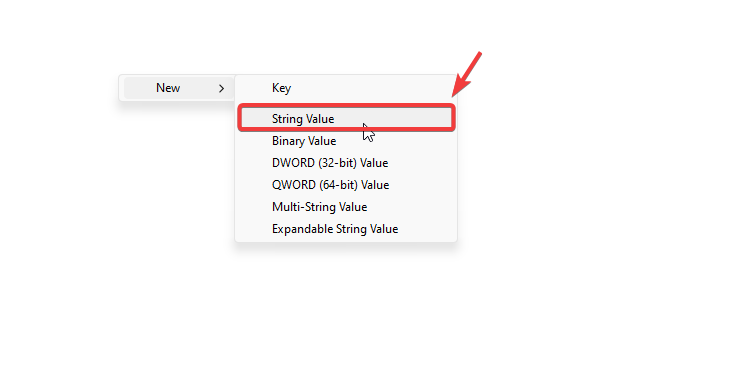
- Once done, right-click the empty space, hover over New, and select String to create a registry entry. Name it TargetReleaseVersionInfo and set the value data to your current Windows version. If you don’t know the current version of your Windows, follow the next steps to find out.
- Click the Start Menu and type About.
- Hit Enter to navigate to the About settings.
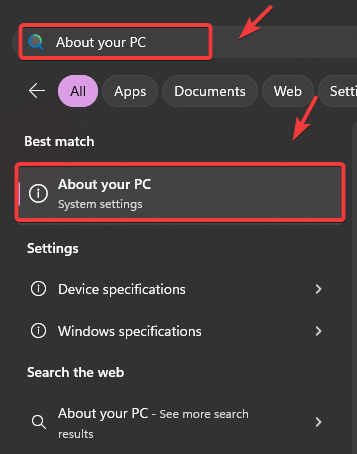
- Under the Windows Specifications section, you can see your Windows version.
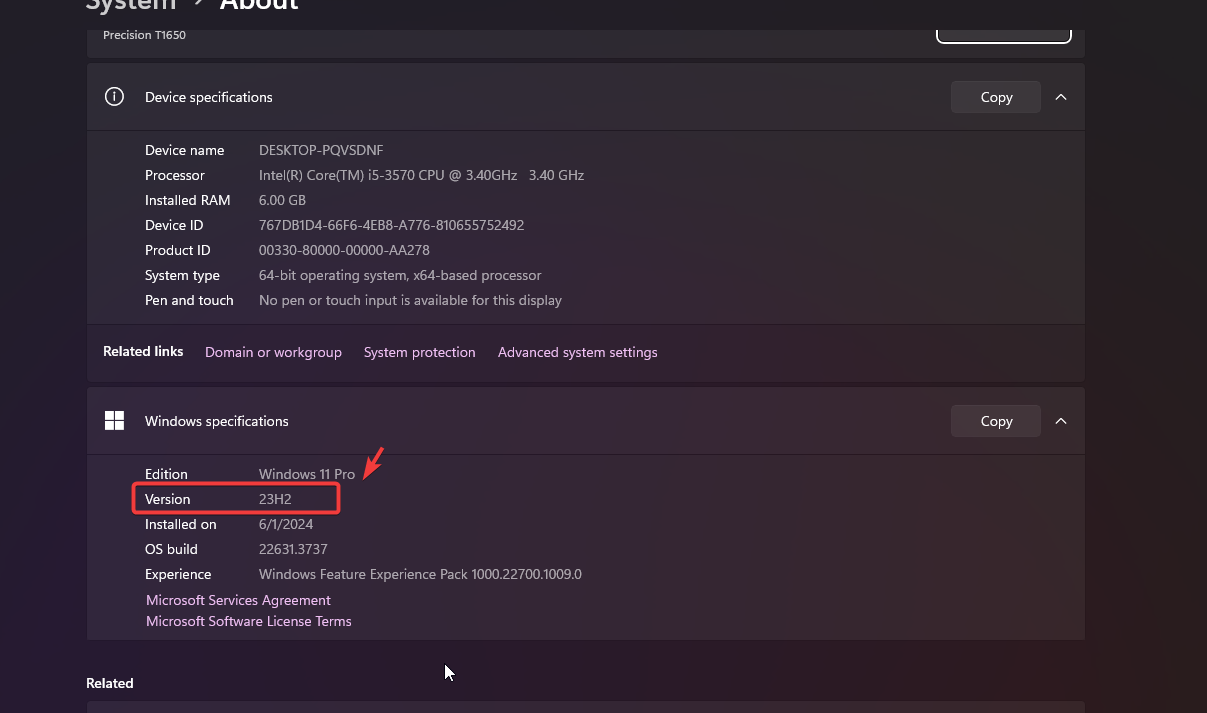
- Use it as the value data for the TargetReleaseVersionInfo registry key.
- Once done, restart your computer for the changes to take effect.
2. Use the Command Prompt
You can also disable the Windows 11 upgrade screen and notifications by just executing simple commands in the Command Prompt. The commands will create the TargetReleaseVersion and TargetReleaseVersionInfo with the appropriate inputs.
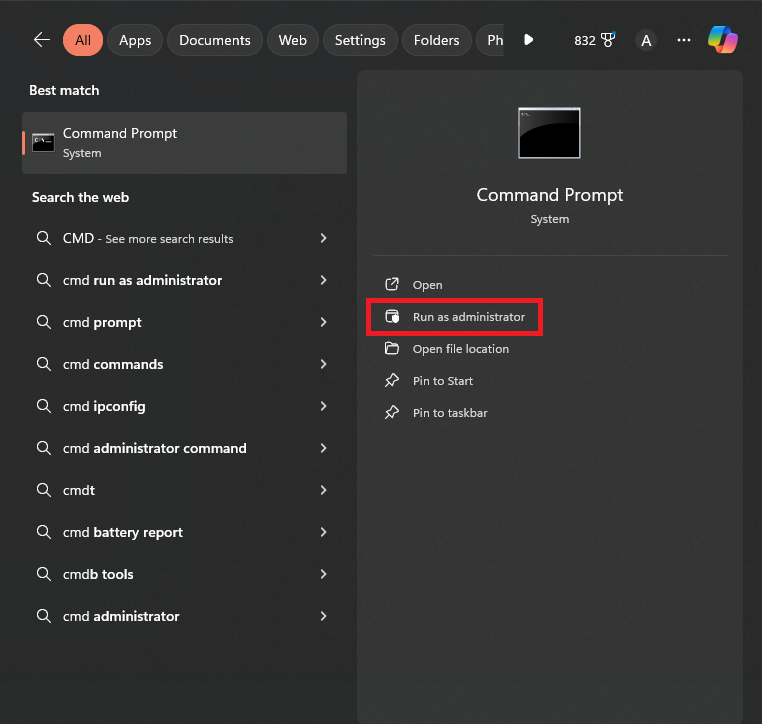
- Open the Start Menu and type Command Prompt.
- Right-click the Command Prompt and select Run as administrator.
- Now run the following commands one by one in the Command Prompt:
reg add "HKLM\SOFTWARE\Policies\Microsoft\Windows\WindowsUpdate" /v TargetReleaseVersion /t REG_DWORD /d 1 /f
reg add "HKLM\SOFTWARE\Policies\Microsoft\Windows\WindowsUpdate" /v TargetReleaseVersionInfo /t REG_SZ /d 23H2 /f
shutdown /r /t 0
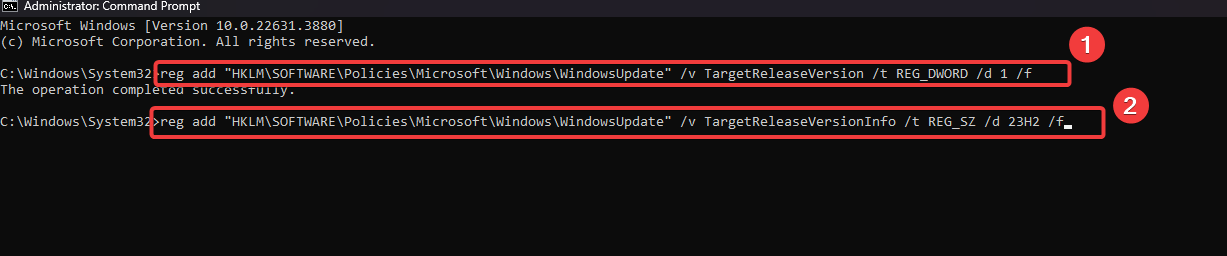
- Make sure to replace 23H2 with your current Windows version. To check the current version, follow steps 5 to 7 of the 1st method.
3. Use Group Policy Editor
If you have the Windows 10 Home edition, unfortunately, you cannot follow this method as the Group Policy Editor is not included in the Home editions. You can only use the Registry Editor, as we did in the 1st method, to disable the Windows 11 upgrade screen and notifications.
The Group Policy Editor allows users to manage and configure Windows operating system settings, such as configuring and disabling Windows updates. We can use the Group Policy Editor to block the Windows upgrade screen and popup ads.
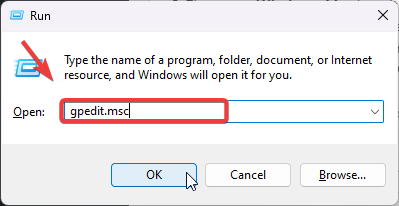
- Press the Win + R keys simultaneously to open the Run program.
- Type gpedit.msc in the input box and click OK to open the Group Policy Editor.
- Navigate to Computer Configuration > Administrative Templates > Windows Components > Windows Update > Windows Update for Business.
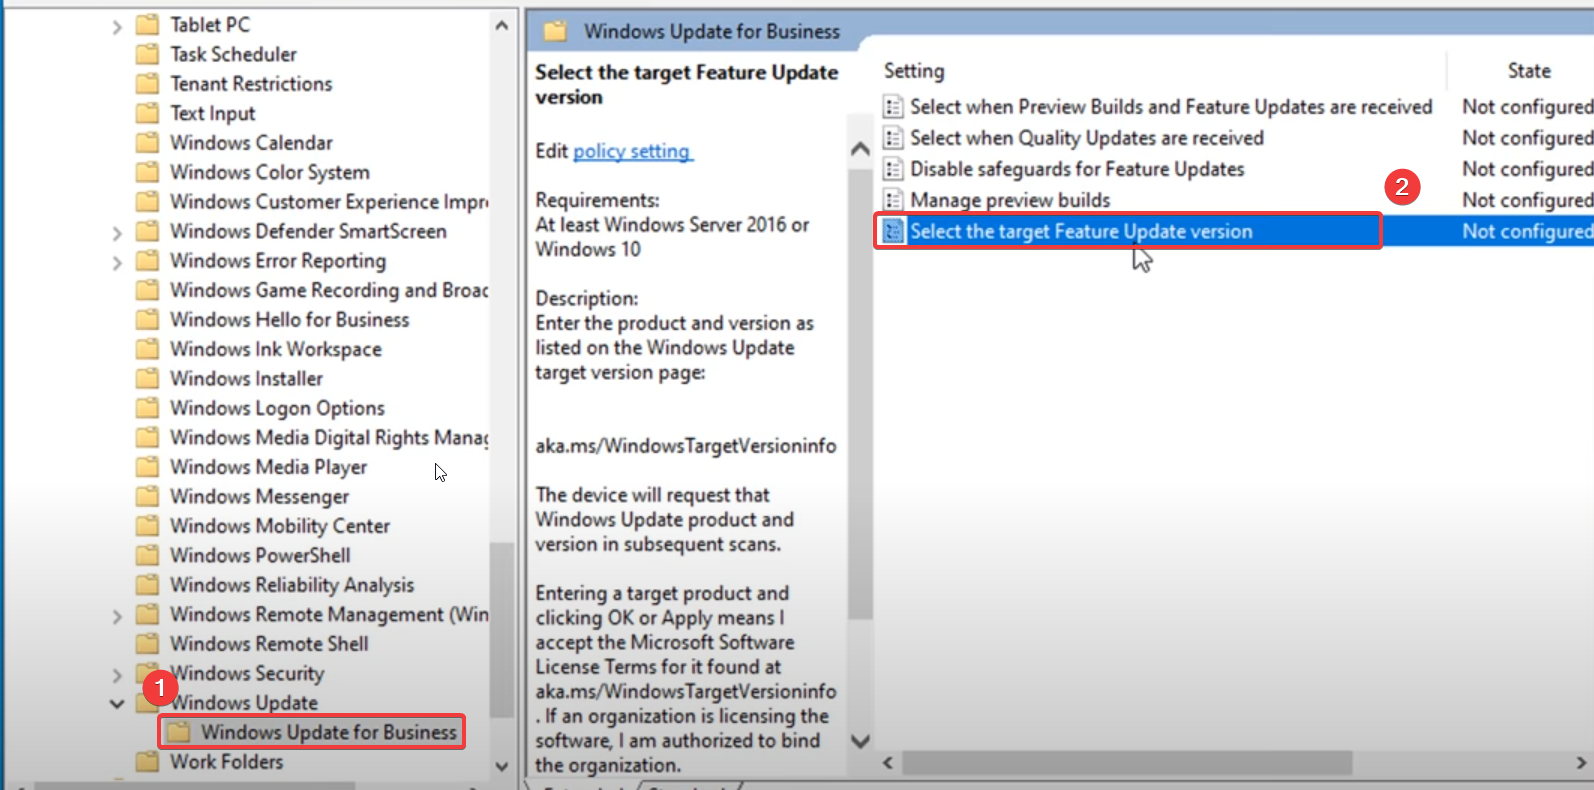
- In the right pane, you will see Select the target Feature Update version. Double-click on it to view its settings.
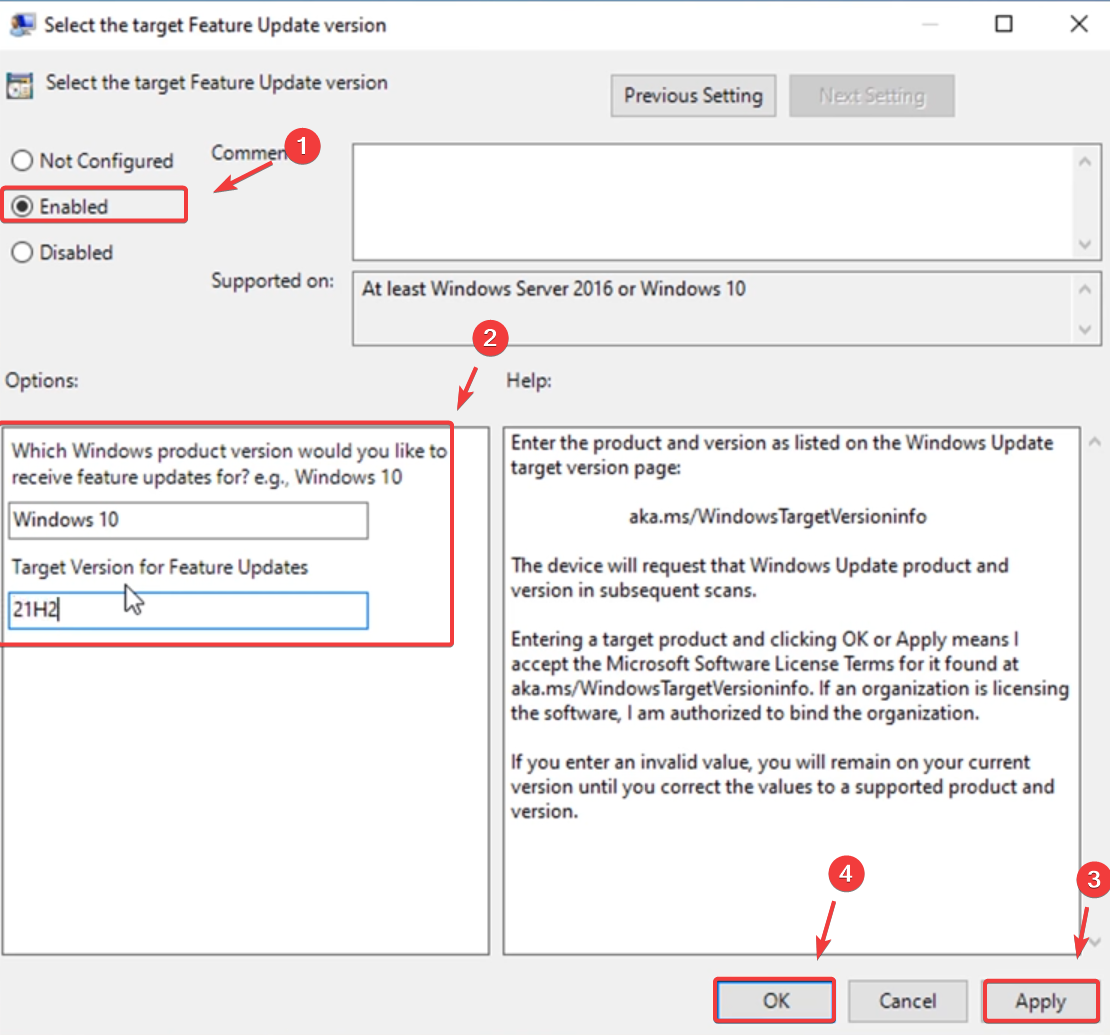
- Type Windows 11 where it says Which Windows product version would you like to receive a feature update for? and type your current Windows version in the Target version for feature updates. To check the current Windows version, follow steps 5 to 7 of the 1st method.
- Once done, click Apply and click OK to save the settings.
- Now, you need to restart your PC to update the policies.
- Once you have done this, you should not see the Windows 11 upgrade screen or any ads popping up.


