How to Fix Ticketmaster Error Code 0011
The error code 0011 on Ticketmaster occurs when you are trying to buy tickets. This can happen due to various reasons including the website cookies stored on your computer, third-party extensions installed on your browser, and more.

In some scenarios, the issue can occur due to security protection put in place by the website where it plants a cookie which causes the error. We have mentioned several different methods down below that you can use to resolve the error message. Let us start right away.
1. Clear Ticketmaster Cookies
The first thing you should do when starting to troubleshoot the error code 0011 is to clear your website cookies. In some scenarios, the problem can arise due to corrupted cookies which prevent the checkout procedure from completing properly.
This can, sometimes, be caused by a security implementation of Ticketmaster. If you refresh the page while trying to checkout, the website can plant a cookie which restricts your access to checkout pages. In such a scenario, you can resolve the issue by clearing the cookies of the website.
Before clearing the cookies, make sure to log out of your Ticketmaster account. Once you do that, follow the instructions below to clear out the cookies:
- First, open the Ticketmaster website in a new tab.
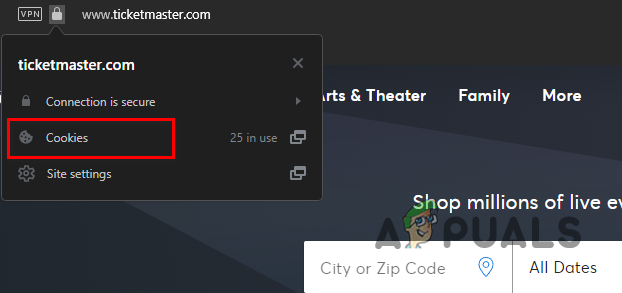
- After that, click on the Lock icon in the address bar before the Ticketmaster address.

Opening the Site Information Menu - From the menu that appears, click on the Cookies option.
Opening the Site Cookies Menu - To delete the cookies, click on each cookie one by one on the Allowed tab and then choose the Delete or Remove option.
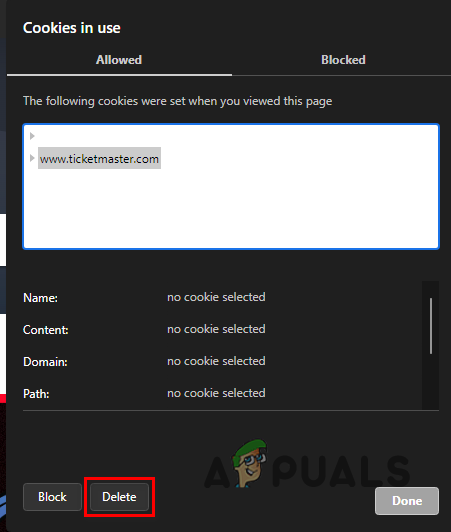
Deleting Ticketmaster Cookies - Once you do that, restart your browser.
- After restarting your browser, head to Ticketmaster’s website and log in.
- See if the issue still occurs.
2. Clear Browser Cache
In some scenarios, the problem may not go away by only removing the website cookies. This happens when the security protection is enforced via a cached file on your computer which stops you from buying tickets on the platform.
If this scenario is applicable, you can resolve the issue by deleting the browser cache on your computer. Clearing the browser cache is completely safe since it is temporary by nature, and is cleared out by the browser periodically as well.
The procedure for clearing out the browser cache can vary slightly depending on the browser that you use. We have listed down the most famous browsers, so follow the instructions of your respective browser.
2.1. Google Chrome
- First, open the Google Chrome browser on your computer.
- Then, click on the More menu (three-dot icon) in the top-right corner.
- From the drop-down menu, choose the Settings option.
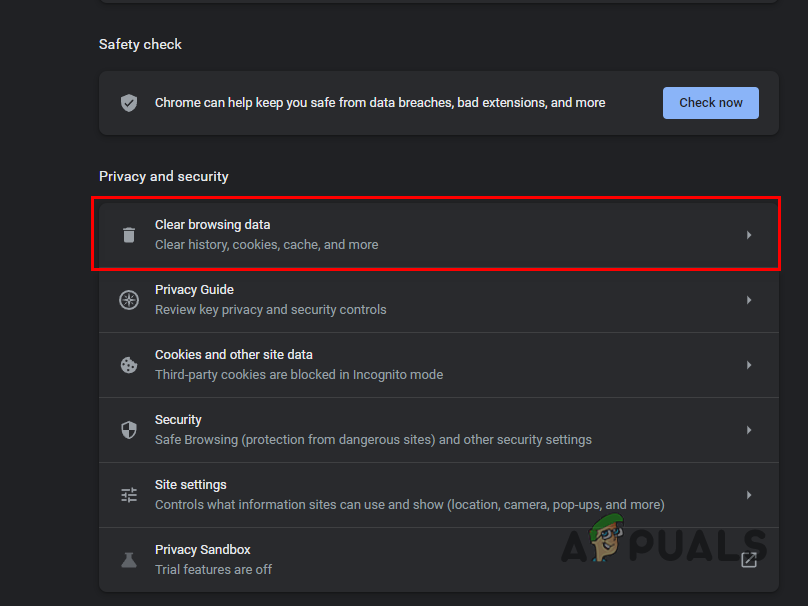
- On the left-hand side, switch to the Privacy and security tab.

Navigating to Privacy and Security - After that, click on the Clear browsing data option.
Clear Browsing Data on Chrome - On the follow-up dialog box, choose All Time as the Time range.
- With that done, make sure the Cached images and files, Cookies and other site data options are checked.
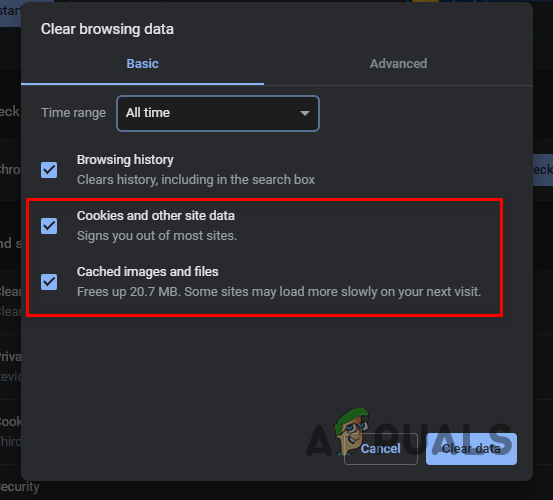
Clearing Cache on Google Chrome - Finally, click the Clear data button.
- Once you do that, restart your browser and see if the issue goes away.
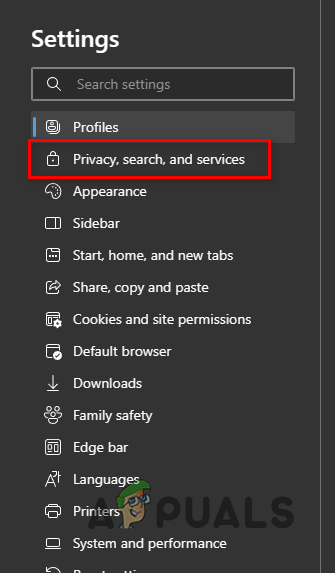
2.2. Microsoft Edge
- Open Microsoft Edge on your computer.
- Click on the More menu (three dots) in the top-right corner.
- Then, navigate to Settings from the drop-down menu.
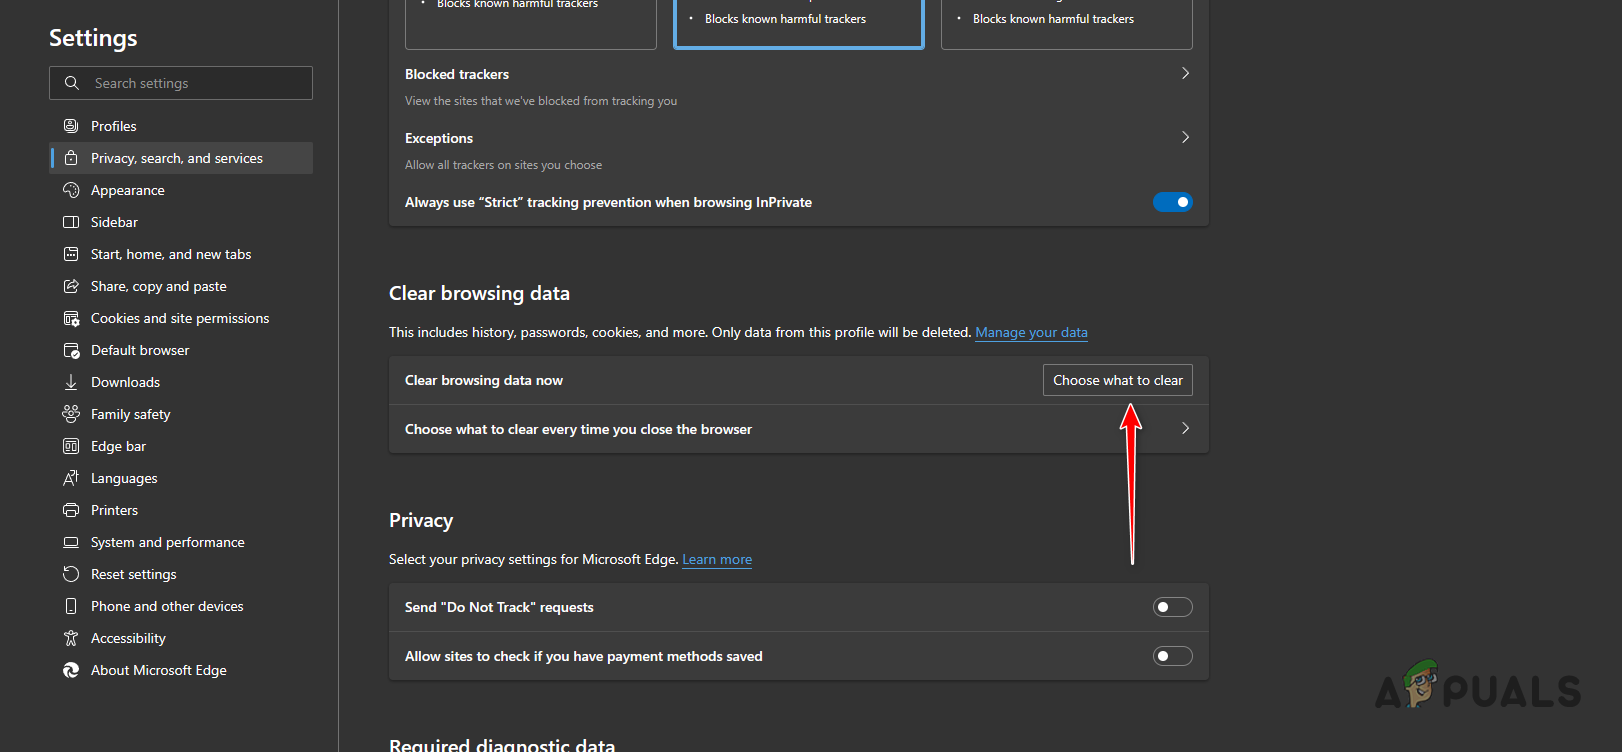
- Switch to the Privacy, search, and services tab.
Navigating to the Privacy, Search and Services Tab - Click on the Choose what to clear option next to Clear browsing data now.
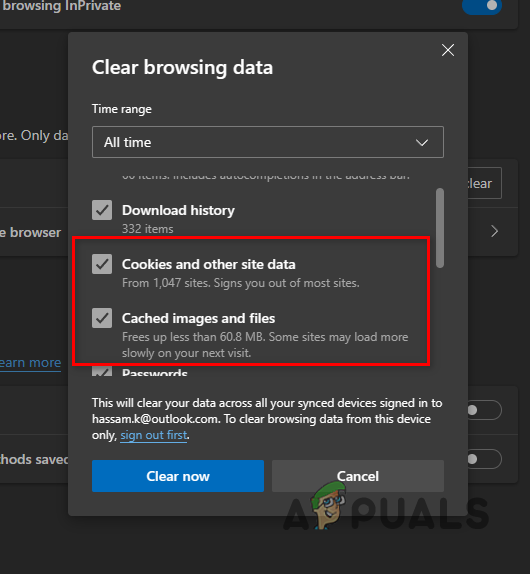
Clear Browsing Data on Microsoft Edge - Tick Cached images and files, Cookies and other site data and then click the Clear now button.
Clearing Browsing Cache on Microsoft Edge - See if that fixes the issue.
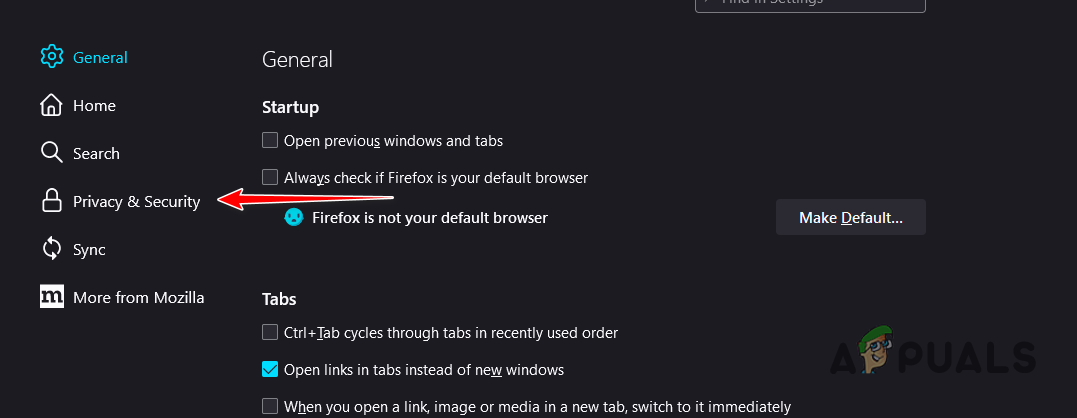
2.3. Firefox
- Start by opening Mozilla Firefox on your PC.
- Click on the More menu icon in the top-right corner.
- From the drop-down menu, choose Settings.
- Switch to the Privacy & Security tab.
Navigating to Privacy and Security - After that, click on the Clear Data option.
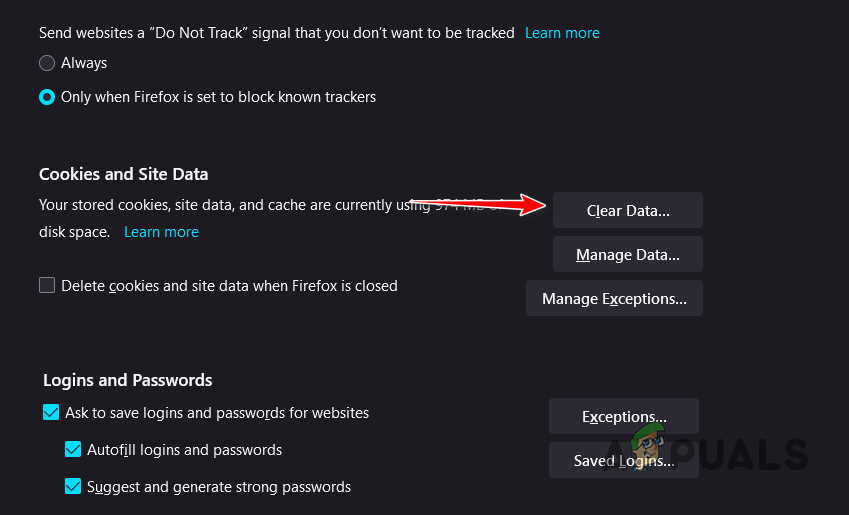
Clearing Firefox Data - Make sure Cached Web Content, Cookies and Site Data are checked.
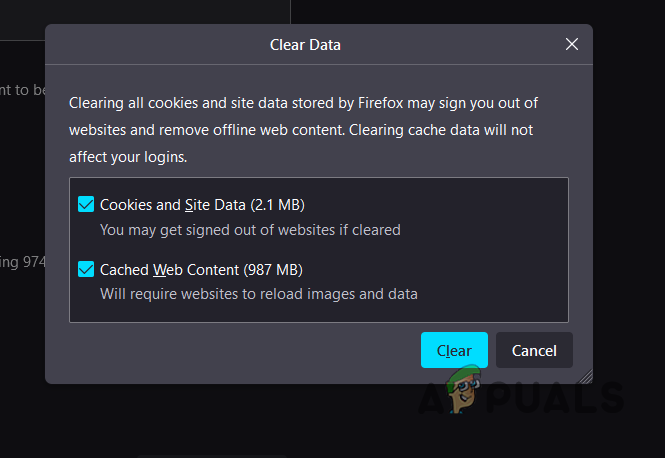
Clearing Cache on Firefox - Finally, click the Clear option.
- See if that resolves the problem.
3. Use Incognito Mode
Another possible reason for the error code 0011 to occur on Ticketmaster is the third-party extensions installed on your browser. This is because Ticketmaster is known to not tolerate certain add-ons which is why having them on your browser can give rise to various errors.
In such a scenario, you can resolve the issue by using incognito mode. By default, all of the third-party extensions installed on your browser are disabled in incognito mode. Therefore, if the issue is caused by a third-party add-on, the problem should go away in incognito or private mode.
If the problem does not go away in incognito mode, move to the following method below.
4. Try a Different Browser
In some scenarios, you can also mitigate the issue mentioned above by using a different browser on your computer, or mobile. This can happen when the problem is specific to a certain browser due to its settings or something similar.
In such a scenario, using a different browser can resolve the issue with purchasing tickets on Ticketmaster. Therefore, use a different browser on your PC to purchase tickets on the platform to see if the error occurs. If the problem persists, move to the next method below.
5. Disable Third-Party VPN
Finally, if none of the above methods has isolated the issue for you, the issue might be caused by a third-party VPN in the background. VPN services are known for hiding your identity online. However, they can often cause issues with simple requests you make to web servers.
If this scenario is applicable, you can resolve the issue by simply disabling the third-party VPN on your computer. If you have added a VPN connection to your Windows internet settings, you will have to remove the VPN connection to resolve the issue.
Follow the instructions down below to remove a VPN connection:
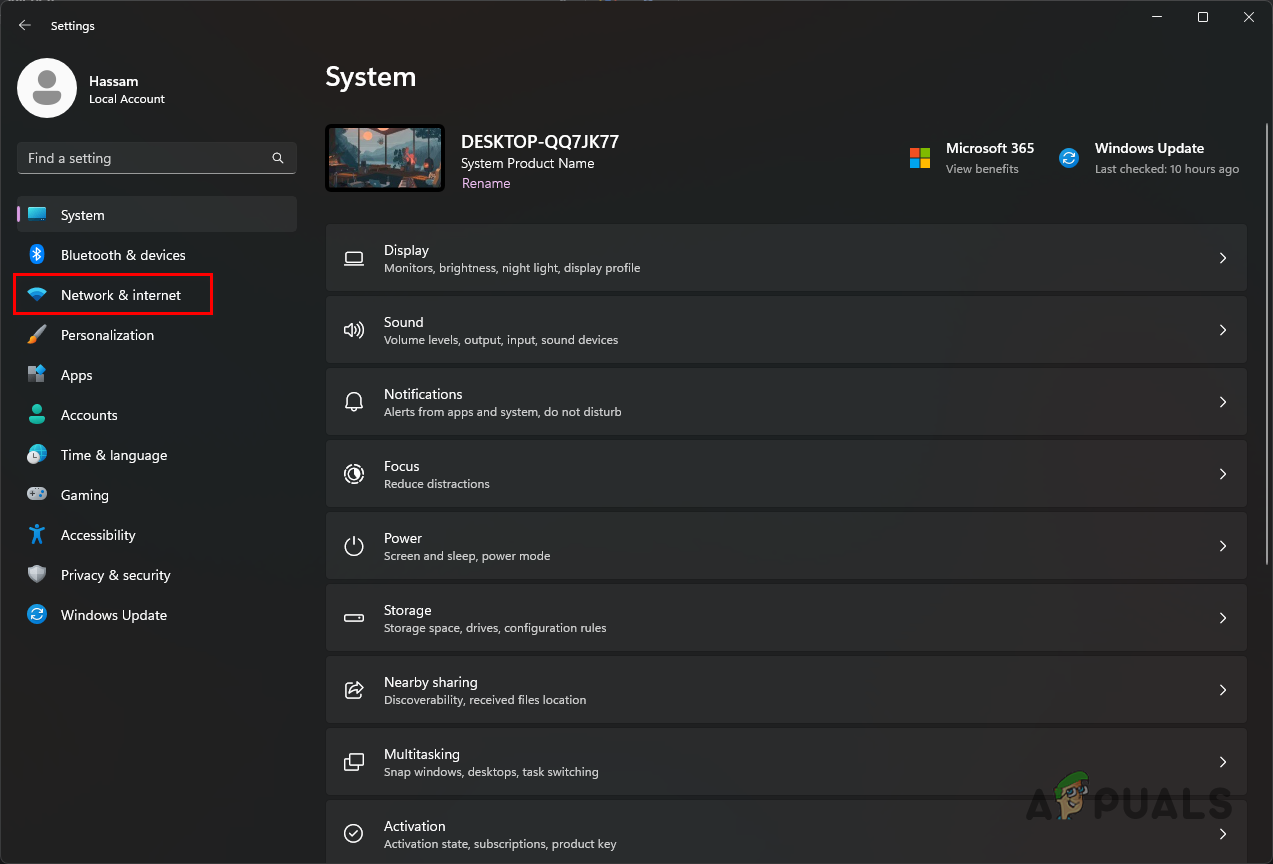
- First, open the Windows Settings app by pressing the Windows key + I on your keyboard.
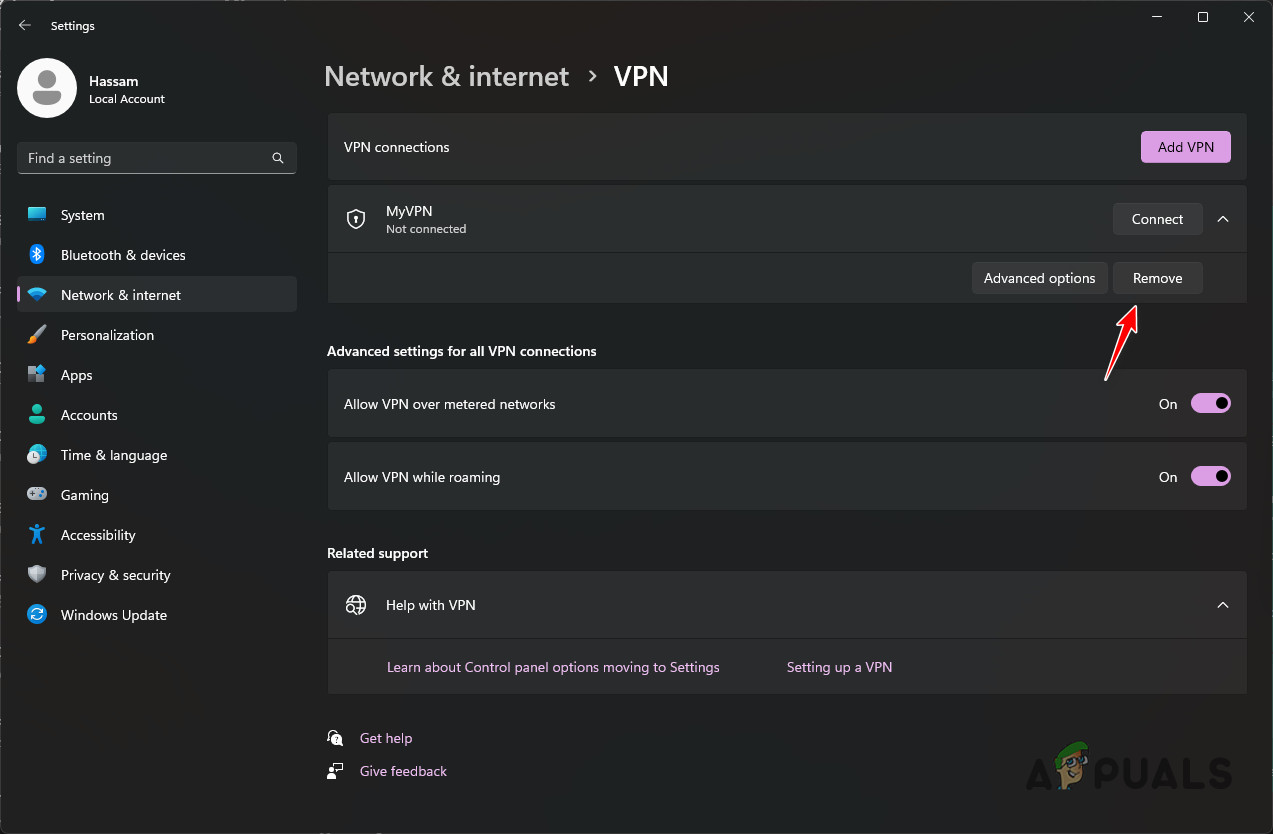
Windows Settings - In the Settings app, navigate to Network & Internet > VPN.
Navigating to Network and Internet Settings - After that, click on the down arrow icon next to your VPN connection.
- From the additional options shown, click on the Remove button.
Removing VPN Connection - Once you do that, try purchasing tickets again to see if the issue has been resolved.