FIX: The task image is corrupt or has been tampered with
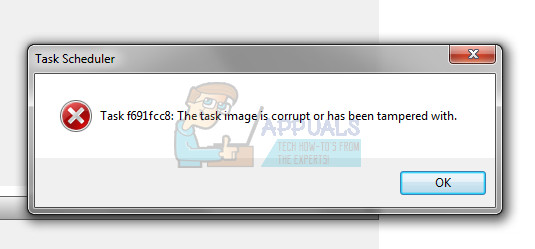
The 0x80041321 error is an error with the Task Scheduler service. The message that comes with it is “The Task image is corrupt or has been tampered with”, and it tells you that you are dealing with a corrupt scheduled backup task. The Task Scheduler service is responsible for the scheduling, and it is possible to try to prepare tasks without it since it works with the file system to store information. However, it may not recognize some of the tasks, and it is highly likely to refuse running tasks that have been messed with, resulting in the aforementioned message.
This error usually appears when you’re trying to configure a backup of your Windows 7 OS, and without fixing it, you won’t actually get very far, as Task Scheduler recognizes the image as corrupt and refuses to do anything with it, rendering your stuck, and the image useless.
There are a few methods that you can try to fix this issue, and they all in some way reset the Task Scheduler task or delete the image, so it can create a new, non-corrupt one and continue working. You can try any, or all of the methods mentioned below, one of them will surely help you fix your problem.
Method 1: Refresh ‘User_Feed_Synchronization’
The ‘User_Feed_Synchronization’ task is the task that updates RSS feeds in Internet Explorer 7/8. However, since it is also an automated task and works with the Task Scheduler, disabling and enabling it may help your issue. For this, you will need an elevated command prompt, Click Start -> Type cmd and choose Run As Administrator. In the window that opens, type the following commands, each one followed by pressing Enter on your keyboard:
msfeedssync disable
msfeedssync enable
These commands will disable, and then enable, respectively, the User_Feed_Synchronization task. Once you’re done, close the elevated command prompt and try backing up again.
Method 2: Delete the WindowsBackup file
Option 1: Manually, via the file explorer
If this file is corrupt, the Task Scheduler will refuse to work with it. What you can do is locate it, manually delete it and let the Task Scheduler create a new one. The first thing you should do is navigate to the folder where the file is located. Open My Computer, and open the partition where your Operating System is installed (usually the C:\ drive). Once inside, navigate inside the following folders:
Windows -> System32 -> Tasks -> Microsoft -> Windows -> WindowsBackup
Inside the folder, you will see the WindowsBackup file you need to delete. Before you delete it, however, take a backup on a different location – this will make sure you still have the file in case something goes wrong. Once you’re done with the backup, delete the file. Try backing up your system again, and see whether the issue appears again.
Option 2: Via an elevated command prompt
You can open an elevated command prompt by opening the Start menu, and typing cmd. Right-click on the result (cmd), and select Run as Administrator. You will need to navigate to the WindowsBackup with the following command:
cd %windir%\system32\tasks\Microsoft\Windows\WindowsBackup
Now that you’re inside the correct folder, type the following commands to delete the files:
del AutomaticBackup
del “Windows Backup Monitor”
When you’re done with this, you should close the command prompt and restarting the backup again, by opening the Backup and Restore Center from the Control Panel. You should now be able to perform a backup without any issues.
Method 3: Delete the task from the Task Scheduler
Deleting the task does pretty much the same thing as deleting the files from the WindowsBackup folder, so it’s good to know this option as a backup method. First you need to open the Task Scheduler, and the simplest way to do this is by pressing Start on your keyboard, typing Task Scheduler and hitting Enter. In the window that opens, you will see a navigation pane to the left. Use the dropdowns to navigate to:
Task Scheduler Library -> Microsoft -> Windows -> WindowsBackup
Once you’re inside this folder, delete both the Automatic Backup and the Windows Backup Monitor tasks. When done, close the Task Scheduler, and try to restart the backup from the Backup and Restore Center.
Method 4: Delete the Schedule key and all of its subkeys from the registry
If you feel safe editing and modifying the registry on your computer, this is another method that helps with the 0x80041321 issue. You might want to back up your registry, just in case.
First things first, open the Registry Editor. This is done by pressing simultaneously Windows and R on your keyboard, typing regedit in the Run window that opens, then press Enter. To the left you will see a navigation pane, use it to browse to the following location:
HKLM\SOFTWARE\Microsoft\Windows NT\Current Version\Schedule
Delete the Schedule key, along with its subkeys. Save your changes and exit the registry editor. You can now try again to see whether the Task Scheduler works as it’s supposed to.
The 0x80041321 error message has become a common sighting, however it is nothing to be afraid of. You can use any of the aforementioned methods to help you solve it, after which you will be able to proceed with your Windows backup without any problems.
Please note that in Method 1, you have the following sentence: “For this, you will need an elevated command prompt, which we have described how to open in the previous method.” There was no “previous method” since this is method 1. I have no idea what I am supposed to open. Please explain everything thoroughly for those of us who aren’t tech savvy.
Thank you;
Laura K