How to Sync Your Chromebook Downloads Folder with Google Drive
If you own a Chromebook, you probably have all your documents and media on the cloud. With Chrome OS, Google wanted us to get used to living off the cloud. The Downloads folder in the Files app is the only way to access local storage on Chrome OS. It is also the default location for Chrome downloads (duh). Today, we are going to try to synchronize the Downloads folder to Google Drive, so that all your downloaded files are backed up on Google Drive. But wait, why do we want to move the only localized folder on your Chromebook to the cloud? Here’s why :-
Chromebooks have a reputation for terribly low storage space. When the 16/32 GB of local storage starts getting close to the limit, Chrome OS stops functioning properly. For a detailed list of problems with less disk space, click here.
It is fairly easy for anyone to accidentally format (or power-wash in Chrome OS lingo) the Chromebook, erasing all your local data. For people with developer mode on, formatting literally just takes the press of a single button on the startup screen.
Files in the local Downloads folder can’t be searched through the inbuilt Google search box. If you haven’t tried searching for files from the search box, you should. For more search box features, look here.
Now that you’re concerned about that local Downloads folder, you will be delighted to know that the procedure to set up a Downloads folder synced with Drive is fairly simple :-
Create a new Drive Downloads folder
Open the Files app on your Chromebook, and navigate to My Drive. When you’re there, create a new folder called Drive Downloads. Press CTRL + E to create a new folder.
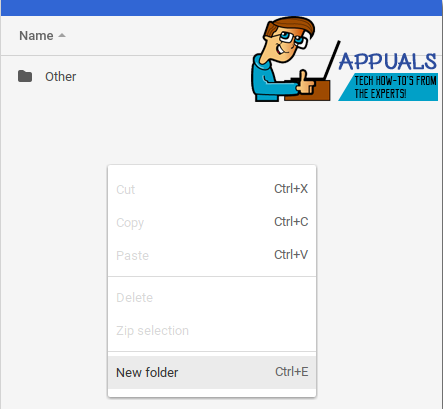
Pin the new folder to the sidebar
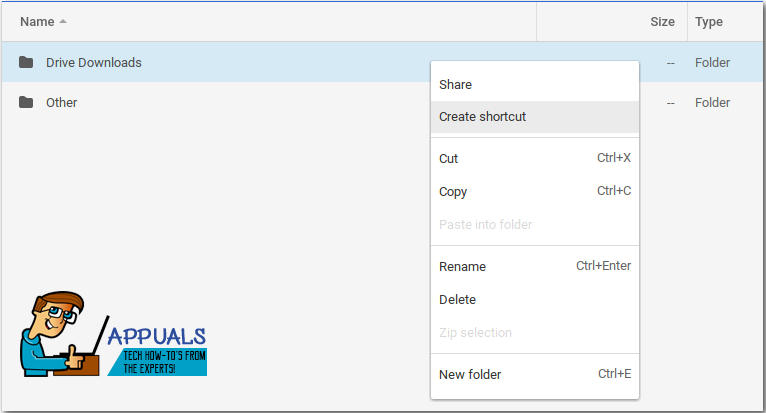
Once your folder is created, right-click on it. From the context menu, click on Create shortcut.
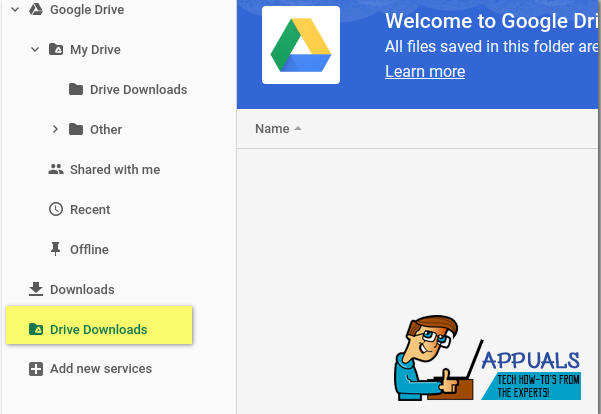
Your new Drive Downloads folder should now appear just below the Downloads folder in the sidebar of the Files app.
Change Chrome’s default download location
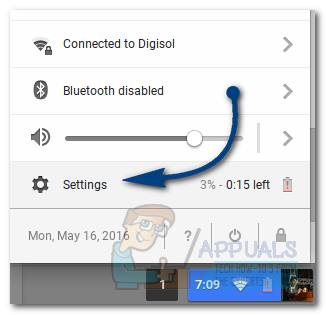
On the right side of the shelf at the bottom, there’s an options menu where you can access Wi-fi and bluetooth options, among other things. Go there and follow these steps –
In the options menu, click on Settings.
Scroll down to the bottom of the window and click on Show advanced settings
In the advanced settings, you will find the Downloads category. From there, change the download location to the new Drive Downloads folder that you created.
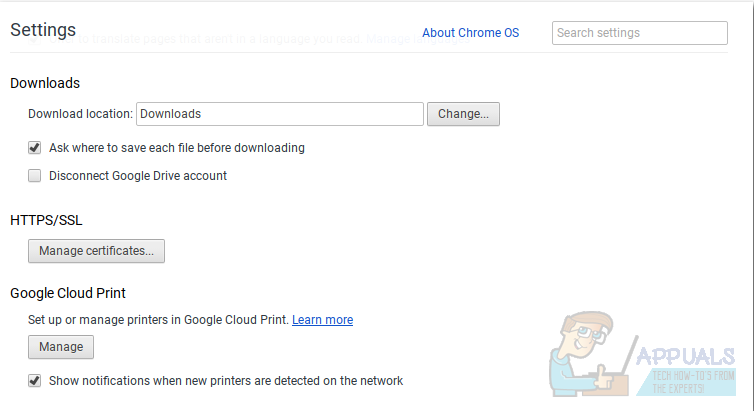
Alternatively, you can also choose to ask where to save each file before downloading. This option gives you the freedom to choose where to download each file individually. The advantage with this option is that you can choose to download important documents on the Drive folder and large media files on the local Downloads folder.
That’s it. You now have a Downloads folder synced with Google Drive. Congratulations on not losing your downloads and having to search for them all over the internet ever again.