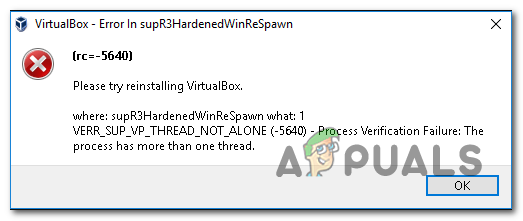
The ‘Error in supR3HardenedWinReSpawn’ issue is encountered with Oracle Virtualbox Installations – typically a couple of seconds after attempts to start their virtual machine. Once this problem starts occurring, every new virtual machine that is created will show the same error message (making Virtualbox completely unusable).
One of the most common causes that will cause this type of behaviour is a missing driver (VBoxDrv.inf). It’s possible that due to some permission issues, the installation of this crucial driver doesn’t complete during the initial installation. In this case, you can fix the problem by installing the VBoxDrv.inf manually.
Another potential cause that might spawn this particular error is a Registry inconsistency that points to the wrong driver directory. If this scenario is applicable, you can fix the issue swiftly by doing a registry check and adjusting the ImagePath string in case the directory is wrong.
If you started encountering the issue the very first time you tried to launch the VM, it’s likely that you’re seeing the error due to the fact that the VirtualBox VM doesn’t have enough RAM to work with. In this case, you can fix the issue swiftly by accessing the VM Settings and adjusting the allocated RAM.
There are a plethora of problems associated with the usage of the Default Paravirtualization option. It’s possible that it’s not supported by the OS you are trying to emulate. To fix the issue in this case, you will need to access your virtual machine settings and change the Paravirtualization from Default to KVM.
If you’re using an older PC configuration, it’s possible that hardware virtualization is disabled by default. In case your machine is unable to substitute this technology, an error might get thrown at every virtual machine startup. To fix the problem, simply access your UEFI / BIOS settings and ensure that Virtualization is allowed.
There are a lot of issues associated with VirtualBox version 5.2.6. If you’re still using it, chances are you’re suffering from the same glitch that caused the problem from thousands of users. The easiest way of fixing the issue, in this case, is to uninstall the current Virtualbox version and then install the latest stable build available.
1. Install the VBoxDRV.inf
As it turns out, one of the most common causes that will cause the VirtualBox ‘Error in supR3HardenedWinReSpawn’ is a missing driver (VBoxDRV.inf). There is a chance that due to some permissions issue, the main VirtualBox application can install without this key driver.
If this scenario is applicable, you will be unable to run any Virtualbox machine (created from scratch or imported from an older installation). Several affected users that were also struggling with this problem have confirmed that they were able to fix the problem by manually browsing to the location of the VBoxDRV.inf driver, doing the installation and then forcing the newly installed service to be started via an elevated Command Prompt.
Here’s a quick guide on installing and starting the VBoxDrv service in order to fix the ‘Error in supR3HardenedWinReSpawn’ issue:
Open File Explorer and navigate to the following location:
Note: You can either browse to the location manually or you can paste the location directly into the navigation bar and press Enter to get there instantly.
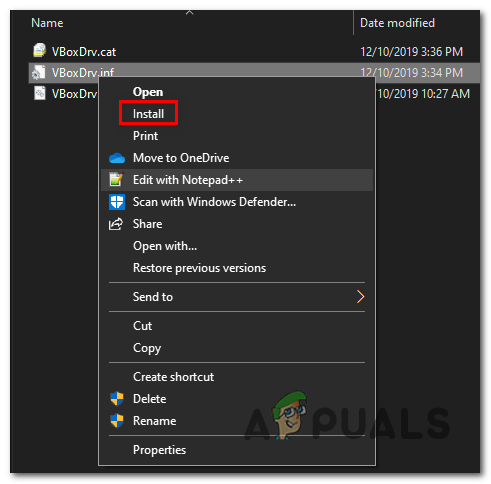
Once you get to the correct location, right-click on VBoxDrv.inf and choose Install from the context menu. Installing the VBoxDrv manually
When prompted by the UAC (User Account Control), click Yes, then wait until the driver is installed successfully. Note: You won’t get a success message, but your screen will flicker after the driver gets installed.
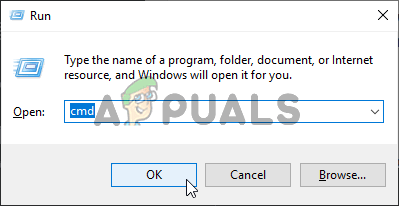
Press Windows key + R to open up a Run dialog box. Next, type ‘cmd’ and press Ctrl + Shift + Enter to open up an elevated CMD prompt. When you’re prompted by the UAC (User Account Control), click Yes to grant administrative privileges. Running Command Prompt
Once you’re inside the elevated Command prompt, type the following command and press Enter to force start the service that you just installed:
sc start vboxdrv
After the command is successfully processed, close the elevated Command Prompt and restart your computer. At the next startup sequence, repeat the action that was previously causing the error and see if the problem is now fixed.
In case you’re still encountering the same ‘Error in supR3HardenedWinReSpawn’ issue, move down to the next potential fix below.
2. Fix the directory problem
Another potential cause that might cause this particular problem is a directory problem facilitated by a Registry inconsistency facilitated by the VirtualBox driver. If this scenario is applicable, you should be able to fix the problem swiftly by doing a quick registry check to see if the driver path leads to the VBoxDrv.sys.
In case the path is different, a small modification should ensure that you are able to start your virtual machines without encountering the ‘Error in supR3HardenedWinReSpawn’ issue again.
Here’s a quick guide on investigating and fixing the directory problem related to the VBoxDrv.sys driver:
Press Windows key + R to open up a Run dialog box. Inside the text box, type ‘regedit’ and press Enter to open up Registry Editor. When you’re prompted by the User Account Control (UAC), click Yes to grant admin access. Running the Registry Editor
Once you’re inside the Registry Editor, use the left-hand section to navigate to the following location:
Note: You can either browse to the location manually or you can paste the location directly into the navigation bar at the top and press Enter to get there instantly.
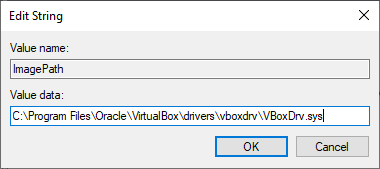
After you arrive at the correct location, move over to the right-hand section and double-click on ImagePath.
Once you get there, check if the path is exactly the one below:
As soon as you’re certain that the ImagePatch string displays the correct location, hit Ok and close Registry Editor to save the changes. Correct location of VBoxDrv
Now to ensure that the driver is actually used, navigate to the driver directory below and run the driver by right-clicking on the VBoxDrv.sys and choosing Install.Installing the VBoxDrv manually
Note: Disregard this step if you’ve already done it at Method 1.
Next, press Windows key + R to open up a Run dialog box. Then, type ‘cmd’ inside the text box and press Ctrl + Shift + Enter to open up an elevated CMD prompt with admin access. Running Command Prompt
Note: If you see the User Account Control prompt, click Yes to grant admin access.
Inside the admin CMD, type the following command to ensure that the VBoxDrv service is running:
sc start vboxdrv
Restart your computer and see if the problem is resolved by attempting to run a Virtualbox machine once again.
If the same ‘Error in supR3HardenedWinReSpawn’ problem is still happening, move down to the next potential fix below.
3. Increase the allocated amount of RAM
As it turns out, this particular problem can also occur due to insufficient RAM allocated to the Virtual machine that was previously created. The problem is, Virtualbox doesn’t do a good job of making it clear what exactly is the problem that’s making the virtual machine unusable.
Even more, there are several different user reports claiming that dynamically adjusting the allocated RAM will not do the trick. To fix the issue if this scenario is applicable, you will need to remove the current virtual machine configuration altogether before creating one with the same image, but with increased allocated RAM.
Here’s a quick guide through the whole thing:
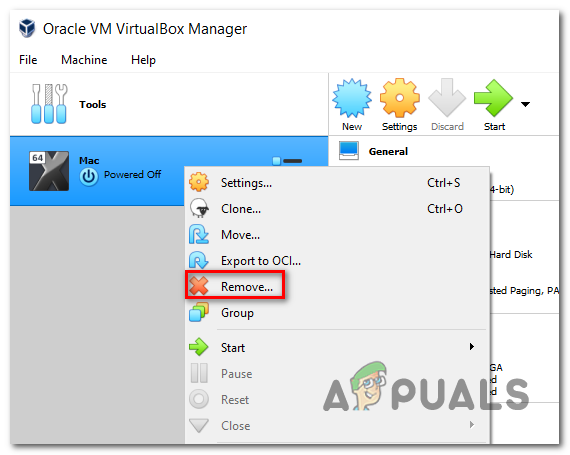
Start by opening your Oracle VM VirtualBox Manager installation and removing the current virtual machine installation. To do this, simply right-click on the VM installation (right-hand section) and choose Remove from the newly appeared context menu. Removing the VM installation
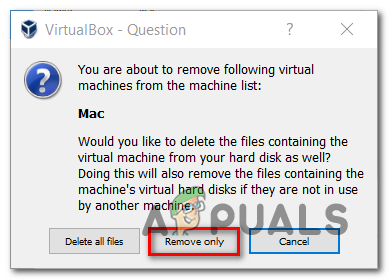
When asked whether you want to remove or delete all the files, choose to Remove Only so you don’t facilitate any data loss. Removing the VM installation
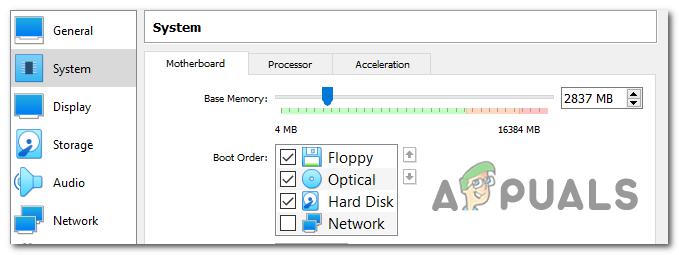
Next, create a new configuration with the same image. But when you get to the part where you need to pick the Base Memory, make sure that it’s higher than your previous VM installation. Creating a new VM machine with more allocated RAM
Complete the initial machine configuration and see I you are able to start the machine without encountering the same ‘Error in supR3HardenedWinReSpawn’ problem.
If the same issue returns, move down to the next potential fix below.
4. Adjust the Paravirtualization Interface
Another potential culprit that might facilitate the apparition of the ‘Error in supR3HardenedWinReSpawn’ issue is a ParaVirtualization technology that is not supported by the OS that is attempted to be emulated. Most frequently, this happens if the user leaves this option to the Default.
Several affected users that were also struggling to resolve this problem have confirmed that the issue was entirely resolved and they were finally able to run their Vmware virtual machine after they changed the ParaVirtualization from Default to KVM.
Here’s a quick guide on making the same change on your virtual machine configuration:
Open Oracle VM VirtualBox Manager and right-click on the virtual machine that is giving you issues. Next, from the newly appeared context menu, choose Settings.
Once you are inside the Settings menu of the virtual machine, select the System tab from the left-hand side menu.
With the System tab selected, move over to the right-hand section and access the Acceleration tab.
When you get to the correct menu, expand the drop-down menu associated with Paravirtualization Interface and change it from Default to KVM.
Click Ok to save the changes, then start the virtual machine again to see if the problem is now resolved.
Changing the default Para-virtualization technology
If the same ‘Error in supR3HardenedWinReSpawn’ problem is persisting, move down to the next potential fix below.
5. Enable Virtualization in BIOS / UEFI
As it turns out, another potential reason that will cause this problem is virtualization being disabled from your BIOS or UEFI settings. While hardware virtualization is enabled by default on the vast majority of computer configurations, it’s possible that older PC rigs need to be adjusted manually.
If this scenario is applicable, you should be able to fix the issue quite easily by accessing your BIOS or UEFI settings and re-enabling the proprietary virtualization technology.
Here’s a quick guide on how to do this (whether you’re using BIOS or UEFI):
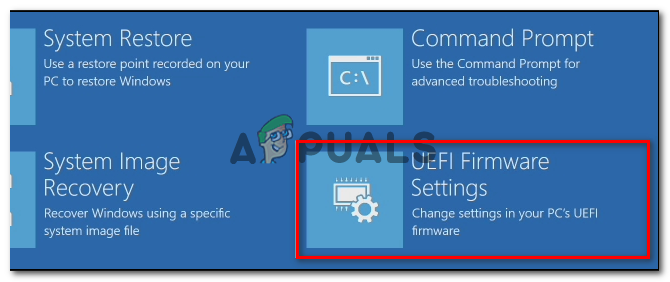
If you’re using a BIOS-powered computer, start your computer and press the Setup key repeatedly during the initial startup screen. With most configurations, the Setup key is usually one of the F keys (F2, F4, F6, F8) or the Del key. Press [key] to enter setupNote: If you’re encountering the issue on a UEFI-based computer, follow the instructions (here) to boot directly into the Advanced Startup options menu. From there, you can access the UEFI firmware settings. Accessing the UEFI firmware settings
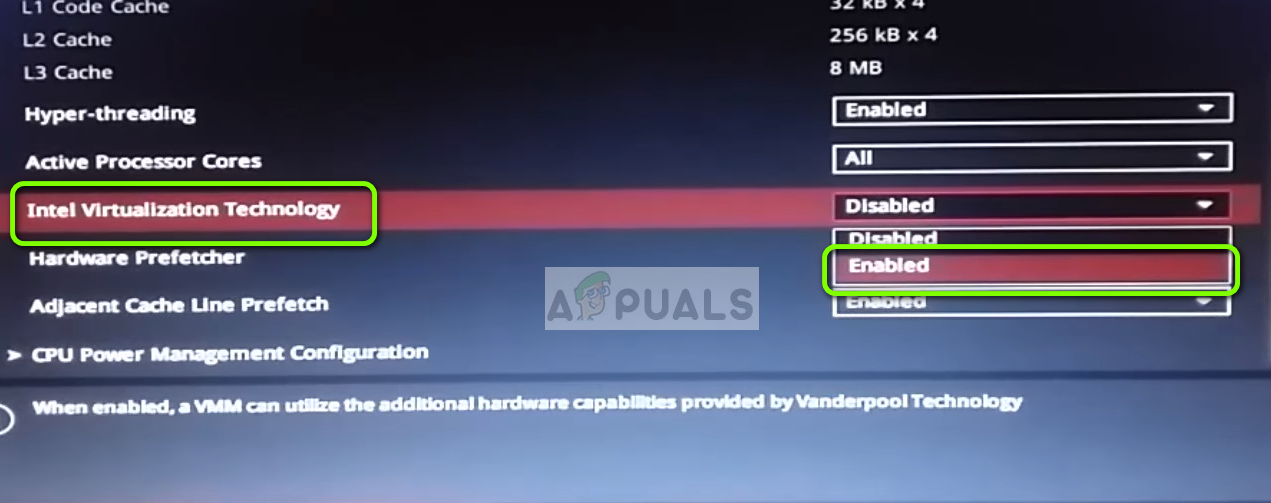
Once you’re inside you BIOS or UEFI setting menu, start browsing the menus to find the option equivalent to your virtualization technology (Intel VT-x, Intel Virtualization Technology, AMD-V, Vanderpool, etc.) When you manage to find the option make sure to Enable it. Enabling Intel Virtualization Technology
Note: Typically, you can find this option under Processor, Security, Chipset, Advanced, Advanced Chipset Control, Advanced CPU configuration, etc. Keep in mind that the settings might be different depending on your motherboard and your CPU manufacturer. If you can’t find the option by yourself, search online for specific instructions.
Once the virtualization technology is enabled, save the BIOS / UEFI changes and restart your computer.
After the next startup sequence is complete, attempt to run the virtual machine once again and see if the same error message is still persisting.
In case you’re still seeing the ‘Error in supR3HardenedWinReSpawn’ initial message, move down to the final method below.
6. Install a newer version of Virtualbox
If you followed all the instructions above to no avail, chances are you’re encountering this problem due to a Virtualbox inconsitency that was resolved with newer versions. In most cases, this particular issue is reported with VirtualBox version 5.2.6.
In case this scenario is applicable, you can fix the issue swiftly by uninstalling your current VirtualBox version and then installing the latest version from the official Virtualbox download page.
Here’s a quick guide on how to do this:
Open up a Run dialog box by pressing Windows key + R. Inside the text box, type ‘appwiz.cpl’ and press Enter to open up the Apps and Features menu. Typing in “appwiz.cpl” in the Run prompt
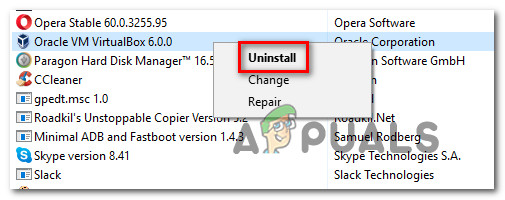
Once you’re inside the Apps and Features menu, scroll down through the list of installed applications and locate your VirtualBox installation. Once you see it, right-click on it and choose Uninstall from the newly appeared context menu. Uninstalling VirtualBox
Inside the uninstallation window, follow the on-screen prompts to complete the process then restart your computer.
After the next startup sequence, access this link (here) and download the latest version of VirtualBox by clicking on Windows hosts.Downloaded the latest version of VirtualBox
After the new version is installed, reconfigure the virtual machine and see if you are able to launch it without encountering the ‘Error in supR3HardenedWinReSpawn’ error message.
Kevin Arrows is a highly experienced and knowledgeable technology specialist with over a decade of industry experience. He holds a Microsoft Certified Technology Specialist (MCTS) certification and has a deep passion for staying up-to-date on the latest tech developments. Kevin has written extensively on a wide range of tech-related topics, showcasing his expertise and knowledge in areas such as software development, cybersecurity, and cloud computing. His contributions to the tech field have been widely recognized and respected by his peers, and he is highly regarded for his ability to explain complex technical concepts in a clear and concise manner.


Installing the VBoxDRV.inf worked, thank you 🙂