[Solved] Steam showing installed games as uninstalled
Steam showing installed games as uninstalled is one of the most common occurrences. This problem occurs when the Steam Client doesn’t detect your game files and decides to show them as uninstalled. However, the games are not entirely uninstalled, as they can be fixed through various methods without downloading them again.

Now let’s begin fixing this issue.
1. Restart your Steam client
When Steam is intentionally not recognizing your games and declaring them as uninstalled. The first method that can help you solve this temporary issue is to log out of your Steam account, close your Steam Client and then Relaunch it after a few minutes. In these cases, this is the best option before you make any significant changes to your directories. Follow the instructions below to learn how to log out of your steam account and relaunch the client:
- Open your Steam Client.
- Click on your Username box in the top right corner of the screen.
- Click on Log out.
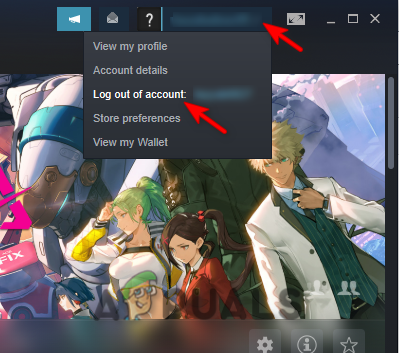
Logging out of the Steam account - Close the Steam Client and reopen it after a while.
- Log in to your account
2. Restart your computer
Restarting your entire system is the second best way to deal with such an error. Because games being uninstalled automatically on Steam is a common occurrence. Restarting your computer will restart Steam, and it’s services which can cause it to detect your games.
3. Run Steam as an Administrator
If Steam isn’t detecting your games, it’s possible that it doesn’t have enough permissions to read the game files. Running Steam as an administrator will allow your app to adjust to its needs. This may include permission to write to the disk. Although Windows will disable these privileges by default, you can still manually do the task. To learn how to run Steam as an administrator, follow the steps below:
- Search for the Steam Launcher.
- Right-Click on it and open its properties.
- Click on the Compatibility tab and check the “Run this program as an administrator” box.
- Click on Apply and OK.
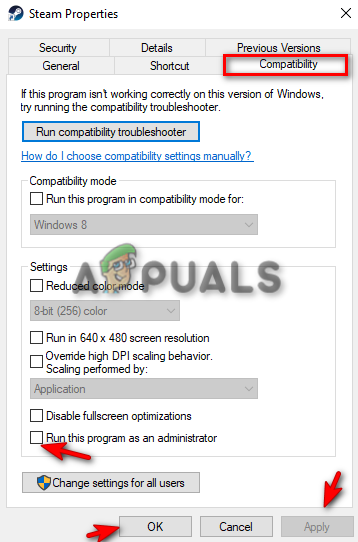
Running Steam as an Administrator
4. Turn off the Steam folder read-only settings
If the Steam directory is set to read-only, the entire directory will be write-protected, preventing any changes to the data stored on your hard drive. Follow the steps below to turn off the read-only settings of the steam folder:
- Locate the Steam folder on your drive.
- Right-Click on it and click on the Properties option.
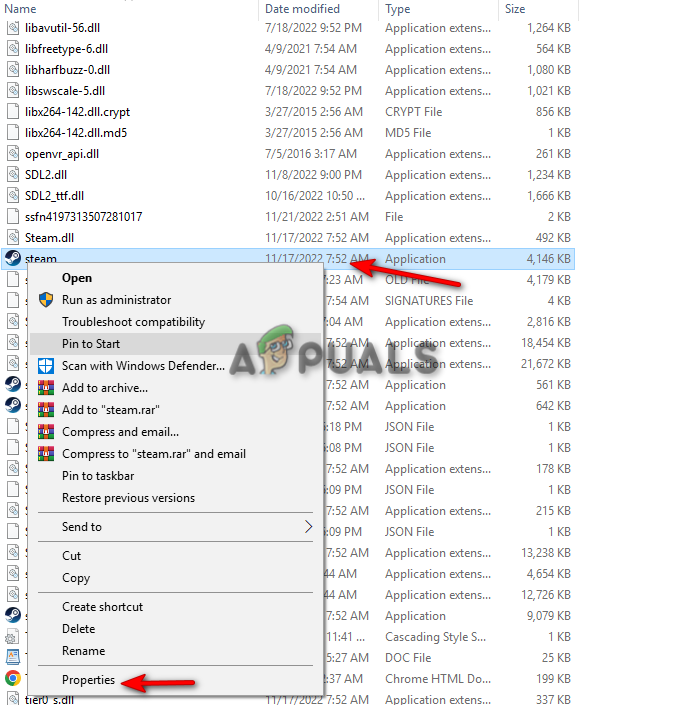
Opening Steam properties - Go to the General tab and uncheck the “Read-only” box in the Attributes section.
- Click Apply and OK.
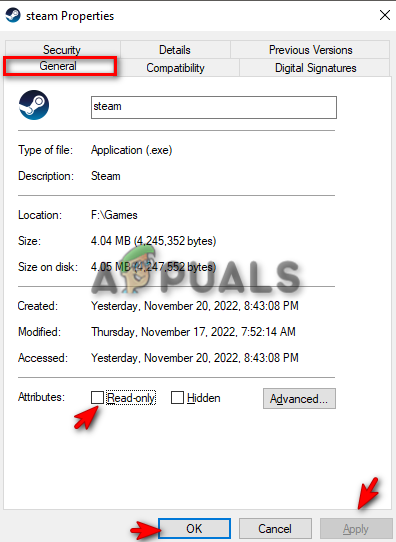
Turning off the Read-only attributes on Steam
5. Manually add your games to the Steam library folders
One of the major causes of this error is when Steam automatically removes your Steam Library folder from its Content Libraries, triggering the client not to recognize your game and eventually declaring them uninstalled. The best way to fix this problem is by manually placing your Steam Library folder into the Content Libraries. You can do that by following the steps below:
- Open your Steam Account.
- Click on the Steam option in the top right corner of the screen
- Click on the Settings option.
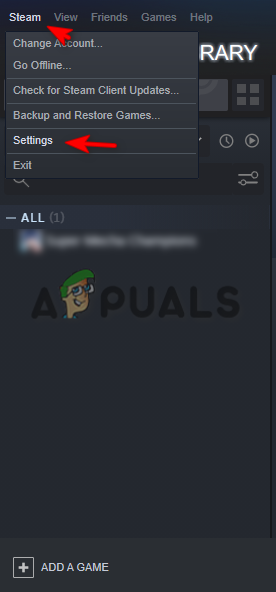
Opening Steam Settings - Click on the Downloads tab and open the Steam Library Folders option.
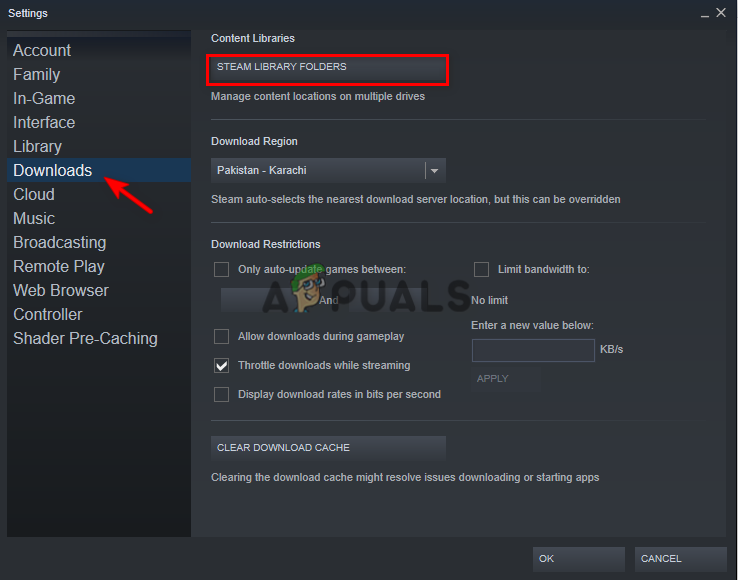
Opening Steam Library Folders - Click on Add Library Folder.
- Click the “+” button to add the folder with all your game data.
- Close the Tabs, Click on OK, and resolve the issue.
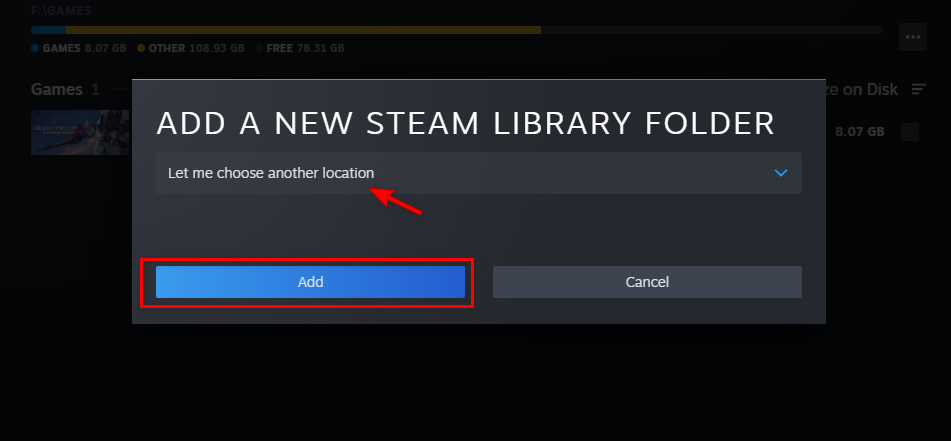
Adding game folder to Steam Library Folders
6. Transfer your game folder to another location
The main cause of Steam showing your installed games as uninstalled is that it cannot properly locate the game folder where your game files are located. One of the most useful ways to prevent this is by creating another folder on another driver and transferring the game folder to it. To do so, follow the steps we have given below:
- Open the current location of your Game folder.
- Copy and paste the folder to another drive of your choice.
- Delete the previous game folder.
- Open your Steam account.
- Find the game in your Library section.
- Click on Install and select where you transferred the game folder.
- Let the application discover the existing files and complete the process.
Note: During this process, you don’t have to install your entire game again since the game is already installed. The application searches for the file location, and once it does, it verifies its files and recognizes them, giving you the play button within a short period.
7. Let Steam recognize the .acf file of the game
Each game on steam has its unique .acf Code attached to it, which helps Steam stay in touch with the state of the game, such as its updates, installation, and downloading progress. If the game is missing the .acf file, the Steam Client will think the game is uninstalled. Below you will learn how to fix the .acf file issue that causes Steam to uninstall games.
- Open your Steam Account and click on the Library tab.
- Download the Game that Steam uninstalled.
- Click the Pause button to pause the game’s downloading process.
- Click the Steam option on the top right corner of the screen and click on Exit.
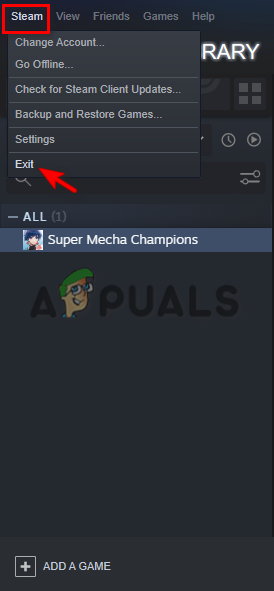
Exiting Steam - Locate the steamapps folder on your disk drive.
- Find the .acf file of the uninstalled game.
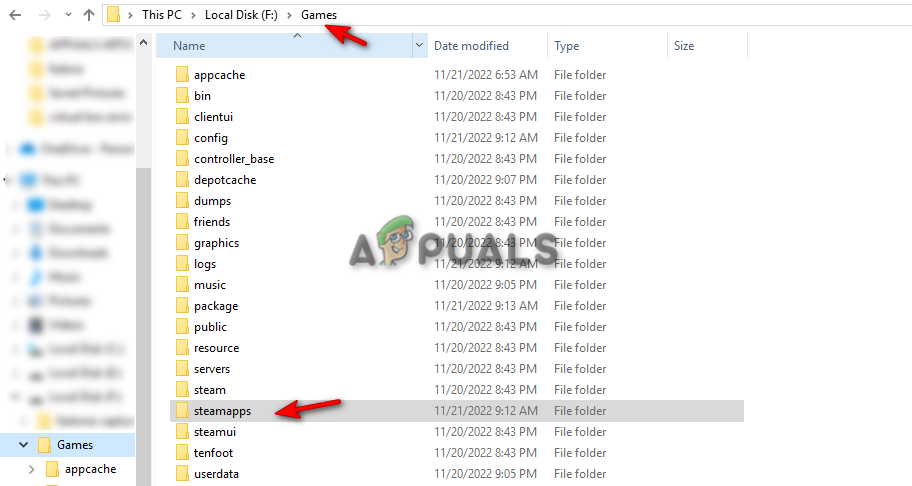
Finding the steamapps folder - Copy and paste the .acf file of the uninstalled game to another folder.
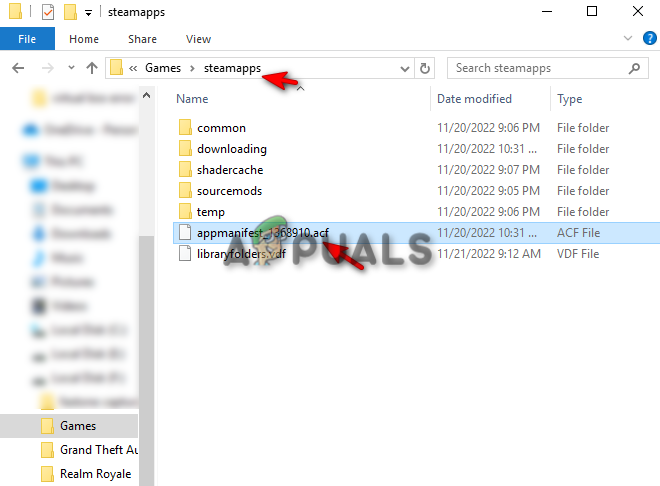
Locating the .afc file - Open the Steam Library again to see the game as uninstalled.
- Exit Steam and place the .acf file back in its original location.
- Open Steam and resume the game’s update, and it will detect all game files.


