Steam Games Killing Network Connection? Here is how to fix
Upon launching a Steam game, some users have been coming across internet connectivity problems. As it turns out, for some users, the internet dies when they launch a Steam while others face internet issues upon downloading a Steam game. The problem in question can sometimes be caused by the third-party apps that are running on your computer. Regardless of how the issue is caused, in this article, we are going to show you how to resolve the problem in question quite easily so just follow through the given guidelines.
As it turns out, Steam has to be the most popular platform when it comes down to video games on Windows. While the app works flawlessly most of the time, there are scenarios where it can stumble up an issue such as Steam failing to start up. The problem in question is usually caused when a third-party application on your system interferes with the network connectivity on your system. In addition to that, Intel Killer drivers have also been known to give rise to the question mentioned. With that said, let us get started and show you the different methods that you can use to resolve the problem in question without any further ado.
Disable Network Boost in Lenovo Vantage Software (if applicable)
The first thing that you should do when you come across the problem in question is to disable the Network Boost option in the Lenovo Vantage software. As it turns out, Lenovo Vantage is an application that can be installed on your Lenovo devices as it makes the process of installing and updating drivers on your computer easier. In addition to that, you are able to run system diagnostics via the app for what it is worth.
Network boost is an option that allows you to restrict network usage for any other app running in the background while you are trying to play a game. However, this can sometimes cause issues as well with the game that you are playing. As such, you should disable the option in case you have Lenovo Vantage installed. To do this, follow the instructions given down below:
- First of all, open up the Lenovo Vantage app.
- Under the Legion Edge heading, click the slider provided for Network Boost to turn the feature off.
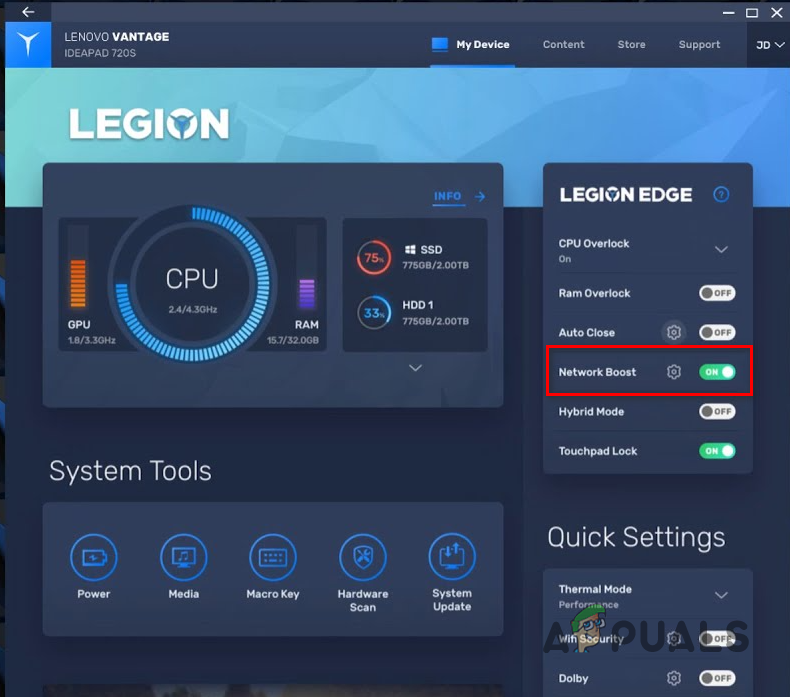
Disabling Network Boost - Once you have done that, see if the problem still persists.
Limit Network Bandwidth
As it turns out, if you are coming across the network disconnection issue while trying to download a game on Steam, it can sometimes be due to the client using up all of the juice. In such a scenario, what you can do is to limit the network bandwidth that is used by Steam. To do this, follow the instructions given down below:
- To start off, open up the Steam client on your computer.
- At the top left corner, click on the Steam option, and from the drop-down menu, choose the Settings option.

Opening up Steam Settings - On the left-hand side, click on the Downloads tab.
- Once there, go ahead and tick the “Limit bandwidth to” checkbox.
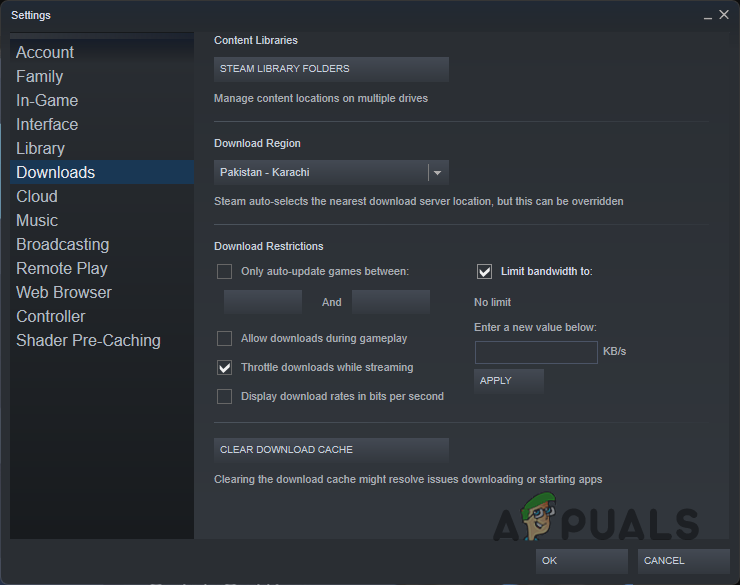
Limiting Download Bandwidth - After that, provide a value that is smaller than your internet speed. Remember that this value is in KB/s.
- After that, switch to the Library tab, and there tick the Low Bandwidth Mode checkbox.
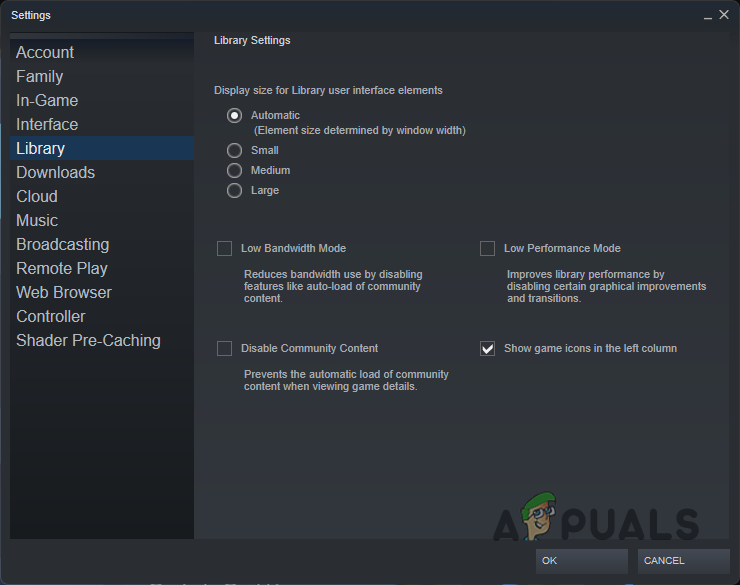
Enabling Low Bandwidth Mode - With that done, click the OK button provided.
- See if the issue is still there.
Disable IPv6
In some cases, the problem can also originate due to your network adapter properties. As per some user reports, various users have resolved the problem for them by disabling Internet Protocol Version 6 in their network adapter properties. As such, you can give this a try as well to see if that gets you any results. To do this, follow the instructions provided down below:
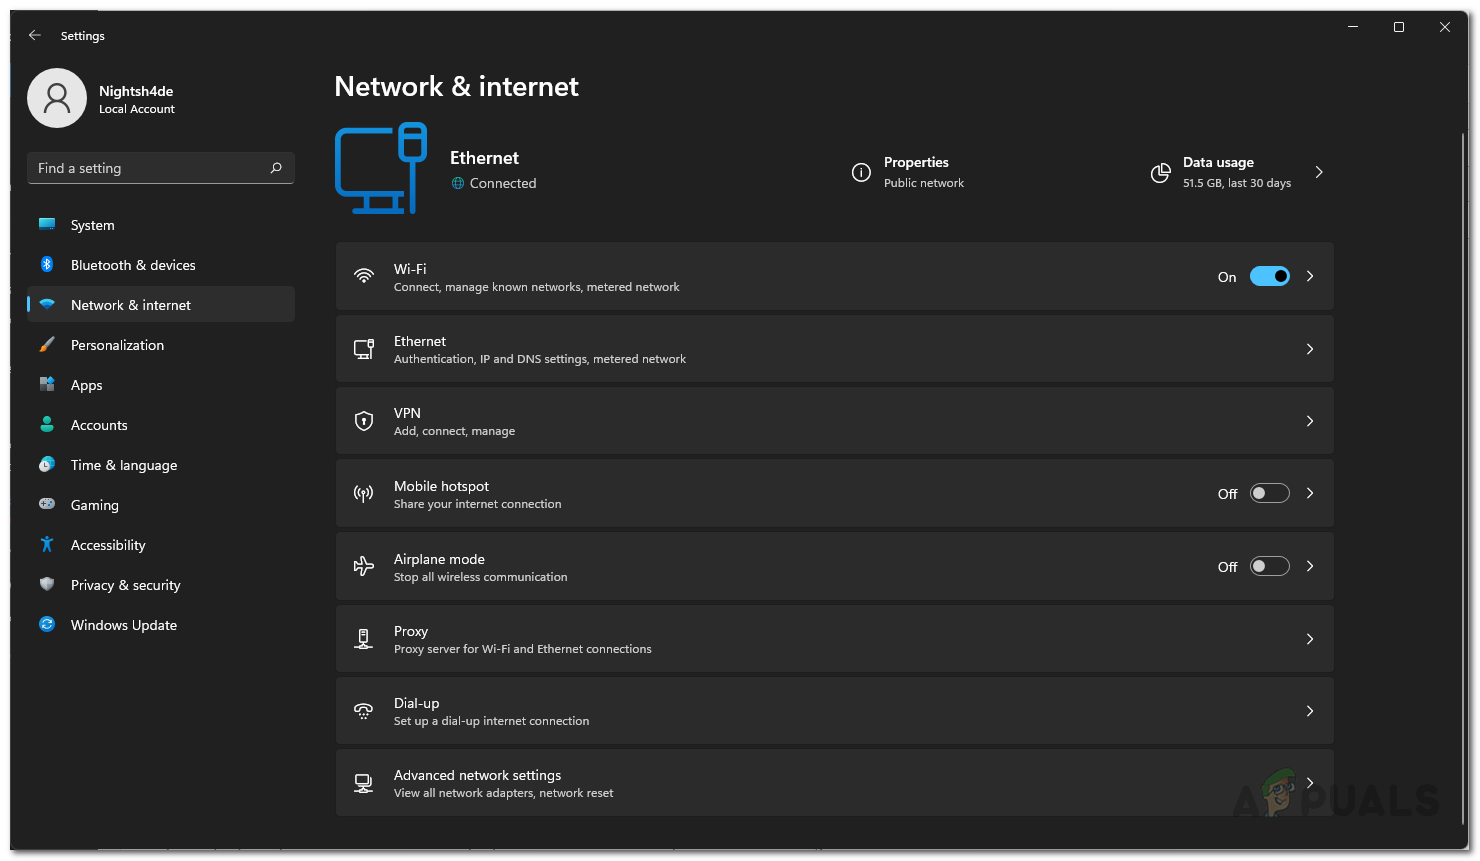
- First of all, right-click on the network icon on your taskbar, and from the menu choose the Network and Internet settings option.

Opening up Network Settings - On the Network Settings window, choose the Advanced network settings option.
Network Settings 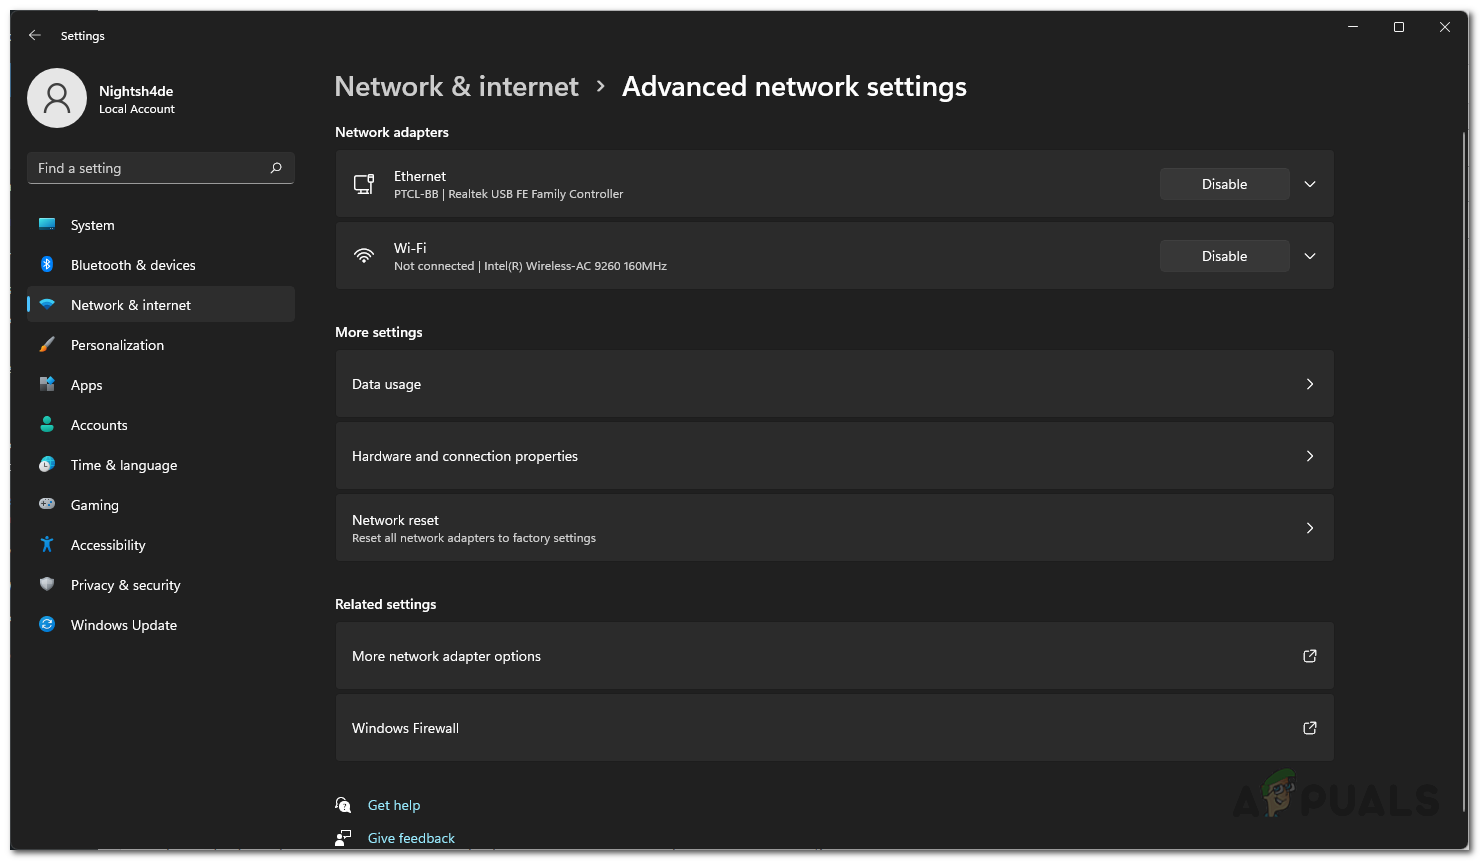
Advanced Network Settings - Then, click on the More network adapter options option provided.
- On the window that comes up, right-click on your network adapter, and from the drop-down menu, choose the Properties option.
- After that, on the Properties window, uncheck the Internet Protocol Version 6 (TCP/IPv6) option and then click OK.
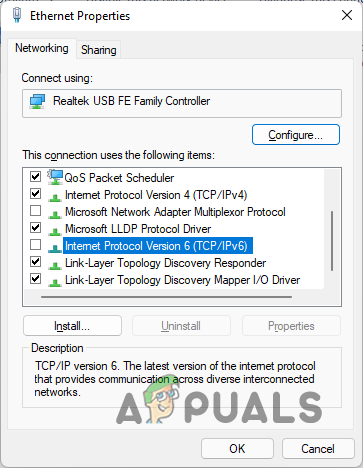
Disabling IPv6 - See if that resolves the problem for you.
Uninstall Intel Killer Drivers
Finally, if none of the methods above have fixed the problem for you, then it is very likely that the issue is being caused by the Intel Killer drivers that you have installed on your computer. Intel Killer is a line of ethernet and wireless adapters from Intel that you might be using on your system.
As it turns out, there have been reports of the Intel Killer drivers causing such connectivity issues in certain cases. As such, you will have to uninstall the drivers and let Windows install generic drivers instead in order to fix the problem. To do this, follow the instructions that are given down below:
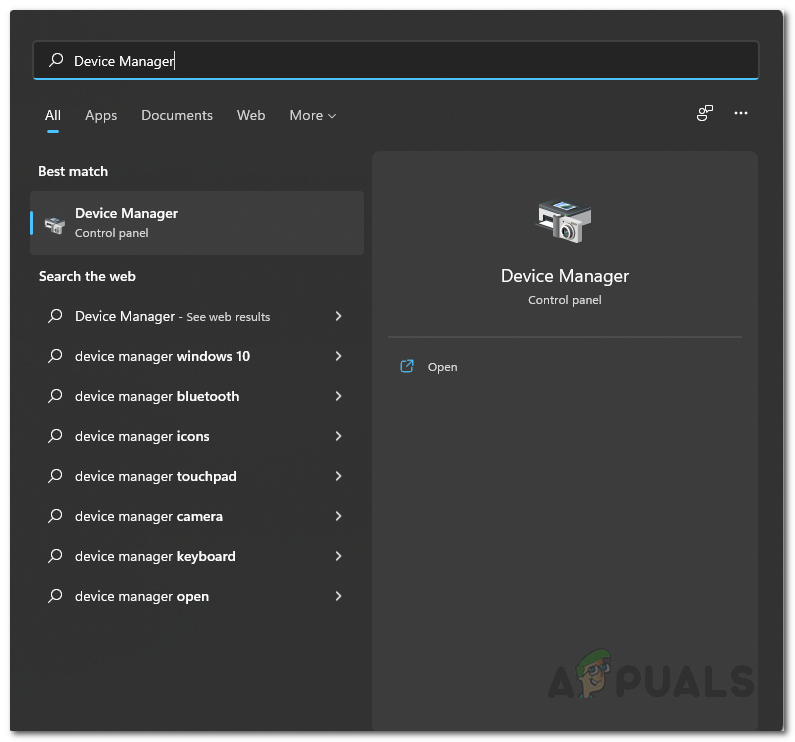
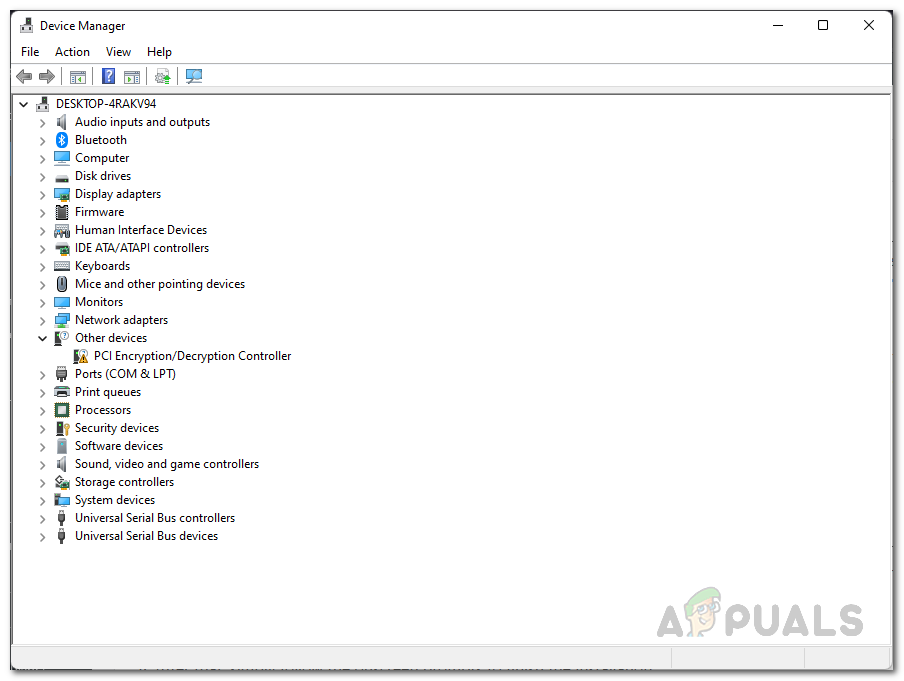
- To start off, open up the Device Manager by searching for it in the Start Menu.
Opening up Device Manager - Once the Device Manager window is open, expand the Network adapters list.
Device Manager - From the list, right-click on the installed Intel Killer drivers, and from the drop-down menu, choose the Uninstall device option.
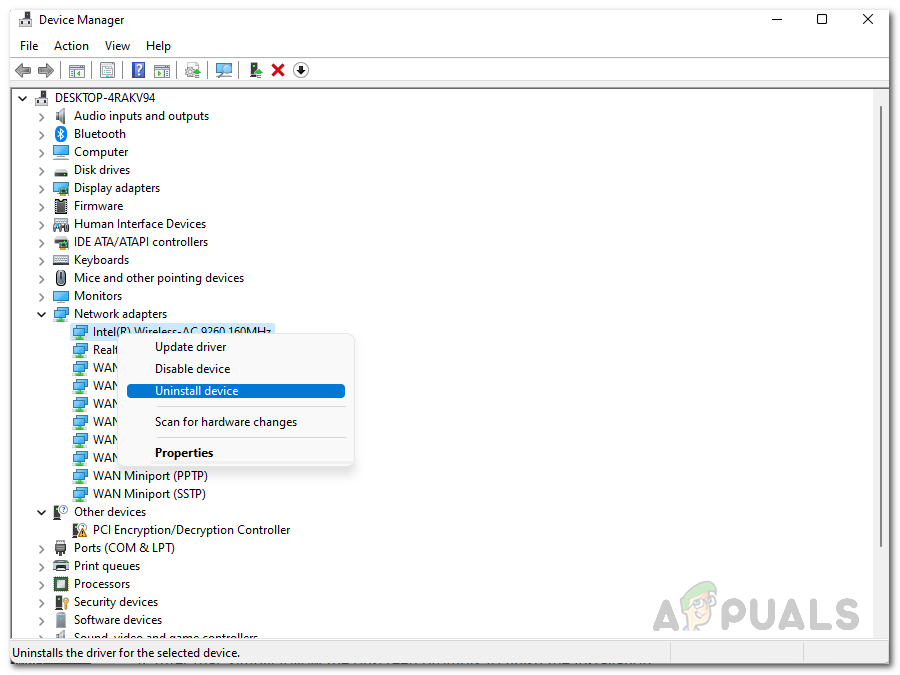
Uninstalling Network Drivers - Once you have done that, go ahead and restart your computer so that Windows can install generic drivers for you automatically.
- Alternatively, you can also click the Scan for hardware changes button at the top after a while for the generic drivers to be installed.
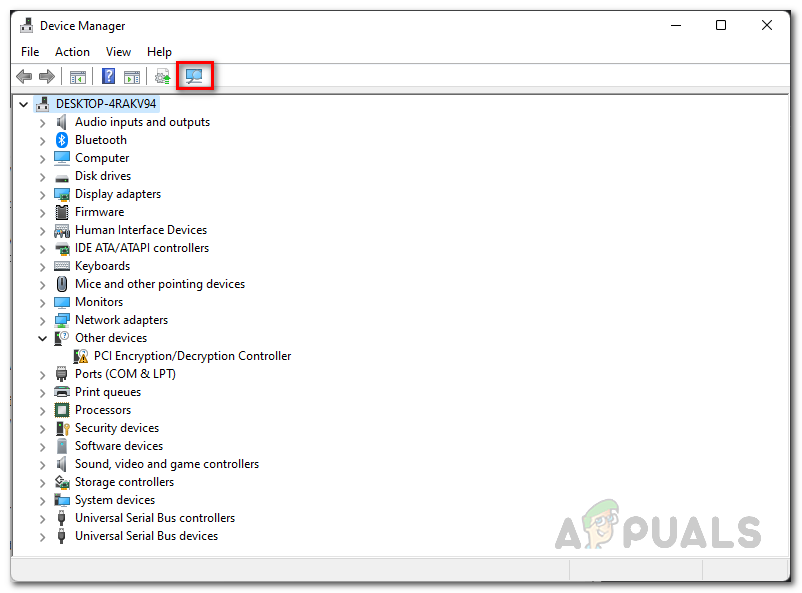
Scanning for Hardware Changes - With that done, see if the problem still persists.


Disabling IPv6 helped me. Thank you very much. Finally after several hours lost something helped. I reinstalled everything I could, updated drivers, lost all my games (uninstalled during steam re-installation), such a great day, well spent.