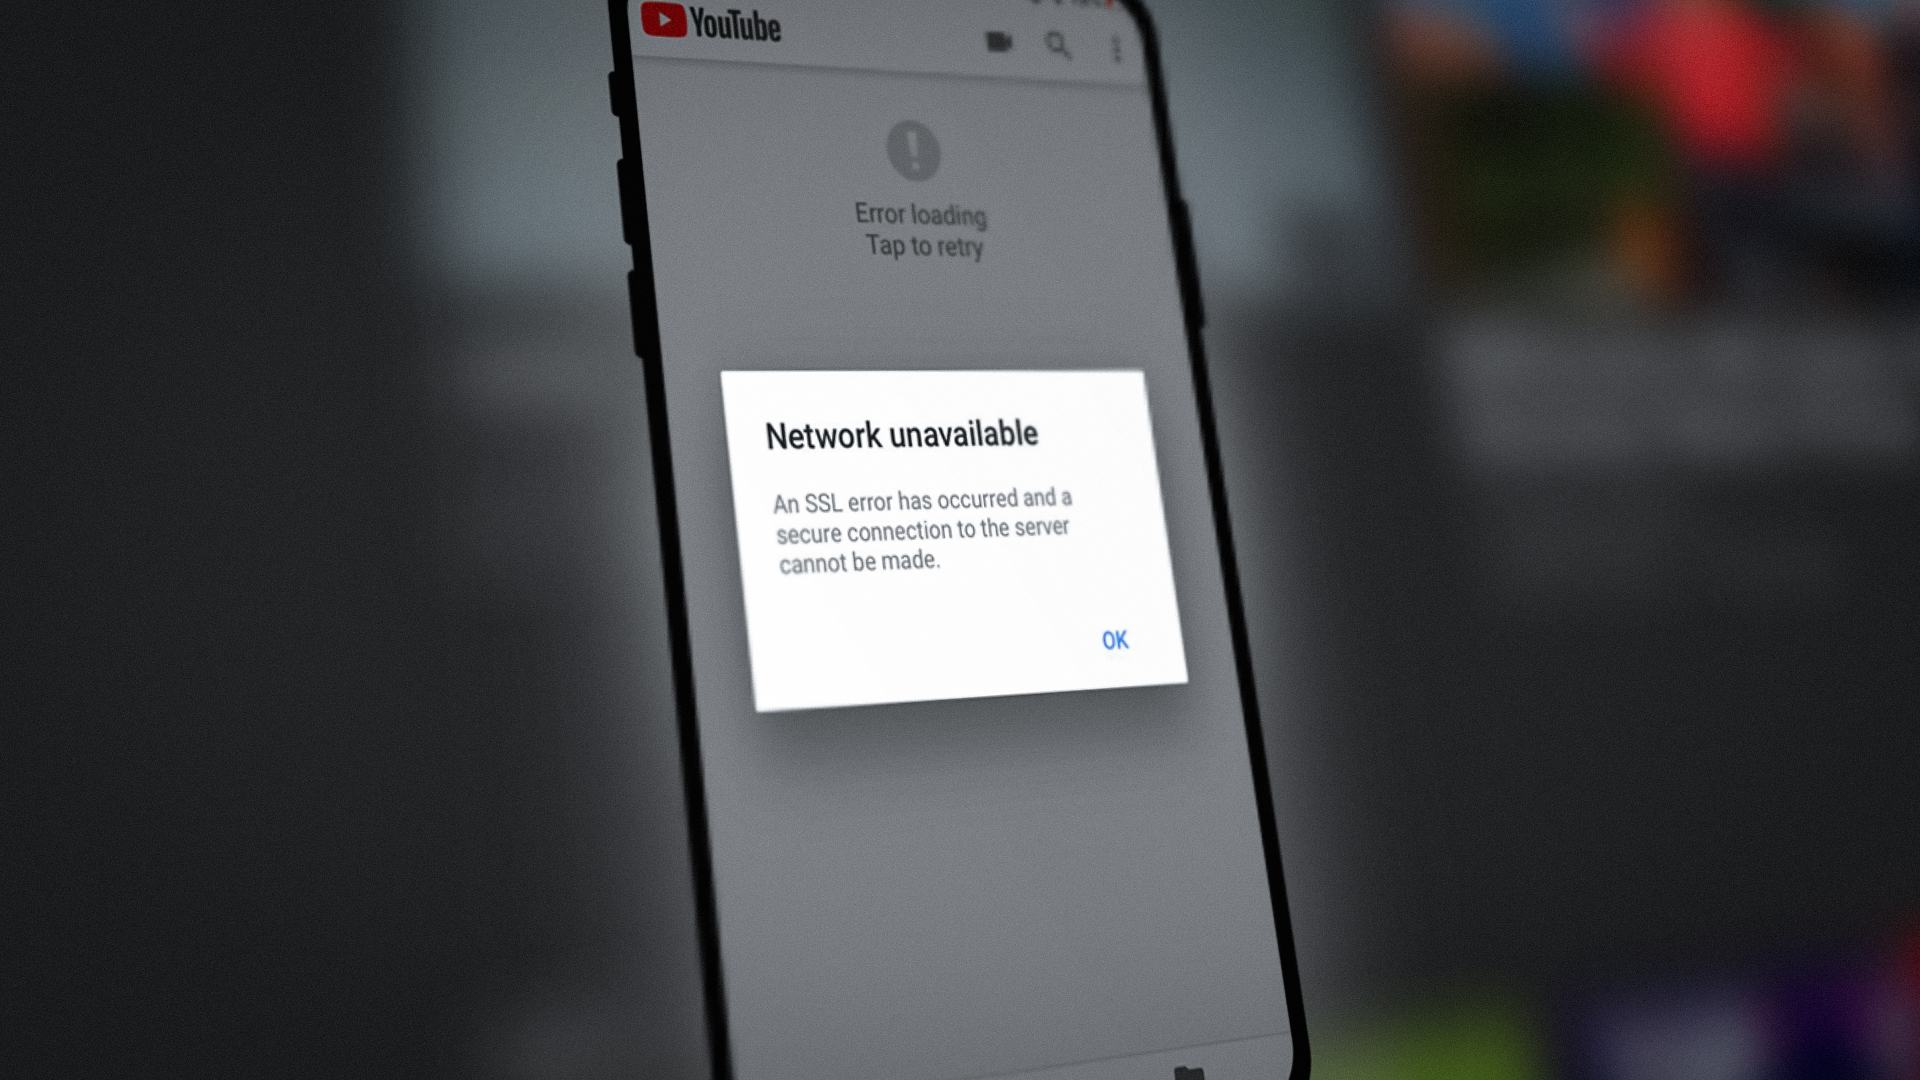
How to Fix “SSL Error has occurred” on an iPhone?
SSL error on an iPhone could be the result of internal iOS issues or interference from the network/router. Internal iOS issues might range from outdated iOS to corrupt OS of the iPhone. The issue arises when an app or a website in a browser shows an SSL error on an iPhone.
An iPhone might show the SSL error due to many factors but the following reasons can be easily called the main ones:
- Outdated OS of the iPhone or Outdated App: If the OS of the iPhone or the problematic app is outdated, then the one’s incompatibility with the other may not let the iPhone’s network modules properly communicate over the SSL protocol, causing the SSL error.
- Incorrect Data/Time of the iPhone: You may encounter the SSL error on an iPhone if the date/time on your phone is not correct as the response server may fail to parse the SSL data packets having the wrong date/time stamps.
- Corrupt Network Settings of the iPhone: An iPhone might show the SSL error if the phone’s network settings are corrupt as the SSL-related modules on the iPhone may fail to load.
- Router Security Product or Content Filters: If the router’s security or content filters (like parental controls) are hindering the iPhone’s access to a required online resource, then that may result in the SSL error at hand.
For developers who are encountering this issue on their websites, make sure the certificate is valid on the server. Also, if your server is using an old SSL protocol, then you may have to reinstall the server’s OS with the latest SSL protocol to clear the SSL error on the iPhone when accessing your web server.
1. Enable and Disable Airplane Mode on the iPhone
A temporary communication glitch on your iPhone may lead to the SSL error and enabling/disabling the iPhone’s Airplane mode may solve the problem as the communication modules are re-initiated.
- Launch the iPhone Settings and enable the Airplane Mode by toggling its switch to the off position.
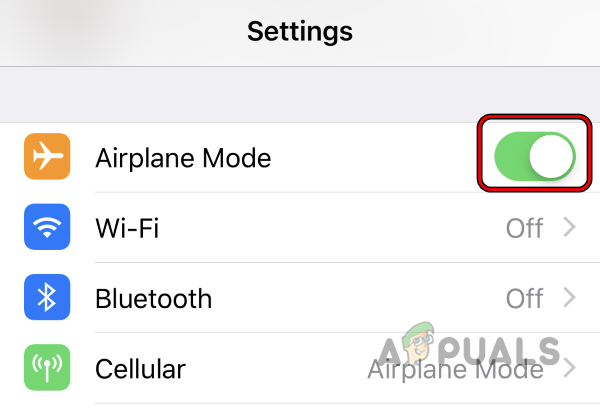
Enable the Airplane Mode of the iPhone - Now wait for a minute and then disable the Airplane Mode to check if the iPhone has started to work fine without showing the SSL error.
If the issue is occurring with a particular website, then the incompatible or outdated SSL on the server side could be the reason for the issue and you may contact the support of that website to clear the error.
2. Perform a Force Restart of the iPhone
A temporary glitch in the iPhone’s modules might cause the SSL error under discussion and performing a force restart of the iPhone may clear the glitch, thus may solve the error.
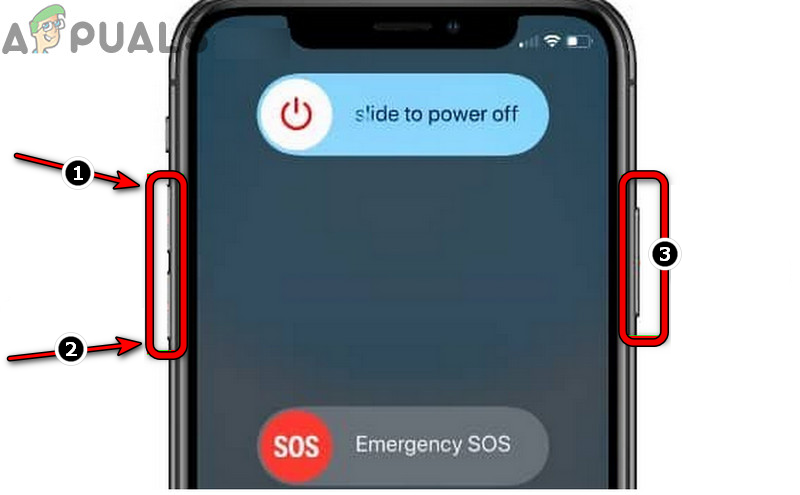
- Press the volume up button of the iPhone and quickly release it.
- Now press the volume down button of the iPhone and quickly release it.
- Then press/hold the side button of the iPhone and wait till the Apple logo is displayed on the screen.
- Now release the iPhone’s side button and wait till the iPhone is powered on.
Force Restart the iPhone - Then, check if the SSL issue on the iPhone is resolved.
3. Update the OS of the iPhone to the Latest Build
You may encounter the SSL error on an iPhone if the OS of your phone is outdated as it can cause incompatibility between your phone and other related modules (especially, websites) which use the latest SSL version but the phone is still on the older version (due to outdated OS). In this case, updating the OS of your iPhone to the latest build may clear the SSL error. Before moving on, make sure to create a backup of your iPhone.
- Firstly, make sure the iPhone is charged fully and connected to a Wi-Fi network.
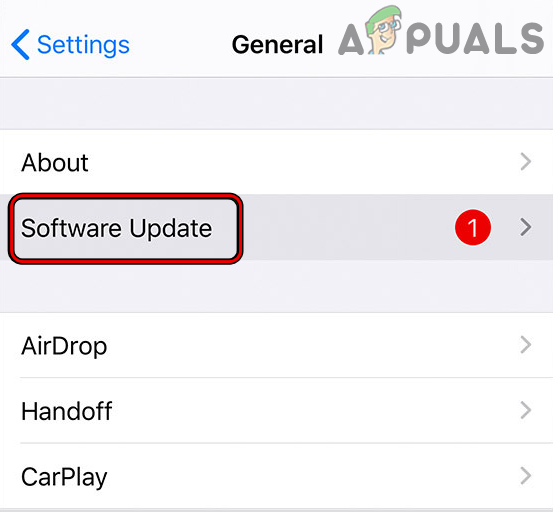
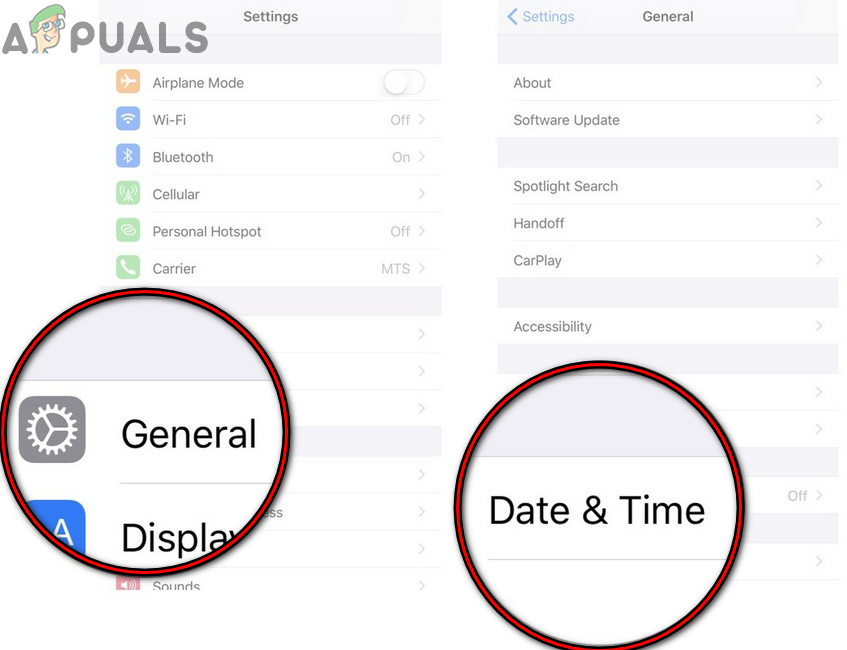
- Then launch the iPhone’s Settings and tap on General.

Open General Settings of iPhone - Now open Software Update and if the phone shows an iOS update is available, download and install the OS update.
Update Software of iPhone - Once the OS is updated, restart your iPhone and upon restart, check if iPhone’s SSL error is cleared.
4. Update the Problematic App to the Latest Build
If you are encountering the SSL error on a particular app (like Apple Music), then the outdated app’s incompatibility with the iPhone’s modules may not let the app access SSL-related components of the iOS and thus may cause the issue. In this context, updating the problematic app to the latest release may clear the SSL issue.
- Launch the Apple App Store on your iPhone and tap on your profile icon.
- Now scroll to Updates and tap on Update All to update all the apps or if you want to update a particular app (like Apple Music), then tap on the Update button for that particular app.

Update All Apps on an iPhone - Once updates are installed, restart the iPhone and upon restart, check if the phone is clear of the SSL error.
5. Set the Correct Date and Time on the iPhone
An iPhone might show an SSL error at hand if the date/time of the phone is not correct as the queried services/website may fail to authenticate the data packets with the wrong date/time stamps. Here setting the correct date and time on the iPhone may resolve the SSL issue.
- Open the Settings of your iPhone and select General.
- Now open Date & Time and disable Set Automatically by toggling its switch to the off position.
Open Date and Time Settings on Your iPhone - Then manually set the correct date and time on your iPhone.
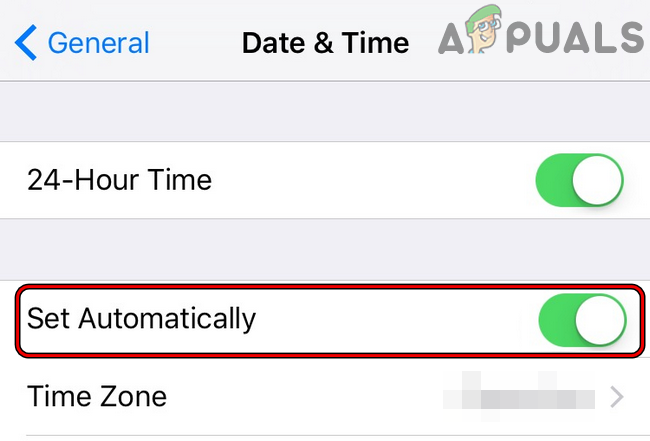
Disable Set Automatically for iPhone’s Date & Time - Now restart your iPhone and upon restart, check if the iPhone’s SSL problem is solved.
6. Enable Location Services of the iPhone
If the Location Services on the iPhone are disabled, then that may cause an SSL error, especially where location is essential for the app’s performance (like a maps app or an app that serves the content based on your location). Here, enabling the Location Services of the iPhone may solve the SSL problem.
- Launch the iPhone Settings and select Privacy.
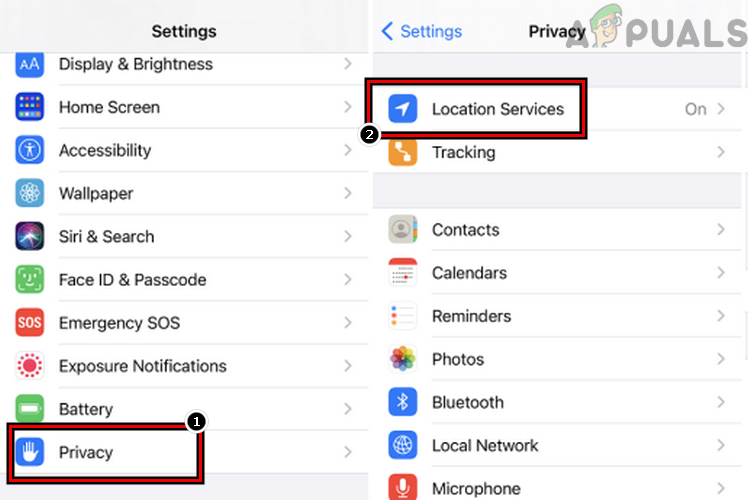
Open Location Services in the iPhone’s Privacy Settings - Now open Location Services and then enable the Location Services by toggling its switch to the on position.
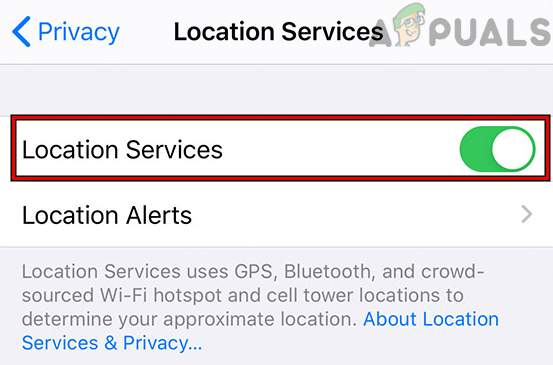
Enable Location Services in the iPhone’s Privacy Settings - Then check if the app or website on the iPhone is clear of the SSL error. If so, then you may disable the Location Services.
7. Edit the DNS Settings of the iPhone
If the DNS of the network of your iPhone is failing to translate the web addresses of the related websites/apps in a timely fashion, then that may lead to the SSL error under discussion. In this case, editing the DNS settings of the iPhone may resolve the SSL issue.
- Firstly, uninstall any DNS-related app on your iPhone (like DNSCloak) and check if that resolves the issue.
- If not, launch the iPhone’s Settings and open Wi-Fi.
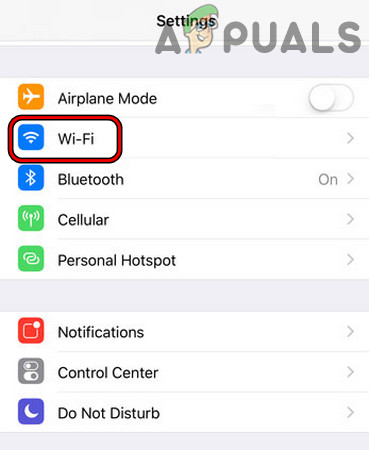
Open Wi-Fi in the iPhone Settings - Now tap on the Info icon for your Wi-Fi network and tap on Configure DNS.
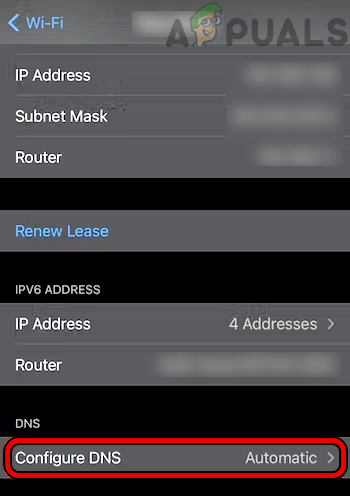
Open Configure DNS in the Wi-Fi Settings of the iPhone - Then if the DNS is set to manual, set it to Automatic, and afterward, check if the iPhone is operating normally without SSL error.
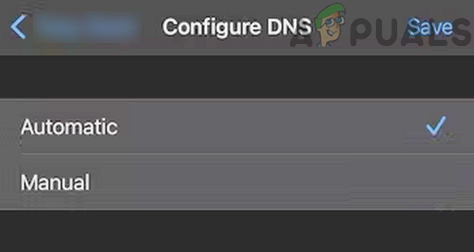
Set the DNS iPhone’s Wi-Fi to Automatic - If that did not work or DNS was already set to Automatic, set the DNS to Manual in the Configure DNS menu of the iPhone.
- Now click on Add Server and add the addresses of a public DNS server like 1.1.1.1 Cloudflare or preferably Quad9.
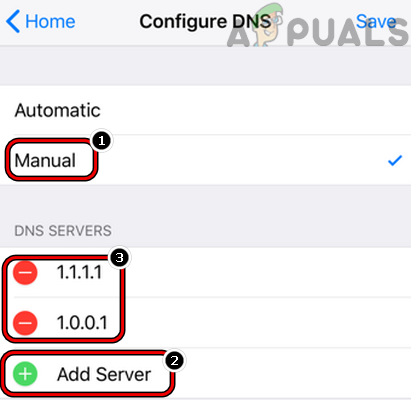
Add Cloudflare DNS to the iPhone’s DNS Settings - Afterward, check if the iPhone is clear of the SSL error.
- If the issue persists and you are using unc0ver to jailbreak the iPhone, then delete unc0ver and check if the issue was resolved. You may reinstall unc0ver if required.
8. Trust the Profile Certificate in the iPhone’s Settings
If your iPhone is a corporate device but the corporate profile on your iPhone is not trusted, then that may cause the SSL error at hand when performing different actions.
- Launch the iPhone Settings and open General.
- Now select About and open Certificate Trust Settings.
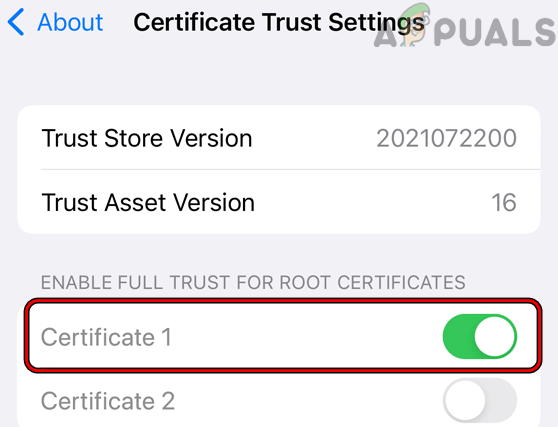
Enable Full Trust for Root Certificates for the Problematic Certificate - Then, in the section of Enable Full Trust for Root Certificates, enable trust for the required certificate by toggling its switch to the on position.
- Now, confirm to trust the certificate, and afterward, restart your iPhone.
- Upon restart, check if the SSL problem on your iPhone is resolved.
9. Reset Network Settings of the iPhone to the Defaults
If the Network Settings of your iPhone are corrupt, then that may lead to the SSL error on an iPhone as the phone may fail to load a network component essential for the SSL transport layer. In this context, resetting the network setting of the iPhone may clear the iPhone from the SSL error. Keep in mind that you may have to re-setup all the networks on the iPhone (like Wi-Fi networks, VPNs, etc.).
- Launch your iPhone’s Settings and tap on General.
- Now open Reset and then tap on Reset Network Settings.
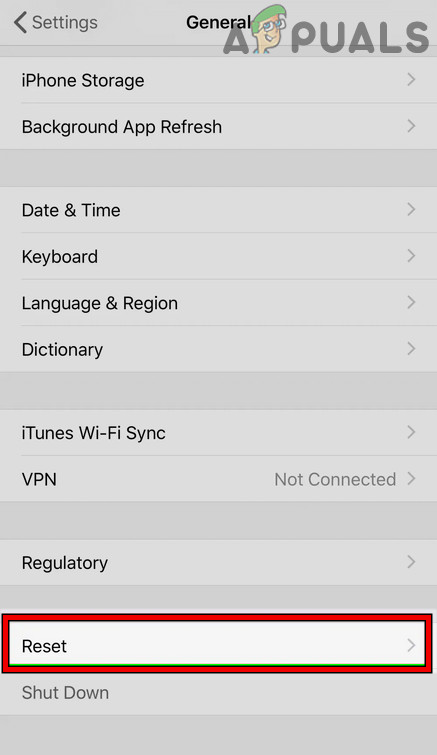
Open Reset in General Settings of Your iPhone - Afterward, confirm to reset the iPhone’s Network Settings, and once done, re-setup the network on the iPhone (like mobile data or Wi-Fi).
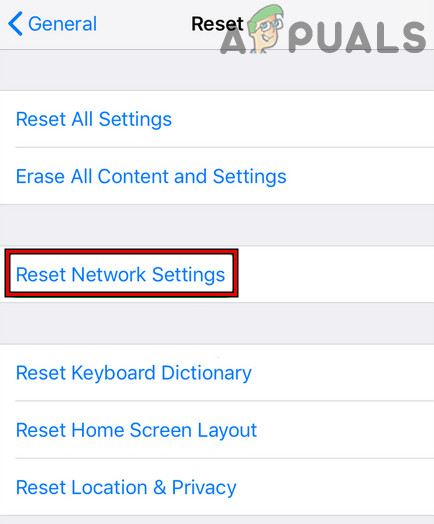
Tap on Reset Network Settings on iPhone - Then check if the iPhone’s SSL error is cleared.
10. Try Another Network or Use a VPN
You may encounter an SSL error on an iPhone if the ISP or router is interfering with the iPhone’s web traffic and blocking its access to an essential online resource. In this scenario, trying another network or using a VPN may solve the problem.
- Open the Control Center of the iPhone and disable Wi-Fi.
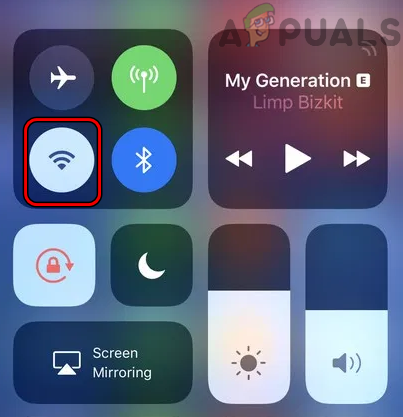
Disable Wi-Fi on the iPhone - Now enable mobile data and check if the SSL issue is resolved.
- If not, check if using the 4G or LTE mobile data connection (not 5G) solves the SSL problem.
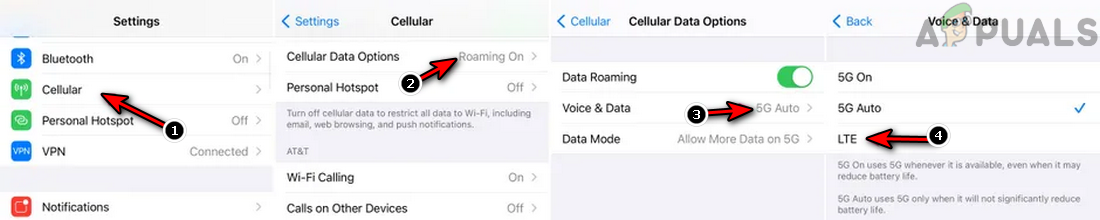
Set Mobile Data of the iPhone to LTE - If that did not work, disable mobile data and enable Wi-Fi on the iPhone.
- Then connect the iPhone to another network like a hotspot from another phone with a different mobile carrier. Make sure the iPhone is not connected to a guest network which limits the device’s ability to communicate over the Internet.
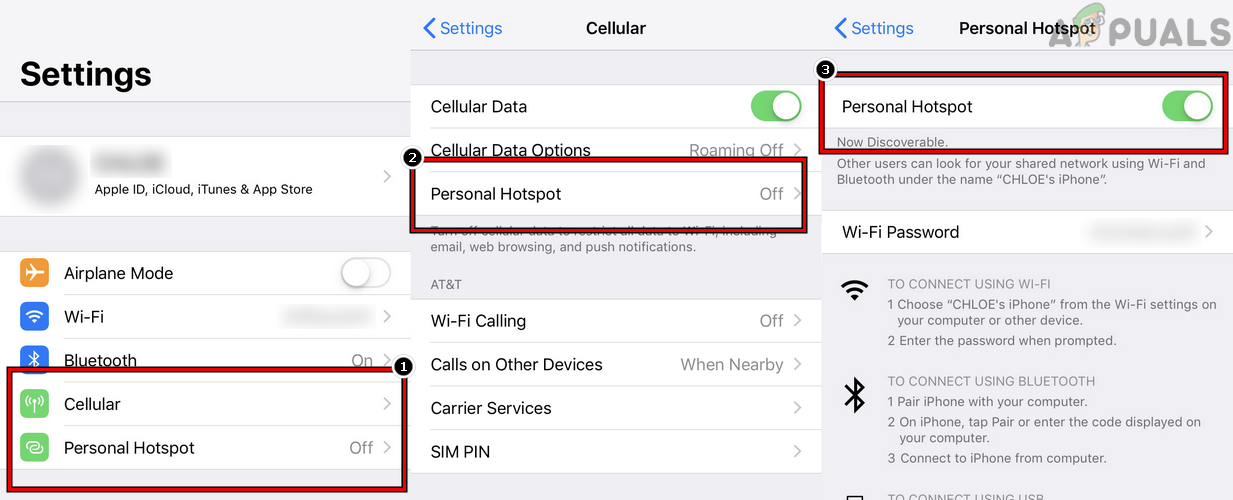
Enable Hotspot on the iPhone - If the issue persists, download and install a VPN app on your iPhone.
- Then launch the VPN and connect to a preferred location like the USA.
- Afterward, check if the iPhone’s SSL error is cleared.
11. Disable Content Filters in the Router’s Settings
If the content filters in the router’s settings are blocking the iPhone’s access to a vital online resource, then that may lead to the SSL error on the iPhone. In this case, disabling the router’s content filters may solve the problem. For illustration, we will discuss the process for Disney Circle.
- Launch the Circle app and near the top left, tap on the hamburger icon to open the Circle menu.
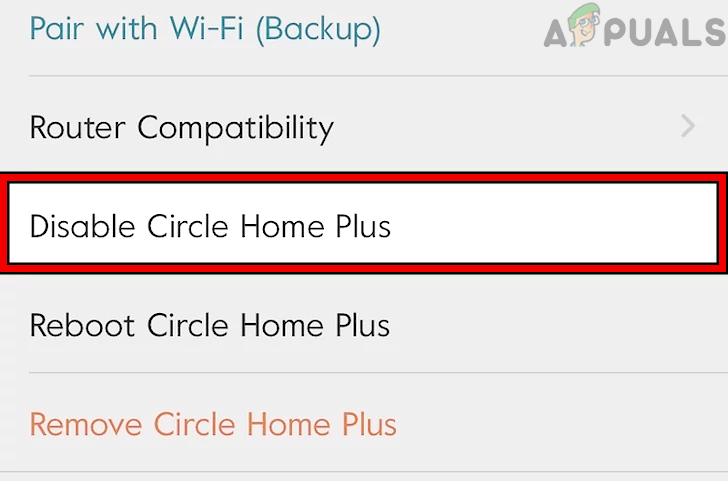
- Now open Settings and tap on Disable Circle.
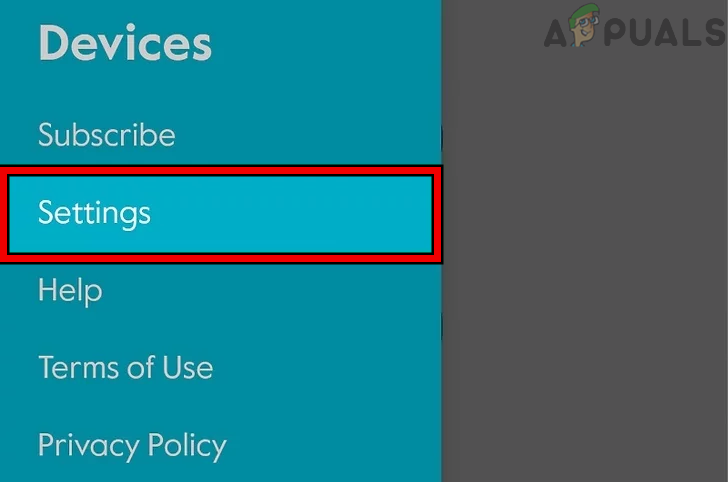
Open the Circle Settings in the App - Then confirm to disable Circle and afterward, restart your networking equipment.
Disable Disney Circle Through the App - Upon restart, check if the SSL error of the iPhone is cleared. If so but you want to keep the Circle enabled, then check if setting the content filtering of Circle to Teen (if set to KID or Pre-K) solves the problem.

Set Filter Settings of the Circle to Teen
12. Reset All Settings of the iPhone
A mere misconfiguration of any of the iPhone’s settings may result in the SSL error under discussion and resetting all settings of the iPhone may solve the problem. Before proceeding, make sure to note down the essential settings that may be required later.
- Open the Settings on the iPhone and steer to General>> Reset.
- Now press on Reset All Settings and afterward, confirm to Reset your iPhone Settings.
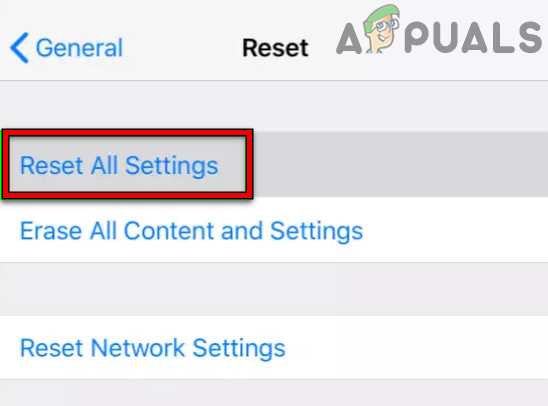
Reset All Settings on Your iPhone - Once done, check if the iPhone is clear of the SSL error.
13. Disable the Router’s Security Product
If the router’s built-in security is “thinking” that the particular website or app is not safe and blocks the iPhone’s access to that resource, then that may cause the SSL error under discussion. In this scenario, disabling the router’s built-in security or network firewall (like Pi) may solve the SSL problem. For illustration, we will discuss the process for Xfinity.
Warning:
Advance with extreme care and your own risk as disabling the router’s security or network firewall may expose the iPhone, network, network devices, and data to threats.
- Launch the Xfinity app on your iPhone and open Connect.
- Then select Advanced Security and tap on the Settings icon.
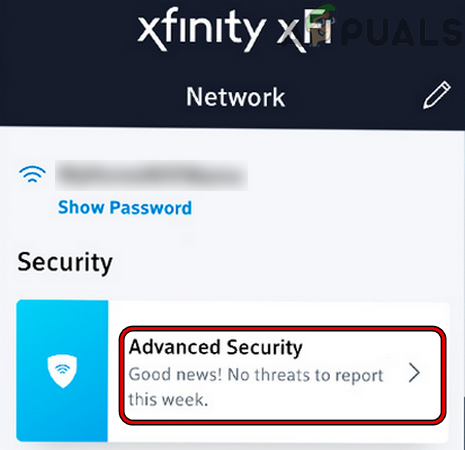
Open Advanced Security Settings of Xfinity - Now disable Advanced Security by toggling its switch to the off position and then save your changes.
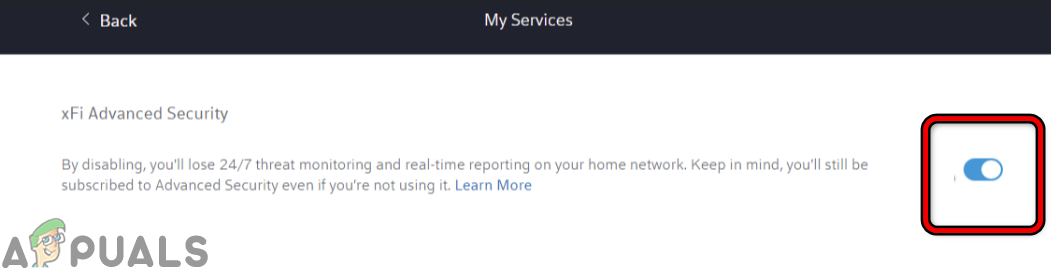
Disable Advanced Security of Xfinity - Then restart the router and other networking devices.
- Upon restart, check if the iPhone is working fine and clear of the SSL error.
14. Reinstall iOS on Your iPhone Through the iTunes
If the iPhone’s OS got corrupt due to partial application of the latest iOS update, then that may cause the SSL error, and reinstalling the iOS on your iPhone through iTunes may solve the problem. Before proceeding, make sure to back up the data on your iPhone and note down the Apple credentials used on the iPhone to re-setup the iPhone.
- Plug the iPhone into a computer (where iTunes are already installed and the phone was backed up earlier) through the USB lightning cable.
- Now open iTunes on the iPhone and if iTunes is already open, relaunch it.
- Then, while the iPhone is still connected to the system, press/release the iPhone’s volume up button.
- Then press/release the volume down button of the iPhone and press/hold the iPhone’s side button till the recovery mode screen is shown (not the Apple logo screen).
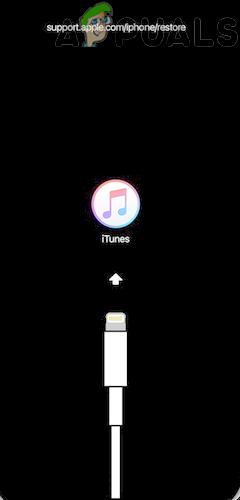
Boot iPhone into the Recovery Mode - Now release the iPhone’s side button and switch to iTunes on the system.
- Then head to Devices and click on your iPhone.
- Now steer to the Summary tab and click on Update (if shown).
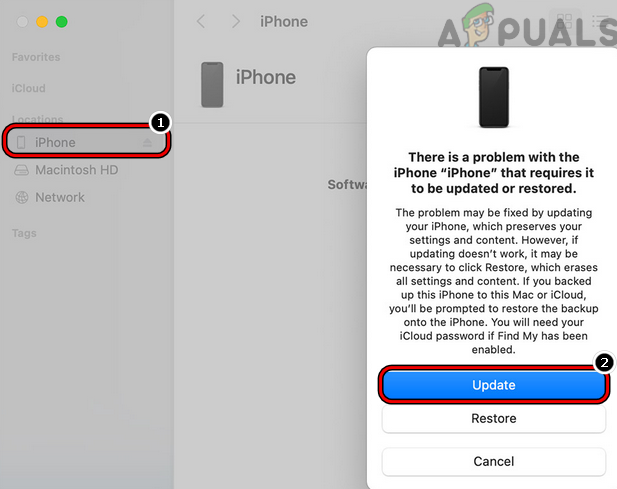
Update iPhone Through the iTunes - Then wait till the process completes. You have 15 minutes in the Recovery Mode to complete the process, otherwise, the iPhone will automatically restart to the normal mode. If that happens, let the update download on iTunes, and afterward, repeat the above steps.
- Once the update process completes, boot your iPhone into the normal mode and check if it is operating fine.
- If not, repeat steps 1 to 7 but at step 7, select Restore and follow the prompts on the screen to complete the process.
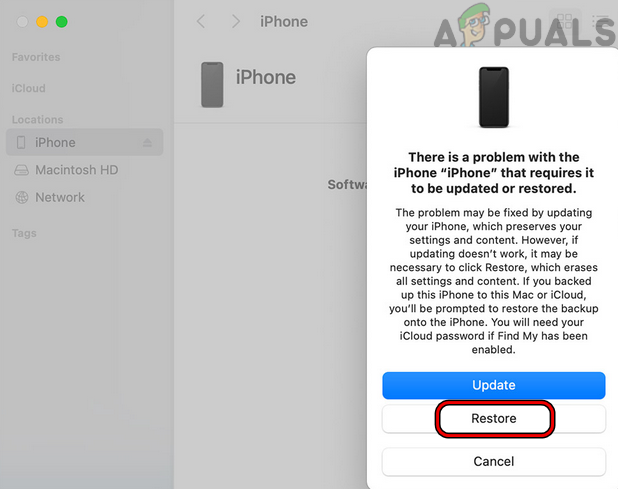
Restore the iPhone Through the iTunes - Afterward, re-setup the iPhone and hopefully, it will be clear of the SSL error.
If iTunes was not used before to back up the iPhone and the Update process did not work, then resetting the iPhone to the factory defaults may solve the problem.