How to Fix SSD Not Being Found During Windows Installation?
SSD not being found when installing Windows is a common issue that often arises due to having incompatible drivers, incorrect BIOS settings, and hardware issues. The most common cause of this issue is missing SSD drivers, which prevents the Windows installer from recognizing the SSD when installing the operating system.
Additional causes include the system being set to an incompatible SATA mode and the SSD not being connected properly.
As we have discussed the causes, let’s jump to the solutions to this issue.
1. Load SSD Driver
In most cases, this issue has been resolved by loading the correct SSD driver when installing Windows. There are circumstances where you need to manually install the SSD driver even though it comes preinstalled in the Windows installation media.
If you have a newer SSD drive or if your SSD uses RAID configurations or Intel’s Rapid Storage Technology (RST), you might need to manually download and install the SSD driver to install the operating system.
- Go to the official Intel website to download the SSD driver if it uses the RST technology.

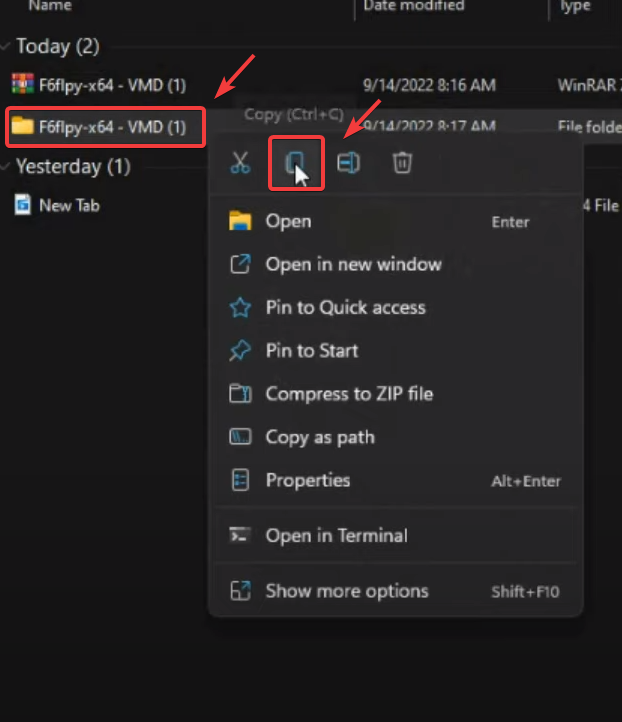
- Once it is downloaded, extract it using the WinRAR or 7zip file.
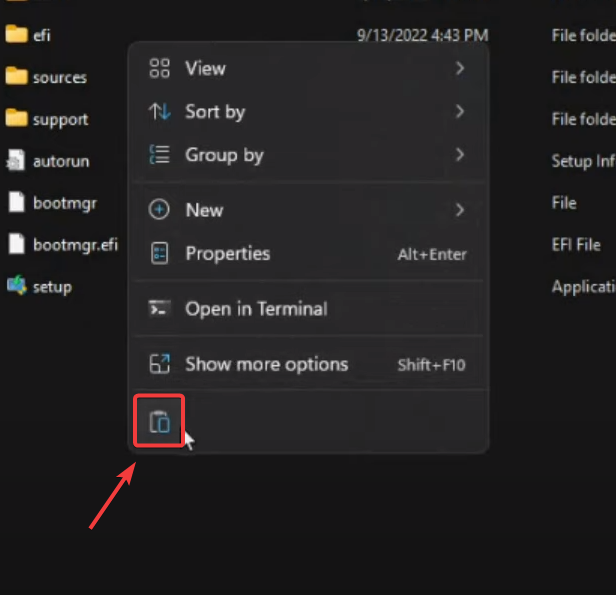
- Then, copy the extracted folder and paste it into the Windows installation media.
- Once done, restart your computer to boot the USB.
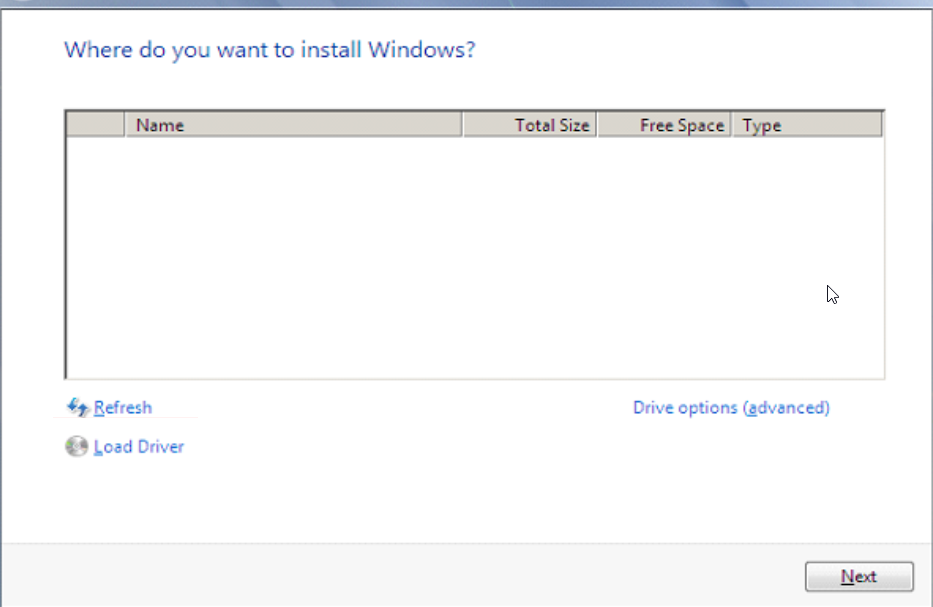
- Then, during the installation, click Load Driver and then browse the SSD driver folder to install the driver.
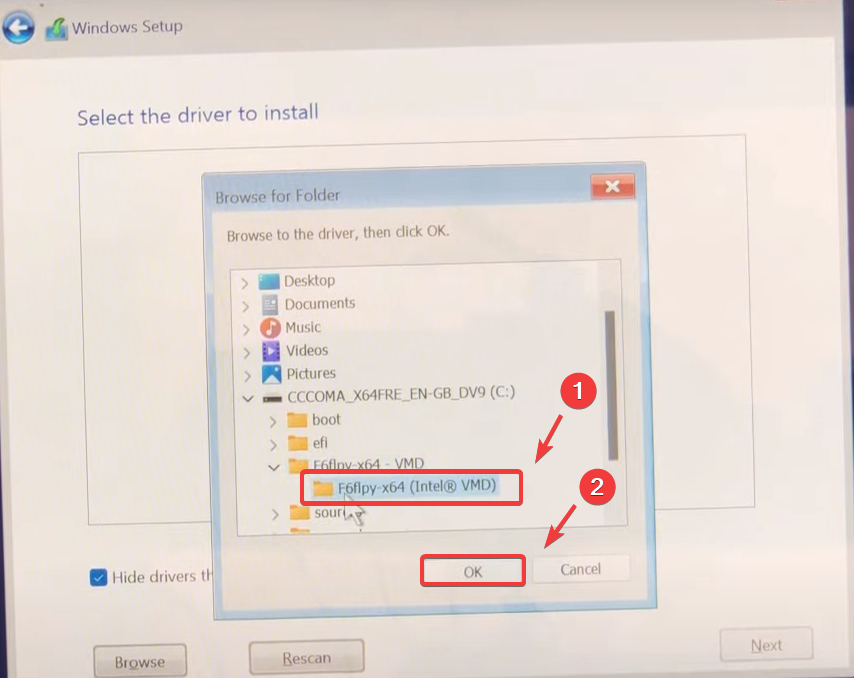
- Once done, click OK and follow the instructions on-screen to install the driver. After that, you should now see the SSD on which you want to install the operating system.
2. Enable AHCI Mode
AHCI (Advanced Host Controller Interface) is a standard mode for SATA drives that is often recommended as it allows better compatibility with the operating system. When you enable AHCI mode, it will ensure the BIOS and OS communicate with the SSD using standardized commands, which can resolve this issue.
- Switch off your computer completely.
- Then, turn it back on. Once you see the manufacturer logo, start pressing the keys that take you to the BIOS settings. Common BIOS access keys (F2, Delete, F12), some motherboards might use different keys (such as Esc, F10, etc.)
- Once you are in the BIOS settings, go to the Main section; here, click the option related to SATA mode and select AHCI mode, or simply press Ctrl + S to switch to the AHCI mode.
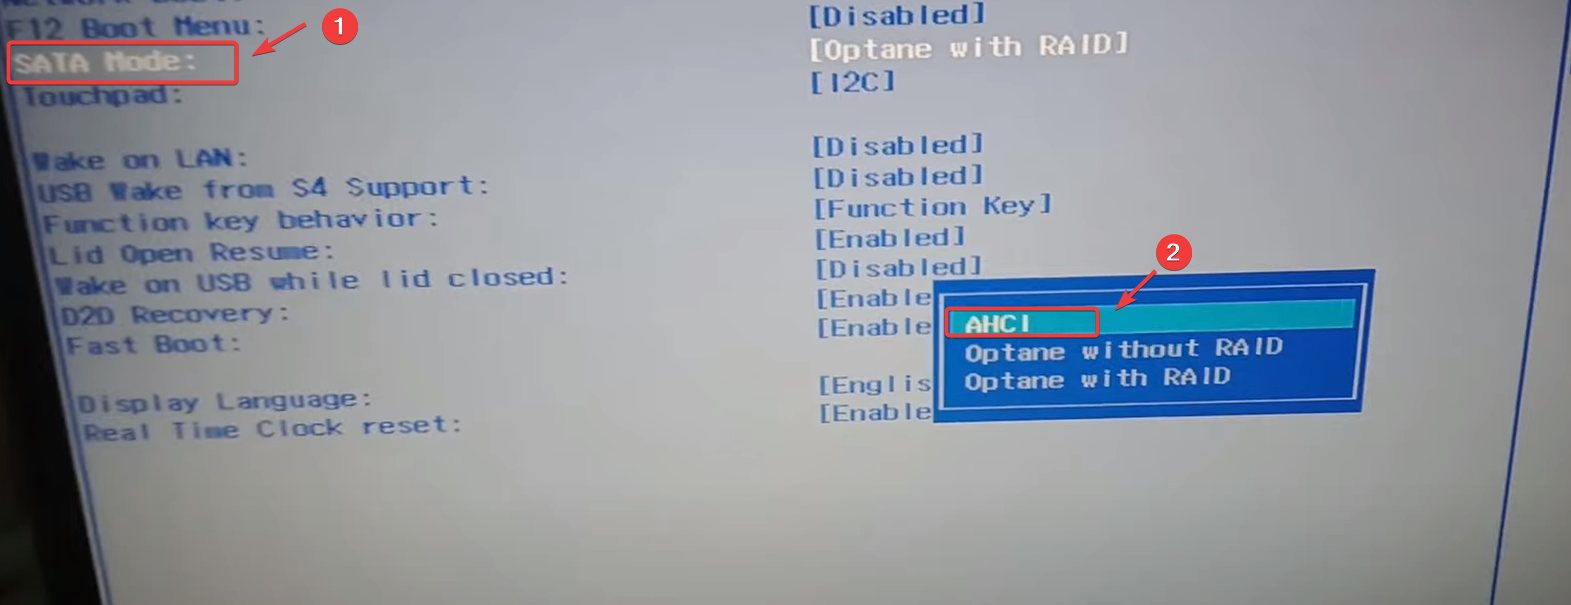
- Once done, you will see AHCI listed next to the SATA mode.
- Verify if the issue is resolved.
3. Disable the VMD Controller
The VMD (Volume Management Device) is an Intel technology that is designed to manage SSDs and NVMe. Your Windows installation media might not include drivers for the VMD controller, potentially leading to an issue with the SSD not being detected. Therefore, you can try disabling the VMD controller to force the system to use the driver installed in the Windows installation media for the SSD drive.
- Turn off your computer completely.
- Then, turn it back on.
- Once you see the manufacturer’s logo, press the Delete or F12 keys to access the BIOS settings. If the BIOS key is different from F12 or Delete, press that key to navigate the BIOS settings.
- In the BIOS settings, navigate to the Advanced Settings > PCH Configurations > VMD Setup Menu.
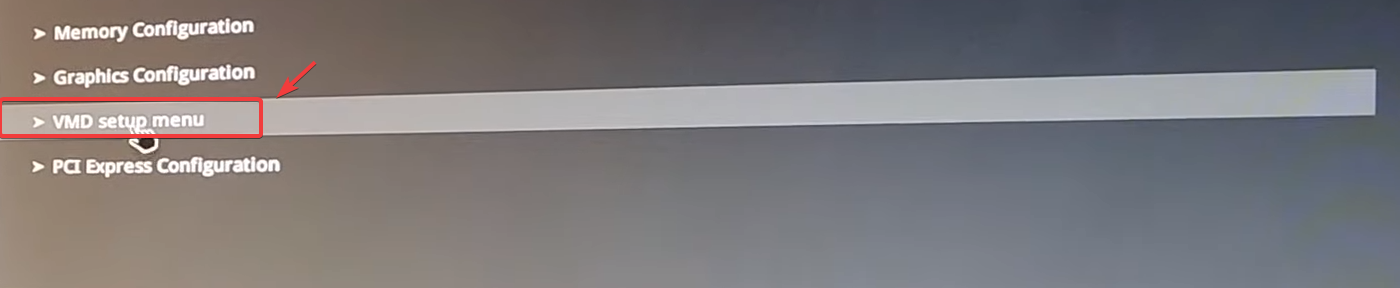
- Here, disable the VMD Controller if it is enabled.

- Once done, check if the issue persists or is resolved.
4. Clean the SSD and Try Again
If the problem is still not resolved, you can try formatting the SSD drive, but remember you won’t be able to boot your previous Windows. Formatting the SSD can resolve the issue if the SSD has improperly formatted partitions, as the Windows installation may not recognize it. Therefore, it is highly recommended that you try formatting the hard drive and see if the issue is resolved.
Boot your Windows installation media and follow the simple on-screen instructions until you get to the Windows setup screen. Then, press the Shift + F10 keys simultaneously to open the Command Prompt window.
- Here, type the following commands to format the SSD drive.
Diskpart
list disk
- After this command, you will see all the disks. Simply type the following command and make sure to replace 0 with the right disk number.
Select disk 0
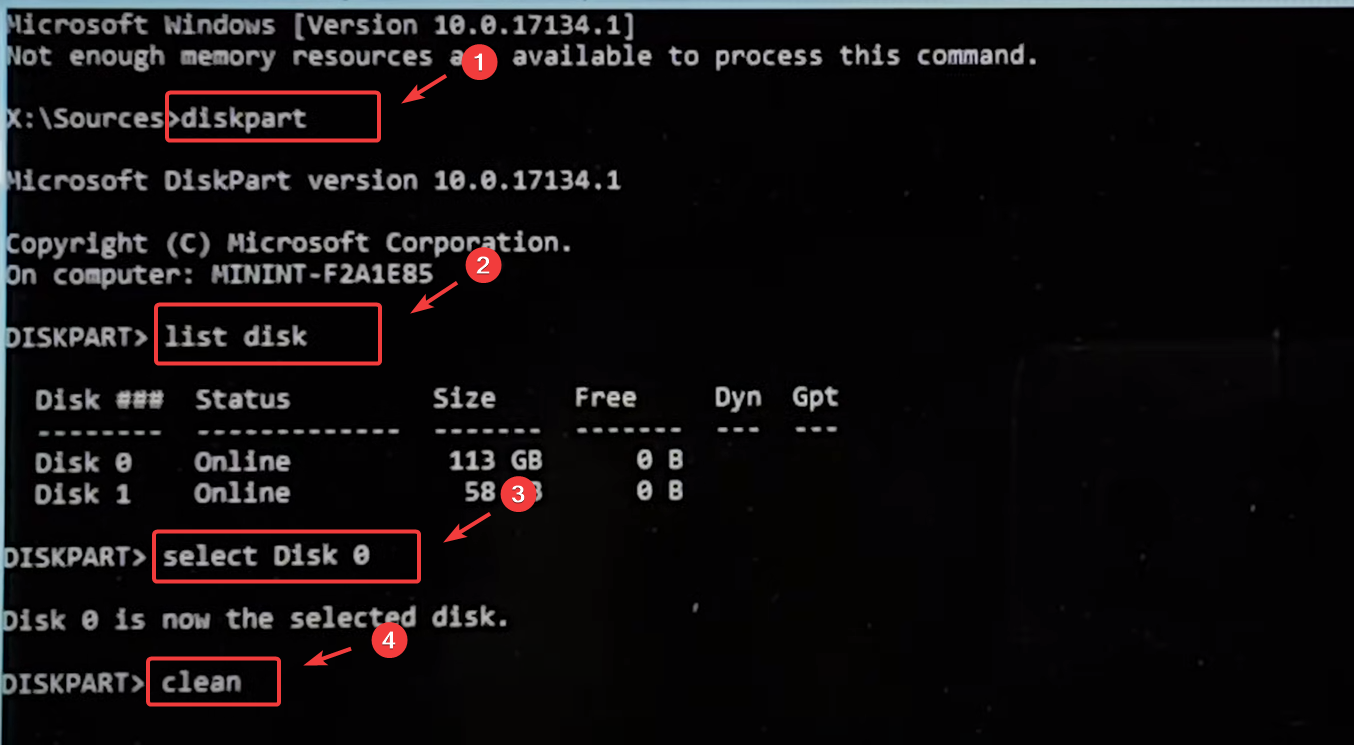
- Once the disk is selected, type the clean command to format the disk.
- Once done, check if the problem has been resolved or not.
5. Re-seat the SSD
I have also encountered this issue when installing Windows. I simply disconnected and reconnected the SSD, which worked for me. However, if the problem persists, try changing the SATA cable and see if that resolves the issue. Further, you can recreate the Windows installation media, as it might be outdated or may not contain the necessary drivers for the SSD. If this also fails, test the SSD drive on a different computer, as it may have a hardware issue preventing the installer from recognizing it.