How to Show Taskbar Across Multiple Monitors on Windows 11
By default, Windows 11 is configured to only show the taskbar on the main display. But if you’re a multi-monitor kind of guy, you might want to make the adjustments in order to force your OS to show the taskbar across all your connected monitors.
If you’re as weirded as I was when I first noticed the taskbar missing from the second screen on Windows 11, you’ll be happy to know there are a few methods of making the taskbar appear on every connected monitor.
You can show or hide that taskbar menu from your secondary displays by tweaking some Windows Settings or by doing some registry changes via Registry Editor.
We’ve covered both methods, so feel free to follow the steps that are closest to your preferred way of doing things on Windows 11.
How to Show the Taskbar Across Multiple Devices via Settings
- Press Windows key + I to open the Settings menu on Windows 11.
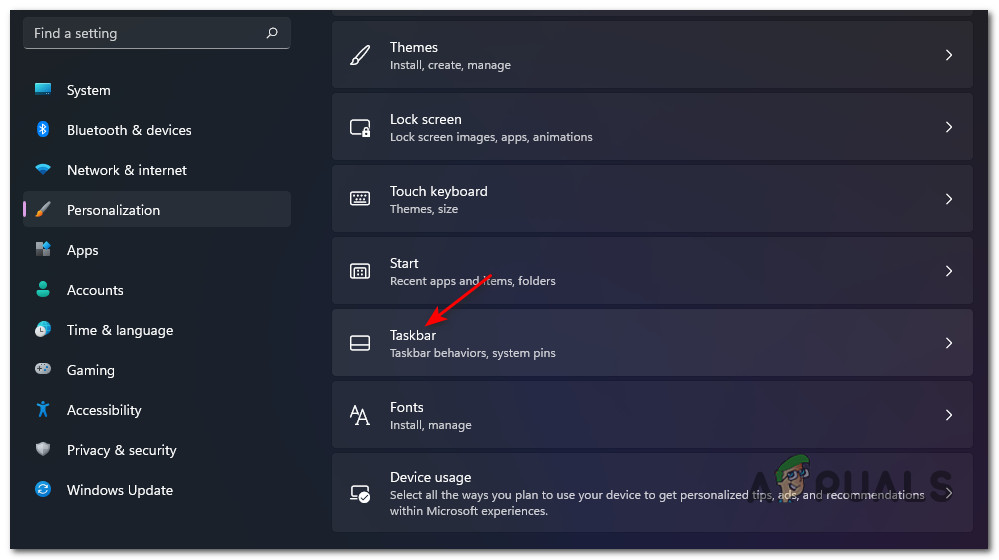
- Inside the Settings menu, select the Personalization tab from the menu on the left.
- Next, scroll down through the various personalization options and click on Taskbar to bring up the dedicated menu.
Accessing the Taskbar menu - Inside the dedicated taskbar menu, expand the Taskbar behaviors drop-down menu from the list of available options.
- Next, check the box associated with Show my taskbar on all displays.
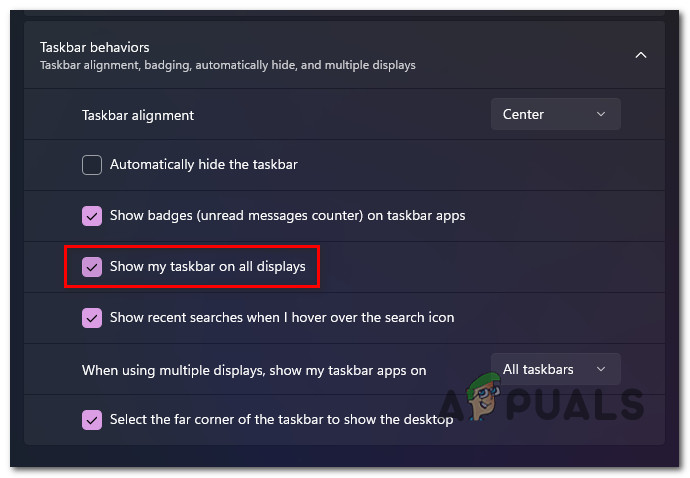
Showing the taskbar on every display - The change is instant, so you should notice the taskbar appearing immediately after you check the box. At this point, you can safely close the Settings window.Note: If you want to customize this behavior further, use the When using multiple displays, show my taskbar on the drop-down menu to make the taskbar appear only where a window is open.
How to Show the Taskbar Across Multiple Devices via Registry Editor
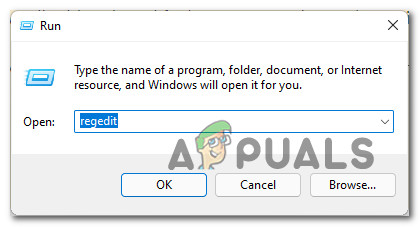
- Press Windows key + R to open p a Run dialog box. Next, type ‘regedit’ inside the text box press Ctrl + Shift + Enter to open up the Registry Editor with admin access.
Opening the Registry Editor - When you’re prompted by User Account Control, hit Yes to grant admin access.
- Once you’re inside the Registry Editor, use the menu on the left to navigate to the following location:
HKEY_CURRENT_USER\Software\Microsoft\Windows\CurrentVersion\Explorer\Advanced
Note: You can either use the menu on the left to navigate to the location above from key to key, or you can paste the full .REG pack inside the navigation bar at the top and press Enter to get there instantly.
- Once you arrive in the correct location, ensure that the Advanced key is selected from the left, then move over to the right section and double-click on the MMTaskbarEnabled DWORD.
- Next, set the base to Hexadecimal and the value to 1 in order to make the taskbar visible on every display.
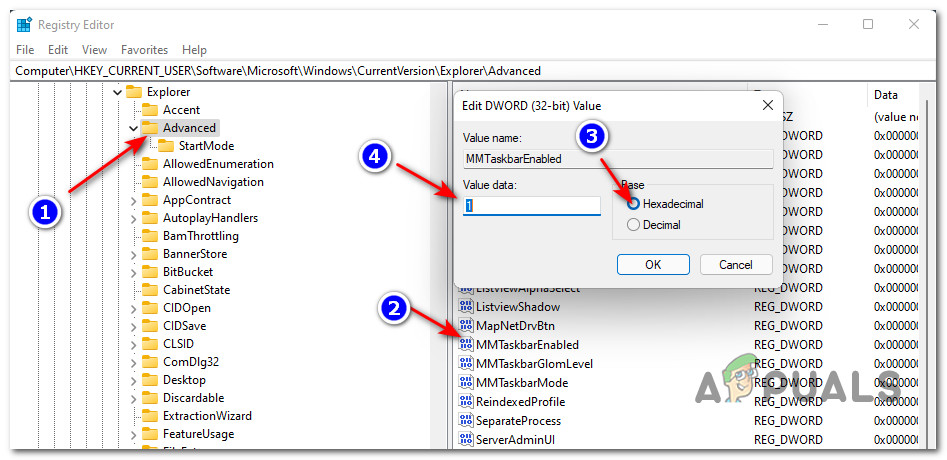
Enabling the Taskbar menu on every connected display via Registry Editor - Click Ok to save the changes, then reboot your PC in order to allow the changes to take effect.


I have done all of this, and while the taskbar is technically there, there is no way to get it to pop up when auto-hide is on, even pressing the windows key on the secondary monitor or clicking around the edges doesn’t help. How do you get it to pop up with auto hide?