[FIX] Service Host: Diagnostic Policy Service High CPU & Memory Usage
Diagnostic service runs in the Windows OS to detect and troubleshoot problems with the Windows components. This service is required to run the Diagnostics utility in Windows and it is a background service which means it is automatically started when you boot your system and keep running as long as the system is on. If this service is consuming an abnormally high amount of CPU and RAM then this will make the overall functioning of the Windows slow to respond to other processes and the user faces a lagging problem.

Method 1: Delete the SRUDB.dat file
In this method, we will stop the service and delete a system file called SRUDB.dat which is located in the Windows installation directory. Sometimes the DPS (Diagnostic Policy Service) service constantly runs and creates logs in that file and the size of the files becomes very large. Forcing the service to stop and then deleting this file fixes this problem.
- Press Ctrl + Shift + Esc to open the Task Manager.

Press Ctrl + Shift + Esc to open Task Manager - Scroll down in the processes tab and search for Service Host: Diagnostic Policy Service.
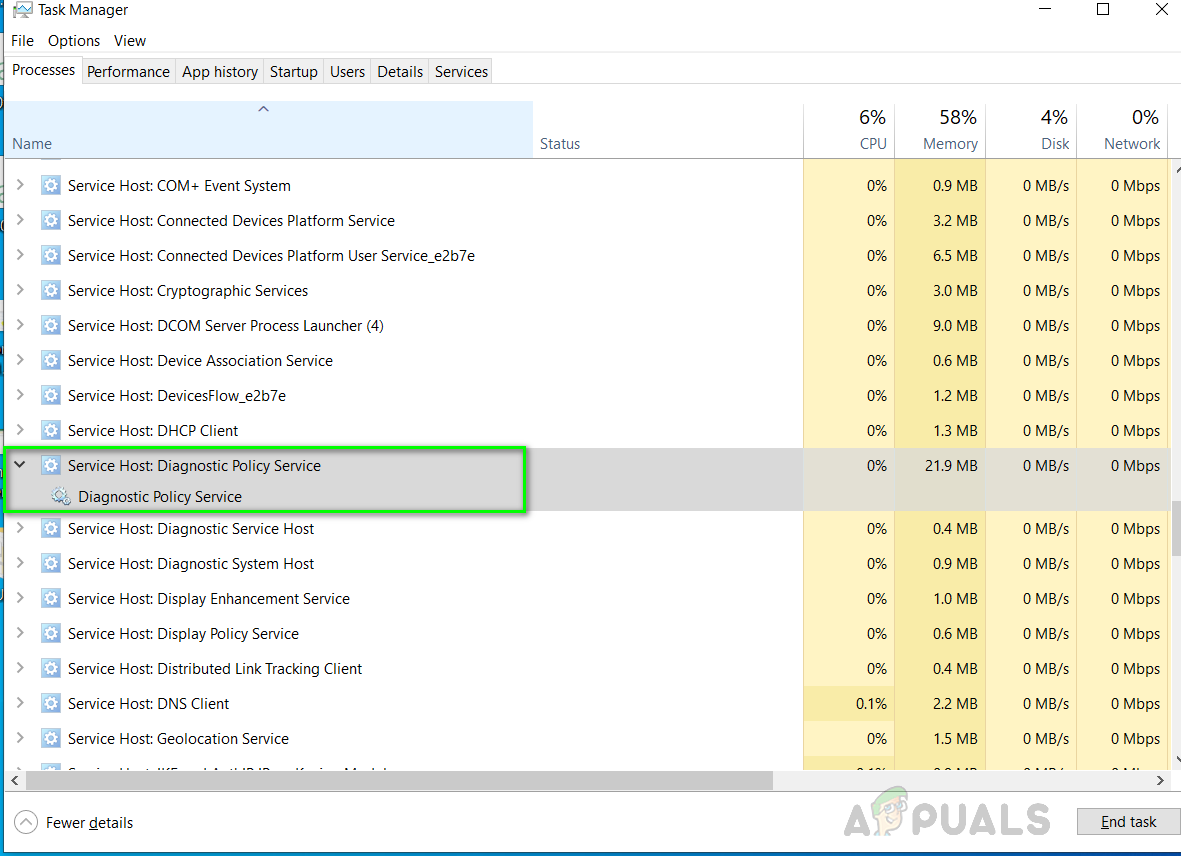
Search for Service Host Diagnostic Policy Service - Click on End Task and make sure to check the Abandon Unsafe data and Shutdown option.

End Task Service host Diagnostic Policy Service - Now click on the Window Search bar and type in Run and open the dialog box.
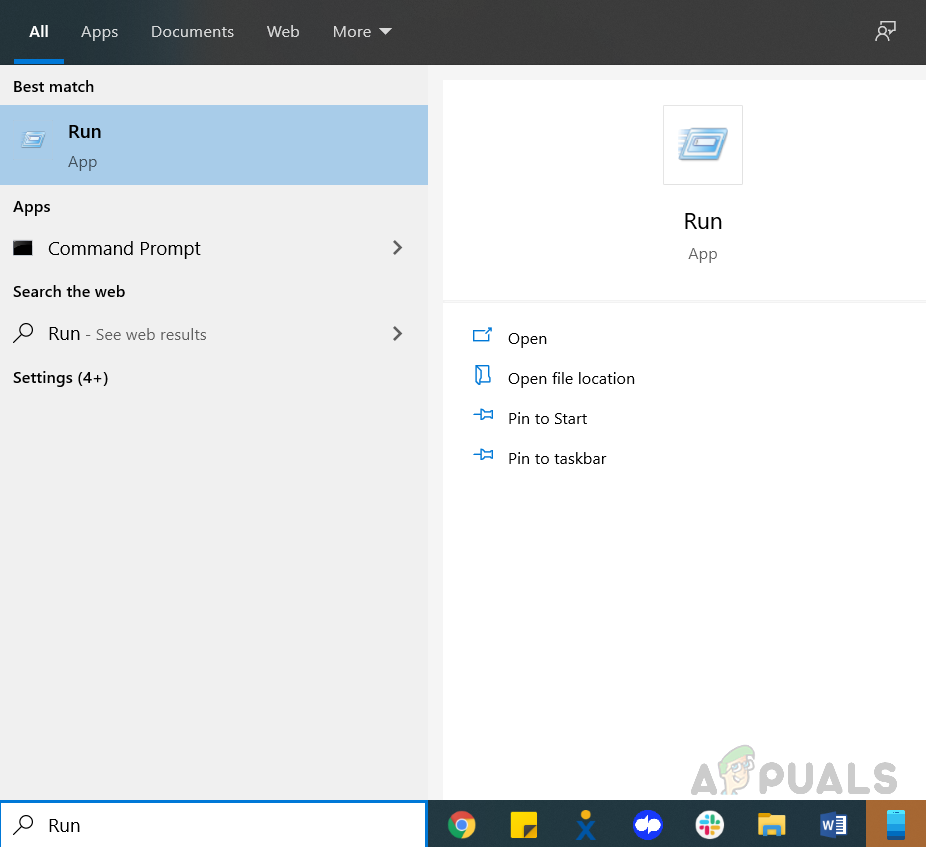
Type Run and click on it to open - Type in services.msc and click Ok to run it In the Services Window, search for Diagnostic Policy Service, right-click, and select properties.
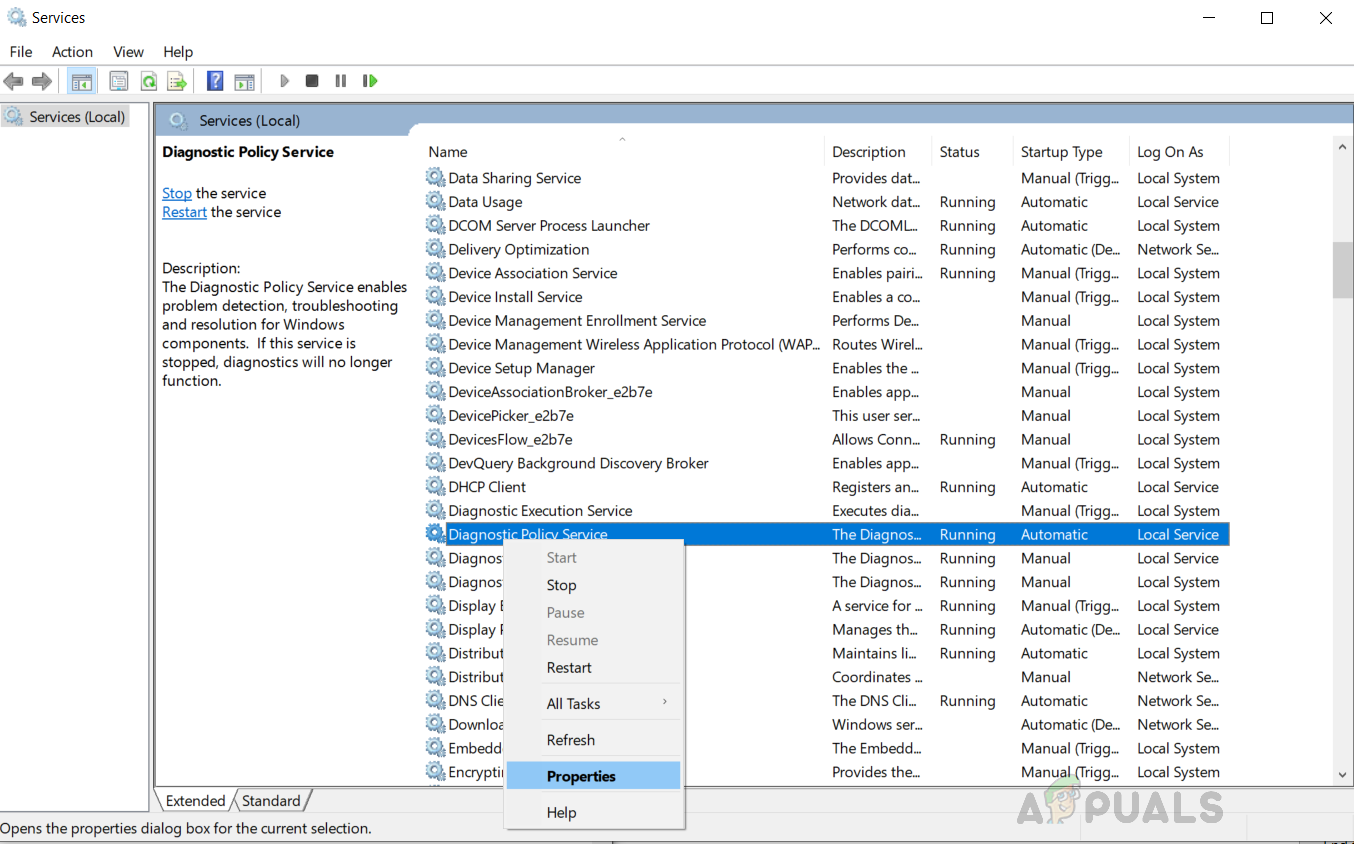
Search for Diagnostic Policy Service right-click and select properties - In the general tab, click Stop, and once the service is stopped click ok to apply changes.

Click Stop and once the service is stopped click ok to apply changes - Now type %WinDir%\System32\sru in the Run dialog box and click Ok (You will need administrator privileges to access this folder).
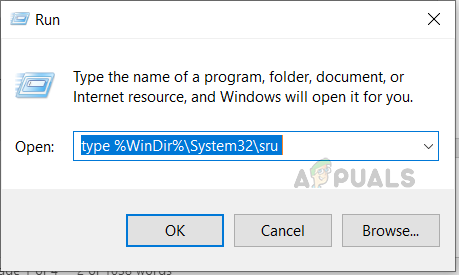
Now type in “%WinDir%\System32\sru” the Run dialog box and hit Ok - Delete the file SRUDB.dat.

Delete the file SRUDB.dat - Now restart your computer and see if the issue is resolved.
Method 2: Change Power plan
If you are using a laptop then this method might work for you. In this method, we will change the default battery Power Plan of the system. There have been reports of Microsoft Drivers malfunctioning and changing the battery settings of the system to cause spikes in the RAM usage. You need to make sure that your Power Plan settings are the same for both On Power and On Battery. Please see the below steps.
- Go to the Windows Search and type in “Power and Sleep Settings” and Click Additional Power Settings
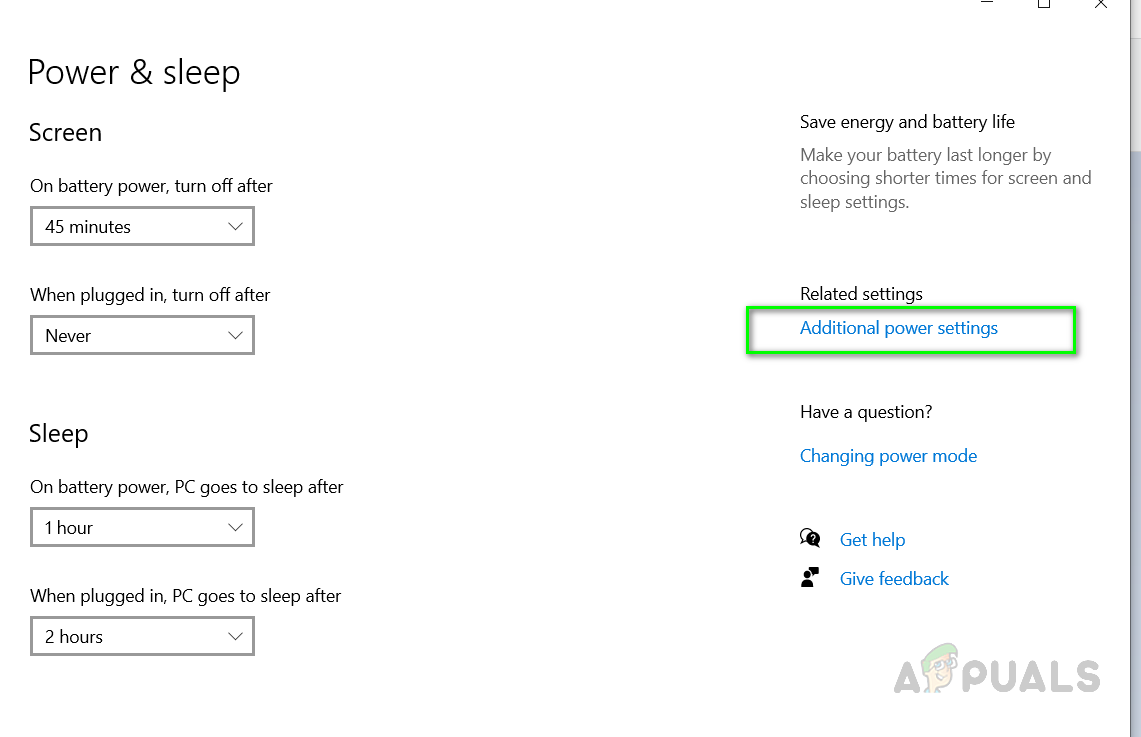
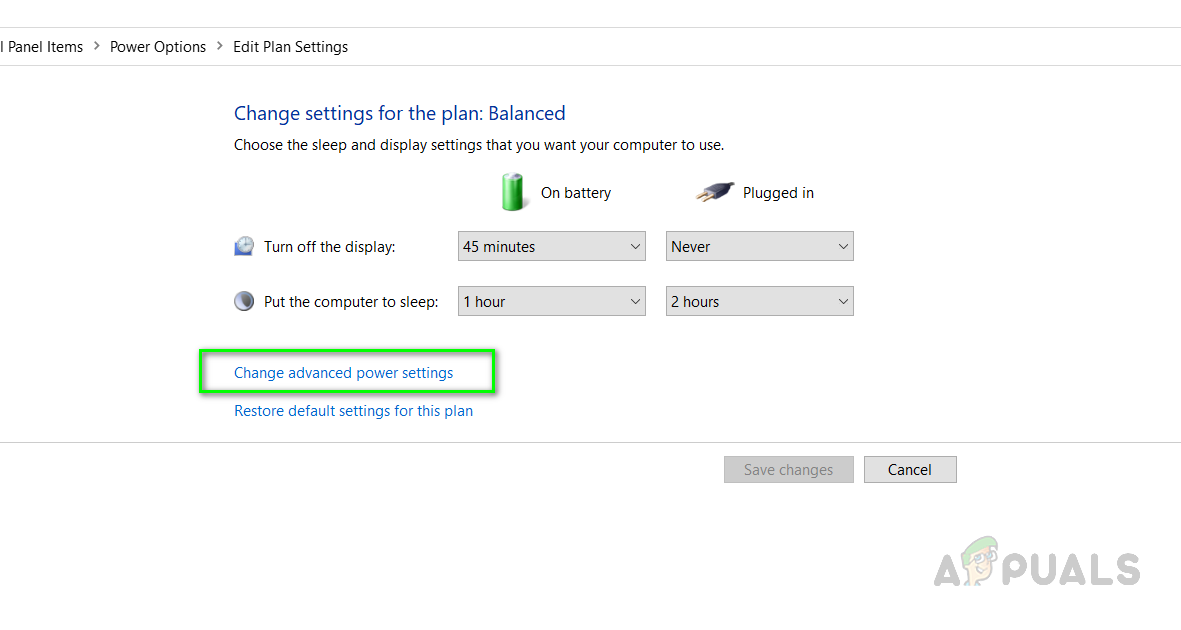
Click Additional Power Settings - Next to your plan click on Change Plan Settings and then click Change Advanced Power Settings.
Change Advanced Power Settings - In the dialog box, search for Wireless Adapter Settings and click on it to expand, under Power Saving Mode, next to On Battery make sure it is set to Maximum Performance, and on Plugged in is also set to Maximum performance.
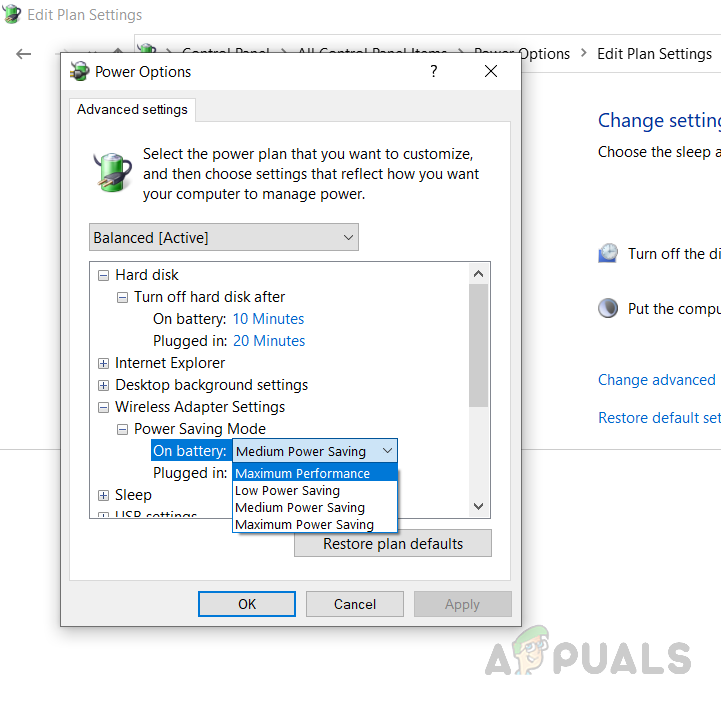
Change On battery to Maximum Performance - Click Ok to apply the changes.


is there something specific that causes this to begin using so much cpu? it’s always running but what would trigger it to begin using so much cpu?