How to Fix “Secure Boot State Unsupported” on Windows?
Secure Boot State Unsupported problem is generally seen while looking into the system information panel on the Windows 11 system. The problem appears due to the problem with the Secure boot, and as a result, users cannot enable device encryption on their system. The error is commonly seen on Windows 11 computers.

You can see this message on your Windows screen for several reasons. Here learn some of the most common ones:
- Hardware incompatibility: If your Windows system won’t meet the hardware requirements for enabling Device Encryption.
- Some required features are disabled: In your system, some of the features like Secure boot, TPM Module 2.0, etc. are disabled you are more likely to see this error message. In this case, enabling the secure boot, TPM Module 2.0, and others may help you to solve the problem.
As we know the potential reasons behind the Secure Boot State Unsupported problem, let’s try the troubleshooting methods to fix this problem.
1. Check if your Device Meets the Hardware Requirements for Device Encryption
Before applying any fixes, check if your device supports PCR7 binding or not.
- TPM Module 2.0 (Trusted Platform Module) Enabled.
- Modern Standby support.
- UEFI firmware (legacy BIOS is not supported)
You can also check if your device supports PCR7 binding by just following the steps mentioned below:
- Click on the Start button, and in the search box, type System Information.
Type System Information in the search box. - Now, click on the System Information app and the Run as administrator option from the list right.
- Then in the UAC pop-up, click on Yes.
- Then click on the System Summary option available on the left side.
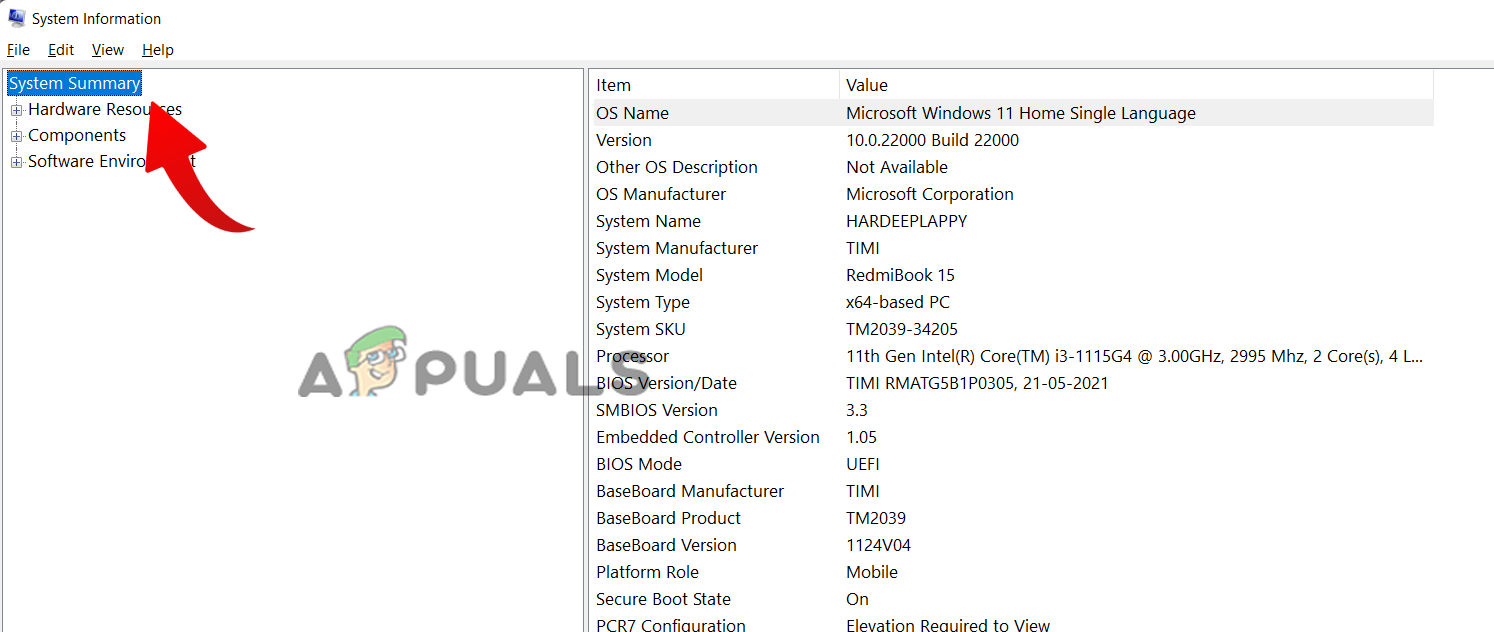
Click on the System Summary option. - Now, if you see Binding is possible besides the PCR7 configuration option, then your device is supported.
But if you see a message “Reasons for failed automatic device encryption: Hardware Security Test Interface failed, and the device is not Modern Standby” besides device encryption support, you need to try the below-given workaround to solve the problem.
2. Check Secure Boot
Secure boot is necessary for device encryption on Windows devices, and if this feature is disabled, you are more likely to see the error message. In this case, you need to enable the secure boot state in the BIOS settings.
Note: Entering into the PC BIOS might differ per your PC brand. Different brands’ PCs have different function keys to enter into the BIOS. It is best to refer to your user manual to learn how to get into the BIOS.
Here follow the steps to do so:
- Click on the Start icon and type System information in the search bar.
- From the results list, right-click on it and click on the Run as administrator option.
- Then click on the System Summary option available on the left side.
Click on the System Summary option. - Now check if the secure boot state is on or not. If not, follow the steps mentioned below to turn it on:
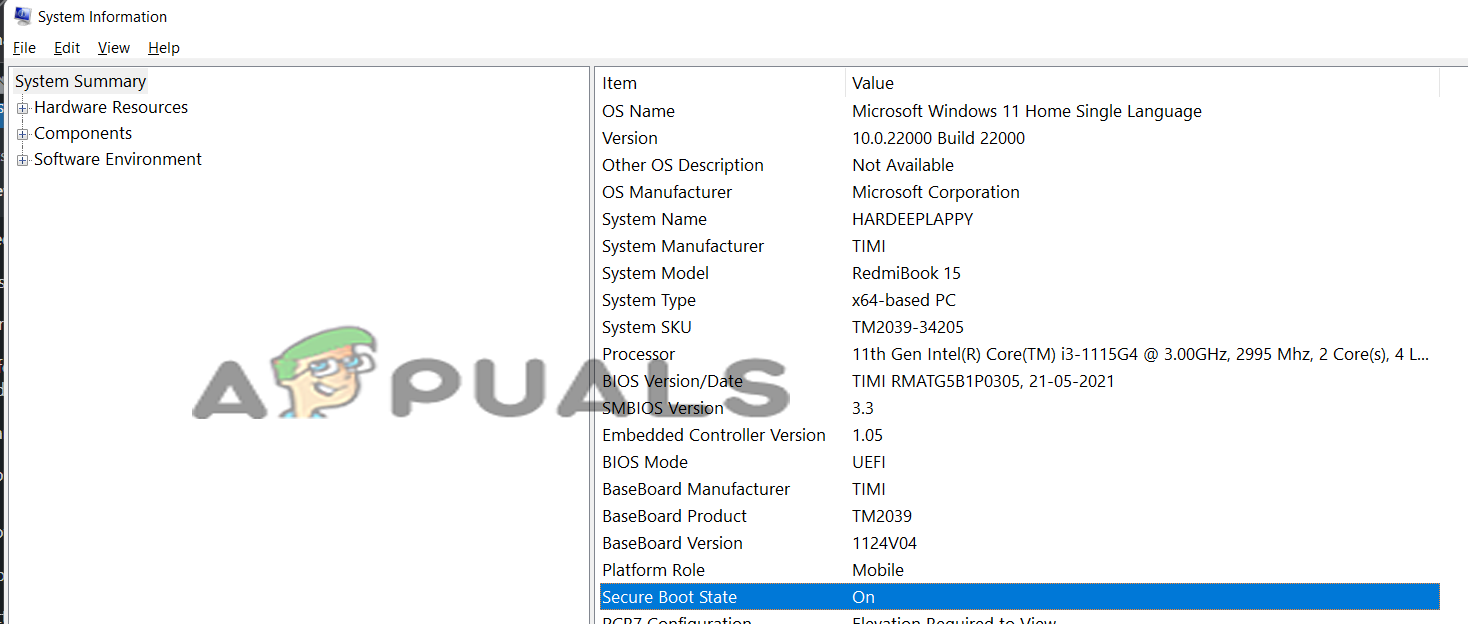
Check if the secure boot state is on. - Restart your device and enter the BIOS menu by pressing F9 or F12.
- Now go to the System Configuration tab and enable the secure boot option.
Boot up your device and check if the issue is resolved or not.
3. Check TPM (Trusted Platform Module)
Like the Secure boot feature, a TPM chip is also required for device encryption, solving the Secure Boot State Unsupported problem. Check if your Windows system has a TPM chip installed or not.
Follow the steps mentioned:
- Press Windows + R on your keyboard to open the run dialog box.
- Now in the run box, type tpm.msc and press ok.
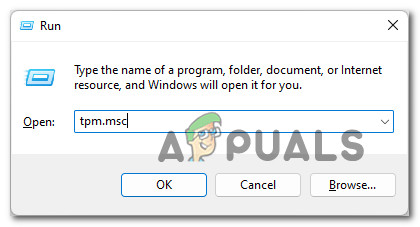
Open up the Trusted Platform Module menu. - If it shows that Compatible TPM cannot be found on this computer, then there is no TPM available on your computer, and if it is showing TPM is ready to use, then your computer has TPM installed. You can also read our guide to fixing TPM device is not detected issue.
4. Change Your BIOS Mode from Legacy to UEFI
Another requirement to run the PCR7 binding properly is that your BIOS should be UEFI, not legacy. So, do check if your BIOS mode is UEFI or Legacy or UEFI by following the instructions given:
- Click on the Start button and type system information in the search bar.
- Now right-click on it and click on the Run as administrator option.
- Then click on the System Summary option available on the left side.
- Now check if your BIOS mode is UEFI or Legacy.
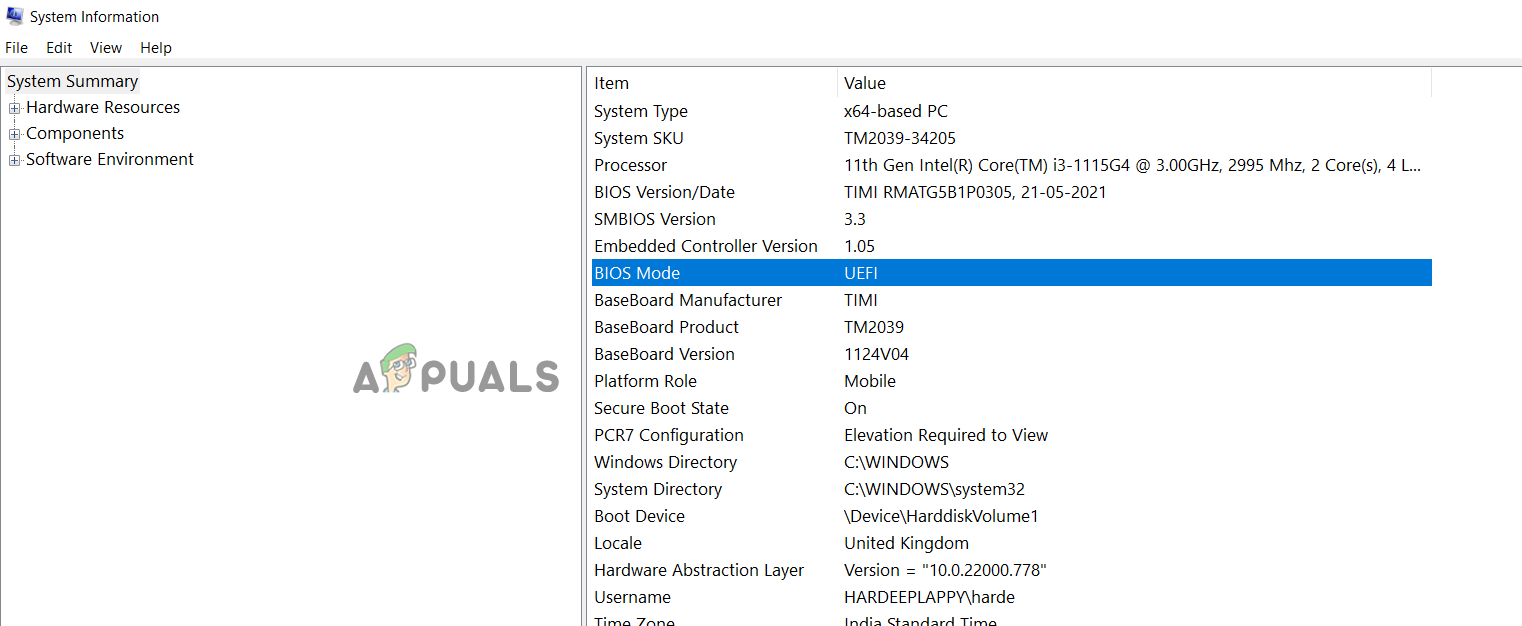
Check your BIOS mode.
If it is Legacy, follow the instructions given to change it to UEFI
- Press Windows + R key altogether to open the Run dialog box.
- Now in the run box, type mbr2gpt.exe /convert /allowfullOS and press OK.
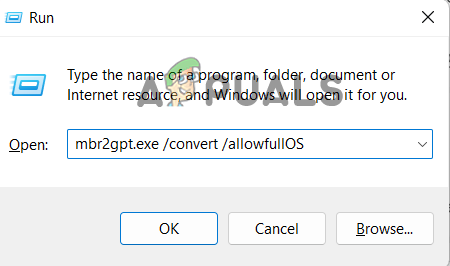
Type the command in the Run box - Then click the Windows Settings, the Update & Security option, and the Advanced Startup options.
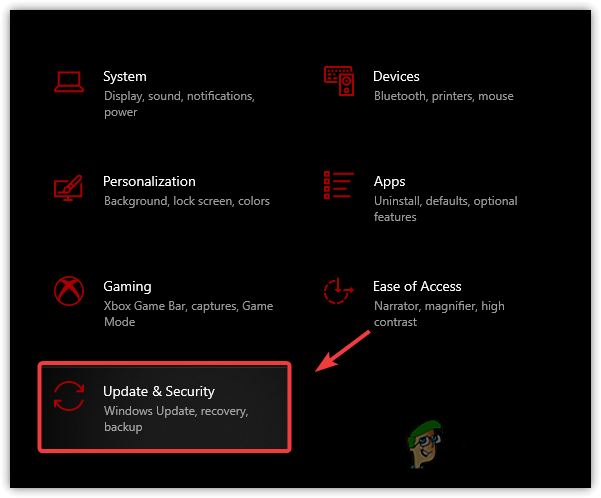
Go to Update & Security - Click on the Restart now option.
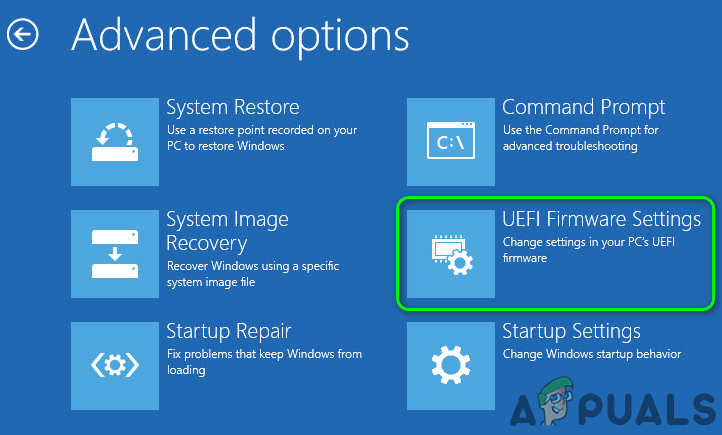
- Then in the Advanced Options, choose the Troubleshoot option.
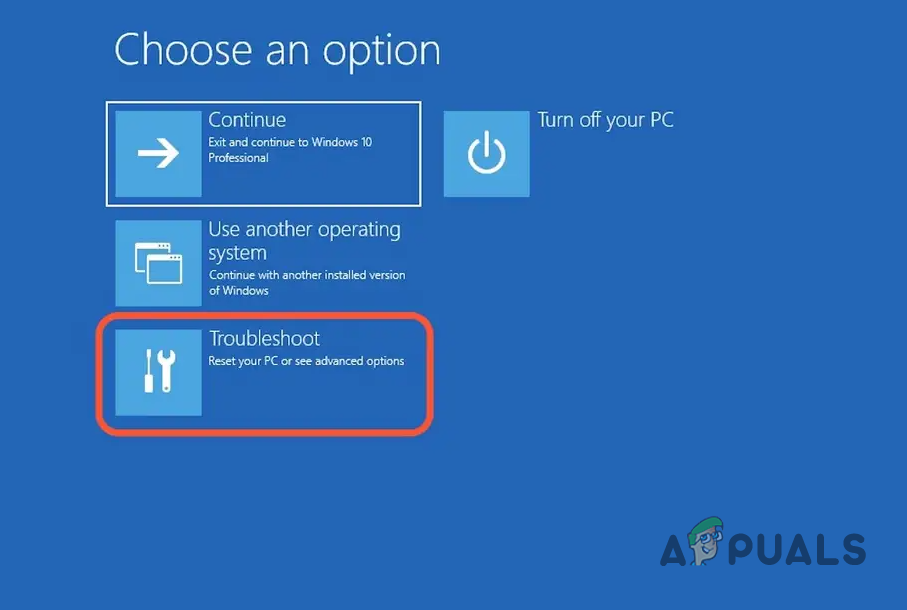
Open the Troubleshoot tab. - Now click on the UEFI firmware settings option, which will take you to the BOOT settings.
Open UEFI Firmware Settings in Advanced Options - Click on the Boot tab, then click the Boot configuration option and set it to UEFI.
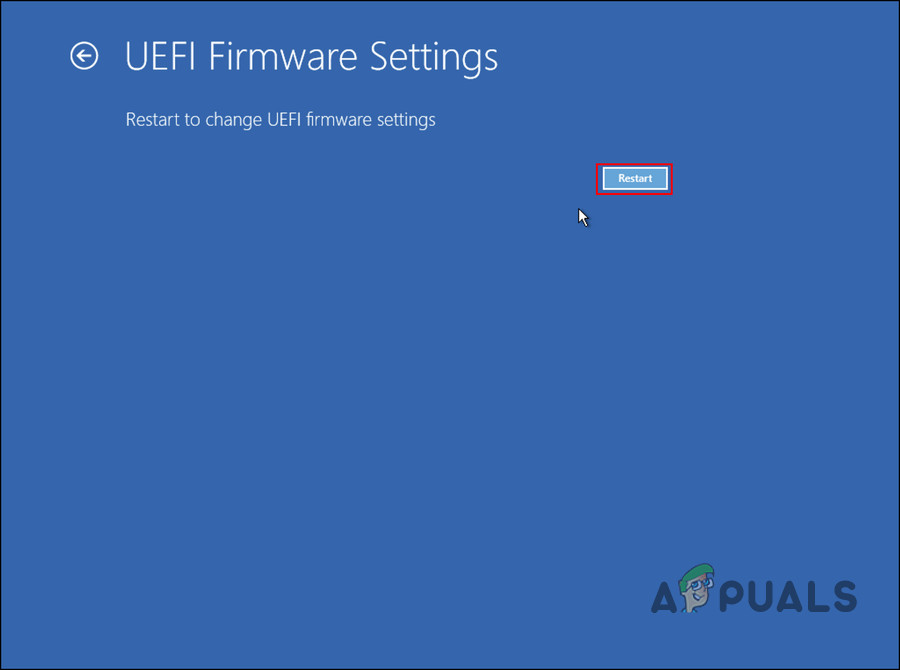
Restart to Set it UEFI - Save the changes, restart your PC, and check if the issue is resolved.
5. Check Modern Standby Support
If you can still not use PCR7 Binding, then the Modern Standby Support is the last feature to check if it is enabled. Check that your device supports Modern Standby Support, which should be enabled too. To check if it is supported and enabled, follow the instructions given:
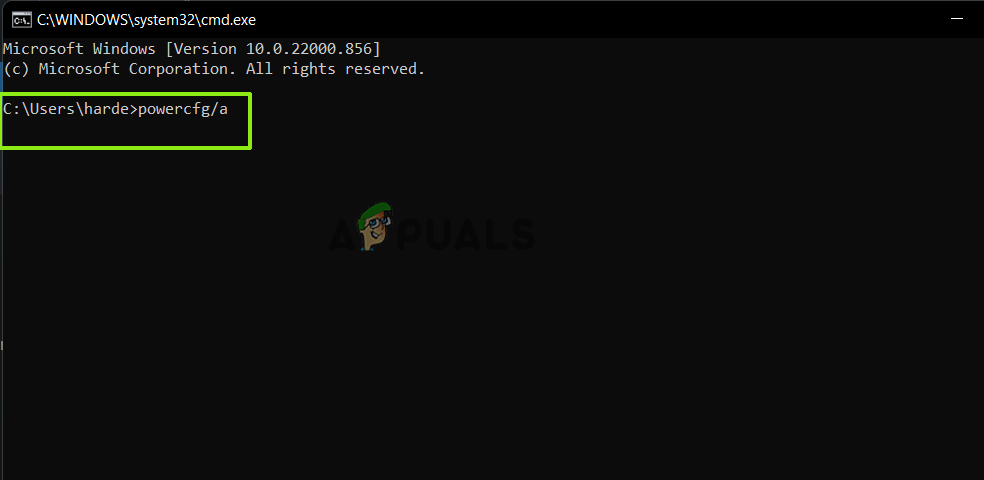
- Press Windows + R key together to open the Run box, and here type cmd and click ok
- Now in the command prompt, type powercfg/a and hit Enter
Type powercfg/a command in CMD - If it shows S0 Low Power Idle Mode, your computer supports the Modern Standby Support feature and is enabled.
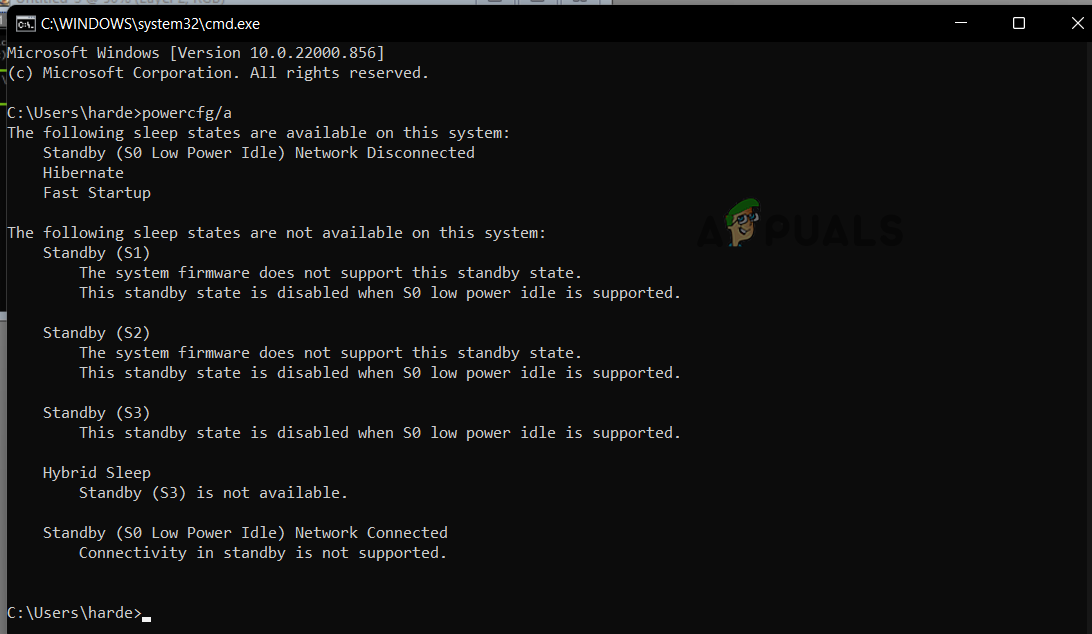
Check the Modern Standby Support feature is enabled
These solutions may work for you to fix the Secure Boot State Unsupported problem in Windows 10/11. If you are still facing the problem, ensure your device is compatible with encryption technology.
Also, if your device is not meeting the device encryption hardware requirements, you can switch to a third-party application to encrypt your device.
If none of these methods work for you, you can try to repair install Windows first; if that doesn’t work, clean installing Windows is your best option.


