How to Restore Windows 11 Taskbar to Windows 10 Style?
Bring Back Classic Taskbar from Windows 10 to Windows 11
Immediately after the launch of Windows 11, it became clear that a portion of early adopters was definitely not happy with the ‘combine buttons in taskbar’ feature that this new OS has. and the fact that the taskbar is locked Fortunately, some community members have discovered a way to bring the old aesthetic and behavior back with a series of modifications.
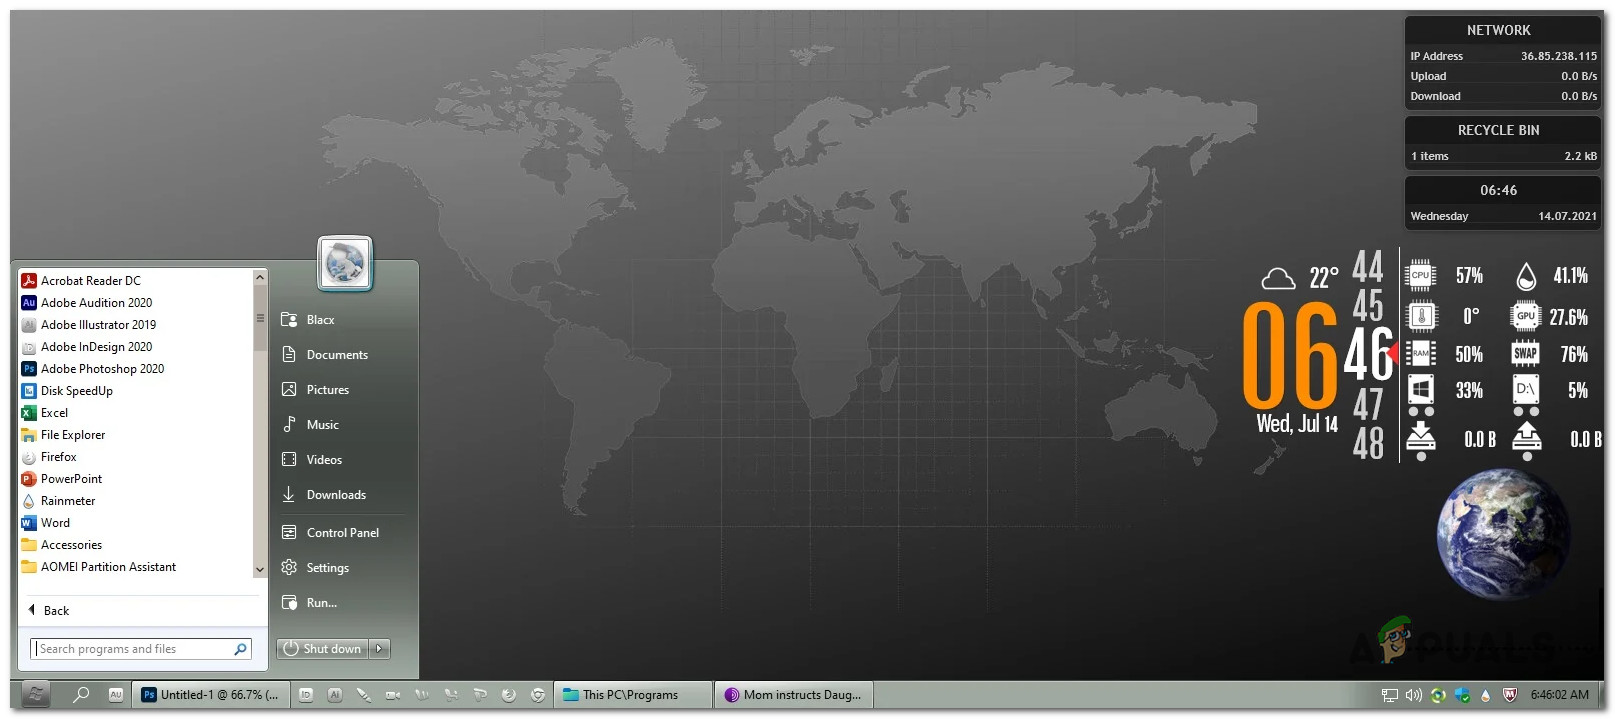
If you’re not a big fan of the un-customizable taskbar, you can subject your operating system through a series of transformations that will make the Windows 11 taskbar uncombined and unlocked.
When it comes to doing this, you have a couple of options at your disposal:
- Use the StartAllBack: Windows 11 tool
- Use a registry hack to replace the new explorer with the old equivalent, then install StartIsBack++ (an application that was originally designed for Windows 10)
Important: Regardless of the method that you decide to go for, keep in mind that both methods are vulnerable to new Windows 11 updates that might mess up their functionality. Both of these methods are confirmed to work as of now, but this might change once new updates are introduced for the official release or for the insider channels.
Install and Configure StartAllBack: Windows11
Transforming your Windows 11 taskbar into an uncombined and unlocked version (as it was with the older version) just got a whole lot easier with the launch of StartAll Back for Windows 11.
But keep in mind that this is not yet a final version – it’s only an RC release.
However, we’ve tested it and found it to be working quite well. Aside from allowing you to bring back the old start menu, you can unlock the taskbar so you can move it on any part of the screen you want.
You can finally have that uncombined and unlocked taskbar look without having to go through risky Registry edits that might or might not break some functionality of your Windows 11 OS.
Note: Keep in mind that StartAllBack is a paid tool, but it has a 30-day free trial version that you can use first. Also, if you already have a license key for StartisBack++ (for Windows 10), you can port it over to StartAllBack.
Follow the instructions below for step by step instructions on installing and configure StartAllBack for Windows 11 to achieve that uncombined and unlocked taskbar look:
- Open your default browser and visit the official download page of StartAllBack for Windows 11.
- Once you’re inside the correct download page, go ahead and click on the Download button, then wait for the download to complete.
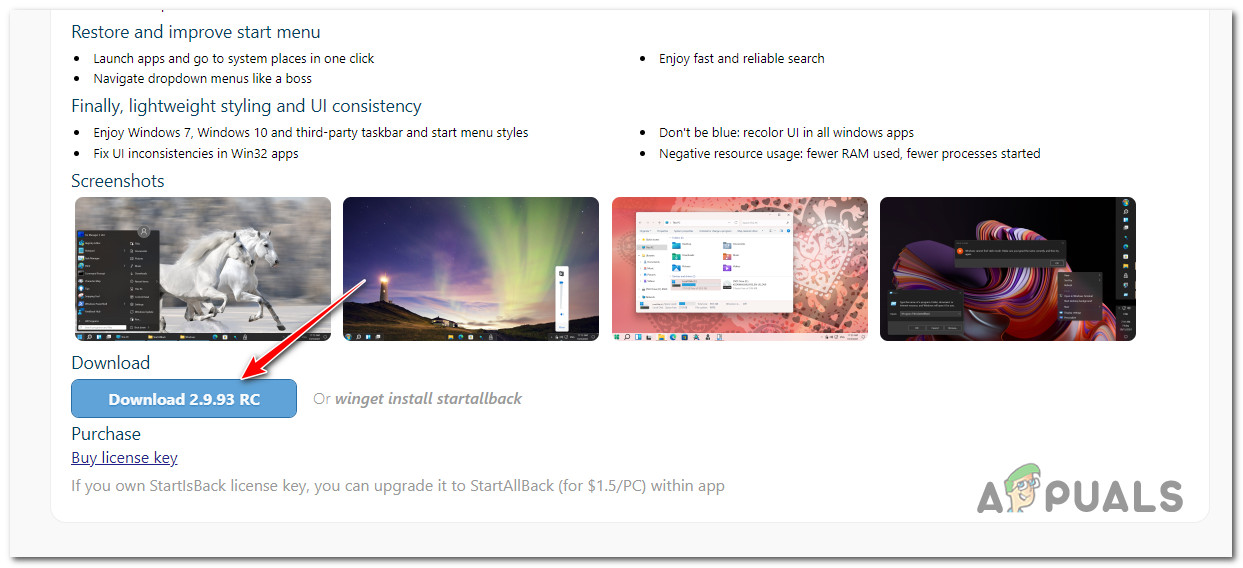
Downloading the latest version of StartAllBack Note: By the time you’re reading this article, it’s possible that the final release is already out. If that’s the case, download that version instead of the RC (Release Candidate) version.
- After the download is complete, double-click on the StartAllBack executable that you’ve just downloaded.
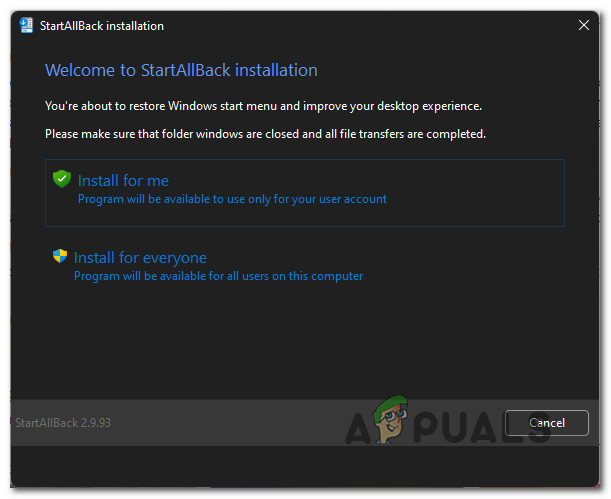
- At the next screen, click on Install for everyone or click on Install for me, depending on if you want this change to be enforced on every user account present on this Windows 11 computer or only on this particular one.
Installing the StartAllBack tool on Windows 11 - At the user account control, click Yes and wait until the installation is complete.
Changed taskbar on Windows 11 Note: At the end of this installation, you’ll notice that the appearance of your taskbar has already begun to change.
- Now that the utility is installed, it’s time to configure it. The easiest way to do so is from the StartAllBack configuration wizard that just appeared on the screen. You can select from 3 different themes – Proper 11, Kinda 10, and Remastered 7.
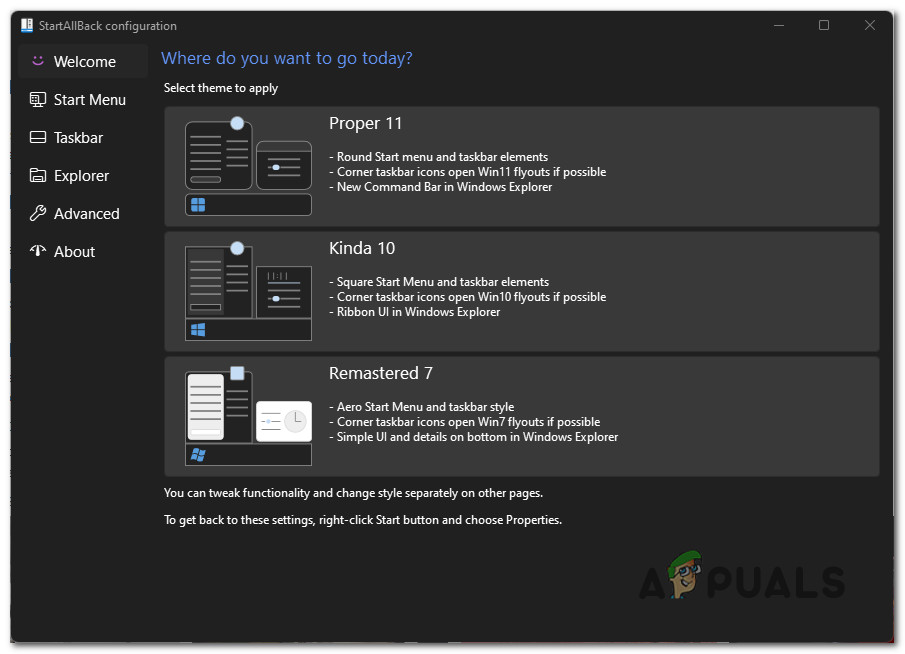
Selecting from 3 predefined themes Note: If you want that retro look with an unlocked and uncombined taskbar, go for Remastered 7.
- Next, from the same wizard window, click on Taskbar from the vertical menu on the left.
- With the Taskbar menu selected, move over to the right-hand pane, go under Tweak behavior and superpowers and change the Combine taskbar buttons and On secondary taskbars to Never.
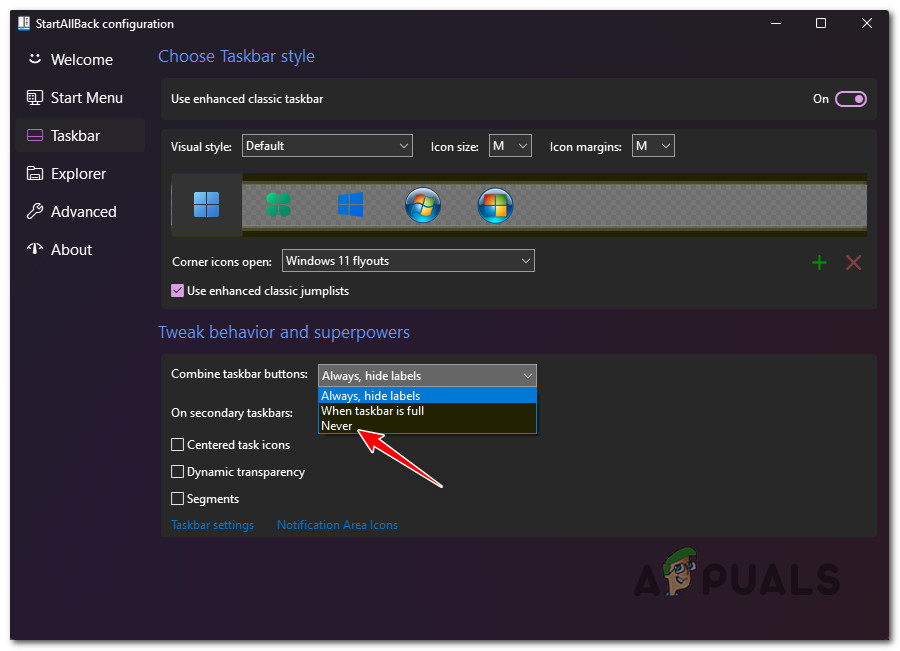
Enforcing the uncombined look taskbar look on Windows 11 Note: This change will enforce the uncombined look on the taskbar.
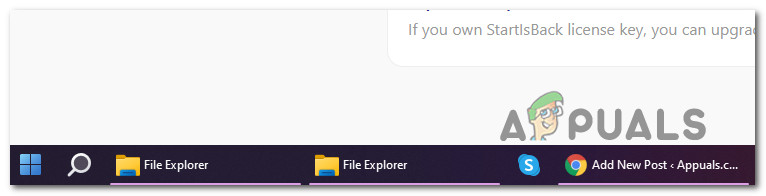
Enable uncombined taskbar look on Windows 11 - Next, all that’s left to do is to unlock the taskbar so you can move it freely to any part of the screen. You can do this simply by right-clicking on your taskbar and clicking on Lock all taskbars to unlock it.
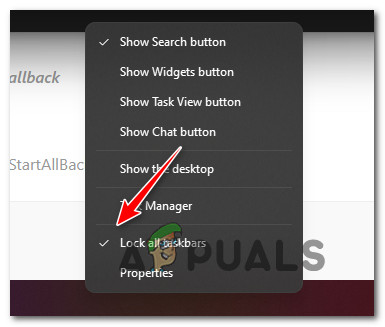
Unlocking the taskbar Note: After the taskbar has been unlocked you can proceed to move it in whichever part of the screen you want (including vertically) simply by dragging and dropping.
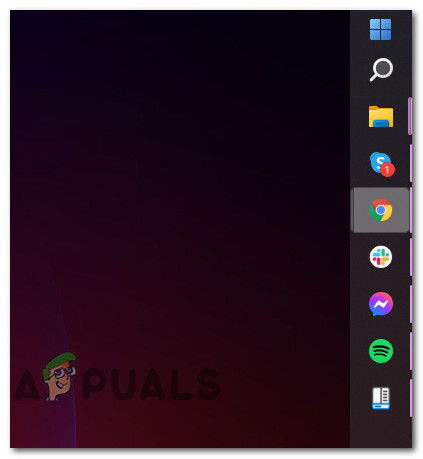
Vertical taskbar on Windows 11 - That’s it. If you followed the instructions above you successfully achieved an uncombined and unlocked taskbar on Windows 11.
Revert changes and uninstall StartAllBack
If you ever get tired of this modified Windows 11 aesthetic and you wish to go back to the stock look, you can do so simply by uninstalling StartAllBack conventionally (from the Programs and Features menu).
In case you’re looking for step-by-step instructions on how to do this, follow the instructions below:
- Press Windows key + R to open up a Run dialog box. Next, type ‘appwiz.cpl’ and press Enter to open up the Programs and Features menu on Windows 1.
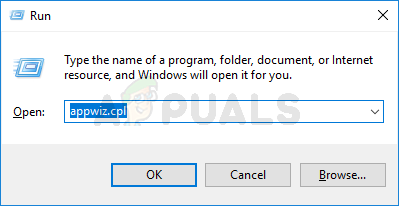
Opening up Programs and Features menu - In case you’re prompted by the User Account Control window, click Yes to grant admin access.
- Inside the Programs and Features menu, scroll down through the list of installed apps and locate StartAllBack.
- After you discover the correct listing, right-click on it and choose Uninstall from the context menu that just appeared.
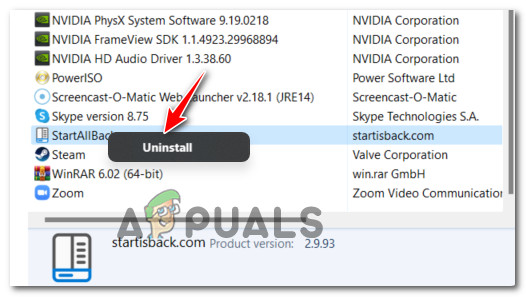
Uninstall StartAllBack - Inside the uninstallation screen, follow the on-screen prompts to complete the uninstallation of the StartAllBlack utility, then restart your PC.
Restore old explorer.exe and install StartIsBack++
Another way to go around enforcing the unlocked and uncombined taskbar look on Windows 11 is to deploy a registry hack that makes it possible to install and use the StartisBack++ utility (designed for Windows 11).
Important: We don’t recommend using this method unless the method above (using StartAllBack) doesn’t work for you or you run into a bug that breaks its functionality.
The main advantage of this method is that you are actually using a final release software that is already the go-to option for people that are fond of the old look and feel of Windows.
Follow the instructions below to achieve an unlocked and unlocked taskbar by using the StartIsBack++ utility:
- Press Windows key + R to open up a Run dialog box. Next, type ‘regedit’ and press Ctrl + Shift + Enter to open up the Registry Editor with admin access.
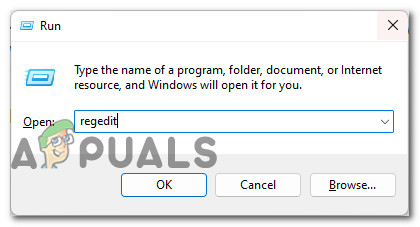
Opening up the Regedit utility - When you’re prompted by the User Account Control (UAC) prompt, click Yes to grant admin access.
- Once you’re inside the Registry Editor, navigate to the following location:
HKEY_LOCAL_MACHINE\SOFTWARE\Microsoft\Windows\CurrentVersion\Shell\Update\Packages
Note: You can either get to this location manually or you can paste the path above directly into the navigation bar at the top of the Registry Editor window to get there instantly.
- After you arrive at the correct location, make sure that the Packages key is selected, then move over to the right-hand section, right-click on an empty space and select New > Dword (32-bit) Value.
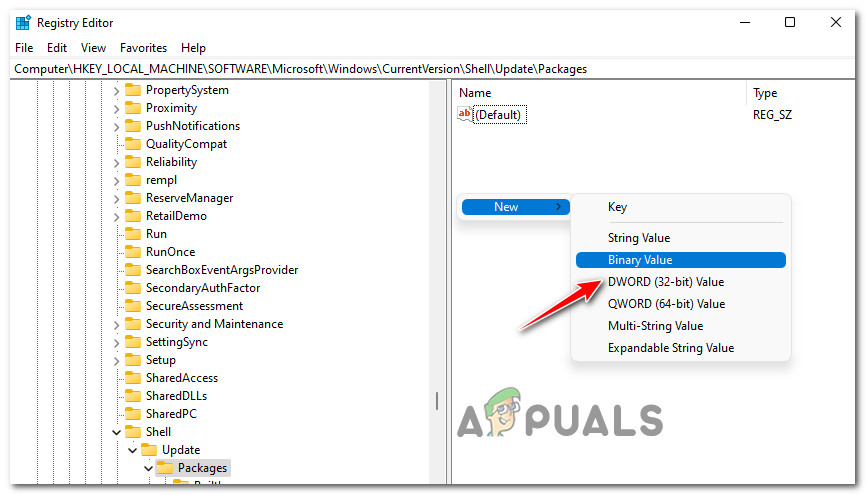
Creating a DWORD 32-bit value - Next, name the newly created DWORD as UndockingDisabled and press Enter to save the changes.
- Double-click on UndockingDisabled, then set the Base to Hexadecimal and the Value data to 0.
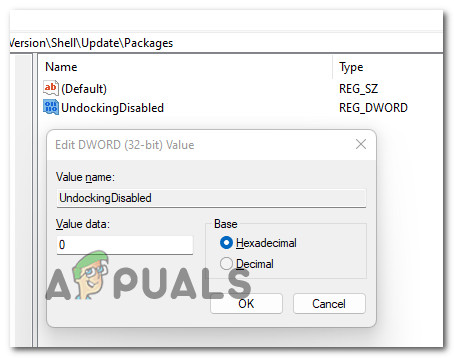
Configuring the UndockingDisabled value - Click Ok to save the changes, then you can safely close the Registry Editor.
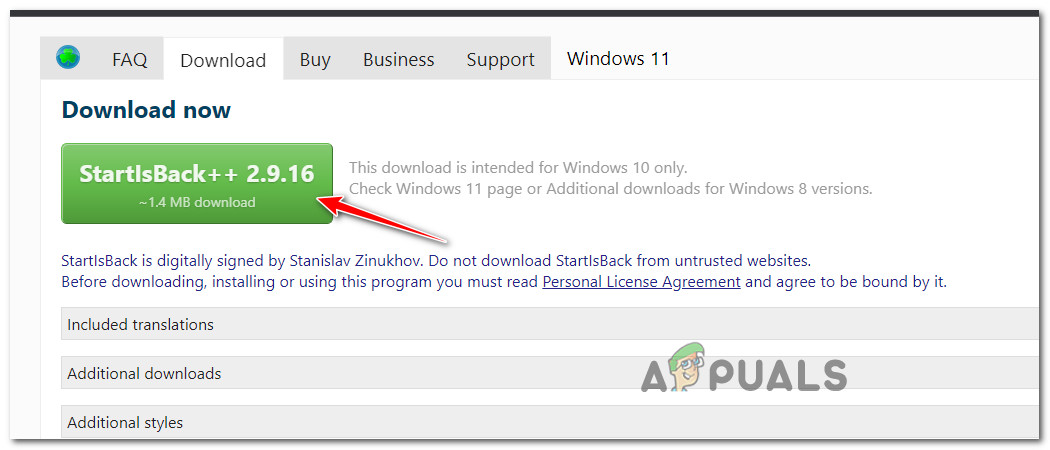
- Next, open up your default browser and visit the official download page of StartIsBack++.
- Once you’re inside the Download tab, click on the StartIsBack download button.
Downloading the StartIsBack installer - Once the installer is downloaded locally, double-click on it and wait until the installation window occurs.
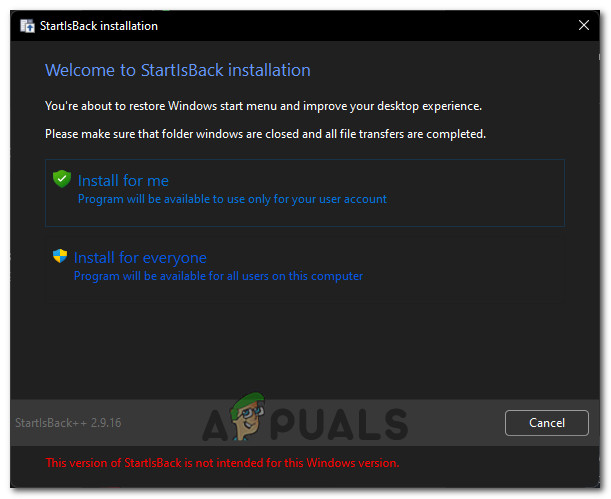
- At the first screen of StartIsBack installation, click o Install for me or Install for Everyone – depending on if you want to change the aesthetic for every user or only for the user that you’re currently signed in with.

Installing StartIsBack on Windows 11 - At the next window, select a viable location where to install StartIsBack, then click on Install and wait for the installation to complete.
- Wait until the new taskbar version is installed. During this installation, you will see your taskbar flashing a few times – don’t worry as this is completely normal.
- Once the installation is completer, click on Configure StartIsBack now from the Welcome window that just appeared.
Configuring StartIsBack - Next, from the StartIsBack configuration menu, use the Appearance and Advance menu to achieve that uncombined and unlocked look on WIndows 11.
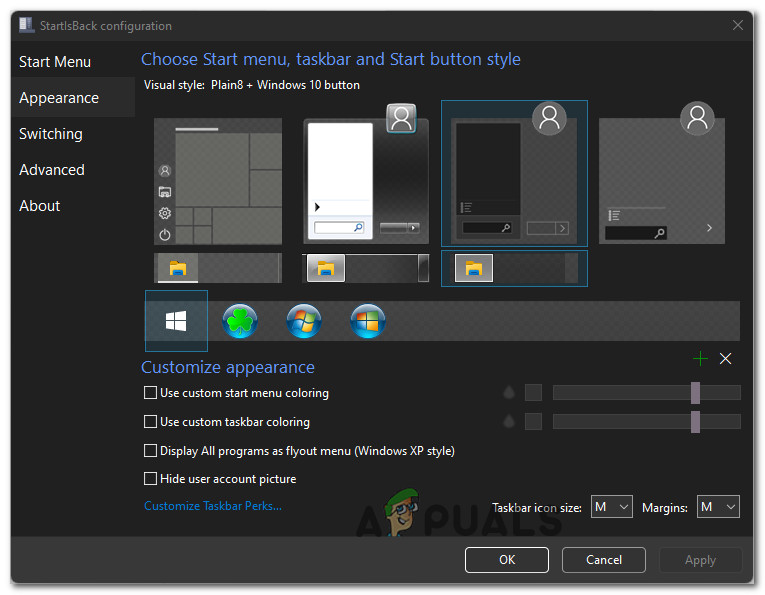
Configuring the StartIsBack configuration to achieve an uncombined and unlocked look on Windows 11
Important: If the new taskbar glitches at any point, hold the ESC key to revert back to the old taskbar.
Revert Changes and uninstall StartIsBack
In case you end up getting bored of this aesthetic and you want to revert back to the ‘new’ look and feel of Windows 11, all you need to do is uninstall the StartIsBack utility using the Programs and Features menu.
Note: If you’re experiencing any glitches while using this Windows 10 utility on Windows 11, you should uninstall it altogether.
Follow the instructions below to uninstall StartIsBack:
- Press Windows key + R to open up a Run dialog box. Next, type ‘appwiz.cpl’ and press Enter to open up the Programs and Features menu.
Opening up Programs and Features menu - At the User Account Control prompt, click Yes to grant admin access.
- Once you’re inside the Programs and Features menu, scroll down through the list of programs and locate the entry named StartIsBack++.
- When you locate the StartIsBack++ utility, right-click on it and choose Uninstall from the context menu.

Uninstall StartIsBack++ - Inside the uninstallation screen, follow the on-screen instructions to complete the uninstallation of the StartIsBlack++ screen.


