How to Reset Network Settings in Windows 10
Connectivity issues are pretty common in Windows. Microsoft often releases updates that offer performance improvements and security patches. These updates, however, at times can bring with itself some issues as well. One of the common issues that are often caused by a recent Windows update is the network connectivity issue. While this doesn’t happen for everyone, there are users who get to encounter it every now and then.
When you are facing any issue regarding your network and are unable to connect to the internet, the system seems pretty much useless as almost everything is now synced to the internet. There are several different methods that you can use to troubleshoot your network, such as flushing your DNS settings, resetting winsock. While these solutions sometimes bear fruits, it may not always be reliable and doesn’t always work.
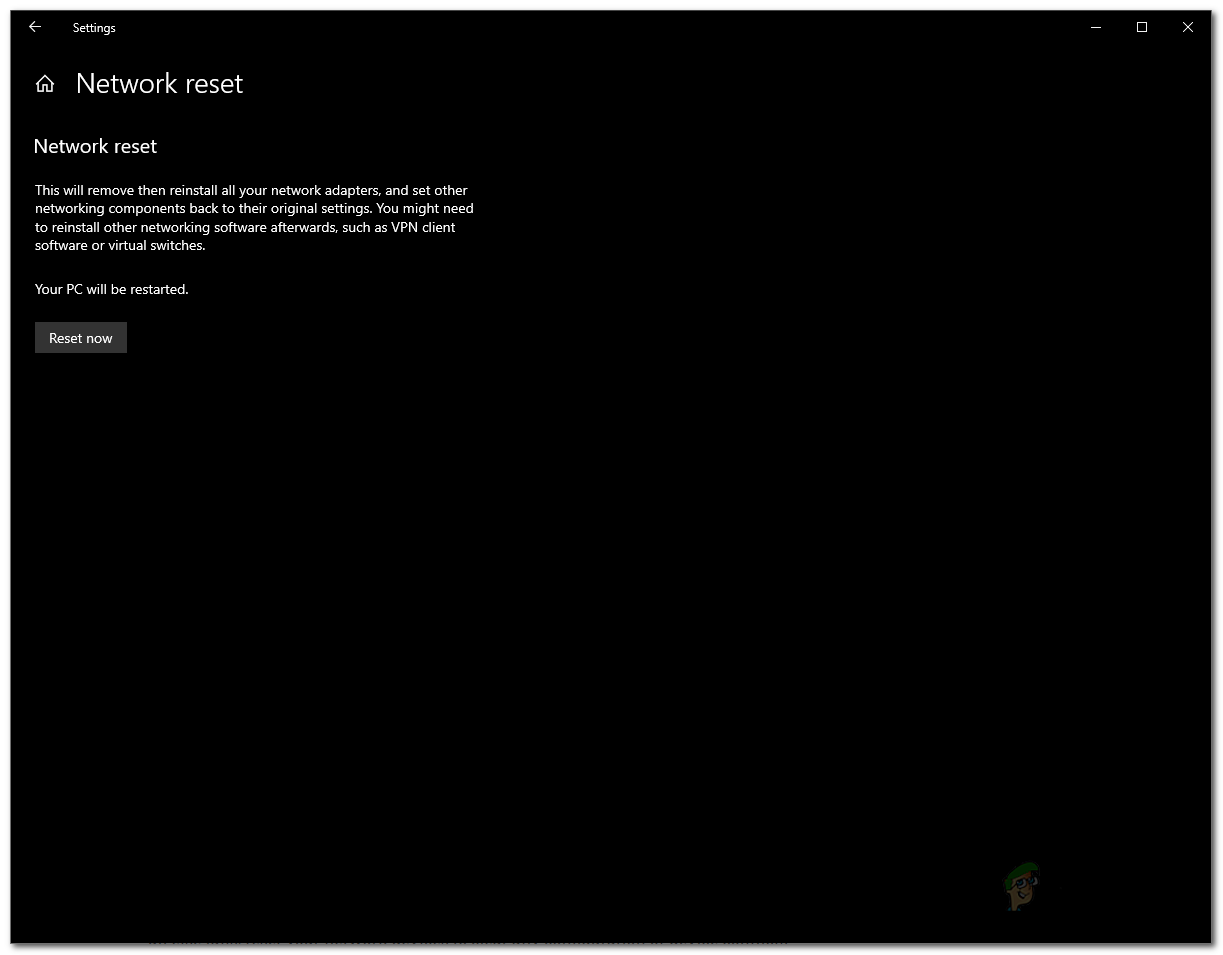
Regardless, whatever the case may be, if you are unable to fix your network issues, an available option is to simply reset the network. Performing a network is not always advisable. This is because of the fact that when you do so, it completely removes any changes that you might have made to your network. Simply put – it completely wipes your network configuration.
Therefore, it is first recommended to try out other available methods before residing in this. A must-do before resetting your network would be to try and run the Windows Network Troubleshooter to see if that actually resolves any issue that you are facing. While that does not always work out, it does identify and solve common connectivity issues that you might be facing.
Running Windows Network Troubleshooter
The network troubleshooter should be the first thing that you do when you stumble upon a connectivity issue. While this built-in troubleshooter isn’t going to solve every issue, it does resolve the common problems that arise and thus saving you from all the trouble. To run the Windows Network Troubleshooter, follow the instructions down below:
- First of all, open up the Settings window by pressing the Windows key + I.
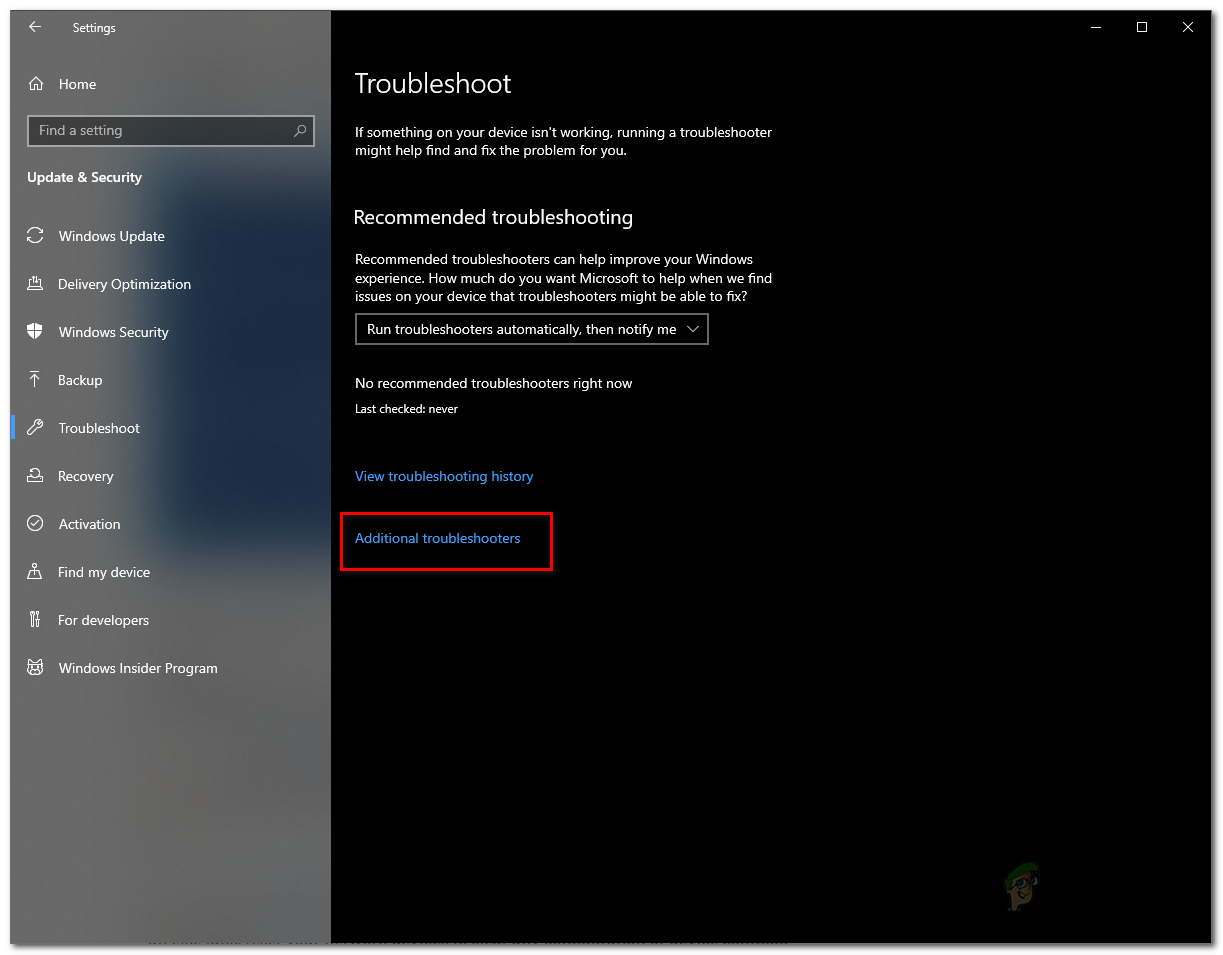
- On the Settings window, click on the Update and Security option and then on the left-hand side, choose the Troubleshoot option.
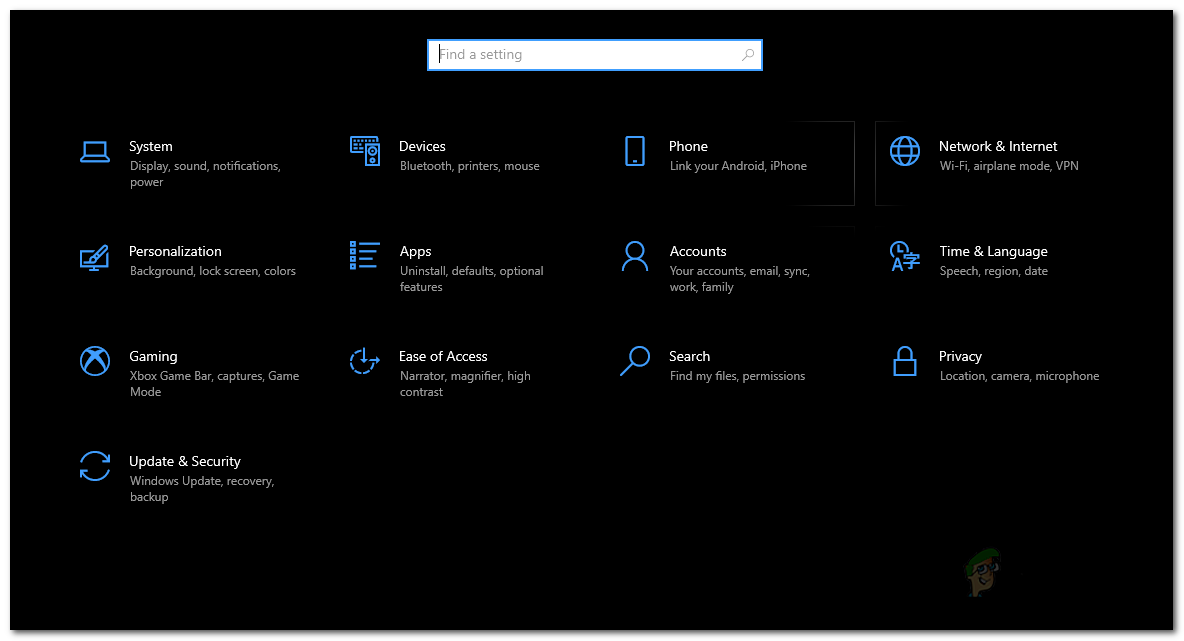
Windows Settings - This will take you to the Windows Troubleshooter menu. Here, you will be able to see various different troubleshooters that come built-in into Windows. These can be used for different cases and you can run any of these at any time when an issue arises. For now, we’ll be running the Internet Connections troubleshooter. To do this, click on the Additional Troubleshooters option.
Windows Troubleshoot - On the Additional Troubleshooters window, click on the Internet Connections under Get up and running and then finally click on the Run the troubleshooter.
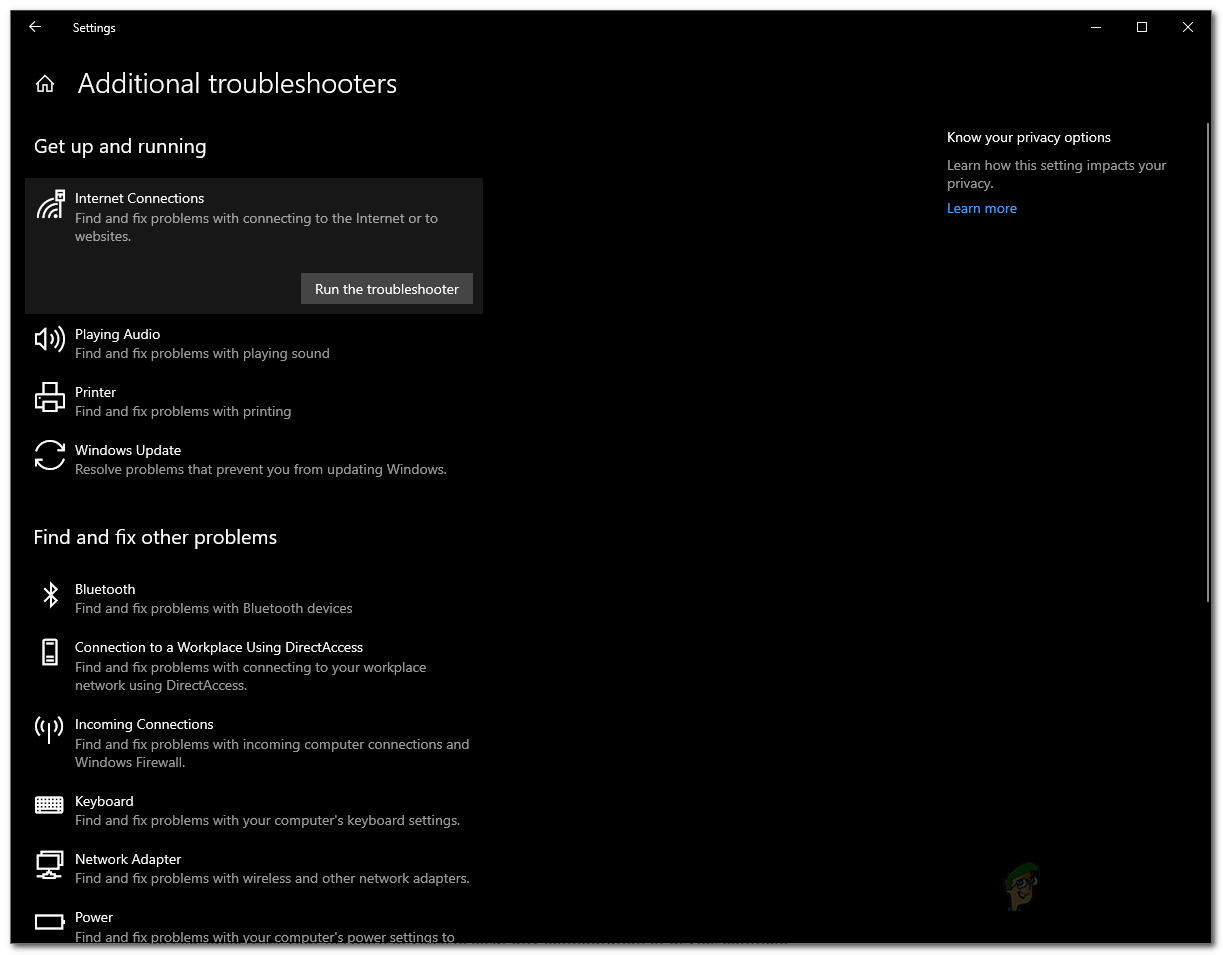
Running Internet Connections Troubleshooter - Wait for the troubleshooter to identify any problems. Once it picks up an issue, you will be prompted to attempt to solve the issue. Click on the respective option and wait for the tool to attempt the fixes. After a while, you will be prompted whether the issue has been solved by the troubleshooter or not.
- Additionally, you can run the Network Adapter troubleshooter down below to see if that can bear some fruits.
Resetting Windows Network Settings
If all fails while trying to resolve any network problems, resetting your network settings is the way to go. When you reset your network settings, Windows will basically forget your Ethernet network, any proxy or VPN connections that you have set up along with everything else. Along with this, all of the network adapters will be removed and then installed again so if you have any third-party VPN or proxy service set up, their adapters will be removed. Thus, after resetting your network settings, you will have to install those services again to get them to work as intended.
Considering that it does all of this, resetting the network should be hard, right? On the contrary. It is essentially just a few clicks that will do all of this for you – pretty easy. Actually, there are different ways that you can do this. First of all, is to simply do it via the Windows Settings window. Secondly, you can also do this via a command prompt window actually by entering a simple command. We will be covering both of them. To reset your network settings through the Windows Settings menu, follow the instructions down below:
- First of all, open up the Settings window by pressing the shortcut keys i.e. Windows key + I.
- On the Windows Settings window, click on the Network and Internet option.

Windows Settings - Then, on the Network and Internet page, make sure that you are on the Status tab on the left-hand side. To reset the network settings, click on the Network reset option at the bottom.
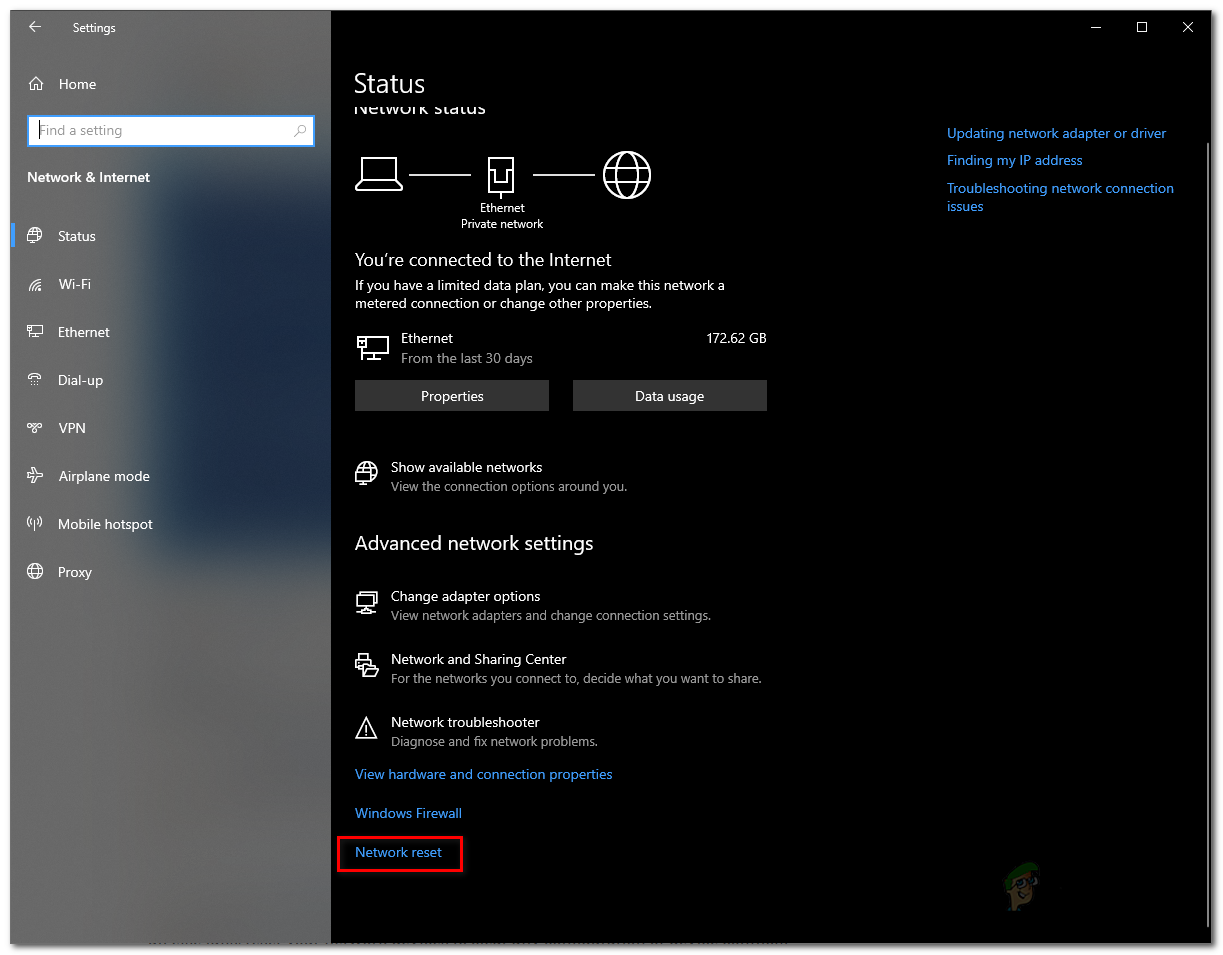
Network Settings - This will take you to a new screen. Read through the information shown. Finally, click the Reset now button to reset the network settings. On the pop-up dialog box, click the Yes button.

Windows Network Reset - Your system will reboot once this is done to complete the reset.
Using Command Prompt
As we mentioned earlier, another way of resetting Windows network settings is through the command prompt. This can be done through the netcfg, short for network configuration, utility. There are a whole lot of different things that you can do with the help of this utility, but for today, we’ll just be resetting the network settings. To do this, follow the instructions down below:
- First of all, you will have to open up an elevated command prompt. To do this, open up the Start Menu and search for cmd.
- Right-click on the result shown and choose Run as an administrator from the drop-down menu.

Opening CMD as an Administrator - Once the command prompt window launches, type in the following command to reset network settings:
netcfg -d

Resetting Network Settings - Once you have executed this command, it will go ahead and remove all the network adapters along with other things. Finally, once it is done, you will be prompted to reboot the PC.
- Once your computer restarts, you will have successfully reset your network settings.
Do not forget to install any third-party VPN or proxy services that you had before as they won’t work after the reset. This is because their respective network adapters have been removed by the reset. Therefore, install them again to get them to work normally.


