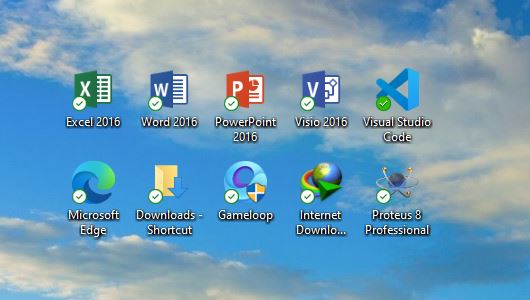
Why are there Green Checkmarks on my Desktop Icons? How to Get Rid of them?
The green checkmarks on your desktop indicate that the file or folder has been successfully backed up in the cloud storage of Microsoft OneDrive. Because of this, you will be able to access your data from anywhere on any PC.
These checkmarks do not indicate any errors or file corruption. However, if you find them distracting or want to remove them for another reason, then it is a very simple process.
They show up because the users have turned on the desktop backup or sync on OneDrive. Turning off both of these options will easily remove the green checkmarks. Apart from that, there is always the option to disable OneDrive altogether.
Before we examine these methods in detail, I will quickly highlight the four types of checkmarks that users can obtain on their icons. The solutions will not only make the green ones disappear but also eliminate all of them.
Types of Checkmarks on Desktop Icons.
The four colored checkmarks of OneDrive consist of red, blue, outlined green, and solid green. Below is a brief description of what they indicate.
Red Checkmark
A red mark appears when the file struggles to upload to the cloud server due to a weak internet connection.
Blue Checkmark
The blue mark signals that the file or folder is currently being uploaded to the cloud server of OneDrive.
Outlined Green Checkmark
Green outline checkmarks indicate that the file has been backed up and is available to view online. You can’t use it offline without downloading it.
Solid Green Checkmark
A solid green mark indicates that the file is available both online and offline. Moreover, there is an option to download it as well.
How to Remove the Green Checkmarks from the Desktop
More often than not, the checkmarks on your desktop will either be outlined or solid green. It is rare for the red and blue ones to show up for long if you have a good Wi-Fi signal.
Nevertheless, the following are seven guaranteed methods to permanently remove these checkmarks until you want to enable them again.
1. Disable OneDrive on your PC.
The easiest way to get rid of this issue is to disable OneDrive itself. However, you will not be able to back up any files on its cloud server or use some of its other services.
Here’s how to disable OneDrive:
- Select the OneDrive icon from the system tray.
- Click on the settings icon in OneDrive.
- Expand the Pause Syncing option.
- Select Quit Drive to close the application.
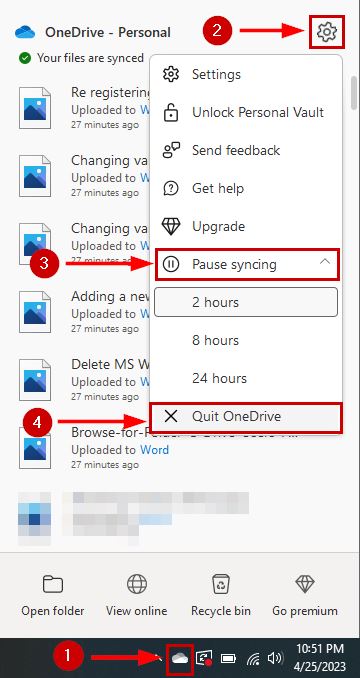
- Refresh your desktop, and the checkmarks will be gone now.
Note: When you reboot your computer the next time, OneDrive will start syncing and the checkmarks will appear again.
2. Disable sync on OneDrive.
OneDrive needs to sync with your PC in order to back up the files on its cloud server. If you don’t want to close OneDrive completely, stopping just the sync function is a good option. It will stop backing up your data, and the checkmarks will no longer show up.
This option is available for 2, 8, and 24 hours only. You cannot stop syncing forever. In this case, you would have to refer to the method above or the one coming next.
Here are the steps to stop the sync:
- Open OneDrive from the system tray again.
- Click on the settings icon.
- Click on Pause syncing.
- Select the time (2, 8, or 24 hours) for which you need to stop the sync.
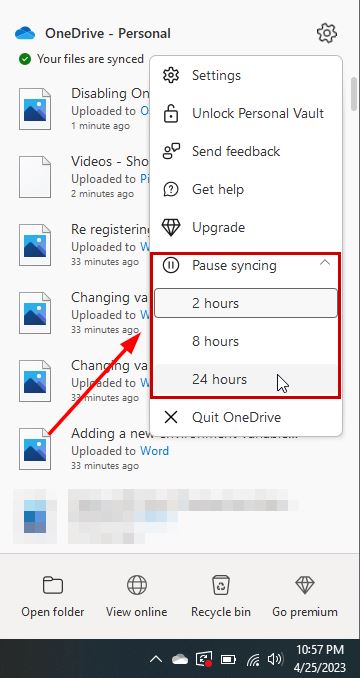
- Close OneDrive and refresh your desktop.
3. Disable the Desktop Backup.
If you do not want to cancel the backup for each and every folder, then I recommend turning off the OneDrive sync specifically for the desktop location to remove the green checkmarks from there. The rest of your documents, pictures, and videos will be synced without any issues.
Follow the steps below for this method:
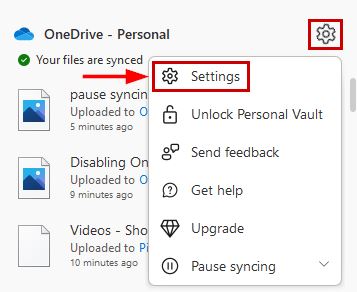
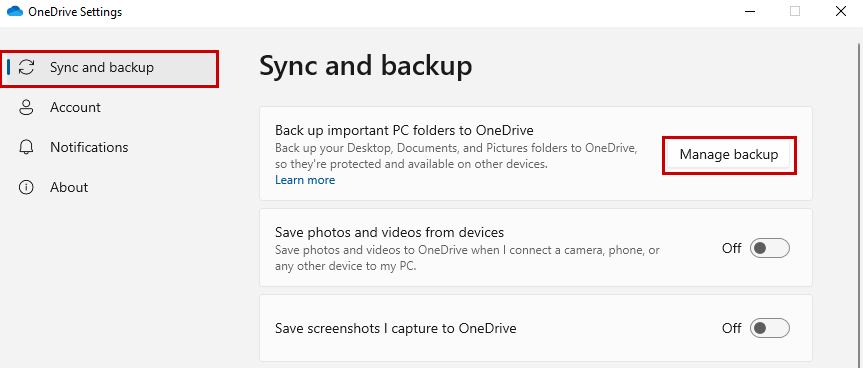
- Open OneDrive, click on the settings icon, and go to Settings.
- Click on the Backup tab.
- Select Manage Backup.
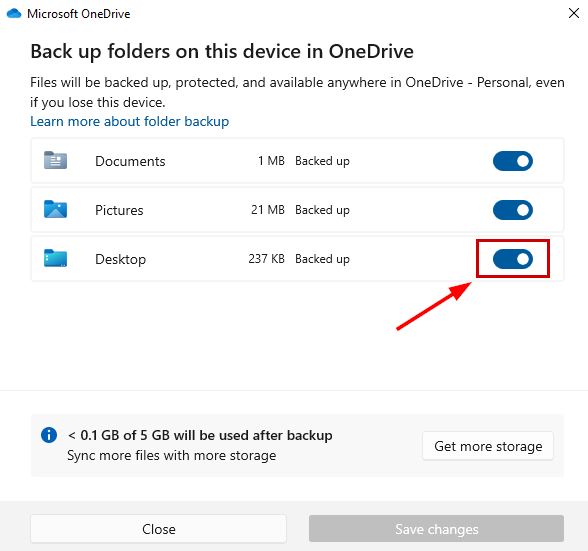
- In the Manage Folder Backup window, toggle off the Desktop backup option.
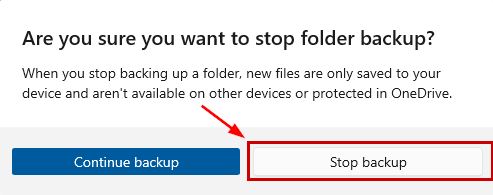
- Click Stop backup on the following prompt.
- Wait for the stoppage to complete, then refresh your desktop.
4. Use the ‘Free Up Space’ option for each icon.
Using the ‘Free up space’ option in OneDrive will remove your files or folders, but their shortcuts will remain available for downloading them again from the cloud. This will save you some disk space as well. Additionally, the green checkmarks on the icons will be removed unless you back up the files again.
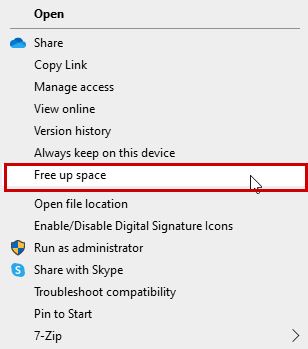
- Right-click on the icon with the checkmark.
- Select Free up space.
- Do the same with every other icon that has a green mark.
5. Remove the icons.
Deleting the desktop icons is the most straightforward way to remove the green checkmarks. You can always access the files from the cloud storage on OneDrive. This also helps clean up the PC and free up some hard drive space.
The steps to remove the shortcuts are as follows:
- Right-click on the folder/file’s icon.
- Click on delete to remove them.
![]()
6. Move the files to another location.
Moving the files to a location that is not being backed up will remove the green checkmarks from their desktop icons. For instance, if only the folders from the C drive are being sent to the cloud storage, then moving the folders to the D or E drives will prevent them from being backed up.
You can simply use Ctrl + X and Ctrl + V to cut and paste the files.
7. Disable OneDrive from starting up.
Whenever you start your PC, OneDrive begins uploading and backing up your files. To stop that, you need to disable the drive from starting up in Task Manager. Once done, OneDrive will cease functioning, and the checkmarks will disappear.
The following are the steps to remove OneDrive from Startup:
- Open Task Manager using either Ctrl+Alt+Del or Ctrl+Shift+Esc.
- Go to the Startup tab and look for OneDrive.
- Now right-click on it and left-click on Disable.
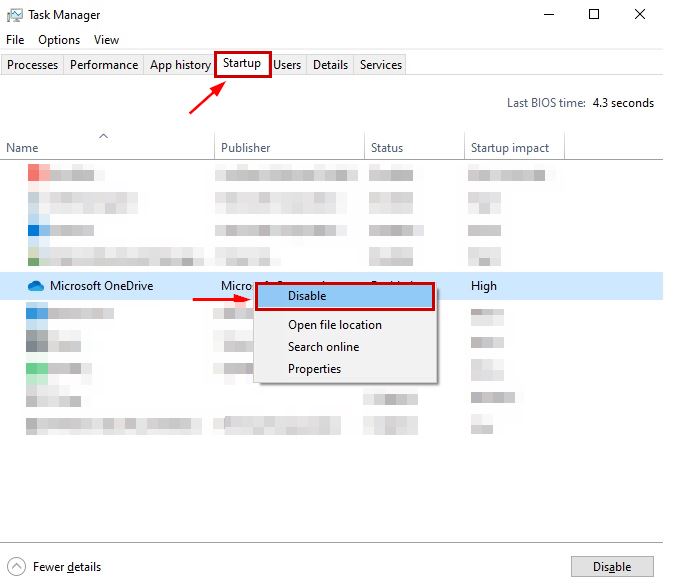
- Finally, refresh your desktop to remove the checkmarks.
8. Unlink your PC from your account.
Unlinking your OneDrive account from the laptop or PC you are using is equivalent to stopping OneDrive from syncing and backing up your files. As a result, the green checkmarks will be removed from the icons.
Here’s how to do that:
- Open OneDrive and go to Settings.
- Click on Account and then click on Unlink this PC.
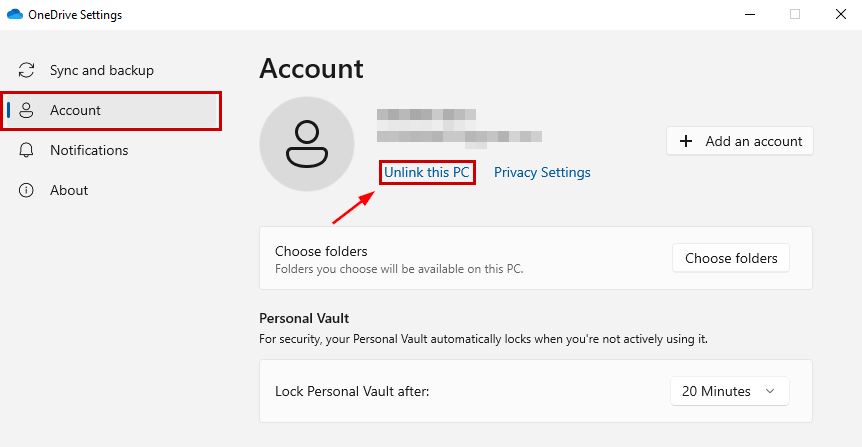
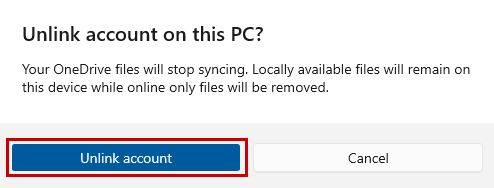
- Click on Unlink Account on the next prompt.
- Refresh your desktop now.


