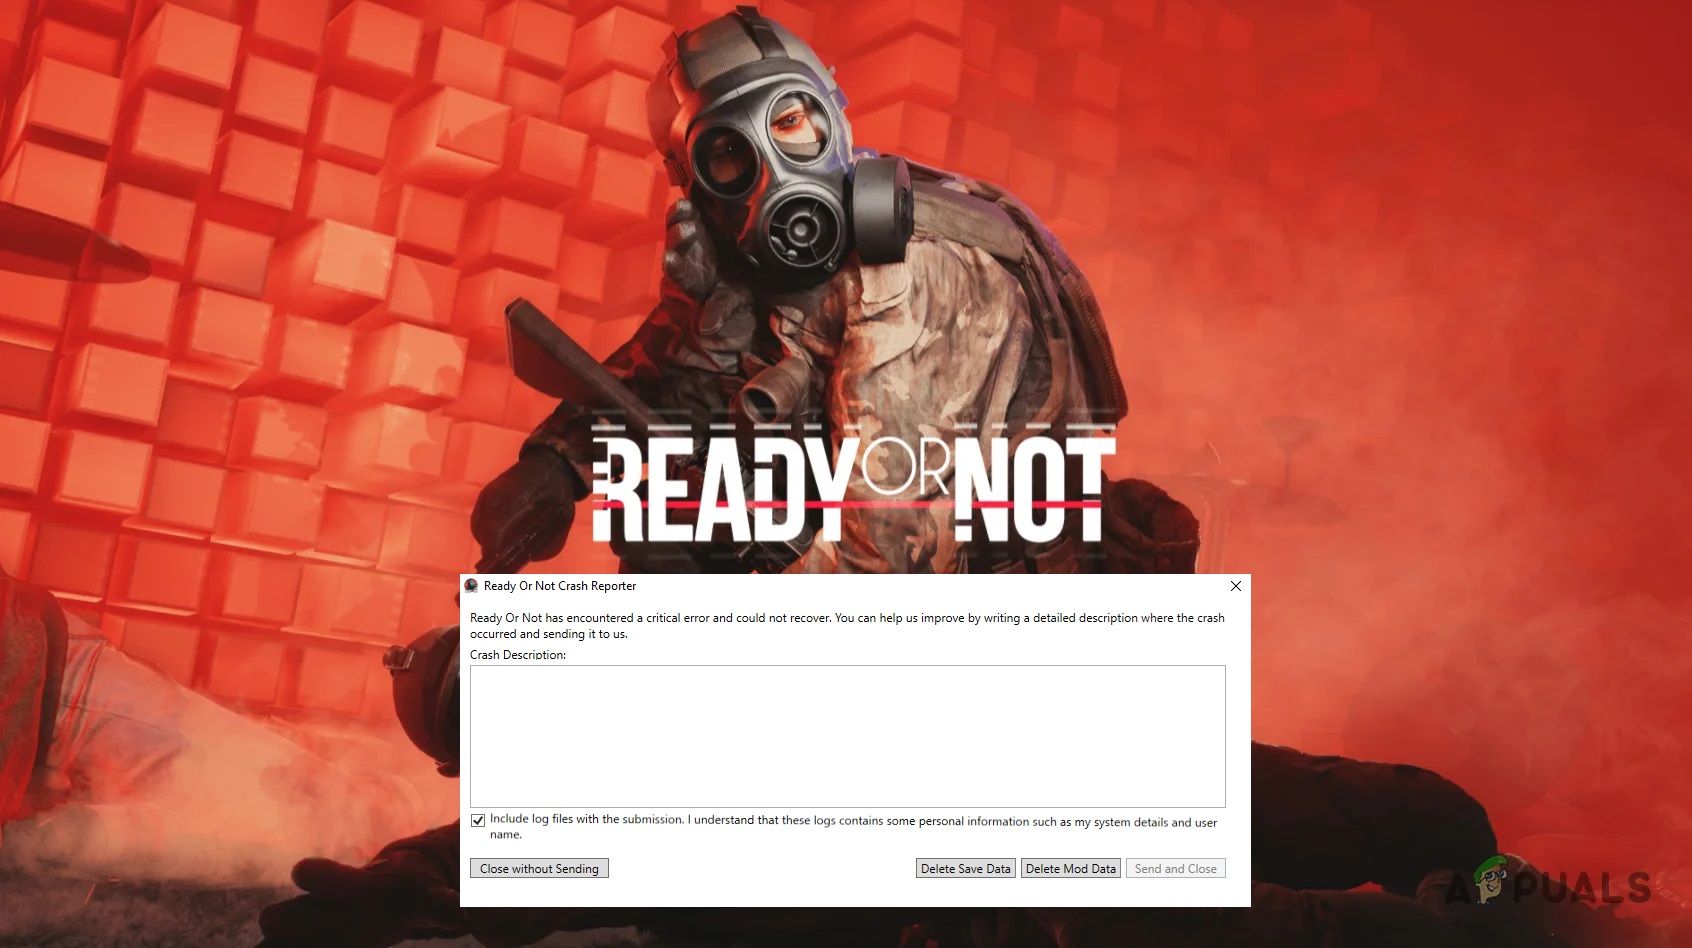
Fix: ‘Ready or Not Has Encountered A Critical Error and Could Not Recover’
When launching or playing Ready or Not, users may encounter the error ‘Ready or Not Has Encountered A Critical Error And Could Not Recover’. This error forces the game to crash or prevents it from loading, indicating that the game engine encountered a fatal issue it was unable to process.
What Causes This Error in Ready or Not?
Some of the most common causes include:
- Outdated or conflicting mod files: Mods located in the Paks folder that are incompatible with the latest game version can cause instability.
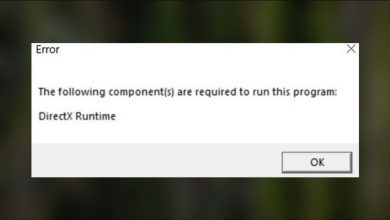
- DirectX 12 compatibility issues: Running the game with DirectX 12 may lead to crashes on systems with limited driver or hardware support.
- Corrupted configuration files: Damaged or improperly configured game settings can also trigger critical errors.
In the following sections, we’ll outline proven solutions to remove problematic mods, switch to a more stable DirectX version, and reset configuration files. We’ll also cover additional steps to ensure your system is properly configured for stable gameplay.
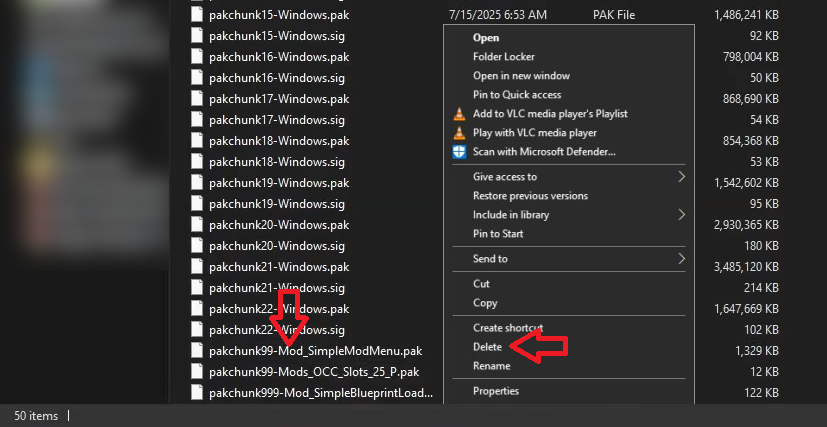
1. Delete Mod Files in the Paks Folder
When the game launches, it loads all the essential game and engine files, including any mod files in the Paks folder. Outdated or incompatible mods can cause instability when launching or playing the game, resulting in abrupt crashes. Removing these mods often resolves the problem.
- Open File Explorer and navigate to the Ready or Not game directory, typically located at:
C:\SteamLibrary\steamapps\common\Ready Or Not\ReadyOrNot\Content\Paks
- Right-click on the mod files in the folder and select Delete. Mod files typically have names such as ‘Swaggered.pak’ and ‘SimpleModMenu.pak’.
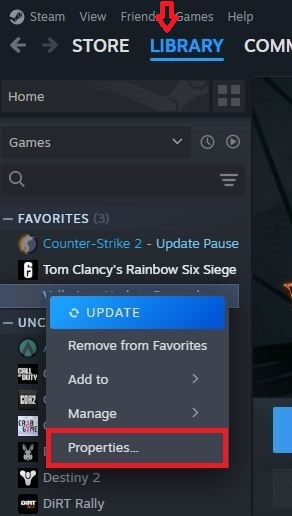
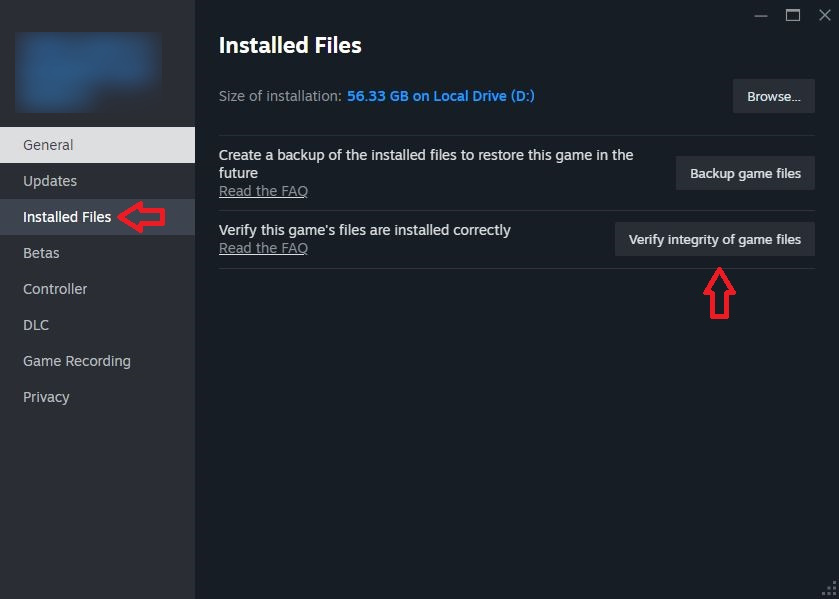
- After deleting the modded files, open Steam and go to the Library section.
- Right-click on the game and select Properties.
- Navigate to ‘Installed Files’ and select ‘Verify integrity of game files’.
2. Switch to DirectX 11
While DirectX 12 offers enhanced visuals, it can lead to crashes on some systems due to limited driver or hardware compatibility. Switching to DirectX 11, which is more stable and widely supported, often resolves these errors.
- Open Steam and go to the Library. Right-click on Ready or Not and select Properties.
- Click on the Launch options drop-down menu and select ‘Play Ready or Not DirectX11’.
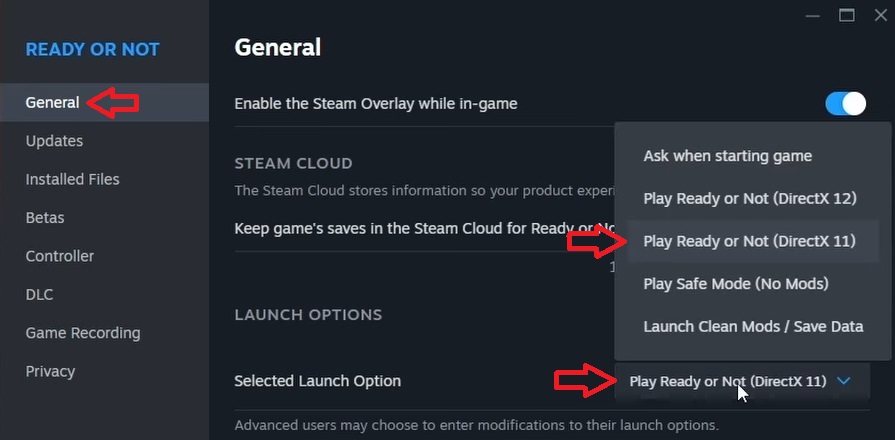
- Launch the game and verify if the issue is resolved.
3. Delete the Configuration File
The configuration file stores user-specific game settings. Corruption or misconfigured preferences in this file can lead to crashes. Deleting it forces the game to create a fresh configuration file with default settings, often resolving the issue.
- Open File Explorer and navigate to the Config folder, typically located at:
C:\Users\<YourUsername>\AppData\Local\ReadyOrNot\Saved
- Right-click on the Config folder and select Delete.
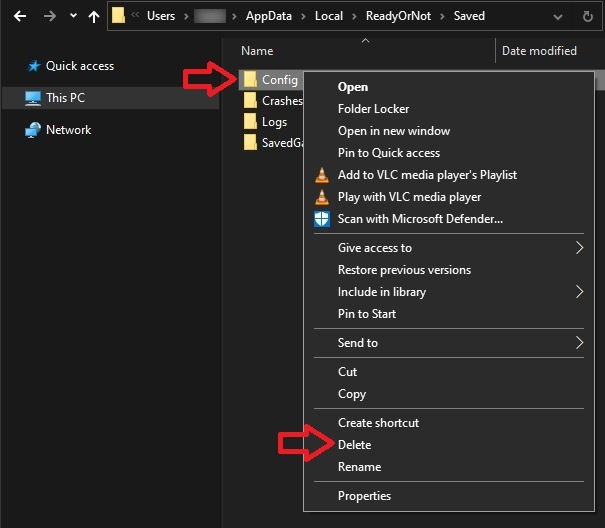
- Launch the game. A new configuration file with default settings will be created automatically.
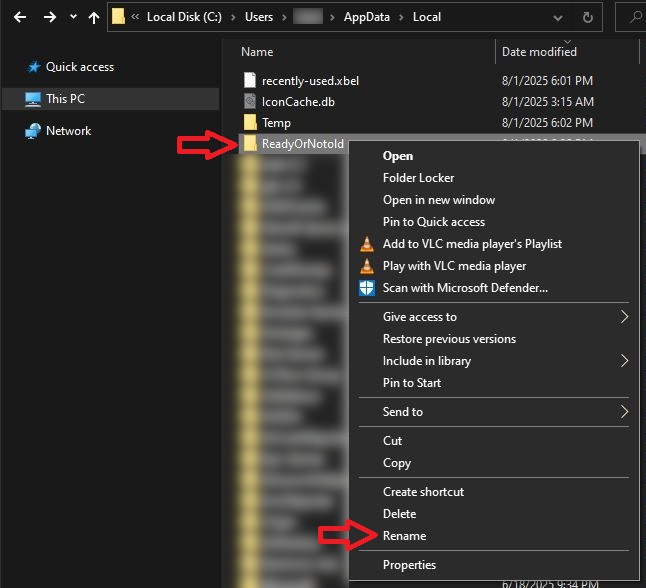
- If the issue persists, back up the ReadyOrNot folder by copying it from:
C:\Users\<YourUsername>\AppData\Local\
and saving it to another location (e.g., another drive).
- Rename the original ReadyOrNot folder to ReadyOrNotOld. (Important: This step will recreate all game data from scratch and remove saved progress.)
- Launch the game again to verify if the problem has been resolved.
Additional Fixes:
If the above methods do not resolve the issue, try the following:
- Disable in-game overlays: Overlays from Steam, Discord, or other apps can interfere with game performance. Follow this guide to disable in-game overlays on Windows.
- Clean install GPU drivers: Corrupted or outdated drivers can lead to DirectX-related crashes. Perform a clean installation of NVIDIA drivers (or reinstall drivers for AMD/Intel accordingly).
- Reinstall the game: If all else fails, a clean reinstall can replace any corrupted or missing game files.