Fix: ‘PWA Identity Proxy Host’ Errors in Windows Reliability History
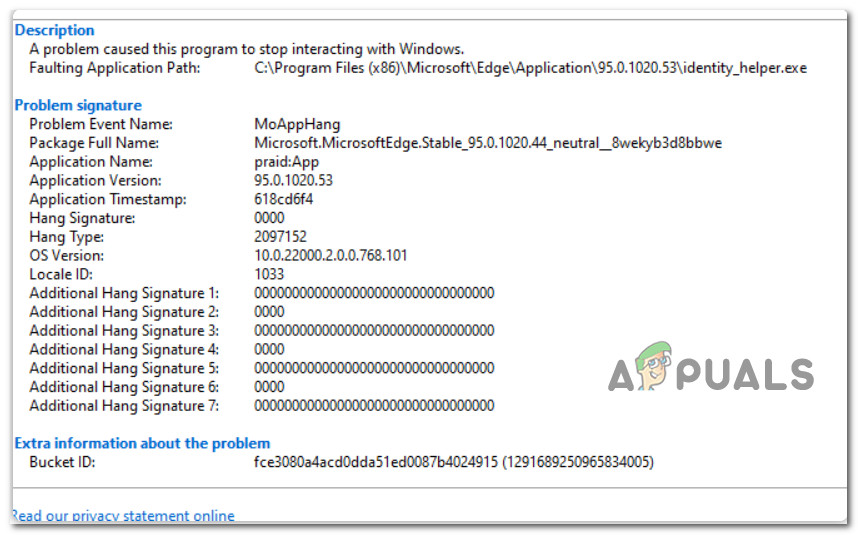
Some Windows users report that their Windows Reliability monitor is showing a lot of different random ‘PWA Identity Proxy Host’ errors. In most reported occurrences documenting this error, the problem seems to be related to Edge Chromium. This problem is confirmed to occur on both Windows 10 and Windows 11.
After thoroughly investigating the issue, we realized several underlying causes of why you might deal with this issue on Windows 10 and 11. Here’s a short list of scenarios that you should investigate:
- Web Apps Identity Proxy is enabled – According to several affected users; you can hope to experience this problem because the identity proxy for web apps is enabled. Several affected users have confirmed that they managed to fix the problem by accessing the Flags menu inside Microsoft Edge Chromium and disabling the Web Apps Identity Proxy.
- Outdated Microsoft Edge – As it turns out, you face this issue due to a missing infrastructure update that Microsoft has released for the Chromium Edge version. Several affected users have confirmed that they managed to fix the problem simply by installing the pending Chromium Edge update and restarting the browser.
- Outdated Windows build – Another reason why you can expect to deal with these recurring ‘PWA Identity Proxy Host’ errors is a scenario in which you’re missing a critical feature update that Microsoft released to tackle the various issues surrounding PWAs. In this case, you can fix the problem by installing every pending update until you bring your Windows version up to date.
- Edge extensions are running in the background – According to affected users, you can expect to deal with this problem due to a series of Chrome-specific extensions that are permitted to run in the background long after the browser is closed. To prevent this issue from occurring, you can fix the issue by re-configuring the behavior of Edge to disallow Edge Extensions from running in the background once the main browser is closed.
- Proxy and VPN interference – Keep in mind that if you’re using a proxy or VPN service, there’s a likely possibility that it ends up conflicting with the PWA protocol. To prevent this issue, go ahead and disable the Proxy or VPN connection and see if new instances of the ‘PWA Identity Proxy Host’ error stops occurring.
- 3d party interference – It’s been confirmed that several applications are known to conflict with the PWA protocol and cause these repeat errors. Since quite a few services and processes might cause this problem, the easiest way to fix and pinpoint the issue is to go for a boot.
- Recent system change – According to affected users, this problem can appear after a recent system change, like the installation of a pending driver, an application reinstallation, or even an unexpected system interruption. In this case, performing a System Restore procedure is the best hope of fixing the issue.
- System file corruption – Under certain circumstances, you can expect to deal with this issue in a scenario where you’re dealing with system file corruption that affects the PWA protocol. In this case, start by going for an SFC and DISM scan and progress to a clean install or repair install procedure if the problem persists.
Now that we have gone over every potential reason you might be dealing with the ‘PWA Identity Proxy Host’ error let’s go over a series of fixes that other affected users have used successfully to fix the problem.
1. Disable Web Apps Identity Proxy
Numerous afflicted customers claim that this issue is caused by the fact that the identity proxy for online apps is turned on. Several impacted users have reported that by going to the Flags menu in Microsoft Edge Chromium and turning off the Web Apps Identity Proxy, they were able to solve the issue.
Note: Progressive Web Apps (PWAs) are web applications that make use of contemporary web technology. They may be opened on the desktop and have a native app-like interface. PWAs are hosted online, but users can install them in Windows 10 or Windows 11 using the Microsoft Store or access them using a specific shortcut.
If you’re just beginning to troubleshoot this issue, start following the instructions below and disable the #edge-web-apps-identity-proxy flag to see if the error is now resolved:
- First things first, open Microsoft Edge Chromium.
- Paste the following path inside the navigation bar at the top to navigate to the Webapp Identity proxy Flag.
- Once inside the dedicated Web Apps Identity Proxy, change the toggle associated with Web Apps Identity Proxy to Disabled.
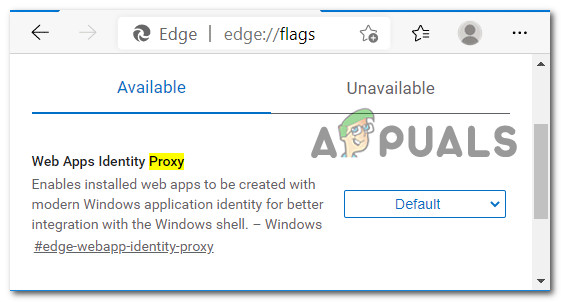
Disable Web Apps Identity Proxy - Save the changes, reboot your PC and see if the issue is now fixed.
If the same problem is still not fixed, move to the following method below.
2. Update Microsoft Edge
It turns out that the reason you’re seeing this problem is that Microsoft’s infrastructure upgrade for the Chromium Edge version is missing. A number of impacted customers have reported that they were able to resolve the problem by simply installing the upcoming Chromium Edge upgrade and restarting the browser.
Note: Microsoft Edge is available in two different iterations: the first, included with Windows 10, and the second, built using open-source Chromium code. Since the issue we are troubleshooting is exclusive to the chromium version, we will focus on how to update the Chromium version of Microsoft Edge.
Here’s how to manually check and update the Chromium Edge browser:
- Open Microsoft Edge and click on the action button (in the top-right section of the screen).
- From the context menu that just appeared, click on Help and feedback from the context menu that just appeared.
- Next, from the secondary context menu, click on About Microsoft Edge from the context menu that just appeared.
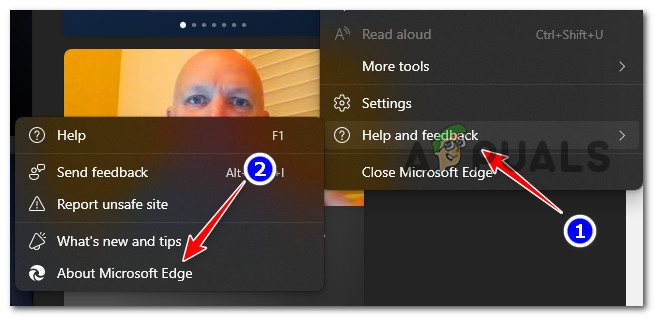
Access the About Microsoft Edge menu - Next, your browser will check for available updates and install the automatically if any new ones are available.
Note: If no new updates are available, you will see a page displaying your current Microsoft Edge version. - Once Microsoft Edge has been updated, reboot your PC and see if the problem is now fixed.
If the same issue is still occurring, move to the next potential fix below.
3. Update Windows Build to the Latest
Another reason you can get these persistent “PWA Identity Proxy Host” errors is if you’re missing a crucial feature update that Microsoft published to address the many PWA-related problems. In this situation, you can resolve the problem by applying each pending update until you update your Windows version.
As reported, Windows has already patched the problem causing several PWA app-related issues. If you have a valid license key, this hotfix will immediately be installed on any Windows version (7, 8.1, or 10).
Install each and every Windows update that is still awaiting installation in order to apply the hotfix. Here is a little guide on how to accomplish it:
- To bring up the Run dialog box, press the Windows key + R. The Windows Update tab of the Settings program will then appear once you input “ms-settings:windowsupdate” and hit Enter.
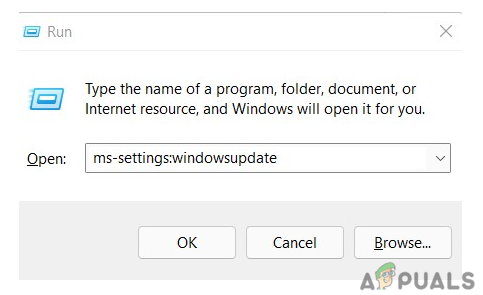
Access the Windows Update component Use the ‘wuapp’ command if you’re running Windows 7 or 8.1.
- Click Check for updates on the Windows Update screen, then follow the on-screen instructions to install each Windows update that is currently scheduled for installation. Install all updates, not just the most crucial ones, such as cumulative and security updates.
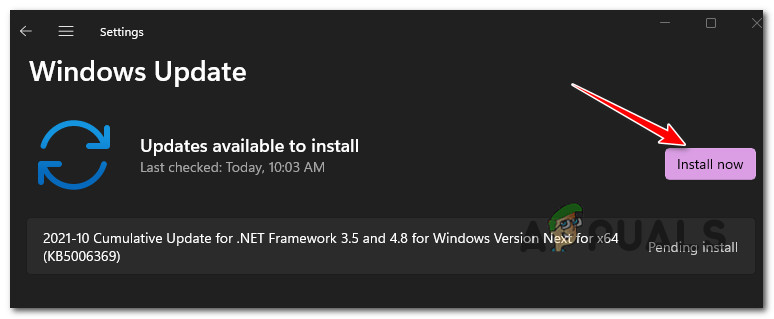
Install now the pending updates Note: For the time being, install everything else and skip the troublesome update!
- You may likely be asked to restart before each update is installed if you have a lot of pending updates. If this occurs, take the necessary action, but come back to this screen at the subsequent startup and complete the installation of the remaining updates.
- After completing the installation of every outstanding update, restart your computer one last time to check if the problem has been fixed.
Continue to the following method below if you’re still encountering new occurrences of the “PWA Identity Proxy Host” problem in the Windows Reliability monitor.
4. Prevent Edge Extensions from running in the background
Users who have experienced this issue claim that it is caused by a number of Chrome-specific extensions that are allowed to continue operating after the browser has been closed.
You can resolve this problem by changing the behavior of Edge so that Edge Extensions are not permitted to run in the background after the primary browser has been closed.
If this method is applicable, follow the instructions below to prevent Edge Extensions from running in the background via the Settings menu of Microsoft Edge:
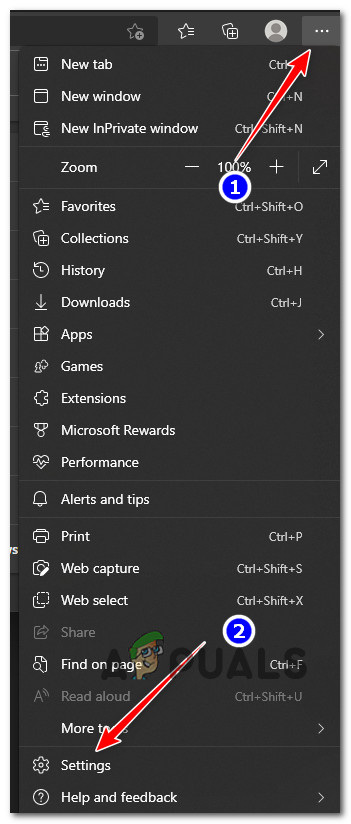
- Open Microsoft Edge and click on the action button (top-right section of the screen.
- Next, from the context menu that just appeared, click on Settings.
Access the Settings menu - Once you’re inside the Settings menu, use the vertical menu on the left to click on System and performance.
- Next, move over to the right pane and uncheck the box associated with Continue running background extensions and apps when Microsoft Edge is closed.
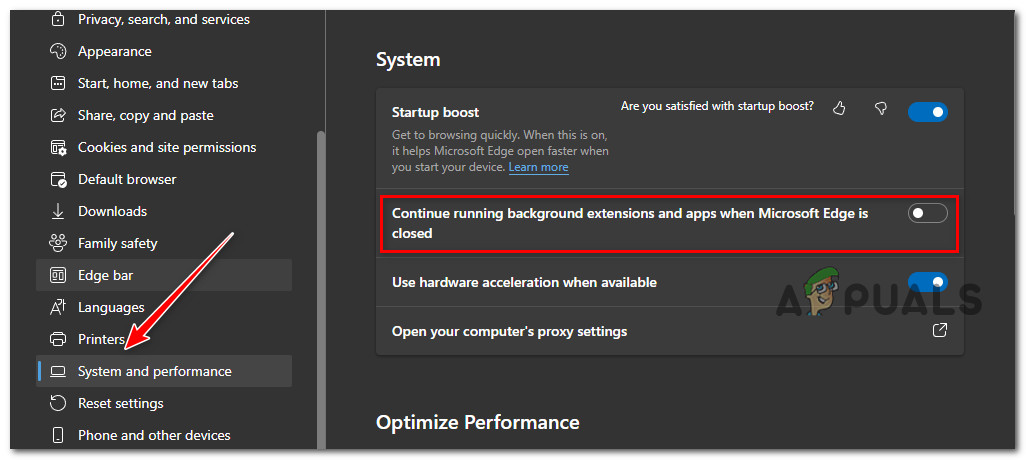
Access the System performance and disable the usage of background extensions - Once this change has been enforced, reboot your PC and see if the problem is now fixed.
If you’re still seeing the same ‘PWA Identity Proxy Host’ error inside the Windows Reliability monitor, move down to the next method below.
5. Disable Proxy and VPN
A proxy or VPN service may wind up conflicting with the PWA protocol if you’re using one, so keep that in mind. To solve this problem, turn off your VPN or proxy connection and check if any future occurrences of the “PWA Identity Proxy Host” error are prevented.
This is much more likely to occur if you’re using Windows 11’s native proxy or VPN features. To fix this issue, you have to disable the VPN or proxy components and test if the error still appears.
If none of the aforementioned methods were successful for you, you might consider severing any connected VPN or proxy sessions on your computer.
Reminder: VPN and proxy servers don’t work well with Windows, especially Windows 10.
It also turns out that a lot of anonymous providers have a clear policy against exchanging PWA data.
Many affected customers claimed they could only resolve the issue by disabling their proxy server or VPN client.
If you fit this description, we have two separate guides that will explain how to terminate your VPN or proxy server.
4.1. Turn off the proxy server
You must manually terminate the connection using a proxy server by accessing the Proxy menu in the Window Setting menu.
Here’s what you need to do:
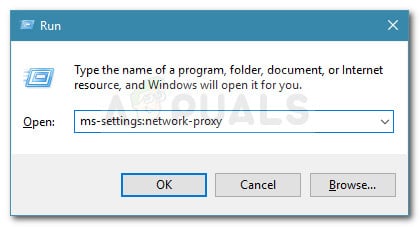
- To open the Run dialog box, press the Windows key + R.
- Next, enter “ms-settings:network-proxy” and click Enter to open the Proxy tab of the Settings app.
Access the Proxy server - On the Proxy tab of the Settings menu, scroll down to the Manual Proxy Setup section.
- After that, move to the right side of the screen and uncheck the box by Use a proxy server.
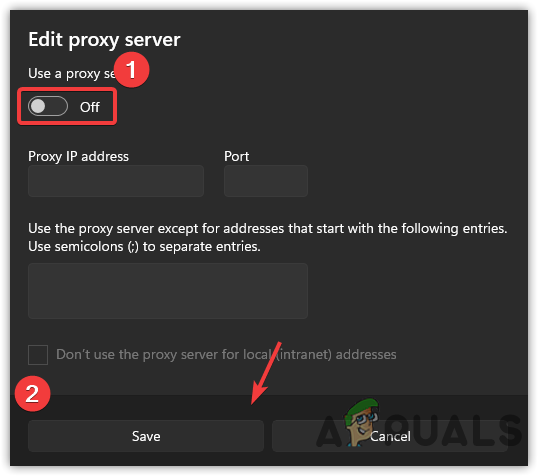
Disable Proxy server - After you’ve successfully turned off the proxy server, restart your computer to check if the problem is resolved when it starts up again.
4.2. Turn down the VPN server
It might be possible to disable the VPN client depending on the implementation type that you’re using. In the event a desktop VPN client was installed, the VPN connection must be terminated from the specific settings menu.
As an alternative, here is a brief guide on how to uninstall a VPN connection that you have set up using a Windows 10 default feature:
- Press the Windows key + R to launch the Run dialog box before entering it.
- Next, enter “ms-settings:network-vpn” and hit Enter to launch the VPN tab of the Settings app on your Windows PC.
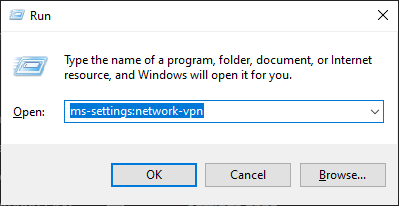
Accessing the VPN client - Click your VPN in the right-hand section of the VPN connection tab, then select Remove from the context menu to stop it from interfering with the Settings app.
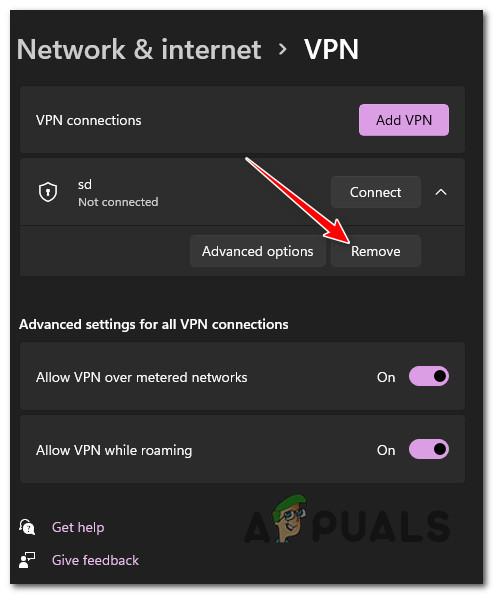
Disabling the built-in VPN
If the problem is still not solved, move on to the following potential fix.
6. Perform a Clean boot
It has been established that a number of programs are known to clash with the PWA protocol and result in these recurrent errors.
Going for a clean boot is the simplest option to resolve the issue and identify the problem because there are numerous services and processes that could be the culprit.
Note: It’s impossible to build a thorough list of all probable culprits. Therefore, the best thing you can do is perform a clean boot and gradually activate each service, beginning item, or process until you find the offender. In this case, beginning in clean boot mode and following a set of instructions to check for a software conflict and identify the troublesome service or process should be able to fix the issue.
In order to achieve a clean boot state and maybe prevent the emergence of this problem, your computer will boot without any third-party services, processes, or startup items.
Below are the specific steps to follow in order to get this clean boot condition:
- To open the Run dialog box, first press the Windows key while clicking R. When you type “msconfig” into the text field, the System Configuration window will show up.

Access the Msconfig menu Note: Select Yes when the User Account Control (UAC) window requests admin access.
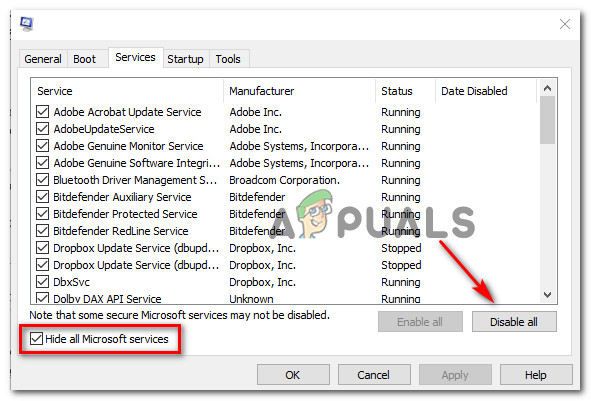
- Check the box next to Hide all Microsoft services by selecting the Services tab from the ribbon bar at the top of the System Configuration menu.
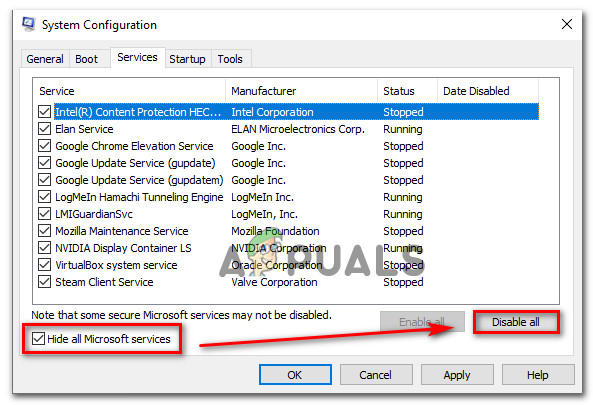
Accessing the Startup services screen Note: This step will not disable a Microsoft service that is essential to your OS.
- Remove any necessary services from the list and click the Disable all option to ensure that no unneeded third-party services are started when your System restarts.
- After choosing the Startup tab, click the drop-down menu and choose Open Task Manager.
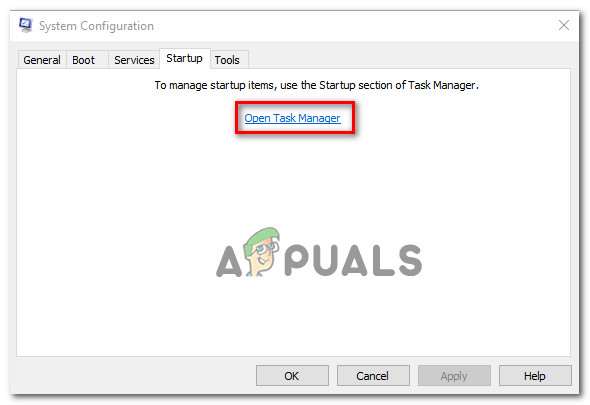
Open Task Manager - The previous action will immediately bring up the Startup tab in Task Manager. To stop them from starting the next time the system boots, while inside, go through each third-party startup service one at a time and click the Disable button at the bottom of the screen.
Disable 3rd party services Note: Repeat this process until no startup services are left that can be started at the next boot.
- If you have made it this far, you are ready to carry out a clean boot. The only thing left is to restart your computer to see if the screen flickering issue has been fixed.
- The next time you turn on your computer, it will only boot with the essential services required by your operating System. Once the procedure is complete, use your computer, as usual, to see if the screen flickering has returned.
- Reactivate each previously deactivated process, one at a time, until the issue recurs. This makes it easy to pinpoint the person responsible for the screen flickering.
- Reverse engineer the aforementioned instructions to confirm that your subsequent computer setup is regular and that third-party services, processes, and starting items are permitted to run, regardless of the outcomes.
Use the likely solution below if you were unable to address the issue using this method.
7. Deploy SFC and DISM Scans
If the “PWA Identity Proxy Host” error couldn’t be fixed using the clean boot method described above, your following action should be to investigate any system corruption problems.
By promptly running SFC (System File Checker) and DISM (Deployment Image Servicing and Management) scans, the vast majority of likely issues that could be the root of this error code can be resolved.
Although the two built-in tools are roughly comparable, we suggest running both scans fast, one after the other, to increase your chances of fixing the issue without having to perform a clean install or repair install.
Your initial action should be an SFC scan. This scan will use a local archive to replace corrupt Windows files with healthy ones, so there is NO need for an Internet connection.
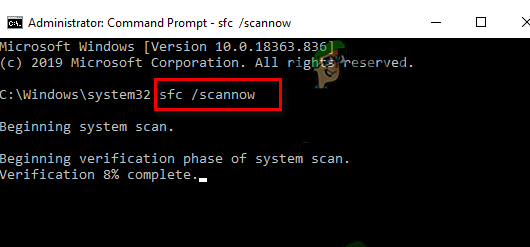
After starting this process, refrain from resuming, turning off, or closing the elevated CMD window.
By doing this, there is a potential that your PC’s HDD or SSD would suffer from further local issues.
After the SFC scan is finished, restart your computer, and when it comes back up, begin a DISM scan.
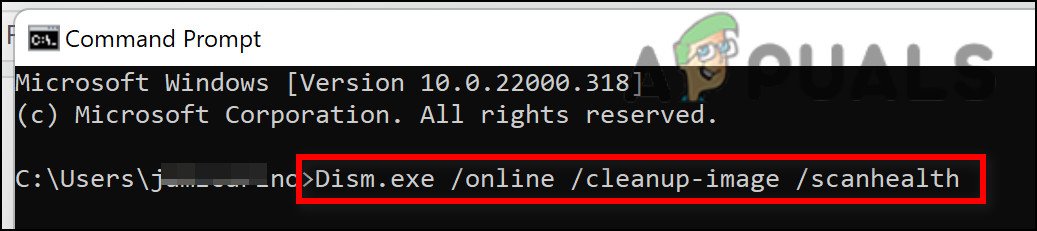
Unlike an SFC check, DISM requires a constant Internet connection to replace damaged files with their healthy equivalents. This is necessary because, unlike SFC, which uses a local file archive, DISM gets brand-new copies free of corruption from a Windows update feature.
After the DISM scan is complete, restart your computer to determine if the problem has been fixed.
If the problem is still there, move on to the next potential fix below.
8. Use System Restore
Users who have experienced this issue claim that it can emerge following a recent system change, such as the installation of a pending driver, the reinstallation of a program, or even an unexpected system stoppage. In this situation, using a System Restore operation is your best bet for resolving the problem.
This has assisted numerous folks in solving their issue. Using the Windows System Restore tool, you can return your computer to a prior condition.
Observe these methods to fix your computer and get it back in working order:
- Press the Windows key + R to start the Run command.
- Type “rstrui” in the Run box and hit Enter to start the System Restore wizard.

Deploy a Rstrui scan - Select a different restoration point on the next screen before pressing the Next button.

Restore to a previous point in time Note: Select a restore point established before you realized this error, then click Next again.
- Click Finish once the restoration procedure has started, then watch as your computer restarts.
- Restart your Windows machine to examine if the problem has been fixed and whether the error’s symptoms have vanished.
If the problem is still not fixed, proceed to the last technique below.
9. Perform a Clean install & Repair Install
You have a significant corruption issue if you’ve tried every option suggested in this post and are still receiving the same error.
You must restart each component of Windows in this scenario to be sure that every instance of incorrect system files has been removed.
Most users choose a clean install, which completes the task while erasing all personal data, including programs, games, movies, and documents.
By choosing a repair install, you can upgrade your Windows components in a less drastic way without running the danger of damaging your private property (games, apps, images, papers, etc.). This method allows you to keep all of your personal information.


