How to Fix “Proxy server is refusing connections” Error on Firefox?
Some Mozilla Firefox users are encountering the The Proxy server is refusing connections error when attempting to access certain websites. In most cases, affected users report that this problem does not occur when they access the same website from a different browser.
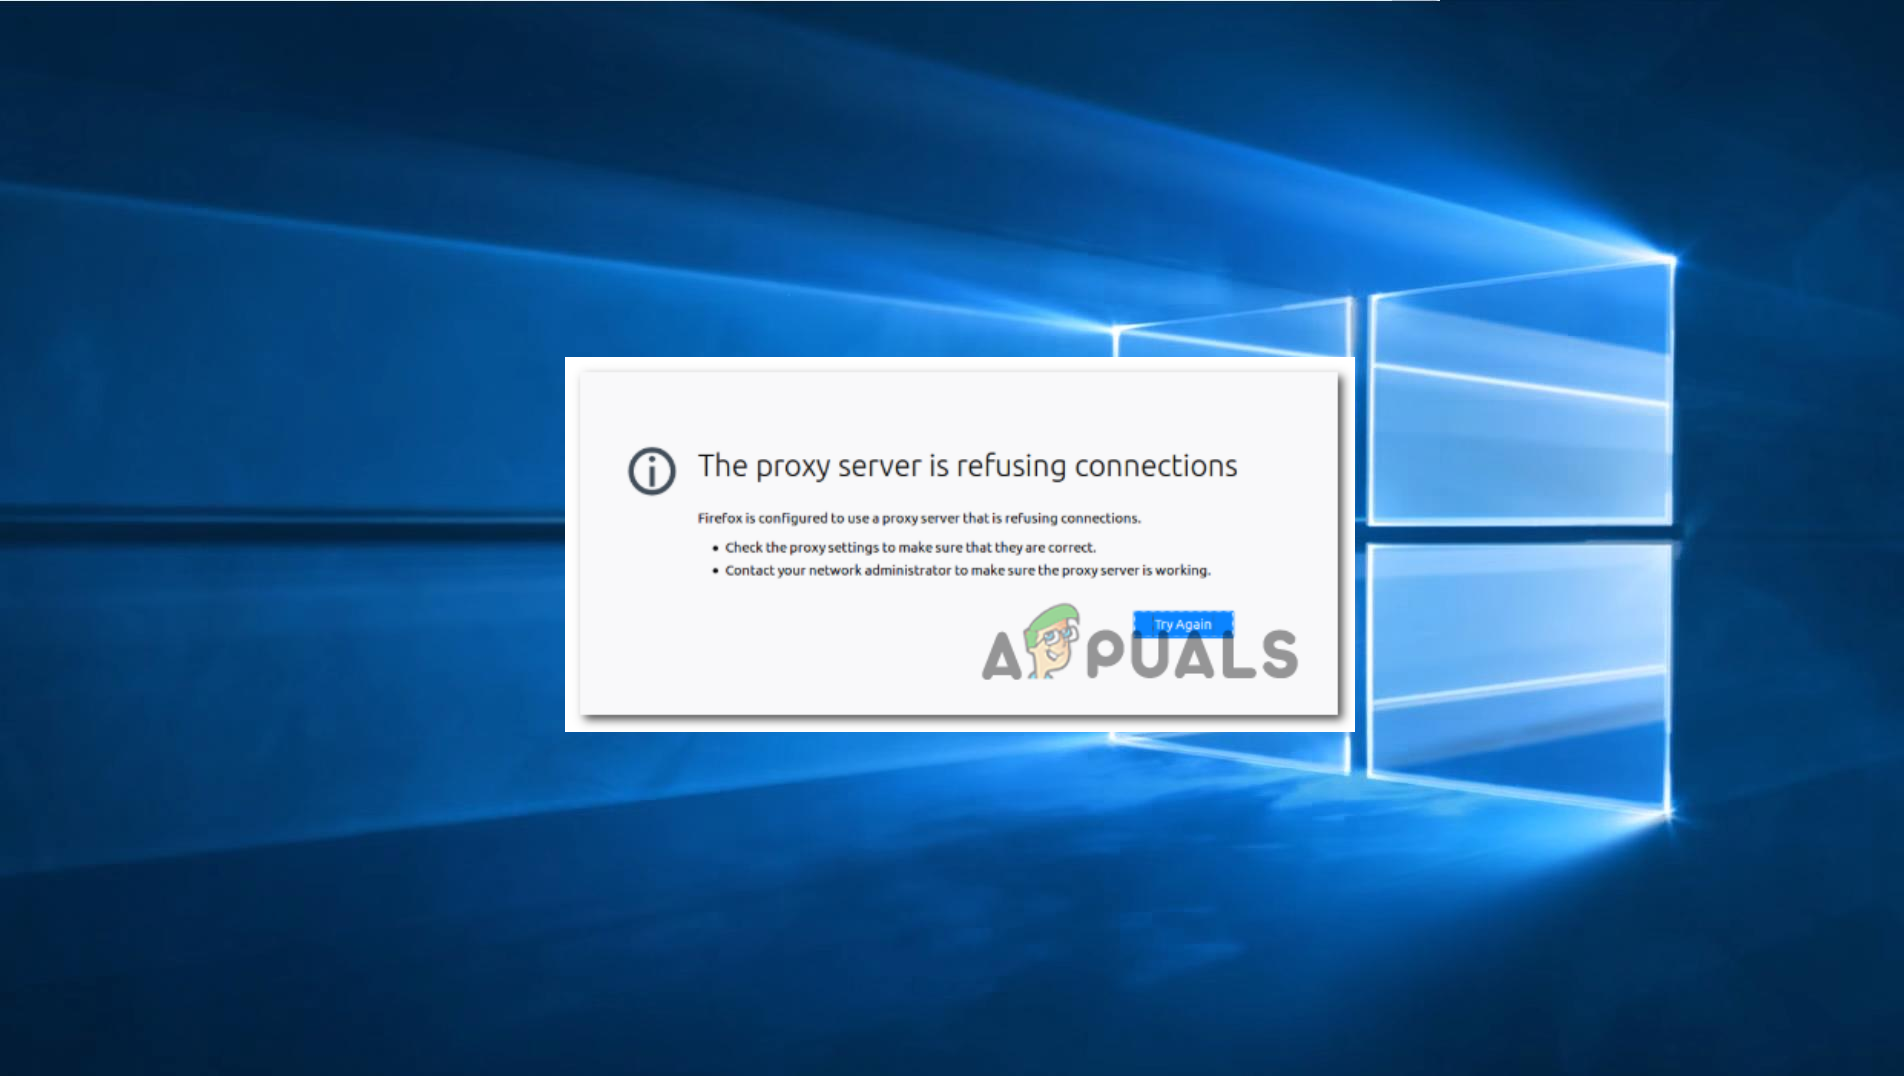
In Firefox, this issue is indicative of a communication error with the proxy server – the browser is able to connect to the proxy, but the proxy is not allowing the browser to retrieve and display the webpage.
Often, this is due to the proxy solution requiring some form of authentication which Firefox is not configured to use. If this is your situation, resolving the issue could be as simple as setting your Firefox browser to Auto Detect the system’s proxy settings. Another potential cause is the proxy server not permitting SSL connections on the port you’re using. Adjusting your Proxy settings to allow this port may resolve the issue.
If you encounter this error while trying to access an FTP site through an HTTP proxy, switching to an HTTPS proxy that allows secure connections might be the solution.
1. Forcing Firefox to Auto Detect Proxy Settings
Basically, this approach directs your browser to use the proxy configurations established across your entire system. By doing so, Firefox can automatically apply any network-specific proxy settings that are necessary for internet access, potentially fixing the proxy errors you’ve encountered.
This balances the browser’s connectivity with your system’s network environment, hence resolving the refusal error when reaching out to a website.
- Open your Mozilla Firefox browser and click on the action button at the top-right. From the menu that appears, select Options.
- In the Options tab, select the General category from the menu on the left, then scroll down to Network Settings. Click on Settings to access the advanced menu.
- In the Connection Settings menu, change the toggle for internet access to Use system proxy settings.
- Save the changes by clicking OK, restart your browser, and try accessing the web page again.
Forcing Firefox to use the system’s proxy server
2. Add URL SSL Port to the Allowed List
When a web address uses an SSL port different from the standard ones, the proxy may block it as a security measure. By adding this specific SSL port to the list of approved ports within your proxy configurations, you basically grant Firefox permission to establish a secure link with the intended server, hence overcoming the connection refusal.
- Analyze the URL causing the error to identify if it’s using an alternate port.

- Open your proxy configuration settings and find the option to add an alternate SSL port.
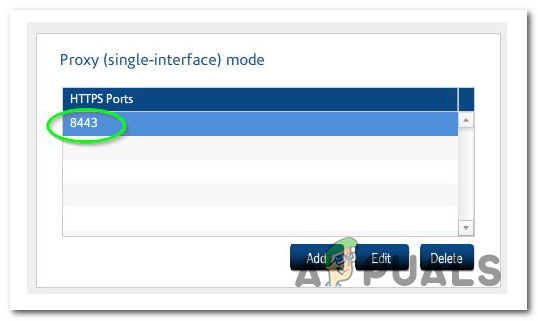
- Save the configuration, then restart your computer.
- Check if the matter is resolved after the computer restarts.
3. Switch to an HTTPS Proxy
You may encounter the ‘The Proxy server is refusing connections‘ error when accessing an FTP site via an HTTP proxy, which is less secure.
HTTPS proxies encrypt data between your browser and the internet, hence potentially bypassing restrictions or blocks that an HTTP proxy might impose on certain types of traffic, such as FTP requests. By using an HTTPS proxy, you’re making sure a secure connection that’s less likely to be refused by the proxy server.
4. Disable the Built-in Proxy Server
If malware has interfered with your system’s proxy settings or if you’ve mistakenly configured multiple proxies, this can lead to connection issues in Firefox. By turning off the built-in proxy server in your Local Area Network (LAN) settings, you eliminate the possibility of such conflicts or unauthorized settings, potentially restoring your access to web pages.
This step makes sure that Firefox relies on direct internet connections or system-approved proxy configurations, hence resolving the error.
- Press Windows key + R to open a Run dialog box. Type ‘ms-settings:network-proxy‘ and hit Enter to open the Proxy tab of the Settings menu.
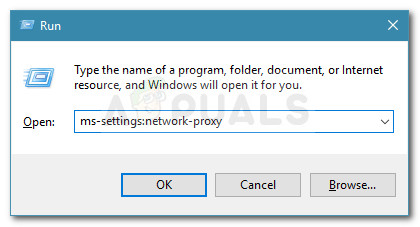
Run dialog: ms-settings:network-proxy - In the Proxy tab, go down to the Manual Proxy setup section and disable the Use a proxy server toggle.
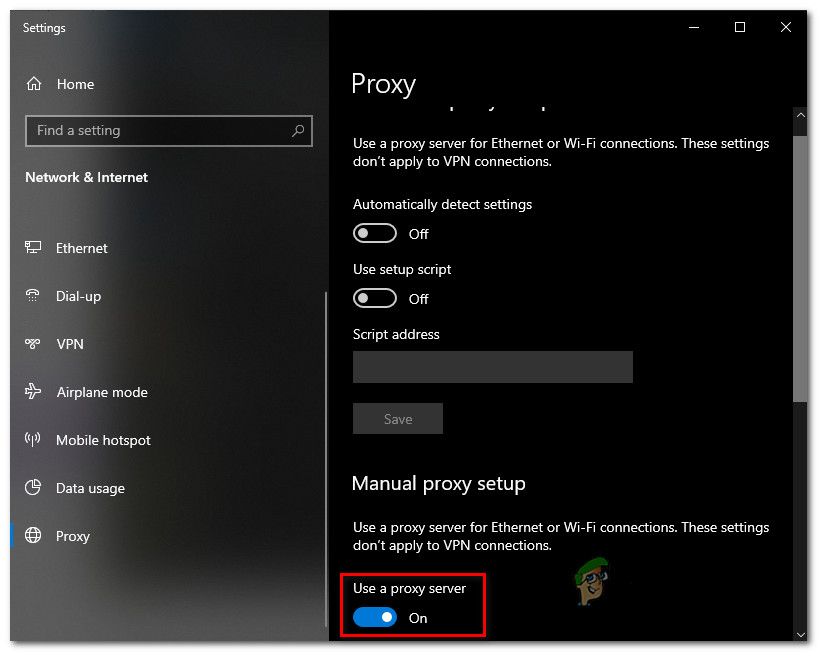
Disabling the use of a proxy server - Once done, restart your computer and check for resolution upon startup.
5. Uninstalling VPN Client
Sometimes, a VPN client configures network settings in ways that interfere with the browser’s ability to connect through a proxy. This can accidentally lead to the error in Firefox. Removing the VPN software reverts these settings, potentially eliminating the conflict and restoring your browser’s proxy connection capabilities.
- Press Windows key + R and type appwiz.cpl. Press Enter to open the Programs and Features window. Click Yes if prompted by UAC (User Account Control).

Typing in “appwiz.cpl” in the Run prompt - Scroll down to locate your VPN client in the list, right-click on it, and select Uninstall.
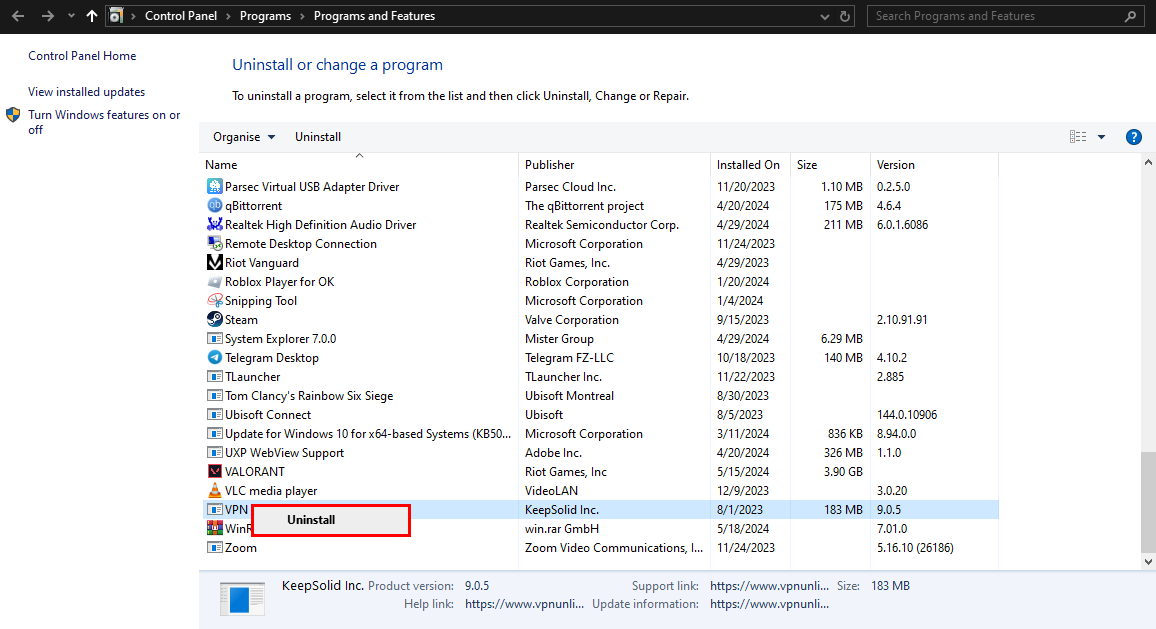
- Complete the uninstallation process by following the on-screen instructions, then restart your computer and check if the issue has been resolved.


Thank you very much, method 1 works!!