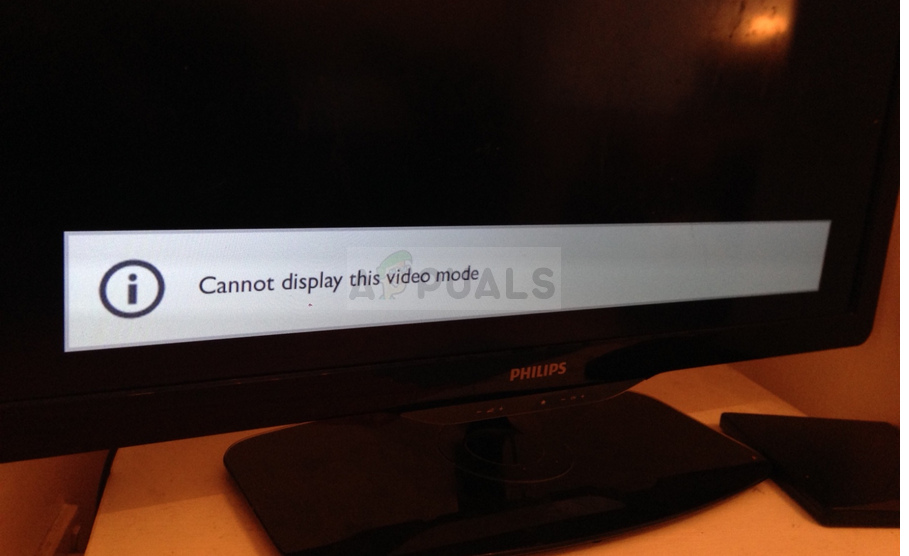
Fix: Cannot Display this Video Mode
This error can show up in a variety of different scenarios but it’s often not so difficult to get rid of the error. It can show up during startup and prevent you from even accessing your computer, which is a somewhat more difficult scenario; or it can appear when you are trying to run a certain program.
No matter what is the case, we got you covered so make sure you follow our instruction below in order to get rid of the issue. Good luck!
Solution 1: Try Booting in VGA Mode
If you have just installed a new graphics card or if you have changed certain vide settings on your computer such as changing the resolution out of the accepted sope, a possible occurrence is that the graphics card or your PC is set to run on a resolution higher than the monitor can handle which results in this annoying error code.
This problem is the most common among laptop users with smaller monitors and you can solve the problem by accessing the Advanced Startup settings from your recovery media.
- Turn your computer on and insert a bootable Windows 10 DVD or a USB drive which has been setup correctly. It does not have to be your original Windows 10 DVD since you won’t need it to activate your version of Windows, only to access certain options you can’t access otherwise.
- Boot from the drive you just inserted by restarting your computer after insertion and follow the instructions.
- Windows Setup windows should open prompting you to enter the language and time and date settings so make sure you add them correctly.
- Choose the Repair your computer option at the bottom of the window after proceeding and choose Troubleshoot >> Advanced options >> Startup settings.
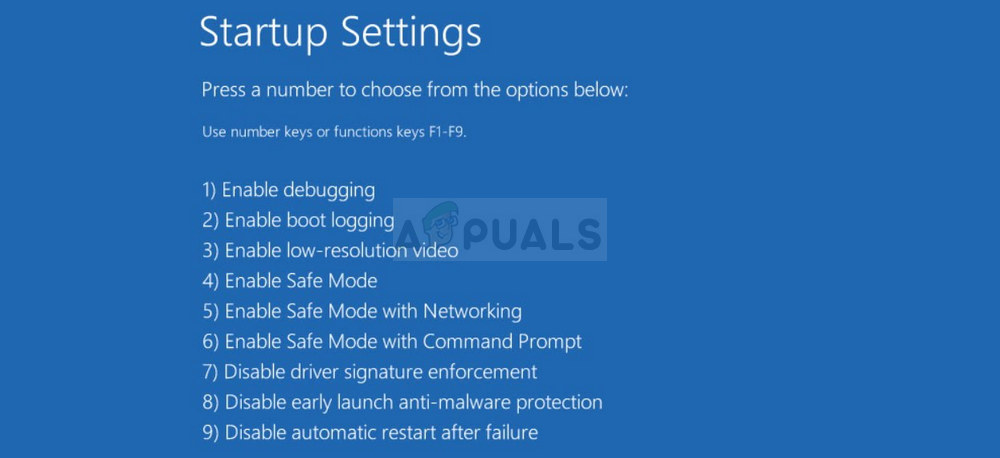
- Click the number 3 key or F3 in order to start your PC in low-resolution mode.
- Once the PC has started, right-click on your Desktop and choose Properties. Navigate to the Settings tab and tweak the resolution tab to set the resolution suitable to your computer’s screen size. Try lowering the setting insignificantly and restarting your computer in normal mode to see if the problem is solved.
Note: If nothing regarding the resolution tweaks managed to fix the problem, navigate back to the same startup option, right-click on your Desktop, and navigate to Properties >> Settings tab >> Advanced, and then navigate to the Monitor tab. If the refresh rate is set too high, try lowering it a bit. Note that the lowest recommended setting is 60Hz. It occurs if you have a new monitor or a new graphics adapter which may have changed this setting.
Solution 2: Use System Restore
Using System Restore can be quite useful as it will change your user settings back to the place they were in before the error started to occur. Sometimes it’s a new update for a program being installed or a new app that has caused the occurrence of this error. Either way, you are going to be able to solve the problem by using System Restore.
the problem by accessing the Advanced Startup settings from your recovery media.
- Turn your computer on and insert a bootable Windows 10 DVD or a USB drive which has been setup correctly. It does not have to be your original Windows 10 DVD since you won’t need it to activate your version of Windows, only to access certain options you can’t access otherwise.
- Boot from the drive you just inserted by restarting your computer after insertion and follow the instructions.
- Windows Setup windows should open prompting you to enter the language and time and date settings so make sure you add them correctly.
- Choose the Repair your computer option at the bottom of the window after proceeding and choose Troubleshoot >> Advanced options >> System Restore.
- Inside the System Restore window, select the option called Choose a different restore point and click the Next button.
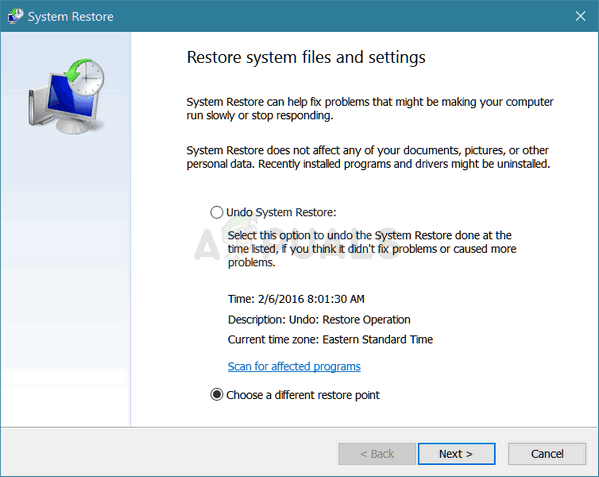
- Select a particular restore point you have created before manually. You can also select any restore point available in the list and hit the Next button to proceed with the restoration process. After the process is over, you will be reverted to the state your computer was in at that period in time. Check to see if you are able to boot normally now.
Note: If you are somehow unable to access the Recovery screen even after putting in your recovery DVD or USB, you might need to tweak certain settings in BIOS in order to proceed successfully. It shouldn’t be difficult as long as you follow the instructions carefully.
- Turn off your computer by navigating to the Start Menu >> Power Button >> Shut down.
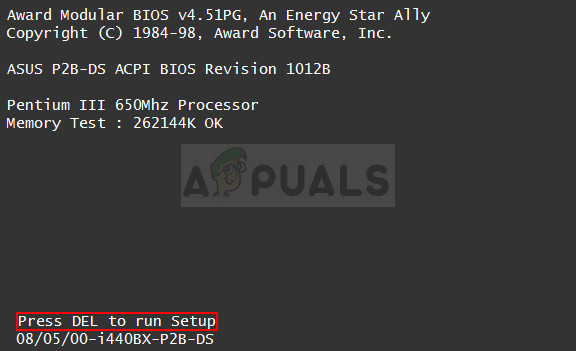
- Turn your PC on again and proceed to enter BIOS settings by pressing the BIOS key as the system is about to start. The BIOS key is typically displayed on the boot screen, saying “Press ___ to enter Setup.” There are other keys as well. The usual BIOS keys are F1, F2, Del, etc. Note that you will have to be quick about this as the message disappears pretty fast, which means you will have to reboot again.
- The setting which you need to turn off is usually located under the Chipset tab which may be called different depending on the manufacturer. Another alternative is Integrated Graphics Configuration. The setting is called Initiate Graphic Adapter, Primary Display, or Primary Display Selection.
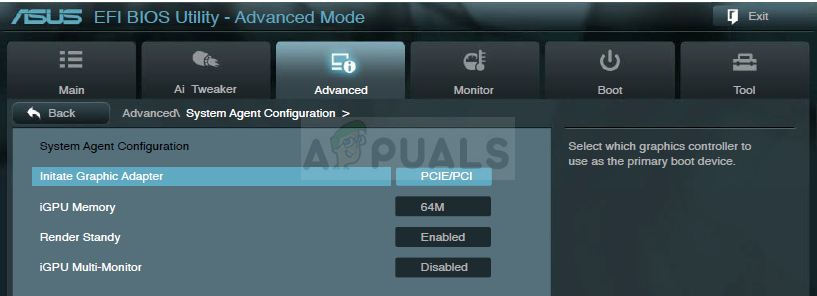
- Once you locate the correct settings, set it to IGD. Navigate to the Exit section and choose to Exit Saving Changes. This will proceed with the computer’s boot. Make sure you try to run the installation again.
- Don’t forget to change the settings back to their original state after you have finished with the process and installed Windows 10 successfully on your computer.
Solution 3: Errors Occurring with League of Legends
Another place where this error occurs quite often is definitely League of Legends, especially after a certain patch was released. The problem can be solved by updating the game but some users still claim that the issue is present so you can try one of the workarounds below:
- Open the League of Legends Launcher and launch the game. Since the error usually appears after the champion select screen, navigate towards that screen.
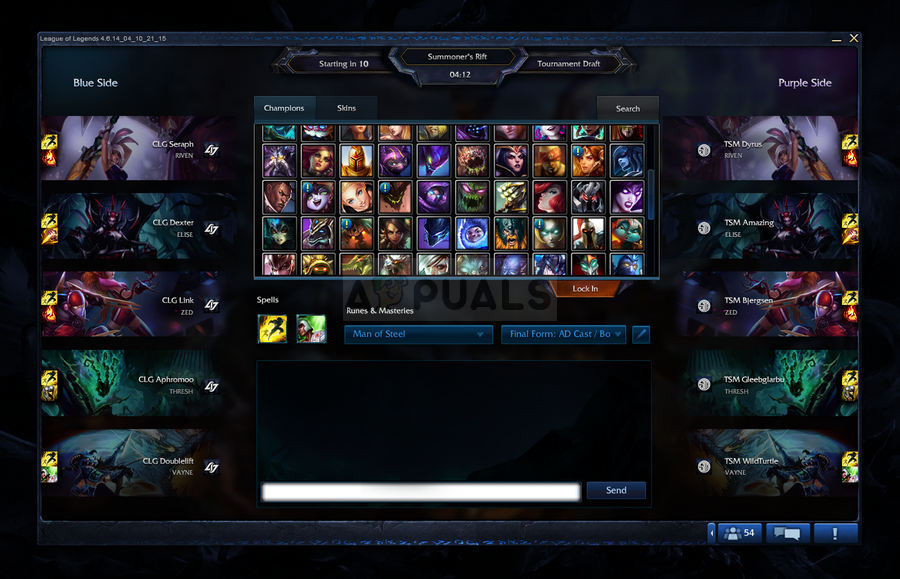
- After you choose your champion, use the Alt + Enter key combination in order to quickly switch to the windowed mode. After the match has started, you can switch back to the fullscreen mode in the settings if you are used to it.
Here is another workaround:
- Open the game and navigate to the screen which is showing you the monitor error.
- After this error pops up, unplug your VGA cable from your monitor and wait for 5 seconds before plugging it back.
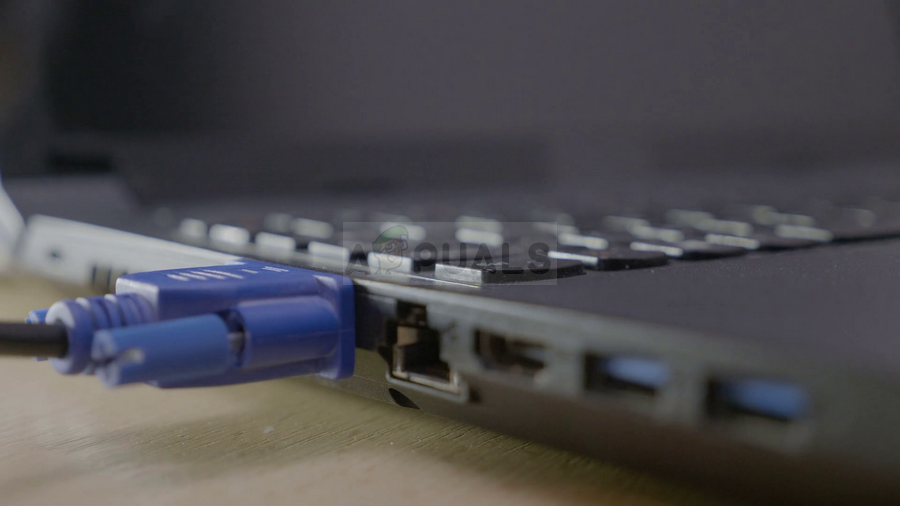
- You might receive a bug report so make sure you just exit it without sending a bug report. Press Reconnect in the LoL client and your problem should be solved!


