Fix: “File Doesn’t Exist On the Client” Project Zomboid
 Reviewed by Muhammad Zubyan
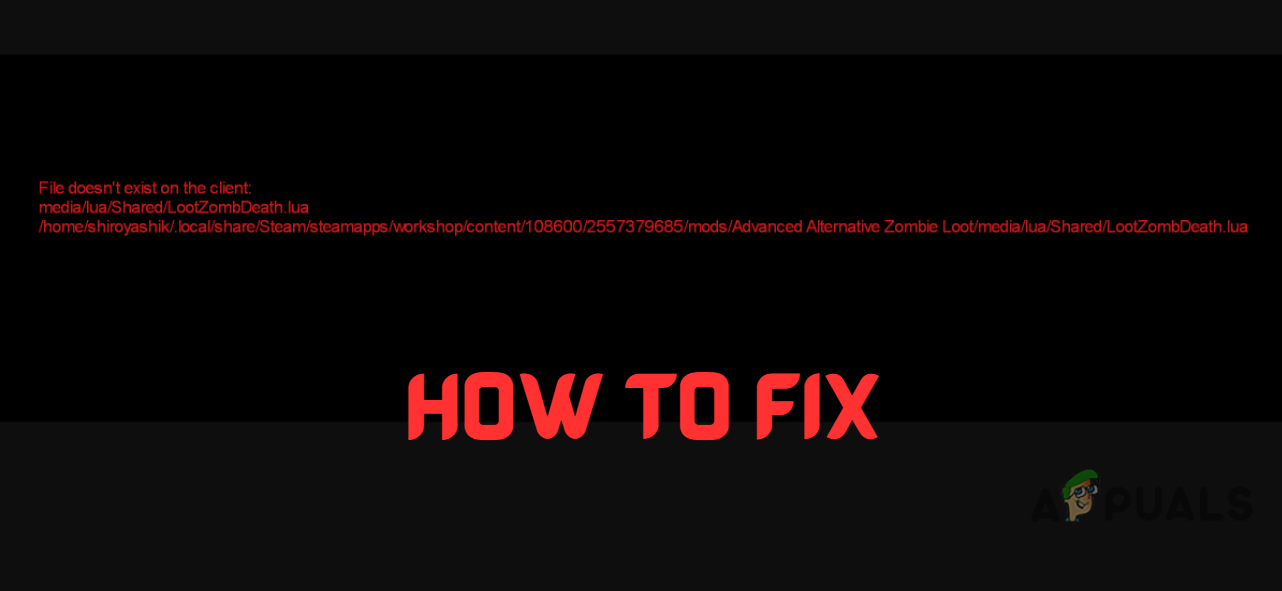
When connecting to a server in Project Zomboid, you may encounter an error message that reads “File doesn’t exist on the client“, followed by the address of the file in question. This error is generally related to the mods installed on the client’s or the host’s system. The error message may also read “File doesn’t match the one on the server“, but these two errors are caused by the exact same reasons.
This error message can be very misleading because, while it can be caused by missing mods, it can also occur if the client or server host’s mods are simply outdated.
However, this error can even occur when the client and host seemingly have all the required mods installed and up to date. In this case, you will need to do some troubleshooting to determine the actual cause of the error. To help you with that, this guide will show you all the possible causes of this error and what you can do to solve them.
1. Force-update all the mods
Instead of manually updating your Project Zomboid mods one by one through Steam, it is much better to force-update them all together. This will save you effort and ensure that every single mod is up to date. Moreover, the best part is that it can be accomplished by following a few simple steps.
For player:
If you are simply a player trying to connect to a server, follow these steps to forcibly update all of your mods:
- Completely shut down Project Zomboid. You can open Task Manager to ensure that the game has been closed entirely.
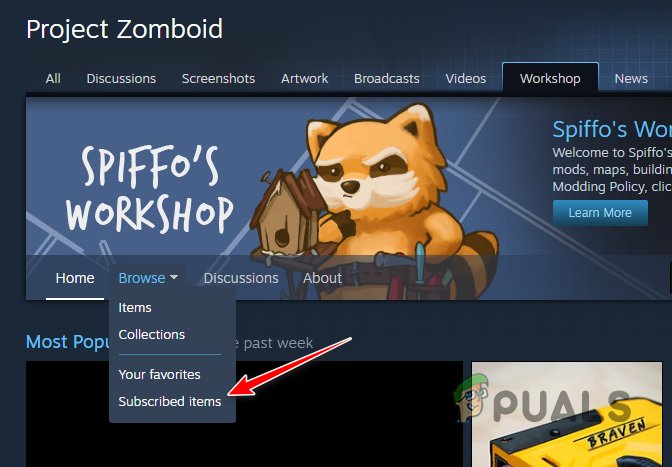
- Open your Steam Library, click on Project Zomboid, and navigate to its workshop.

Opening Project Zomboid Workshop - Click on the “Browse” option and then select “Subscribed Items” from the dropdown menu.
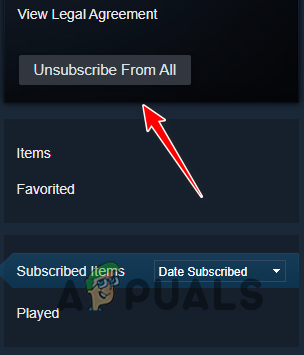
Opening Installed Mods menu in Steam - Click on the “Unsubscribe From All” button on the right side of the page.
Uninstalling all mods - Relaunch the game and connect to the server you were originally trying to join.
When you reconnect to the server, the game will automatically install all the mods that are running on it. In this way, you will automatically update all your mods to their latest versions.
If you are still unable to connect to the server even after you have updated all your mods, it most likely means that your mods are all up to date, but the server’s mods are outdated. In this case, you will need to contact the server’s host and inform them that their mods are outdated. Fortunately, server hosts can also force update their mods by following a few quick steps.
For Host:
If you are hosting a dedicated PZ server, follow these steps to force-update all your mods.
- Completely shut down your dedicated server.
- Open File Explorer and navigate to your Project Zomboid Dedicated folder. It should be located in this directory:
C:\SteamGames\steamapps\common\Project Zomboid Dedicated Server
- Navigate to SteamApps > workshop.
- In the workshop folder, delete this file:
appworkshop_108600.acf
- Restart your dedicated server.
After you restart your dedicated server, take a look at your console. It will show that it has verified all the server mods in comparison to the workshop. Additionally, if it finds any outdated mods, it will update them to the latest version available in the workshop.
If you are hosting a PZ server using the game’s Host feature, follow the same steps that we have listed above, but navigate to this directory instead:
C:\Steam\steamapps\common\ProjectZomboid\steamapps\workshop
In this folder, delete the same file (appworkshop_108600.acf), and then restart your server using the in-game Host option to update all the server mods.
2. Delete Lua Folder and Verify the Integrity of Game Files
Your Project Zomboid folder has a sub-folder named ‘lua’ that contains all sorts of important game files and mod files necessary for the game to function properly.
If the directory shown in the error message reads “media/lua,” then it means that the files in the folder may be corrupted or that they failed to install properly during the game’s installation process.

An easy way to ensure that your Lua folder is not corrupted is to delete it from the directory and then verify the integrity of game files on Steam. This will reinstall the Lua folder and verify all its files.
Follow the steps we’ve listed below to reinstall the lua folder:
- Close the game entirely.
- Open File Explorer and navigate to this directory:
Steam\steamapps\common\ProjectZomboid\media
- In this folder, delete the “lua” subfolder.
- Open Steam Library.
- Click on Project Zomboid and select “Properties.”
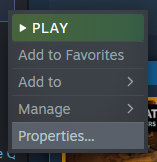
Opening Game Properties menu - Click on the Local Files option (on the left) and select “Verify integrity of game files…”
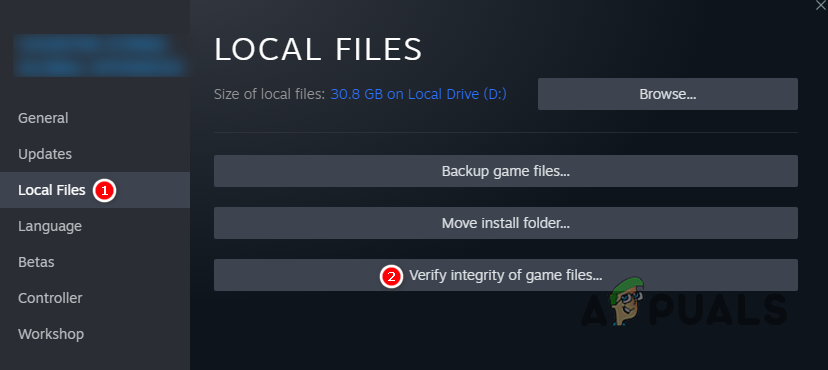
Verifying the integrity of game files
After Steam has finished verifying the files, it will reinstall the lua subfolder. Once that is done, launch the game and try connecting to the server. If you’re still unable to join the server, don’t worry, as we’ve listed more solutions below.
3. Disable the “Do Lua Checksum” Option
If both the client and server host have all their mods up to date but are still encountering this error, an easy way to work around it is to turn off the “Do Lua Checksum” option in the game’s settings.
The Lua Checksum verifies that the client and server host both have the same mods installed on their systems. So if the server host disabled this option, clients would be able to bypass this check and connect to the server without any issues.
To disable this option, simply open the game, join your server, and click on the ADMIN button on the left side of the screen. Then, press the “See Server Options” button.
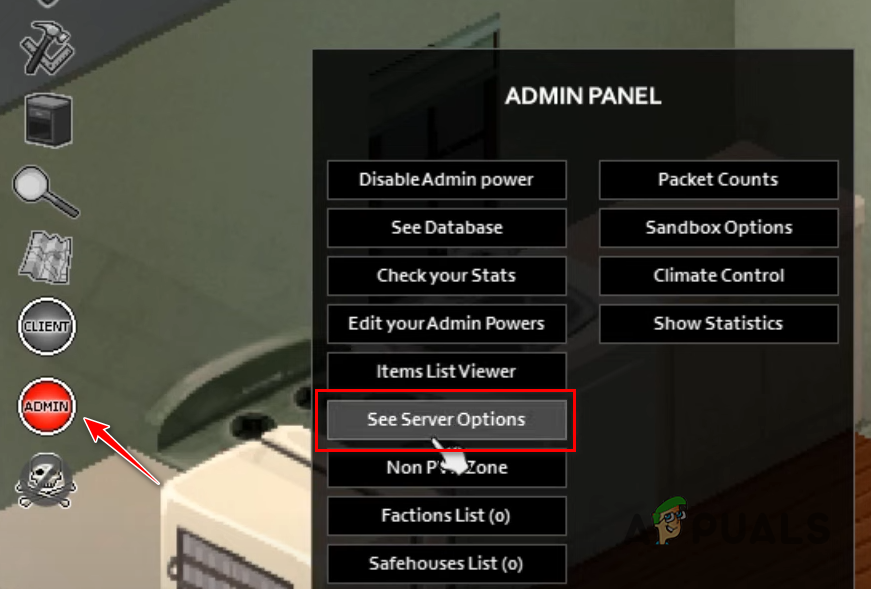
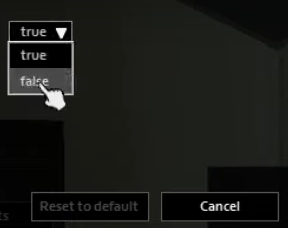
Click on the search bar at the bottom-left and search DoLuaChecksum. Click on the option and set it to false to disable it.
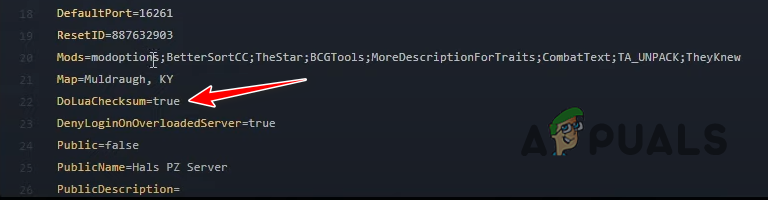
You can also disable this option by opening the Project.ini file of your server and editing “DoLuaChecksum = true” to “DoLuaChecksum = false“. Now, clients should be able to join your server without getting the “File Doesn’t Exist” error.
But an important thing to keep in mind is that if this error is being caused by incompatible mods (rather than missing/outdated mods), disabling this verification check may cause gameplay errors in your server.
If you encounter any such errors while playing on the server, try the next solution below to find the incompatible mod(s) and fix the issue.
4. Find the Incompatible Mods
If none of the above solutions have worked for you, or if disabling the DoLuaCheckSum option worked, but is causing gameplay errors, the cause of the error is most likely incompatible mods.
If the server has many mods running on it, some of the mods may not be compatible with the rest. So the next solution for this error is to find and delete/fix the incompatible mods.
The best way to do this is (for the server host) to disable a small set of mods at a time, and then run the server after each set to see if the issues still persist. In this way, once the issue stops occurring, you’ll know that the incompatible mod is one of the mods in the last set you disabled.
The number of mods you should disable at a time depends on how many you have installed on the server. If you have only a few mods installed, you can simply disable one mod at a time and then run the server and check for issues.
However, if you have a very large number of mods installed, you can disable them in sets of 5 (or more) and then check for issues after each set.
To disable the server mods, simply open the Project.ini file of the server and remove the Mod ID and Workshop ID of the mods you want to disable.


5. Add Exception for Project Zomboid in Antivirus and Firewall Settings
Your Antivirus and/or Firewall programs might be causing trouble with your Project Zomboid game files and stopping your mods from working correctly.
The security programs on your system may be flagging your mod files as suspicious and preventing them from working entirely. Because of this, the server may believe that your mod files are completely missing because the game is being blocked from accessing them.
To resolve this issue, you can simply create an exception for Project Zomboid and Steam in your Antivirus and Firewall settings. This will ensure that the security programs on your system do not interfere with the game files at all.
To create an Antivirus exception follow the steps below:
- Press Windows Key to open the Start menu, type “Windows Security” and press enter.
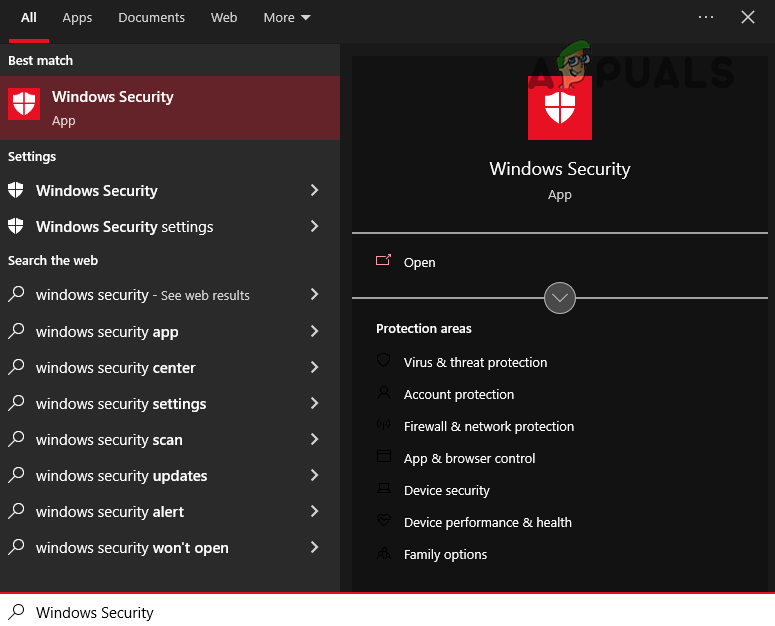
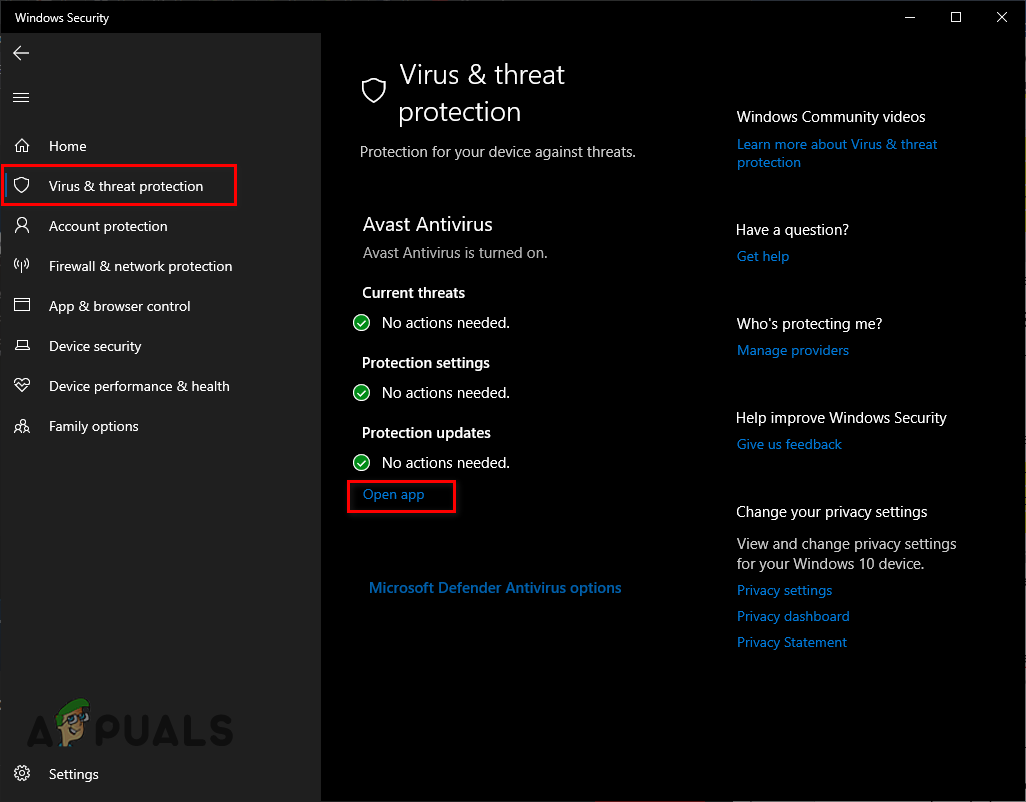
Opening Windows Security - Navigate to the Virus & Threat Protection menu.
- Click on the blue “open app” button.
Opening Antivirus menu
This will open the menu of your Antivirus program where you can create an exception for the game and Steam. If your Antivirus program’s menu doesn’t have an option for creating exceptions, you can simply turn off your Antivirus temporarily to check whether it is the cause of the issue.
To create a Firewall exception, follow these steps:
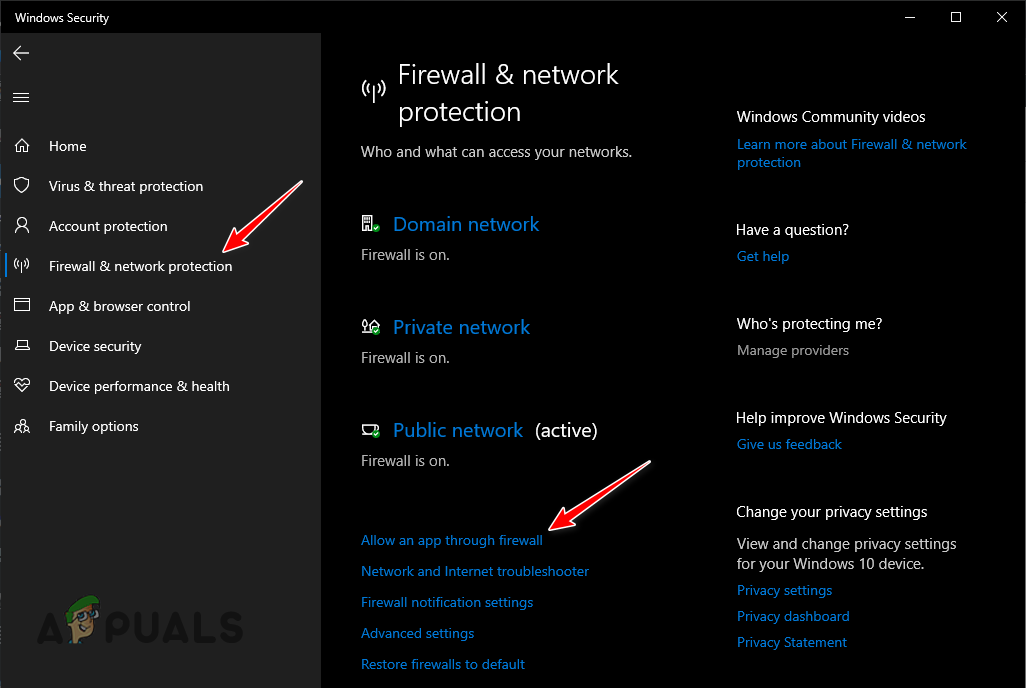
- In the same Windows Security menu, navigate to the Firewall & Network Protection menu.
- Click on the “Allow an app through firewall” option.
Opening Firewall menu - Click on the “Change Settings” option at the top-right.
-
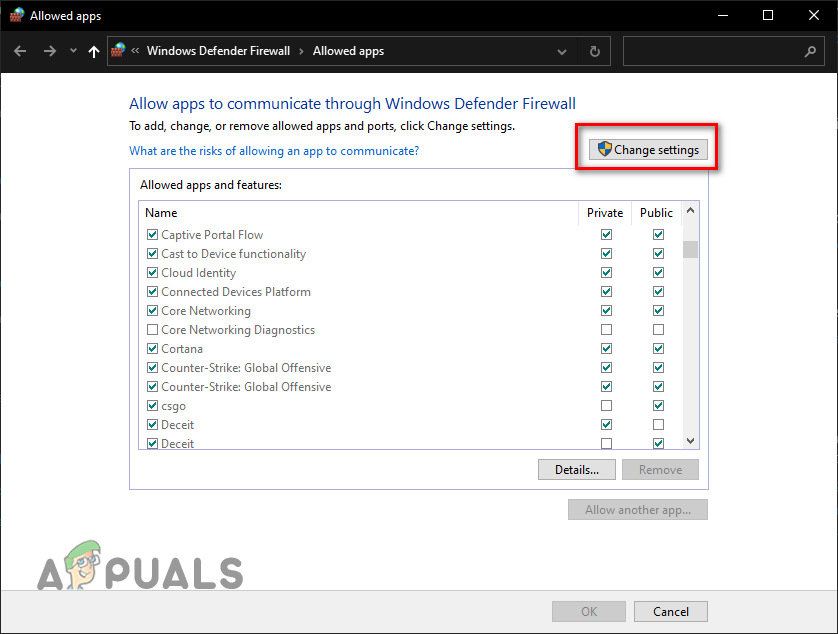
Pressing the Change Settings option - Add checkmarks for both Project Zomboid and Steam.
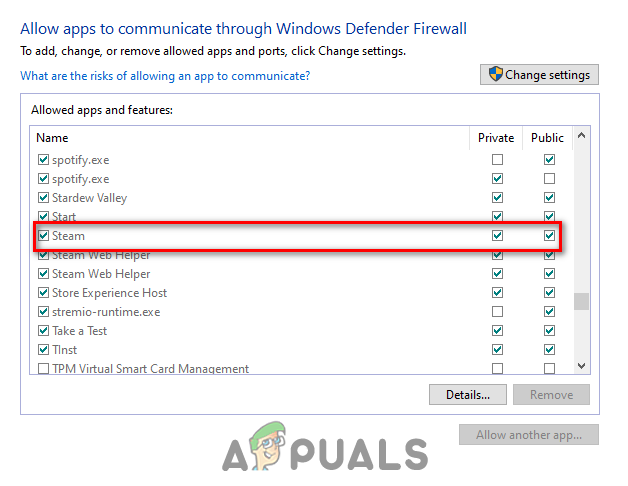
Adding Firewall Exception - Press OK.
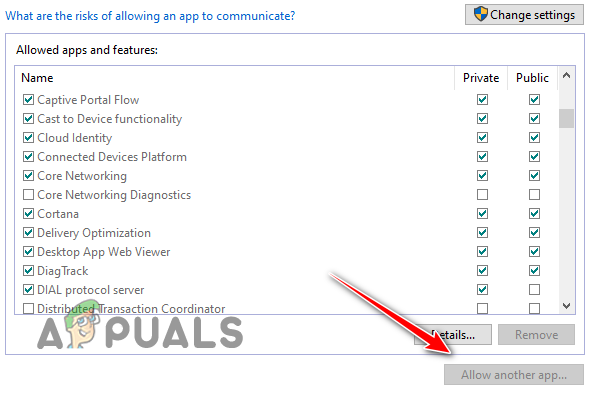
If Project Zomboid and/or Steam aren’t listed in the list of apps, click on the “Allow another app…” option and manually add them to the list.
6. Reinstall the Game
If you’ve tried all the solutions we’ve listed above but are still encountering this error, the final solution is to do a fresh reinstall of the game.
There could be some corruption deep within your game files that are preventing your game from working properly. Performing a complete reinstall of the game will ensure that none of your game files are corrupted or missing.
To reinstall the game, first uninstall it from your Steam Library by following the steps we’ve written below:
- Open Steam.
- Navigate to your Steam Library.
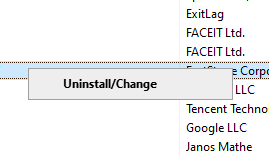
- Right-click on Project Zomboid.
- Hover over Manage and select the “Uninstall” option.
Uninstalling the game - Press the Uninstall button.
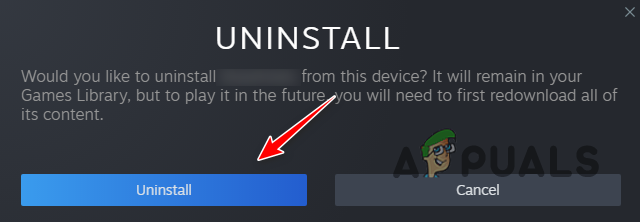
Confirming the Uninstall
After the game has finished uninstalling, reinstall it from your Steam Library and the error should finally go away.
Note: Ensure that your internet and power connection stay stable throughout the installation process, as instability can lead to corrupted files.
Reviewed by Muhammad Zubyan


