How to Prevent Users from Running Specified Windows Applications?
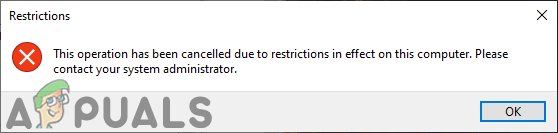
A computer used by multiple users will always require some restrictions for better use. Some applications may not be suitable for kids or you may not want to share with other users. In certain situations, you might want to restrict some of the programs on your computer. The reason can be privacy-related for the users or to be safe from issues caused by misuse of the programs. In this article, we will show you methods through which you can prevent users from running specified applications.
Note: Make sure that you are making changes to the user account in which you want to restrict programs and not in the administrator account. If you are making changes in the administrator account, then make sure tools like Registry Editor and Local Group Policy Editor isn’t restricted. That is because you will lock yourself up and lose access to reversing the changes.
Preventing Users from Running Certain Programs
Most of you may already know about the third-party applications that lock certain applications and folders. However, this can also be done through the tools already available in the Windows operating system. There is a policy setting, especially for this specific task in the Group Policy Editor. You can also use the Registry Editor and restrict applications from the standard users.
Method 1: Using the Local Group Policy Editor
The Local Group Policy Editor is a Windows administration tool that allows users to configure settings for their operating system. It has two categories; computer configuration and user configuration. The setting that we will be using in this method can be found in the user configuration category. Follow the below guide to restrict applications for the standard user.
However, if you are using the Windows Home operating system, then skip this method and try other methods below. That is because the Group Policy Editor isn’t available in the Windows Home Edition.
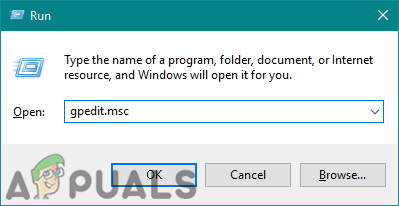
- Hold the Windows key and press R on your keyboard to open a Run dialog. Type “gpedit.msc” in the text field of the Run box and press the Enter key to open the Local Group Policy Editor.
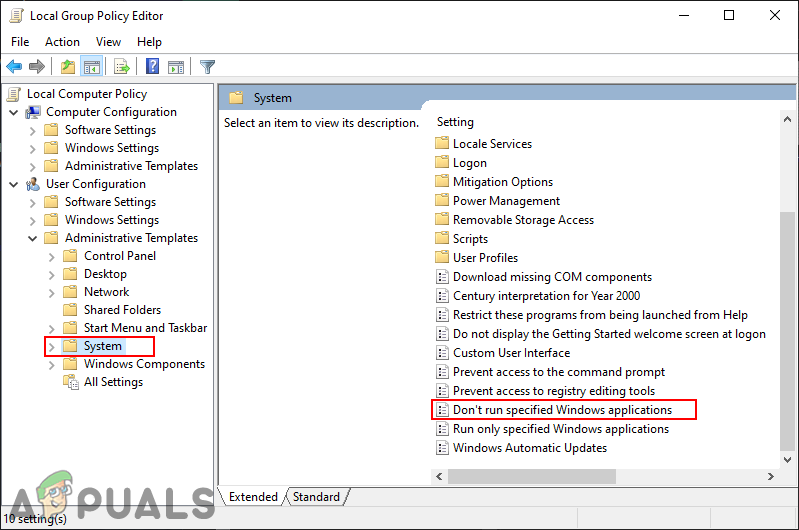
Opening Local Group Policy Editor - Expand the User Configuration and navigate to the following path:
User Configuration\Administrative Templates\System\
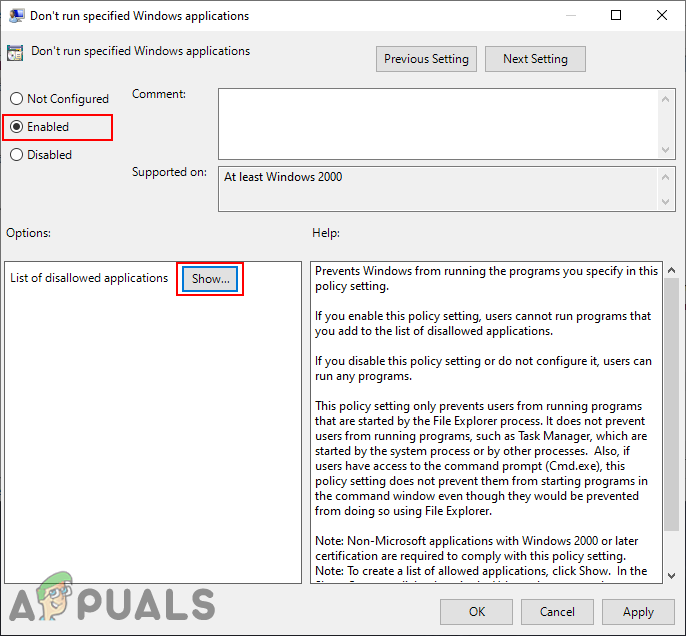
Navigating to the setting - Double-click on the “Don’t run specified Windows applications” setting and it will open in another window. Change the toggle option to Enabled and click on the Show button.
Enabling the setting - Now add programs executable names in the list as shown in the screenshot.

Adding programs executable names - Click on the Apply/Ok button to save changes and it will block the programs that you added to the list.
- To enable those programs back, simply change the toggle option back to Not Configured or Disabled.
Method 2: Using the Registry Editor
The Registry Editor is a graphical tool that the authorized users can use to view and makes changes in the Windows registry. It contains almost all of the information about the computer. In this method, the user will have to create missing keys and values for the setting to work. We also recommend users, always create a backup of the registry before making any changes. Check the below steps and apply them to restrict applications for the standard user.
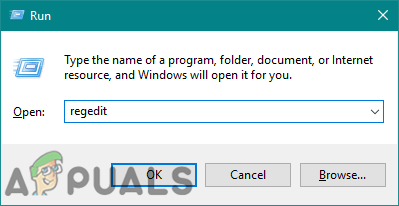
- Hold the Windows key and press R on your keyboard to open a Run dialog. Type “regedit” in the text field of the Run box and press the Enter key to open Registry Editor. If prompted by UAC (User Account Control), then click on the Yes button.
Opening the Registry Editor - In the Registry Editor, navigate to the following key path:
HKEY_CURRENT_USER\Software\Microsoft\Windows\CurrentVersion\Policies\Explorer
- Create a new value under the Explorer key by right-clicking on the right pane and choosing New > DWORD (32-bit) Value. Name this value as “DisallowRun“.
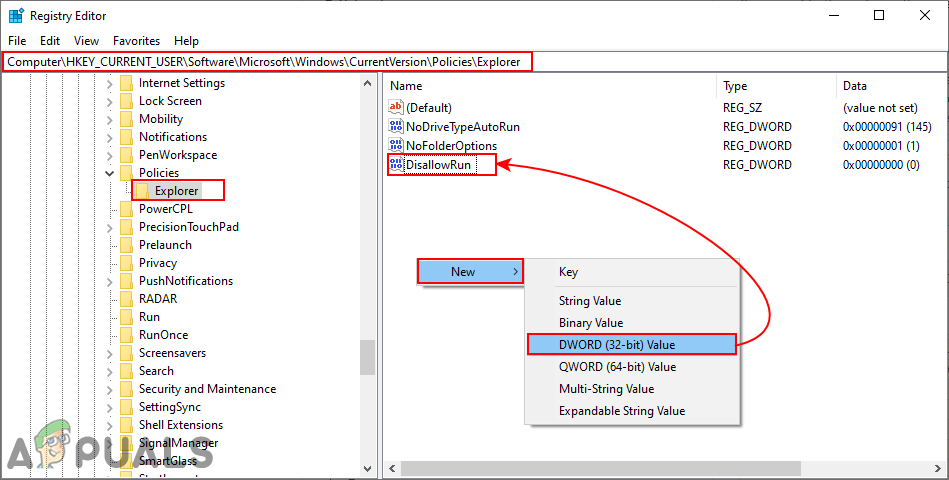
Creating a new value - Double-click on the DisallowRun value and set the value data as 1.

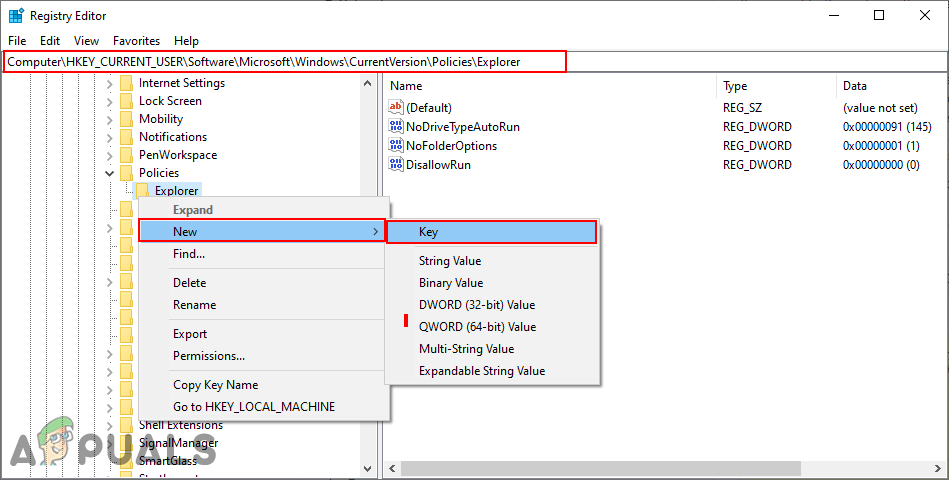
Enabling the value - Now create another key under the Explorer key by right-clicking on it and choosing the New > Key option. Name this key as “DisallowRun“.
Creating a new key - Inside this key create a new value by right-clicking on the right pane and choosing New > String Value. You can name the values in numerical form, starting from 1.
Note: The second value will have the name as 2, the third value will have like 3, and so on.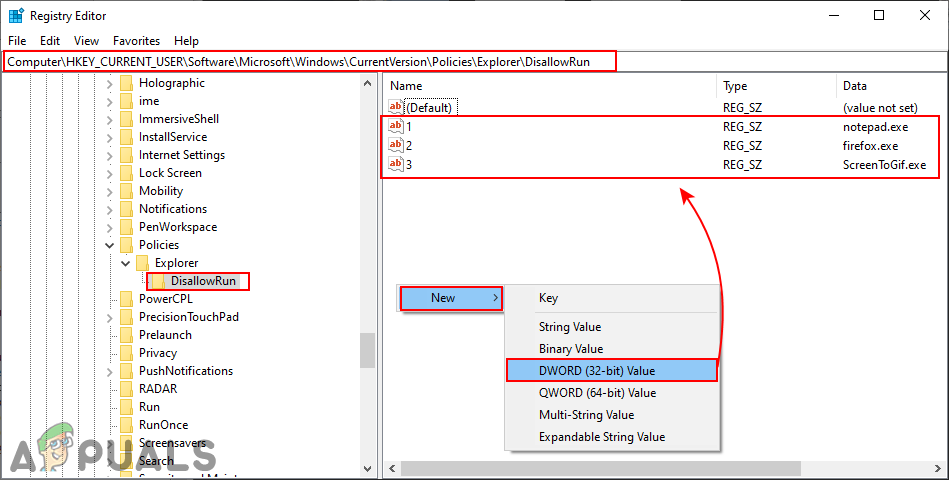
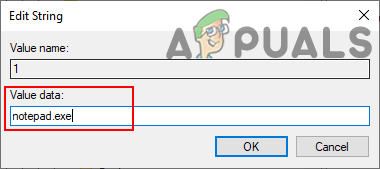
Creating values for programs - Open the value 1 and add the string value as the executable name of the program. In our case, we are blocking the notepad, so we type “notepad.exe” in it.
Adding the executable names of programs in each value - Finally, after configuring all the settings, make sure to restart your system to apply the changes.
- To enable the programs back on your system, you need to remove the executable names in string values or delete the values from the Registry.
Method 3: Using the Program Blocker
There are many third-party programs on the Internet that you can use to restrict applications. They will simply lock the applications and password-protect them. Every program blocker will have a different feature and working. We will be using Program Blocker software in this method to demonstrate the idea of how it works. Check the below guide:
- Open your browser and download the Program Blocker. Open the program by using the WinRAR program. At first, it will ask you to create a new password for the Program Blocker.
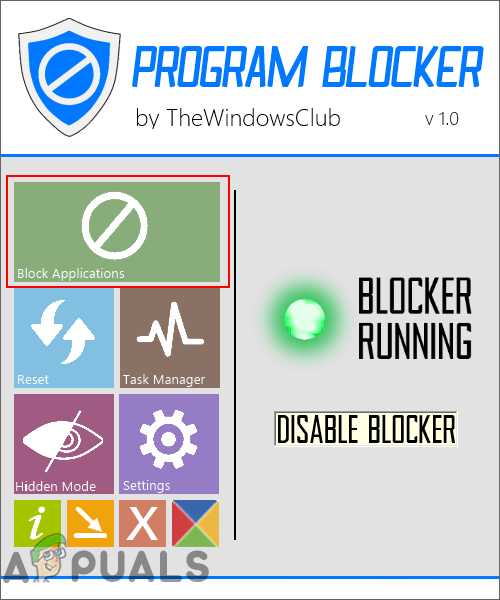
Downloading the application - After that, click on the Block Applications button on the Program Blocker.
Clicking on the Block Applications button - Search for the application that you want to block in the Common Applications list. You can also find the executable of the program that you want to block by clicking on the Add New button.
- Once selected, click on the Arrow button to move it to the right box, and then click on the Save button to save the changes.
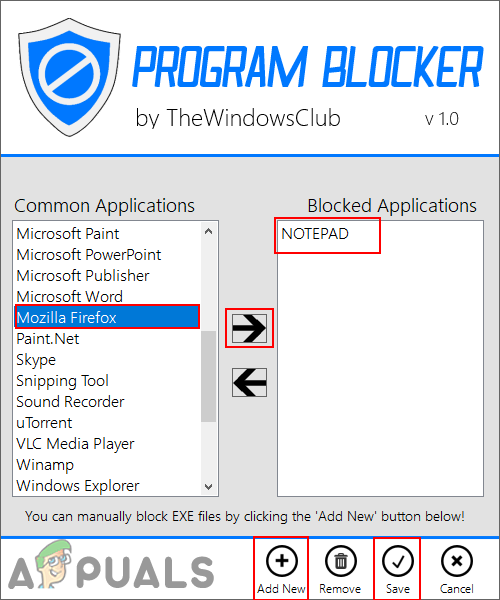
Blocking the selected programs - This will restrict the application from the users and can only be opened by providing the password that you set for the Program Blocker.
- To unblock the application, simply open the Program Blocker and click on the Block Applications button. Now select the application and click on the Remove button.