How to Resolve the Possible Network Security Key Mismatch Error?
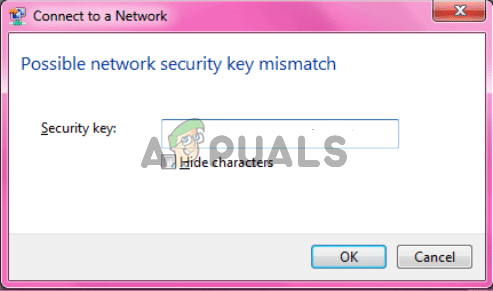
The “Network security key mismatch” error message appears after users type in the password to connect to their wireless network. This problem is commonly related to a single wireless network and it’s typically a home network users have set up. Even though this message states that users have entered the wrong password, users who have experienced this issue claim that the password is 100% correct. Online research suggests that the problem mostly occurs on Windows 7.
Luckily enough, many users who were affected by this problem were able to resolve it easily enough. They have posted their solutions online and we have decided to include them in this article with step-by-step instructions. Follow them below and the problem should be gone in no time!
There are many methods that are known to resolve this problem easily enough. We have created this article where you can see step-by-step instructions for these methods and we guarantee the problem will disappear in no time!
What Causes the Network Security Key Mismatch Error on Windows?
There aren’t many known causes of this problem and it’s not quite well documented either. However, we were able to form a shortlist of causes based on user feedback and various factors that can cause such connectivity problems on Windows. Make sure you check out the steps below!
- Wrong security mode – It’s quite possible that Windows has remembered your network under a different security type and it simply won’t connect until you change the way you connect to the network. These changes can sometimes be carried out on your computer, but there is a chance you’ll need to access your router.
- Third-party antivirus tools – Antivirus tools are known to cause various connectivity issues and they can even affect how Wi-Fi passwords are stored and how you connect to your wireless networks. This isn’t a security breach but it’s a massive problem and you might need to uninstall the antivirus tool you are using at the moment.
- Old or faulty wireless drivers– There is a chance that your currently installed driver might simply fail to connect to your network because it uses newer security modes, protocols, or encryption. You should definitely consider updating to a new set of drivers!
Solution 1: Change the Type of Protocol Used
It’s often the case that Windows somehow manages to store the password correctly but it uses a wrong type of protocol or encryption. For example, WEP is chosen over WPA or WPA is used instead of WPA2. It also occurs with encryptions used. TKIP is often set instead of AES. This can be resolved quite easily so make sure you follow the steps below!
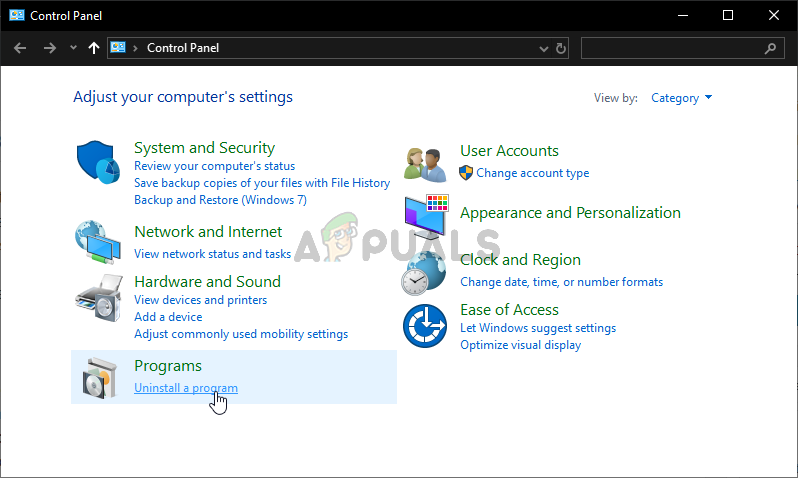
- First of all, you need to open the Network and Sharing Center. Open Control Panel by using the Windows Key + R key combination. This will open the Run dialogue box. Type “control.exe” or “control panel” inside the box and click the OK button.

- You can also open the Start menu and simply type Control Panel. Left-click the first result which pops up in order to open it. In the top right corner of the Control Panel window, click the View by option and set it to Category.
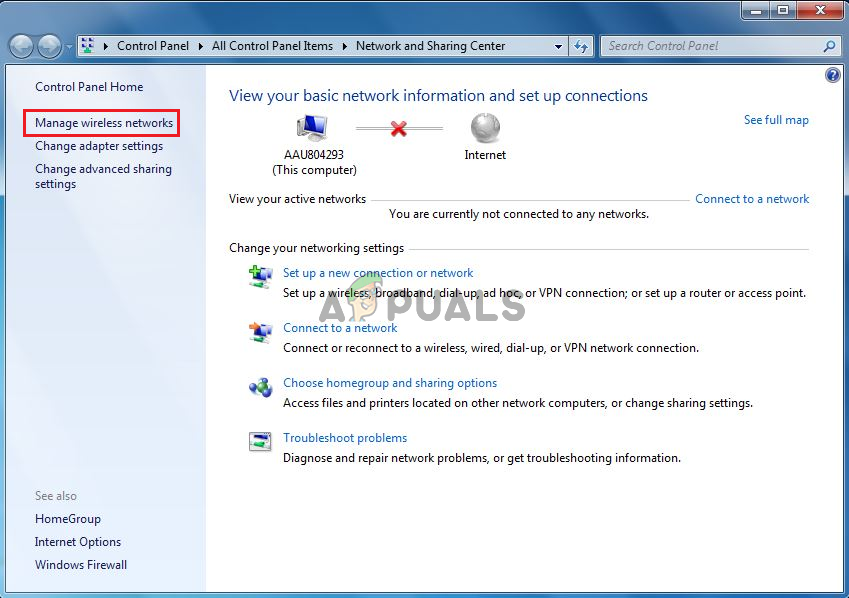
- Left-click to open the Network and Internet Once inside, left-click to open the Network and Sharing Center. Left-click the Manage wireless networks button from the left-side navigation menu in order to open this set of settings.
- Locate the entry of the problematic network inside the list which will appear, left-click in order to select it, and check its Security type. It will be displayed in the info bar below. Click the Remove button from the menu above in order to forget this network.
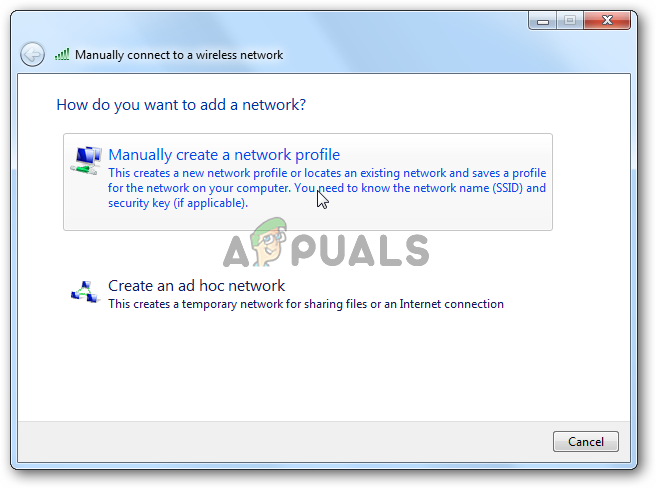
- After that, click the Add button from the menu and choose the Manually create a network profile option from the next window which will appear.
- Inside the new window, make sure you enter the correct Network name. Under the Security type section, try changing it from the previous value. If it was WEP, try WPA or try WPA2-Personal if the previous entry was WEP. Try out several combinations.
- Enter the correct Security Key. Make sure you uncheck the box next to Hide characters in order to see if the password is, indeed, correct. Make sure the Start this connection automatically box is checked and that the Encryption type is set to AES.

- Click the Next button and follow the remainder of the instructions before wrapping up the process. Check to see if you are now connected to the required network properly!
Solution 2: Disable Your Third-Party Antivirus Tool
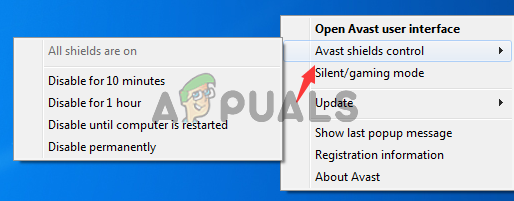
Third-party antivirus tools are a common culprit to this problem. They can often interfere with connectivity protocols and we highly suggest you try disabling them for a while to see if the problem persists. If the problem continues to appear, you might need to uninstall it and choose a different security option.
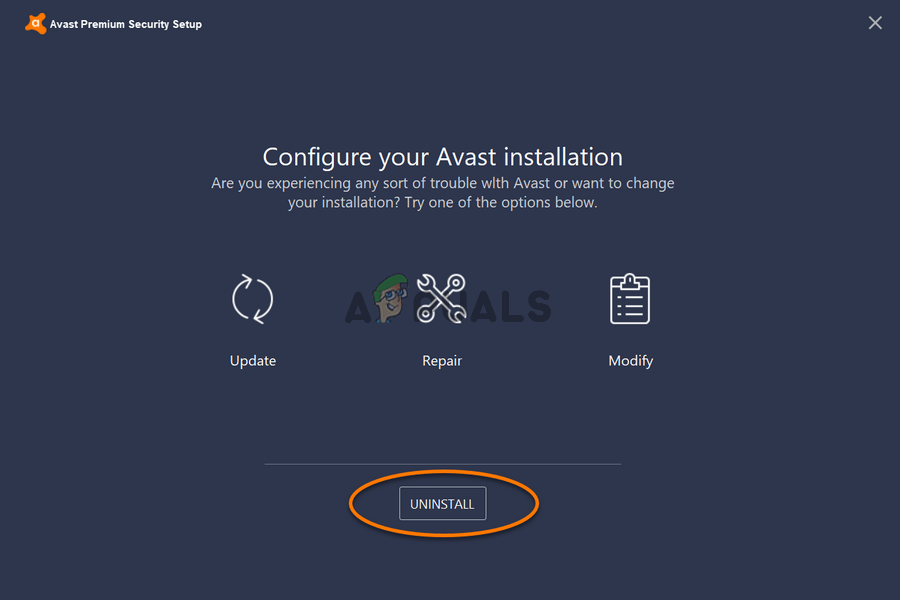
- First, you need to disable your third-party antivirus tool. The process will greatly differ based on which antivirus you have installed. However, make sure you double-click to open it and check out its settings to locate the option.
- If the problem ceases to appear afterwards, the antivirus tool is to blame and your only hope of resolving the problem is to uninstall it. This can be done quite easily.
- Open Control Panel by using the Windows Key + R key combination. This will open the Run dialog box. Type “control.exe” or “control panel” inside the box and click the OK button.

- If you are using Windows 10, you can also use the Windows Key + I key combination in order to open the Settings Settings can also be accessed in the Start menu at its lower left part as a cogs icon.
- In the top right corner of the Control Panel window, click the View by option and set it to Category. Left-click to open the Uninstall a program entry under the Programs
- In the Settings app, simply click the Apps section in order to open the list of all apps and programs installed on your computer.
- Inside Settings or Control Panel, make sure you scroll until you locate your antivirus, left-click to select it, and click the Uninstall button which will appear. Make sure you follow the instructions which will appear on the screen in order to uninstall it completely.
- Try connecting to the problematic network to see if the “Network security key mismatch” error message appears after trying to connect!
Also, take a look at how to disable your antivirus if this method doesn’t work for you.
Solution 3: Reinstall Your Wireless Drivers
If your computer has an old wireless driver installed (or the default Windows driver) it may lack the compatibility with newer types of protocols and encryptions. This is a major problem and you should consider resolving it as soon as possible because you won’t be able to connect to many wireless networks. Follow the steps below in order to update your wireless drivers!
- First of all, you need to open the Device Manager on your computer. Use the Windows Key + R key combination in order to open the Run Type “devmgmt.msc” inside the box in order to open the Device Manager. You can also search for it in the Start menu.

- Once it opens, locate your wireless networking device inside the Network Adapters Click the arrow next to it in order to expand this section, right-click the device, and choose the Uninstall device option from the context menu which will appear.
- Confirm any dialogue prompts which may appear for you to confirm your choice. After that, click the Action option from the menu bar above and click Scan for hardware changes.
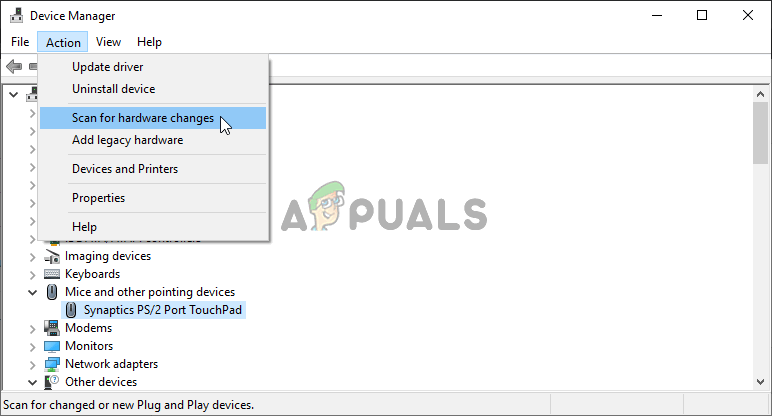
- After Windows find out that you have uninstalled a wireless device, it will proceed to download and install the latest driver available. Wait for the process to finish and check to see if the “Network security key mismatch” error message still appears when trying to connect to the problematic network.
Solution 4: Change the Security Type in Your Router
It’s possible that your drivers or your system simply won’t accept the old WEP protocol for security codes and you may need to switch to WPA or WPA2 inside your router settings. Unfortunately, you will need to have direct access to your router in order for this method to be possible. This makes this method suitable only for home networks. Check out the steps below!
- You will need to log in to your router first. These steps differ from one router to another and we highly recommend you perform a Google search for your router. You can also visit our article for more info!
- After logging in, you will need to locate the set of wireless security settings. The option’s name differs from one router to another but it’s often quite easy to find it.
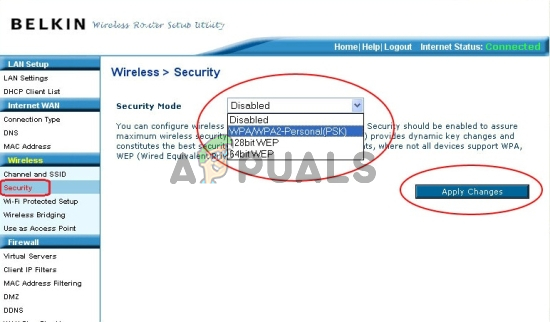
- Change the Security Mode or Security Type option to WPA/WPA2-Personal and type in the new password you will use. Save the changes and check to see if the problem still appears.
Solution 5: Try Several Useful Commands
There are several useful commands which can be used to reset and refresh your IP settings. These commands can be used to resolve a variety of different networking settings, including this specific problem. Make sure you follow the steps below in order to try out these methods!
- Open the Run dialogue box by tapping the Windows Key + R keys at the same time. Inside the box, type “cmd” in order to open the Command Prompt. Make sure you use the Ctrl + Shift + Enter key combination in order to open an administrative Command Prompt.

- You can also search for Command Prompt in the Start menu. Right-click the first result which will appear and choose the Run as administrator option from the context menu which will appear.
- Once the Command Prompt window opens, make sure you type in the commands shown below and tap Enter after each one!
ipconfig/release
ipconfig/renew
- Restart your computer and check to see if the same problem still appears after trying to connect to your wireless network!


