Guide: Port Forwarding in NetGear Routers
If you own a NetGear router and are experiencing network issues with a specific application or game, forwarding the necessary ports is a straightforward and effective way to ensure your PC can reliably connect to the required server.
Although many modern applications and games automatically handle port requirements, there are still occasions when manual port forwarding is essential for achieving a stable connection with servers outside your home network.
What is Port Forwarding?
Today, many users need to forward specific ports to host web servers or game servers from their home network.
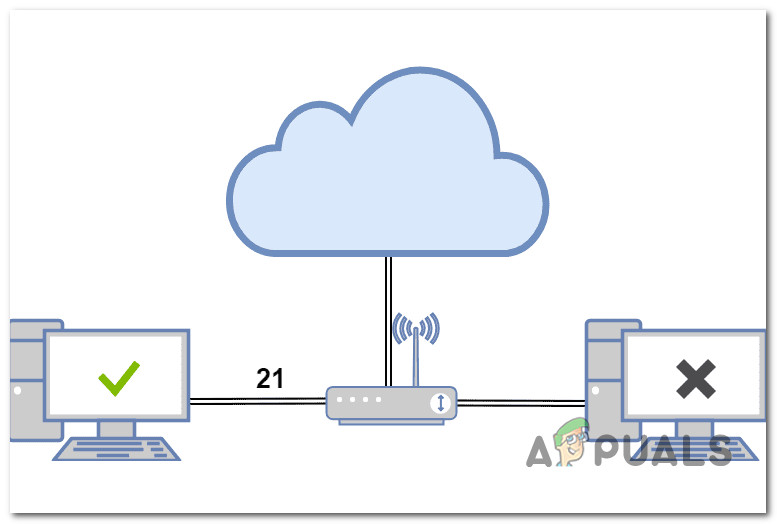
Port forwarding (also known as port mapping) is a method that enables communication between devices on a remote network and a local device connected to your internal network, which often sits behind a router or switch. By forwarding a specific port, you instruct your router to direct certain types of incoming traffic straight to a chosen device without any interference.
Port forwarding is advantageous because it allows devices on your local network to communicate with remote servers easily, bypassing restrictions that could be imposed by your Internet Service Provider (ISP).
When using consumer-grade NetGear routers, there are three primary types of port forwarding you might encounter:
-
- Local Port Forwarding – Required when connecting your local computer to certain legacy game servers or peer-to-peer (P2P) networks. It allows your device to bypass the firewall and access specific websites or pages that would otherwise be blocked.
-
- Remote Port Forwarding – Used when you need your PC to connect to a remote server or computer outside your home network. Remote port forwarding requires knowledge of the remote server’s external IP address and port numbers. This method is common when connecting to hosting company servers.
- Dynamic Port Forwarding – Utilized when your computer connects to a trusted server, serving as a gateway to send or receive data from multiple servers. Dynamic port forwarding adds an extra layer of security when accessing networks that might be unreliable.
The 3 Main Ways to Forward Ports on a NetGear Router
If you need to open a port, NetGear routers typically offer three main methods. It’s important to choose the method that best fits your needs, keeping security in mind:
- UPnP (Universal Plug and Play) – This method is similar to port forwarding but requires minimal configuration. You only need to enable UPnP in your router settings from a web browser. While UPnP offers convenience, it’s recommended to use additional security firewalls, as UPnP can expose your network to untrusted devices.
- Port Forwarding – This is the preferred method if you need greater control and security, especially if UPnP is disabled or unavailable. Here, you specifically direct your router on how to handle incoming requests. Once configured, incoming traffic is forwarded to a designated device according to the rules you set. Refer to our router configuration guide for more information.
- DMZ (Demilitarized Zone) – In this mode, all incoming requests are directed to a single device on your local network. Consider this a last resort, as it exposes the chosen device (and potentially your entire network) to significant security risks. Use the DMZ only if absolutely necessary and ensure the assigned IP address does not belong to a critical device.
How to Forward Ports on a NetGear Router
The user interface for NetGear routers released in the past five years is quite similar, so the instructions below apply to most models.
The setup steps vary depending on the port forwarding method you choose.
For the fastest and simplest solution, you can enable Universal Plug and Play (UPnP). This enables your router to automatically forward the required ports, eliminating the need for manual configuration.
If your router does not support UPnP, or if you need to ensure a specific port is forwarded, manual port forwarding is the best solution.
Important: Using the DMZ to forward ports should only be considered as a last resort when neither of the first two methods is available. This feature opens all ports to a single device, significantly increasing your network’s vulnerability to security threats.
1. Forward Ports on NetGear Routers via UPnP
While it is generally best to manually configure port forwarding for security and control—especially if you only need to open a few ports—enabling UPnP provides a hassle-free solution if you regularly game or use services that require frequent server access.
Note: UPnP (Universal Plug and Play) is an industry-standard protocol that lets devices on the same local network discover and connect using common networking protocols such as TCP/IP, HTTP, and DHCP.
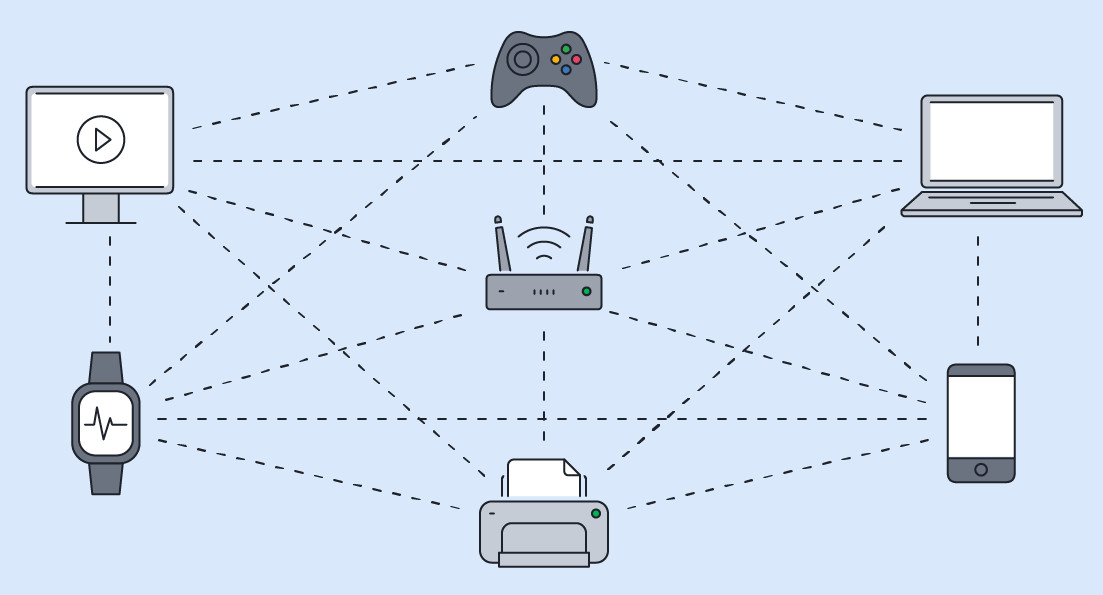
UPnP can configure router settings to open firewall ports, allowing external devices to connect as needed. This streamlines device networking by automatically forwarding the necessary ports, erasing the need for manual intervention.
Caution: UPnP may introduce security vulnerabilities, as malicious software can potentially exploit it to bypass your network’s security controls. Whenever possible, manually configuring port forwarding is safer, unless your device specifically requires dynamic port forwarding.
NetGear routers are usually shipped with UPnP enabled by default. If you are using a consumer-grade NetGear router, this feature is likely already active.
Note: These instructions apply to NetGear router models including: R6700, R6700v2, R6900, R6900P, R7000, R7000P, R7500, R7500v2, R7800, R7850, R7900, R8000, RS400. If you are using an older model, UPnP may not be supported.
- Ensure your PC is connected to the NetGear router’s home network.
- Open a web browser and enter the following address in the navigation bar, then press Enter:
http://www.routerlogin.net
Note: If you are not connected through a NetGear router, you will be redirected to NetGear’s home page.
- At the login screen, enter your username and password. Both boxes are case-sensitive.
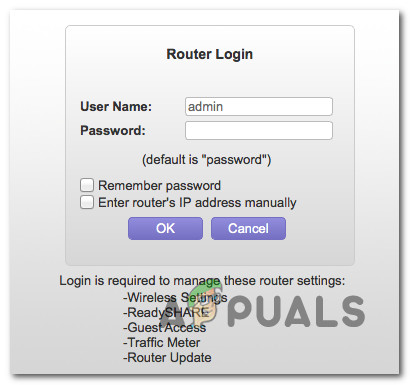
Accessing the login screen Default credentials (unless changed):
User Name: admin
Password: password
- Once you reach the router’s homepage, click on the Advanced tab.
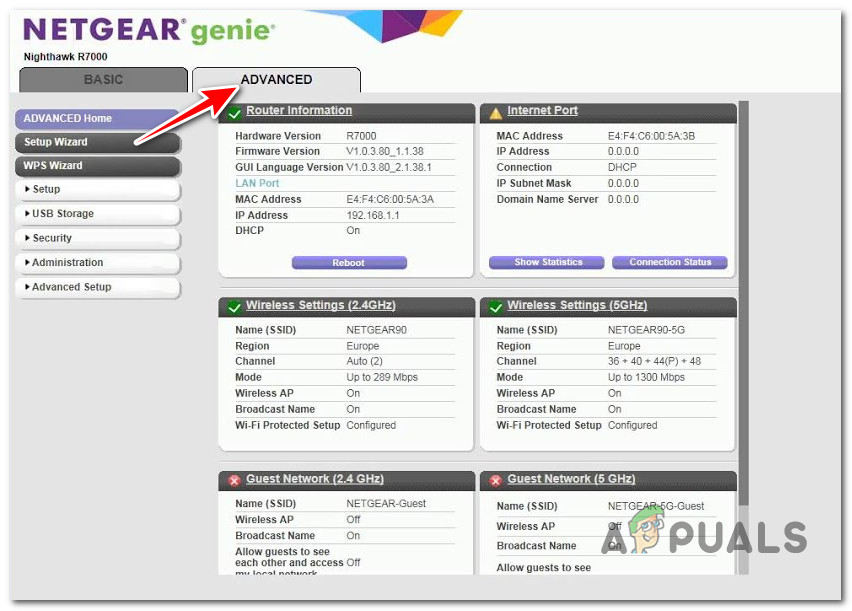
Accessing the advanced tab in the NetGear router - Navigate to Advanced Setup and select UPnP.
- On the UPnP page, ensure that the Turn UPnP On box is checked.
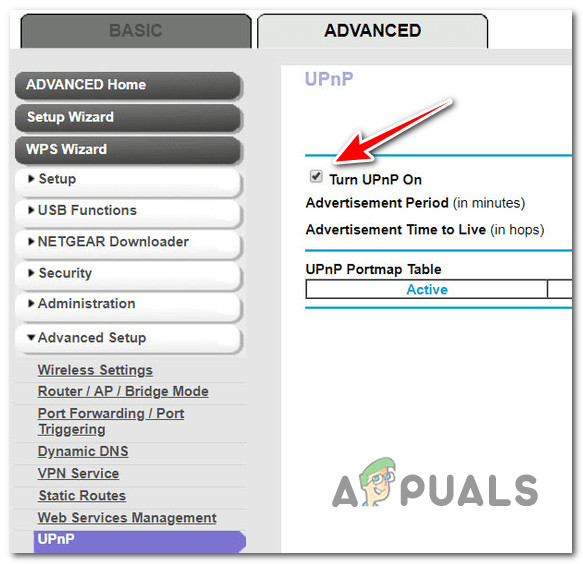
Enabling UPnP on Netgear routers Note: This option is typically selected by default. Enabling it allows your NetGear router to manage resources, including port forwarding, automatically as needed.
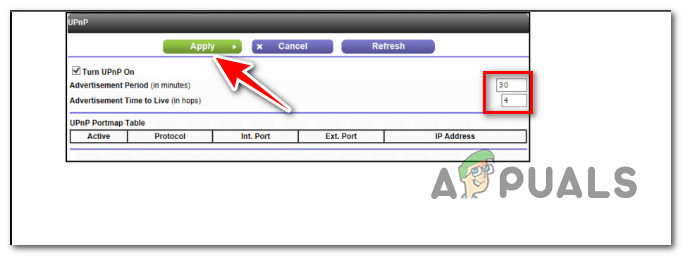
- After activating UPnP, you can adjust the Advertisement Period and Advertisement Time settings:
- Advertisement Period (minutes): This value determines how frequently the router broadcasts UPnP information. The recommended range is 30 to 60 minutes, balancing device freshness with minimal network traffic.
- Advertisement Time to Live (hops): Defines the packet’s journey through routers. The default value is 4 hops, which suits most home networks. If certain devices are not updating properly, increment this value by 1 for each additional connected device.
- Once configuration is complete, click Apply to save your changes.
Configuring the UPnP Pro Tip: View the UPnP Portmap Table to see a summary of all UPnP-enabled devices and which ports they are using, giving you a clear picture of network activity.
2. Forward Ports Manually on NetGear Routers
If UPnP is not available or you prefer enhanced security and control, manual port forwarding is the recommended approach.
Note: Manual port forwarding is especially useful when creating a web server, game server, or FTP server that must be accessible from outside your home network.
By manually configuring port forwarding, you can precisely define connection rules and tightly control which ports are open, reducing exposure to threats.
- Ensure your PC is connected to your home network via the NetGear router.
- Open a browser, enter http://www.routerlogin.net in the navigation bar, and press Enter.
http://www.routerlogin.net
Note: If not connected to a NetGear router, you will be redirected to NetGear’s website.
- On the login screen, enter your username and password (case-sensitive).
Accessing the login screen Default credentials (unless changed):
User Name: admin
Password: password
- From the homepage, click the Advanced tab.
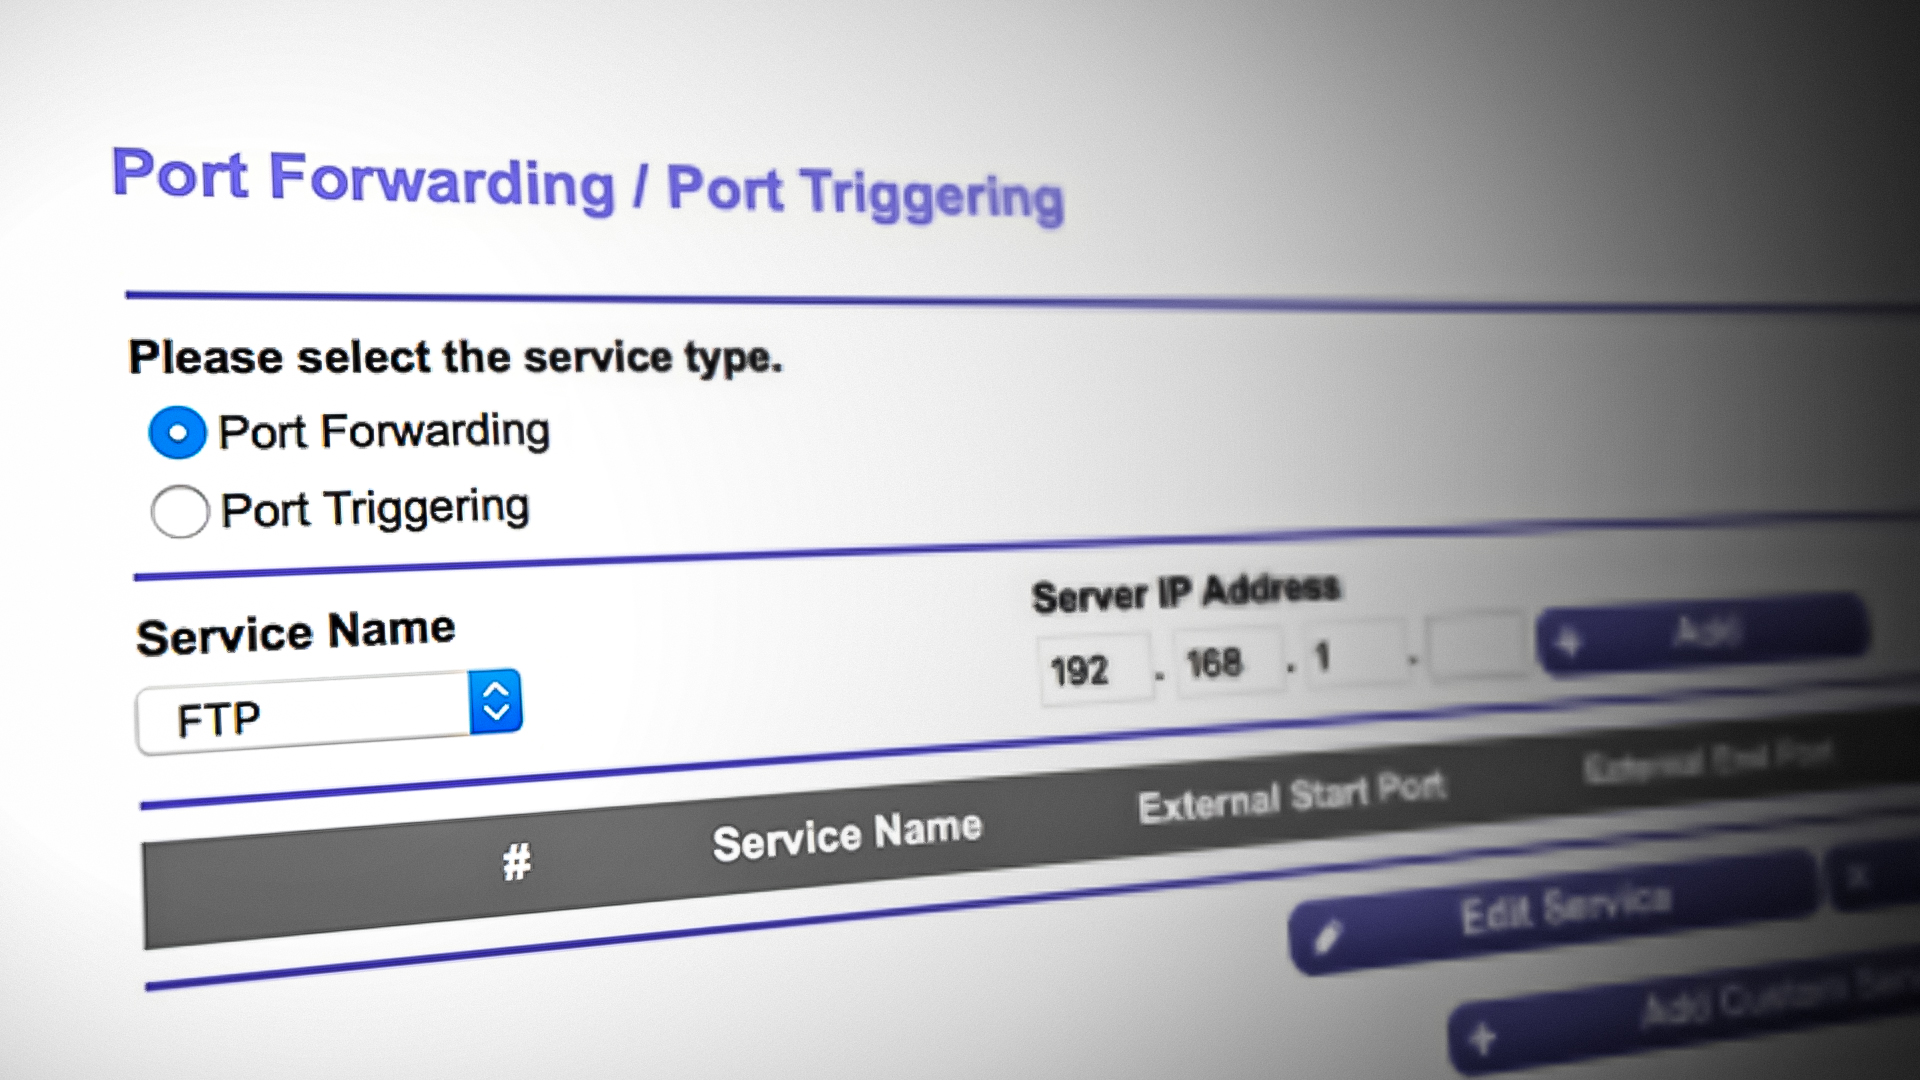
Accessing the advanced tab in the NetGear router - From the Advanced menu, select Advanced Setup, and then choose Port Forwarding / Port Triggering.
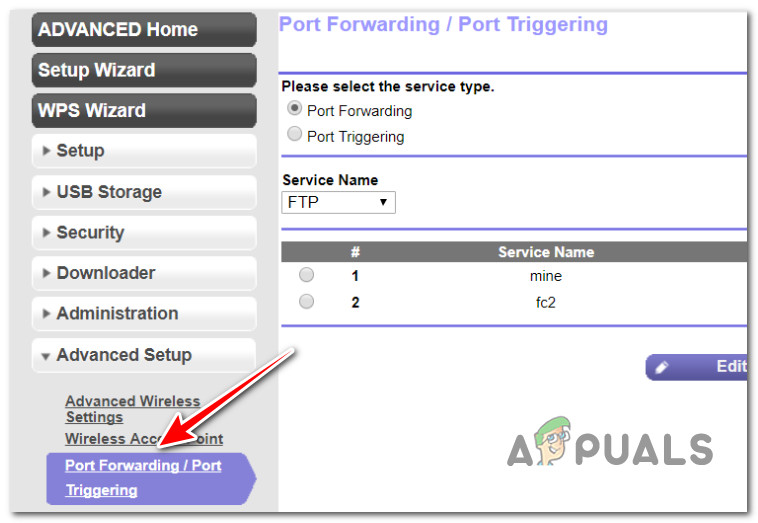
Forwarding the ports - Select the Port Forwarding radio button.
- Click Add Custom Service.
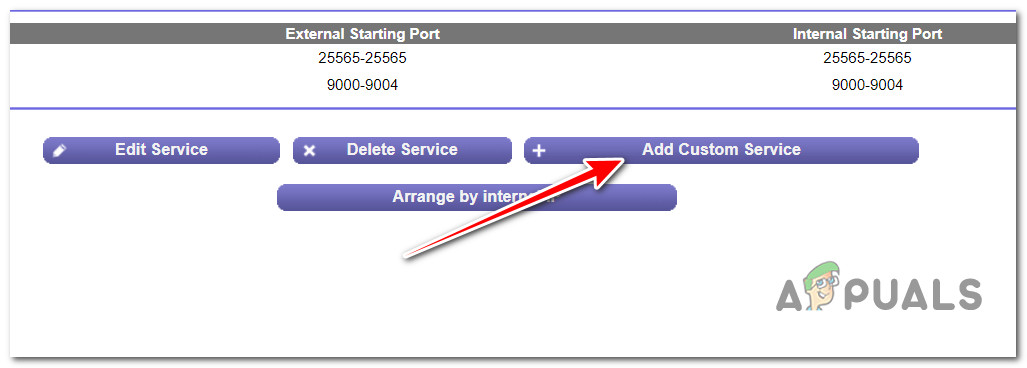
Adding a custom service - Enter a suitable name in the Service Name field for the port you are forwarding.
Tip: Use clear naming conventions. This makes managing multiple port forwarding rules straightforward. - Select the protocol your application requires (TCP, UDP, or both).
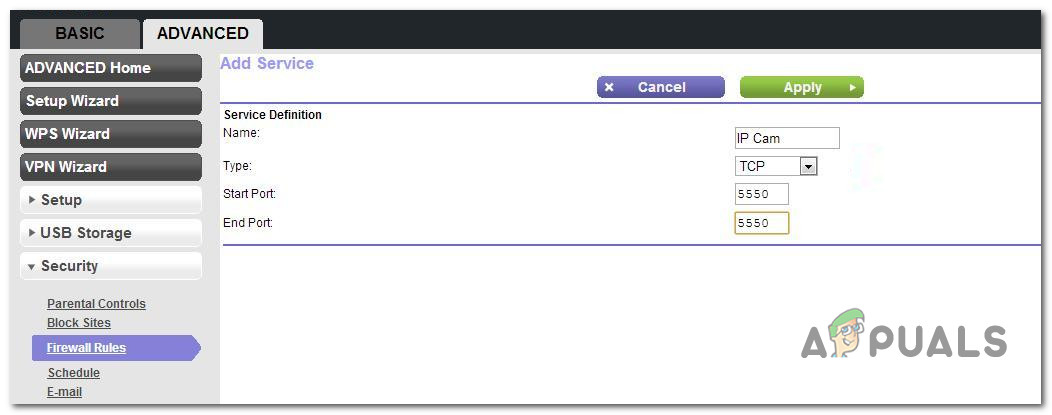
Adding a new port Note: If unsure, choose TCP/UDP to cover both protocols.
- For External Starting Port, enter the beginning port number. Choose the appropriate scenario below:
- Single port applications: Enter the same port number in both the External Starting Point and External Ending Point fields.
- Port range: Enter the first number in External Starting Point and the last number in External Ending Point.
- Now, specify the internal port(s):
- Check Use the same port range for internal port if the internal ports match the external.
- Otherwise, manually type the numbers in Internal Starting Point and Internal Ending Point.
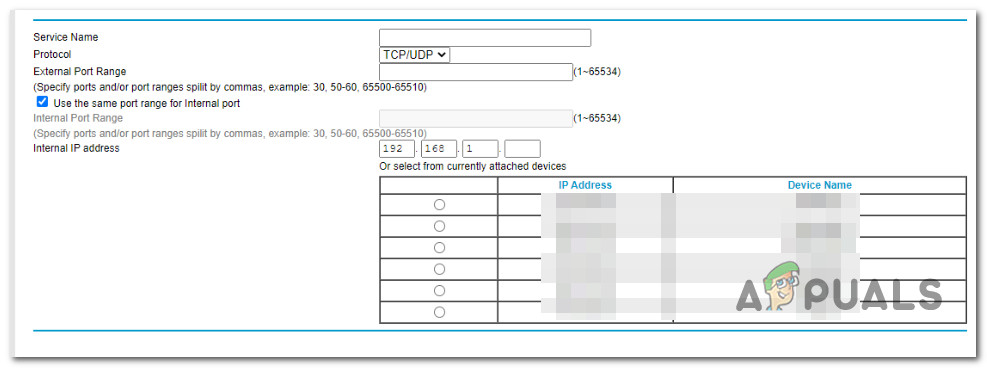
Adding internal and external ports
- Specify the IP address of the device on your local network for Internal IP address, and choose the relevant radio button.
- Select Apply to activate the port forwarding rule.
Note: The order of your port forwarding rules matters. Incoming packets are processed from the top rule down, so prioritize more restrictive rules above broader ones to prevent traffic from being routed incorrectly.
3. Forward Ports on NetGear Routers via DMZ
Only use the DMZ method if you encounter compatibility issues with online games or video conferencing applications that cannot function with Network Address Translation (NAT).
Occasionally, setting one local computer as the default DMZ server can resolve such issues—however, this generally only applies to older or unsupported applications.
Important: The device assigned as the DMZ server loses much of its firewall protection and is exposed to most known Internet threats. If compromised, it can potentially be used to attack other computers on your network. Only use this feature if absolutely necessary and for devices that do not host sensitive data.
When the DMZ server is not set, the NetGear router discards unsolicited incoming traffic unless it matches a port forwarding rule. When a default DMZ is configured, this traffic is sent to the specified device.
To set up a DMZ server (after considering the security risks), follow these steps:
- Connect your PC to the NetGear router’s home network.
- Open a web browser and go to http://www.routerlogin.net.
http://www.routerlogin.net
Note: If not on a NetGear router connection, you will be redirected to the NetGear home page.
- Enter your username and password at the login screen (case-sensitive).
Accessing the login screen Default credentials (unless changed):
User Name: admin
Password: password
- Once logged in, click the Advanced tab.
Accessing the advanced tab in the NetGear router - Click Setup, then WAN Setup to open the WAN Setup page.
- Check the box for Default DMZ Server and enter the IP address of the device to act as the DMZ server.
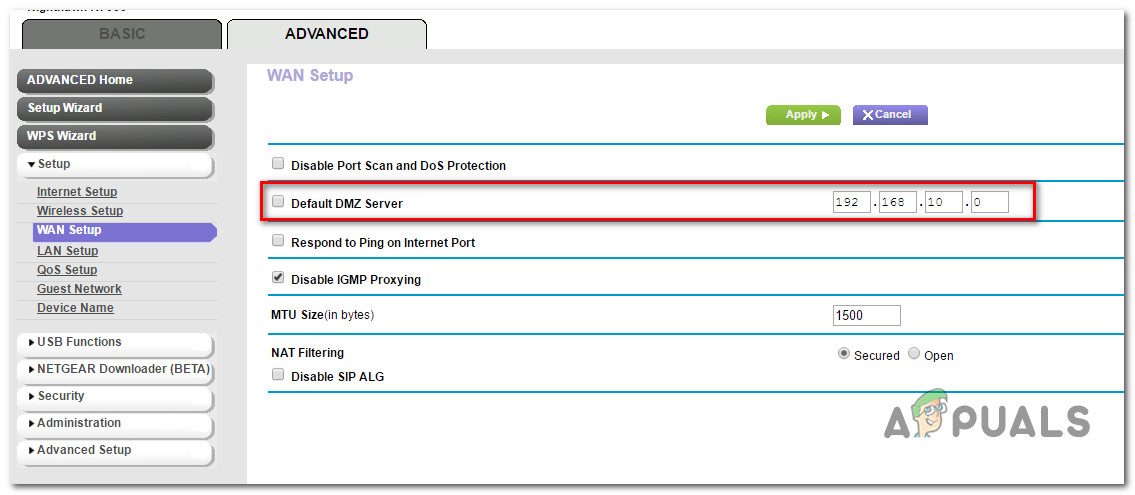
Enabling a DMZ server - Click Apply to save your configuration.
By carefully following these steps, you can efficiently forward ports on your NetGear router, improving connectivity for games, servers, or applications that require open access while maintaining the highest possible level of security for your network.