How to Play VALORANT on Mac? (3 Methods)
Gaming has never been Mac’s forte. This is obvious from various facts including the lack of game support on the platform. As it turns out, this is primarily because porting and maintaining a game on Mac is apparently, a lot more difficult and the efforts are almost to no avail. No one really games on Macs and it won’t be harsh to say, Macs are not built for gaming. However, if you are really intent on gaming on a Mac, there are, obviously, certain ways using which you can achieve this. Spoiler alert, the performance won’t be great but that’s something you should know already.
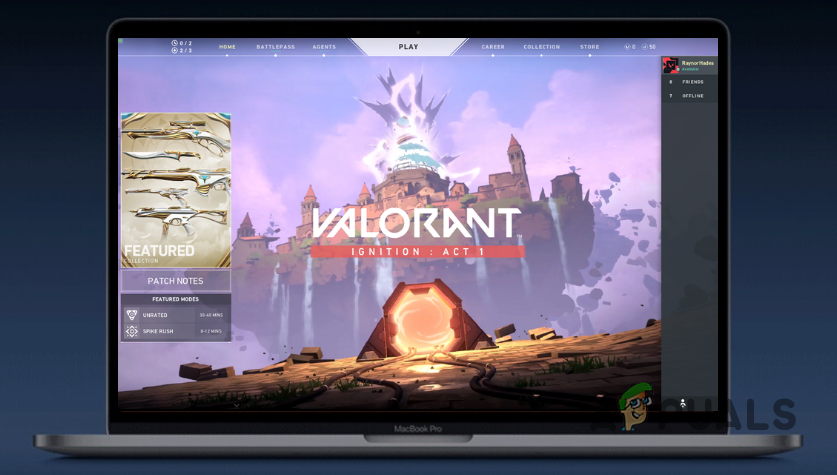
Valorant is a hot game these days developed by Riot Client. The game is not officially supported on Mac OS which means it is exclusive to Microsoft Windows. As such, the obvious question is how do you play a game on a platform on which it isn’t supported? As it turns out, using third-party applications, this can be achieved. In order to do this, if you haven’t already guessed, you will need to install Windows on your Mac. That shouldn’t be a shocker if you want to play games on a Mac.
Installing Windows on Mac is not really hard. There are various third-party applications that you let do this. On top of that, there exists Boot Camp which is included in Mac OS by default using which you can install Windows. However, there is a limitation to that as all Macbooks are not supported.
1. Boot Camp and Parallels
Keeping the thought of installing Windows in mind, there are various options available when it comes down to it. Boot Camp is available on Mac OS directly so no further installation is required. However, if you have the latest Mac M1s, you will not be able to use it to install Windows on your laptop.
If this case is applicable, this is where Parallels comes in which can be used to install Windows on almost any Macbook. With that said, let us get started and show you how to first install Windows using both the applications and then follow it up by installing Valorant to ultimately play it on a Mac. So, without further ado, let us get right into it.
2. Install Windows 10 with Boot Camp on Intel Mac
Before we get started with the process, it is important to note that this might be time consuming so make sure that you bear with it. In addition to that, make sure to create a backup of your important data in case something goes wrong. You should follow this method if you have an Intel Mac. In the case of Mac M1s, skip to the next method down below as this won’t work for you. With that out of the way, let us get into it.
- First of all, you need to make sure that you have a Macbook that is supported with Windows 10. Refer to the below image for this.
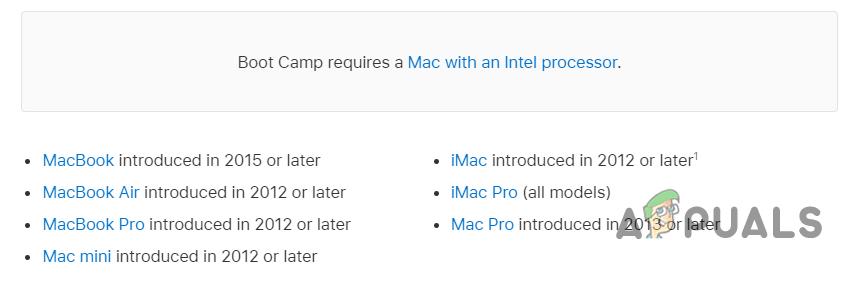
Windows 10 Supported Macs - Once you have confirmed that your Macbook is supported, you will need to download an official ISO of Windows 10. To do that, visit the official download web page of Windows 10 by clicking here. Click the Download Now button to download the Windows 10 ISO.
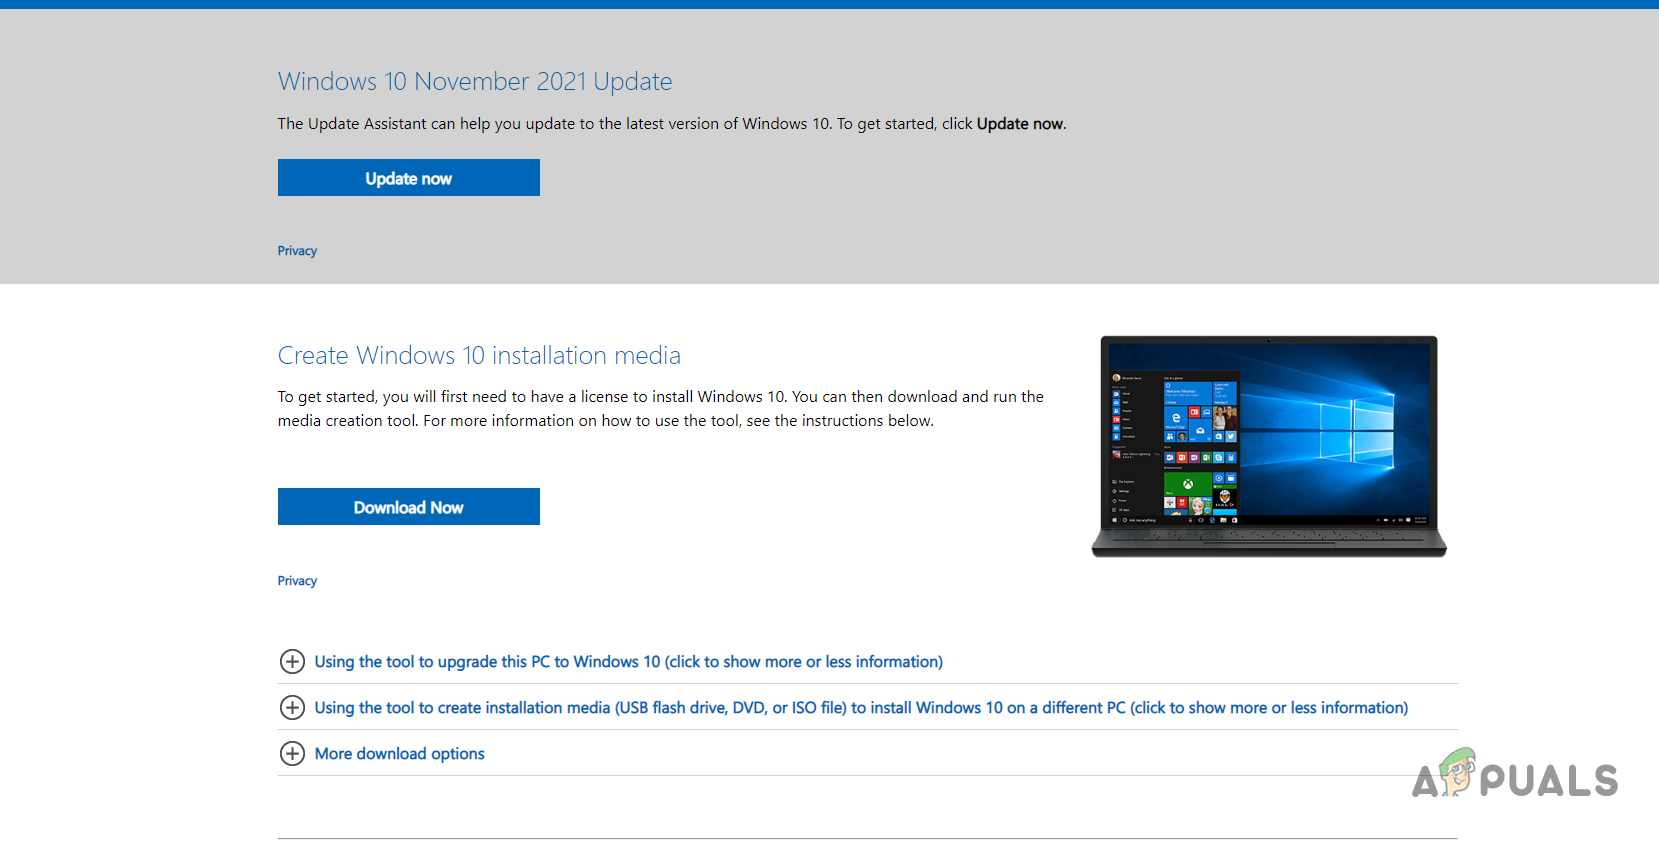
Downloading Windows 10 - While Windows 10 downloads, make sure that you have sufficient space on your Mac for Windows 10 installation. You will need at least 30 GB of free space in order to install Windows 10. In addition to that, a USB drive of 16 GB will be required to create a bootable USB.
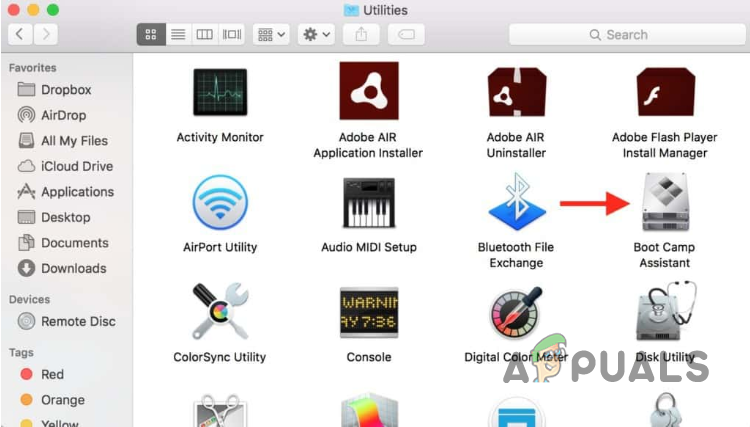
- Once Windows 10 has been downloaded, plug your USB into your Mac and then open up Boot Camp.
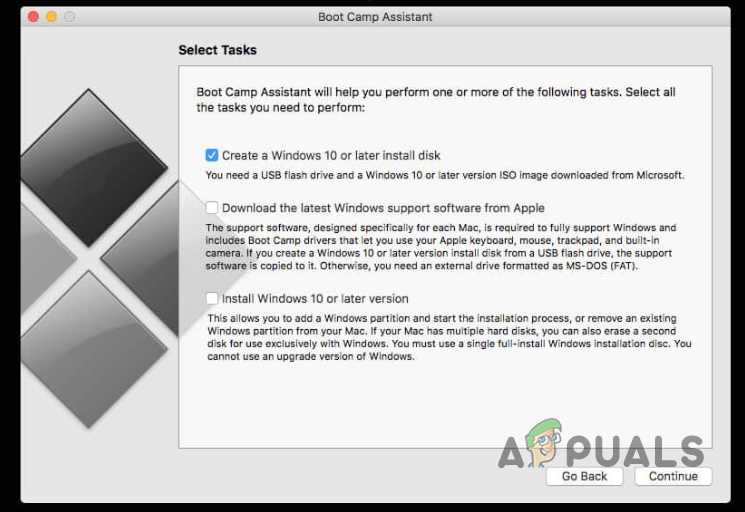
Opening up Boot Camp Assistant - When you Boot Camp for the first time, you will be asked to select what you wish to do. Here, make sure you tick both Create a Windows 10 or later install disk and Install Windows 10 or later version checkboxes. With that done, click Continue.
Boot Camp Assistant - You will be asked to choose an ISO image on the follow-up screen. Choose the Windows 10 ISO file that you downloaded earlier. You might also have to choose the USB that you inserted as your destination disk.
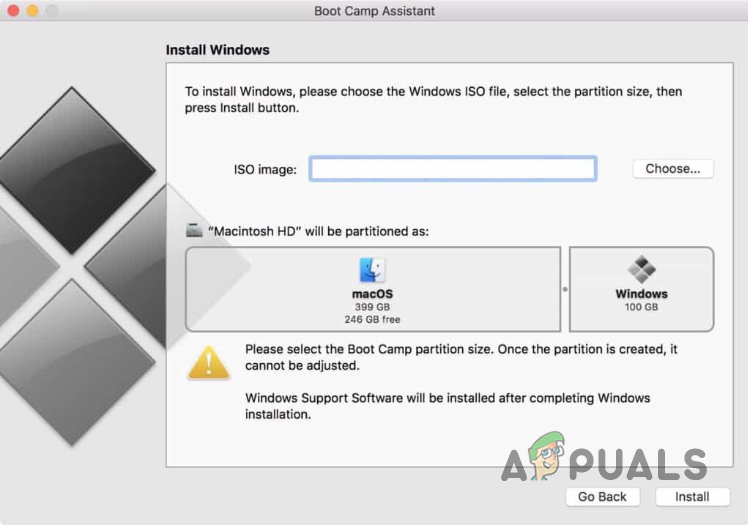
Choosing Windows ISO Image - With that done, you are in the partitioning phase. Select how much space you wish to give to Windows 10 and then click the Install button. Make sure you provided ample space for Windows 10 since you will be downloading Valorant once it has been installed.
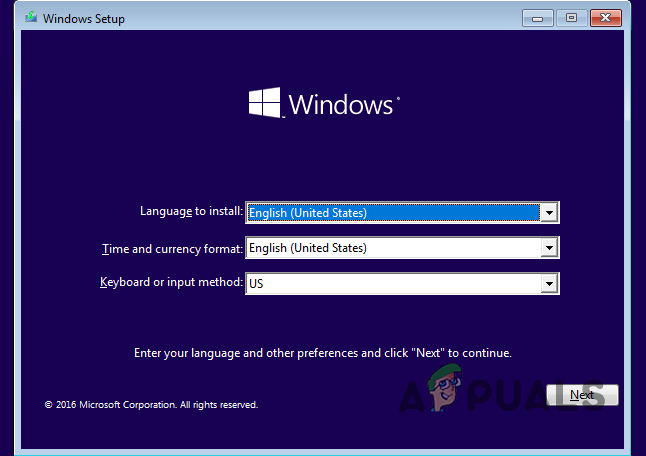
- After you click Install, your Mac will restart and you will be taken to the Windows Setup screen. From here on, it is rather simple. Just follow the on-screen prompts and finish installing Windows.
Windows Setup - Once Windows 10 has been installed, you can open up a browser and head to the official Valorant website by clicking here.
- There, click the Play Free button provided.

Downloading Valorant - Create an account if you do not have one. The Riot Client will be downloaded for you. Install it and once installed, you will be able to install Valorant.
- With all of that done, you will finally be able to run and play Valorant on a Mac.
3. Use Parallels to Play Valorant on M1 Mac
If you are using an M1 Mac, you will not be able to use Boot Camp to install Windows to then play Valorant. This is because M1 Macs use a variant of ARM processors and thus, cannot use Boot Camp to install Windows. In such a scenario, you can use Parallels which allows you to install Windows even on M1 Macs.
With that said, it is important to note that Parallels is not a free software and you will have to buy a subscription in order to be able to download and use it. You can buy Parallels via the official website by clicking here. Once you have installed Parallels, all that remains is to install Windows and then follow it up by installing Valorant on your Mac.
Once you have installed Windows 10, the remaining process is pretty simple since all you need to do is visit the Play Valorant website and download the Riot Client. With the Riot Client downloaded, you will be able to play Valorant on your Mac without any issues. We wouldn’t expect the performance to be on par with Windows but you can try it for yourself to see if it is playable.


