How to Fix “Photoshop Could Not Complete Your Request Because of a Program Error”
The “Photoshop could not complete your request because of a program error” message usually shows up when opening, saving, or closing files. This error means something isn’t working right in Photoshop, often due to broken files, incorrect settings, or issues with the graphics card. The main cause is often a conflict with the graphics processor, especially after updates.

Other possible reasons include messed-up preferences, third-party plug-ins, or issues with file permissions.
Now that we are done with that, lets discuss the solutions.
1. Change the Extension of the Image File
Sometimes, an image file having the wrong extension can cause errors in Photoshop. By changing the file extension, Photoshop might be able to recognize and handle the file correctly. This happens because the software might not understand the file due to format issues or incompatible metadata with the current extension.
2: Disable Graphics Processor Option
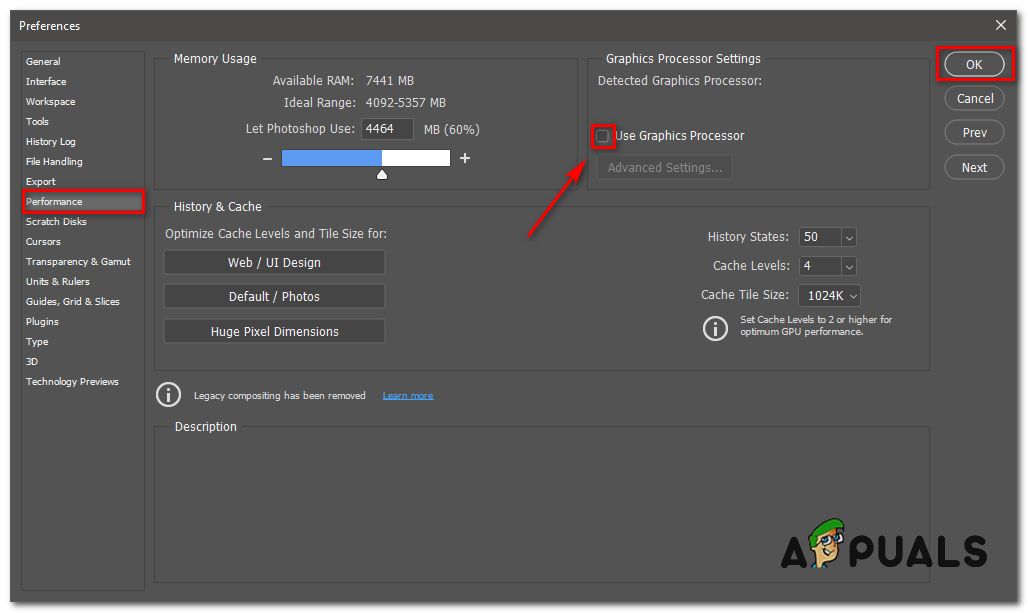
Disabling the graphics processor can help avoid conflicts between Photoshop and your graphics card, which are often caused by driver problems or software updates. This makes Photoshop use the CPU instead, preventing crashes or errors related to the graphics card.
-
- Open Adobe Photoshop.
- Once Adobe Photoshop is open, press the “Control + K” keys together to open Preferences.
- Navigate to the “Performance” section and un-tick the option “Use Graphics Processor”
- Now, restart your Adobe Photoshop and you should be good to go. If the issue persists, check out the other solutions.
3: Disable Generator
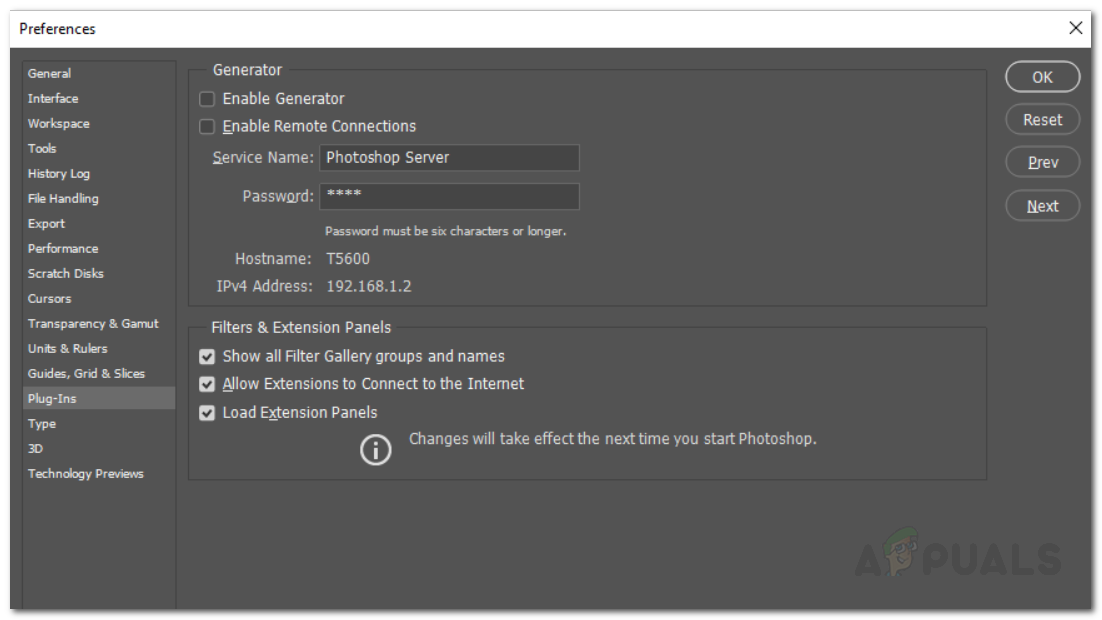
This feature is helpful for creating assets quickly, but it can sometimes cause conflicts, resulting in the “program error” issue. Turning it off stops unnecessary background processes, which can fix the error caused by bad or incompatible plugin actions.
- Open up Adobe Photoshop.
- Click on the Edit drop-down menu and choose Preferences.
- Switch to the Plug-ins tab and uncheck the ‘Enable Generator’ checkbox.
- Once you have done that, click OK.
- Restart Photoshop and see if it resolves the issue.
4: Unlock the Library Folder (On MAC)
Sometimes, these files are hidden or restricted, stopping Photoshop from getting the resources it needs. By unlocking the Library folder, you give Photoshop full access to the system files it needs to work right, which can fix permission errors that interfere with saving, opening, or changing files.
- Open up the Finder and then navigate to your user directory. You can do this by searching for ~/Library/ in the search box.
- Once you see the Library folder, right-click on it or hold the Ctrl key while clicking on the folder to show the drop-down menu.
- Click on the Get Info option.
- Uncheck the ‘Locked’ option under folder details.
- See if this fixes the issue for you.

5: Reset Photoshop Preferences
If none of the solutions work, resetting Photoshop preferences can fix hidden issues. This step returns the software to its default settings, removing any broken or conflicting changes made over time. It helps by getting rid of tricky settings without affecting your saved files, giving Photoshop a fresh start to work smoothly again.
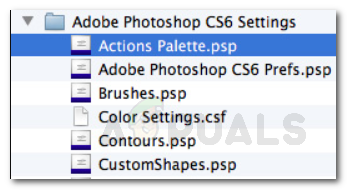
For Mac
- Just navigate to the ~/Library/Preferences/Adobe Photoshop CSx Settings/ directory.
- Once you are there, move the CS6 Prefs.psp file to your Desktop. Here, CS6 is the version, so it might be different in your case, but you get the idea.
- That’s it.
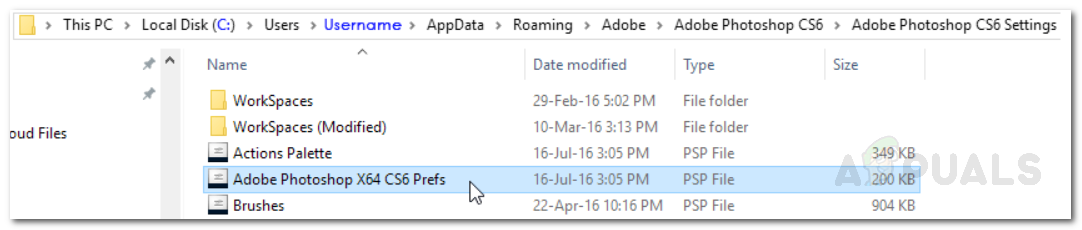
For Windows
- Press the Windows Key + R to open the Run dialogue box.
- Type in %AppData% and hit Enter. This will take you to the AppData directory.
- There, navigate to the Roaming/Adobe/Adobe Photoshop CSx/Adobe Photoshop Settings/ directory.
- Once you are there, move both the Adobe Photoshop CS6 Prefs.psp and Adobe Photoshop CS6 X64 Prefs.psp files to your Desktop.
Once you have done that, run Adobe Photoshop again and see if your issue has been resolved.


Kevin Arrows
IN Photoshop 2020 there is ONLY one file name
“Adobe Photoshop 2020 Prefs.psp”
after i move it to Desktop it’s run OKHappy with this great site
Thanks for all your effort…