Fix: Unexpected Server Error Occurred on Overwatch 2?
Overwatch 2 Players have been complaining about experiencing Unexpected Server Errors when trying to play the game. This server-side error usually occurs when many players try to log in to the game, which puts a heavy load on Blizzard s, causing them to either become unstable or crash.
Many factors lead to this error when trying to launch or play the game. Some of the issues that are causing this error are mentioned below:
- Battle.net Region Settings – Having unsupported settings or servers selected from the Battle.net launcher settings can cause this server error.
- Windows Firewall Exception – In many cases, Windows Firewall can block the access of specific files or applications from connecting to the Internet, which in turn cause Overwatch 2 Server Error.
- Antivirus Real-time Protection – If you are using Windows default Antivirus or any third-party Antivirus, then having Realtime Protection also causes this error.
- Check If You Are Using Any VPN – Windows built-in or any third-party VPN can also be the culprit in many cases.
- Router Settings – More often than not, old routers can overheat and corrupt settings when they are kept running for a long time without restarting them.
- Windows Network Drivers – Having unsupported or outdated network drivers can also cause Unexpected Server Error on Overwatch 2.
- Update Windows – In most cases, outdated windows can also interfere with the proper execution and working of the latest applications or video games which can also cause this issue.
- Windows Compatibility Settings – Not having proper administrative privileges can make Overwatch 2 not launch properly or connect to servers, causing this issue.
- Port Forwarding – Restricted or Blocked network ports from Windows Firewall can also act as a shield when trying to connect to Battle.net servers. They can cause server Errors when trying to play Overwatch 2.
- Keep Restarting The Game – This error code can also be fixed by restarting the game once the error appears.
- Fresh Install Battle.net and Overwatch 2 – Uninstalling the previous iteration of Battle.net along with the Overwatch 2 files and installing a fresh copy can also solve many errors/glitches.
1. Keep Restarting Overwatch 2
Many users experiencing technical issues on Overwatch 2 have notified several fixes through various forums and Reddit to help eliminate the server error on Overwatch 2, among many other randomly occurring errors.
This is primarily because with the launch of Overwatch 2, players of the original game have flooded to give this one a try, and the servers are often overloaded. If you experience any kind of server-side errors, including but not limited to Unexpected Server Errors, then you can just shut the game down, restart the launcher and keep trying to launch the game. Most of the time, these server-sided errors are bound to disappear after 7-8 tries.
2. Change Battle.net Region Settings
Blizzard Global Play allows its users to change the servers/regions of all the games available on Battle.net, which helps by making it easier to troubleshoot if the server is glitching/unstable due to various reasons. It can also help by allowing players from different parts of the world to play with each other. There are currently three regions available to regular players:
- Americas: which includes North America, Latin America, South America, Australia, and New Zealand.
- Europe: which includes European Union, Eastern Europe, Russia, Africa, and the Middle East.
- Asia: which contains players from South Korea, Taiwan, Hong Kong, and Macau.
Changing regions is instead a straightforward and effortless task. To change the Battle.net region/server, follow the steps below:
- Open the Battle.net launcher and log in using your credentials.
- Select the game from your library that you want to troubleshoot, which in this case is Overwatch 2.
- Click on the globe icon over the Install/Launch button
- Change to your desired Region and restart the Battle.net Launcher
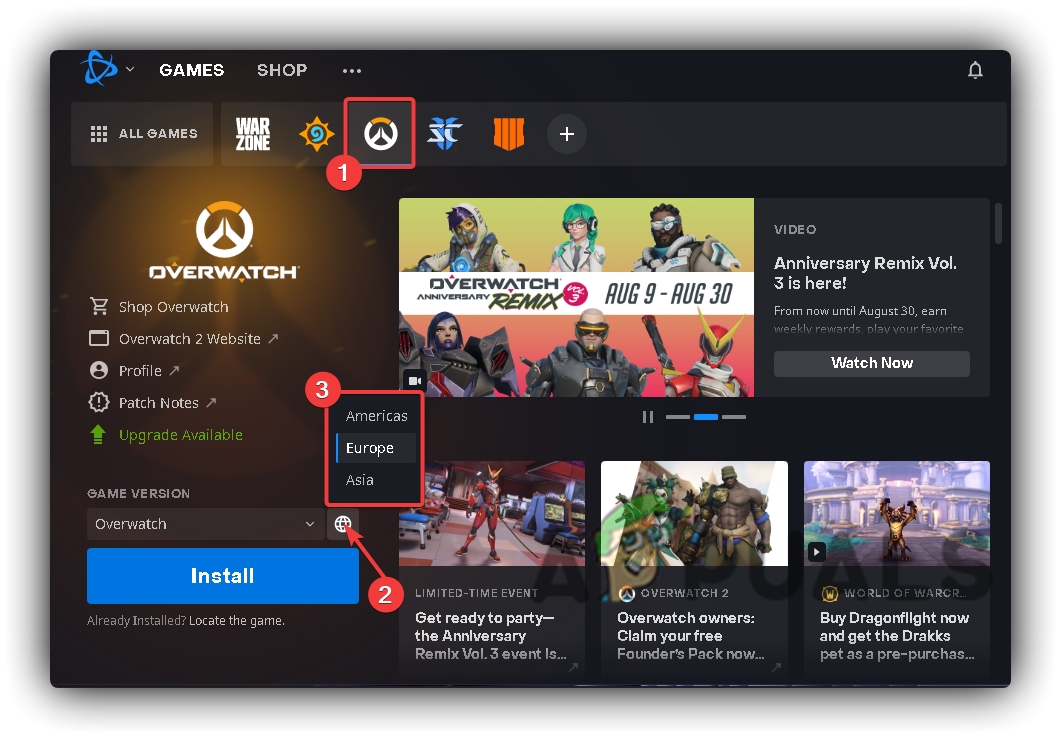
Change Battle.Net Region
3. Add A Firewall Exception
Windows 10/11firewall usually works as a gatekeeper and blocks unused network ports, which disables particular applications from communicating over the Internet. Battle.net servers are pretty prone to this instance, and thus. As a result, Overwatch 2 can easily crash or have multiple problems regarding the Internet, including Overwatch 2 Unexpected Server Error. To fix this, you need to allow Battle.net and Overwatch 2 through Windows 10/11 Firewall so they can easily communicate with the Blizzard servers. Follow the steps below:
- Open Start Menu and Type Windows Defender Firewall
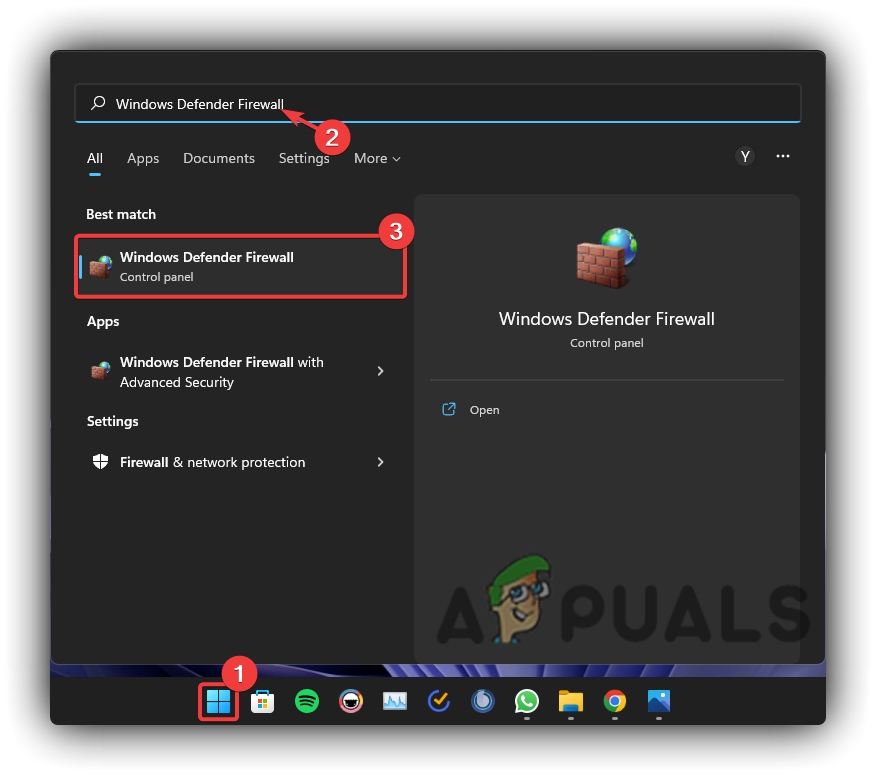
Start Menu To Windows Defender Firewall - Launch it and click Allow An App Or Feature Through Windows Defender Firewall

Clicking Allow An App Or Feature Through Windows Defender Firewall - Click Change Settings
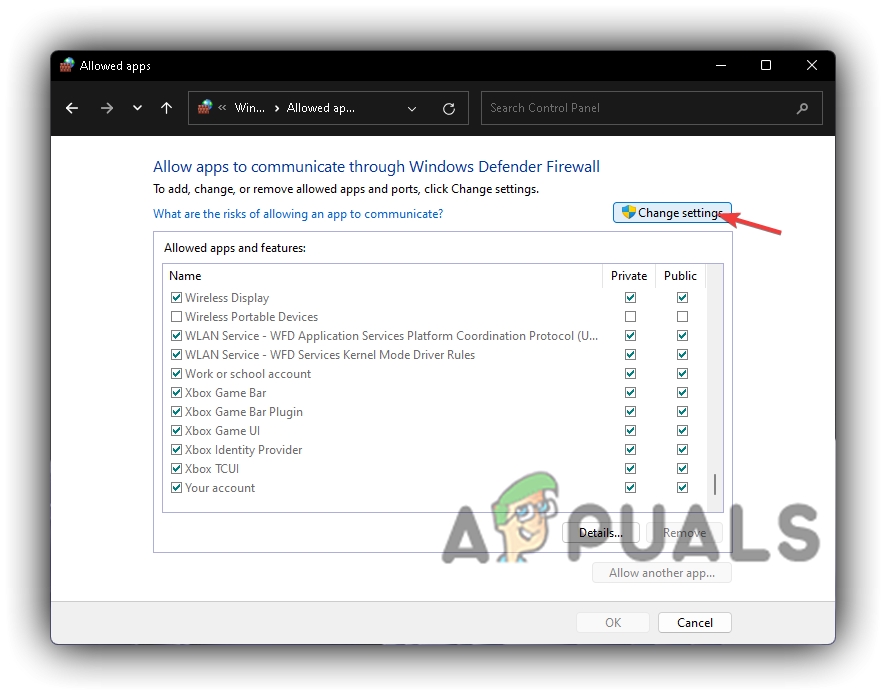
Windows Defender Firewall Change Settings - Navigate to your desired application or game and tick both Private and Public checkboxes
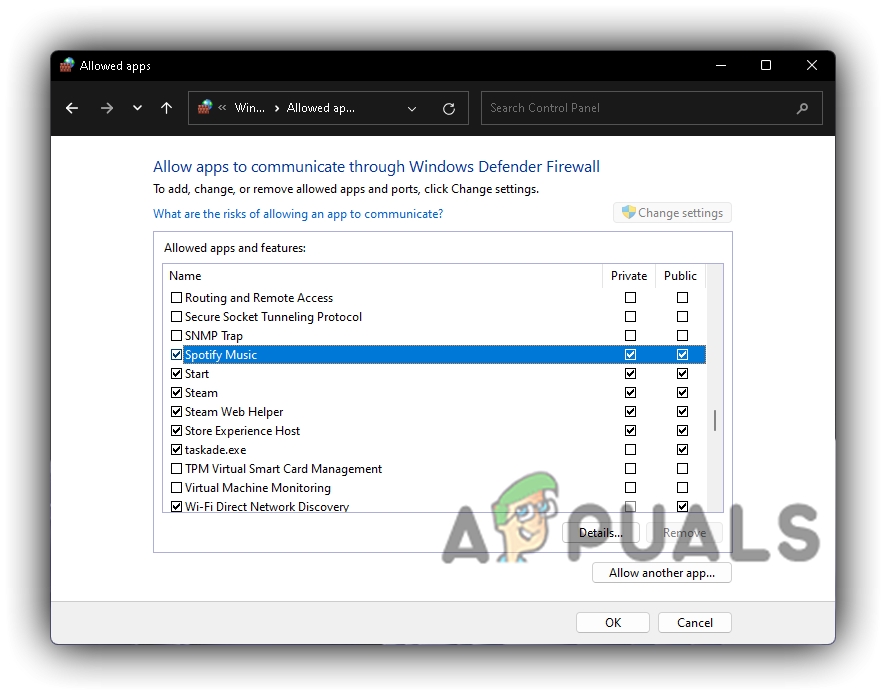
Allow Application Or Game Through Windows Defender Firewall - If you can’t find your desired application or game in the list, then click on Allow Another App
- Then click browse, locate your desired app or game and then tick both Private and Public checkboxes
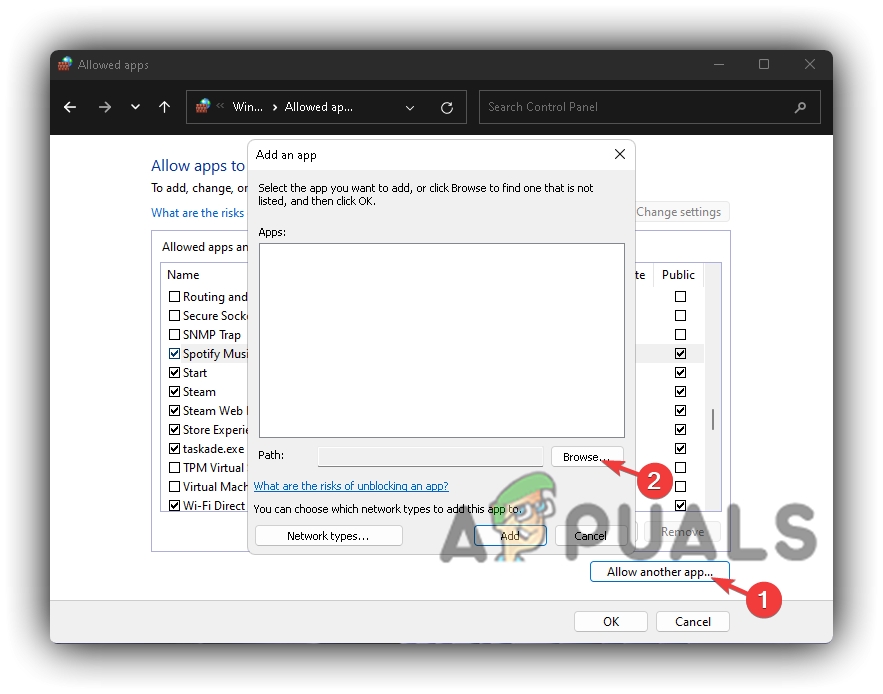
Allow Another App Through Windows Defender Firewall
4. Disable Antivirus Real-time Protection
If you are using any third-party Antivirus Real-time Protection or even a Windows 10/11 built-in Windows Defender/Security, then it can block a particular application or video game from launching or communicating with the server. Antivirus Real-time Protection can result in many network-related issues, including lags, ping spikes, packet loss, server connection loss, or even game crashing.
To fix this issue, you can turn off the Antivirus Real-time Protection so Battle.net and Overwatch 2 can have direct and uninterrupted communication with the server, making your game run without lag or crashes. To do so, follow the instructions below:
- Click Start Menu, Type Windows Security, and launch it
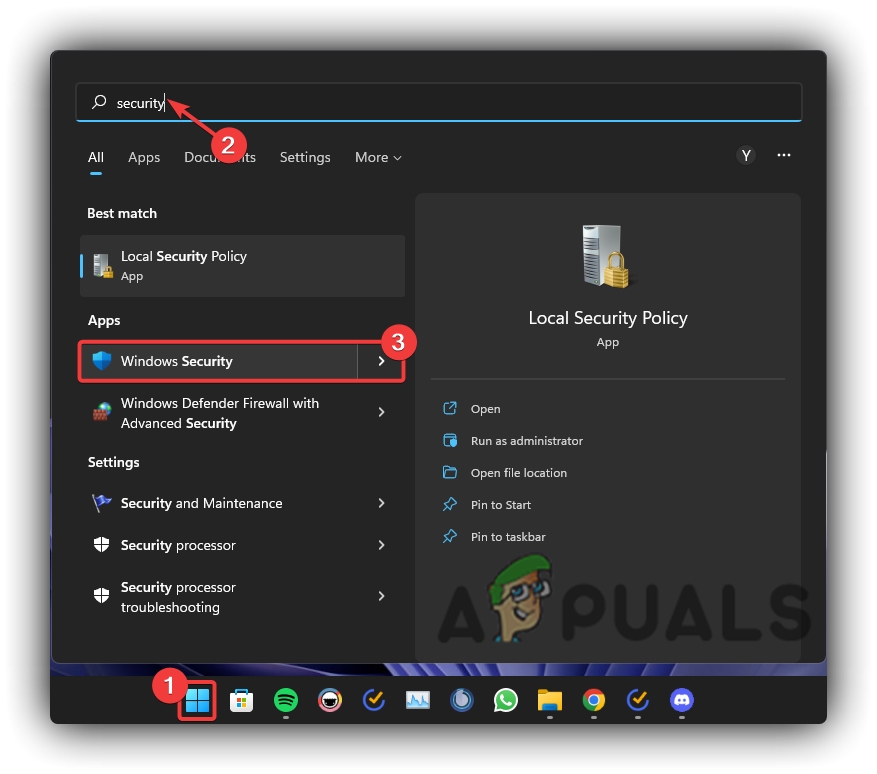
Opening Windows Security - Click on Virus & Threat Protection Settings
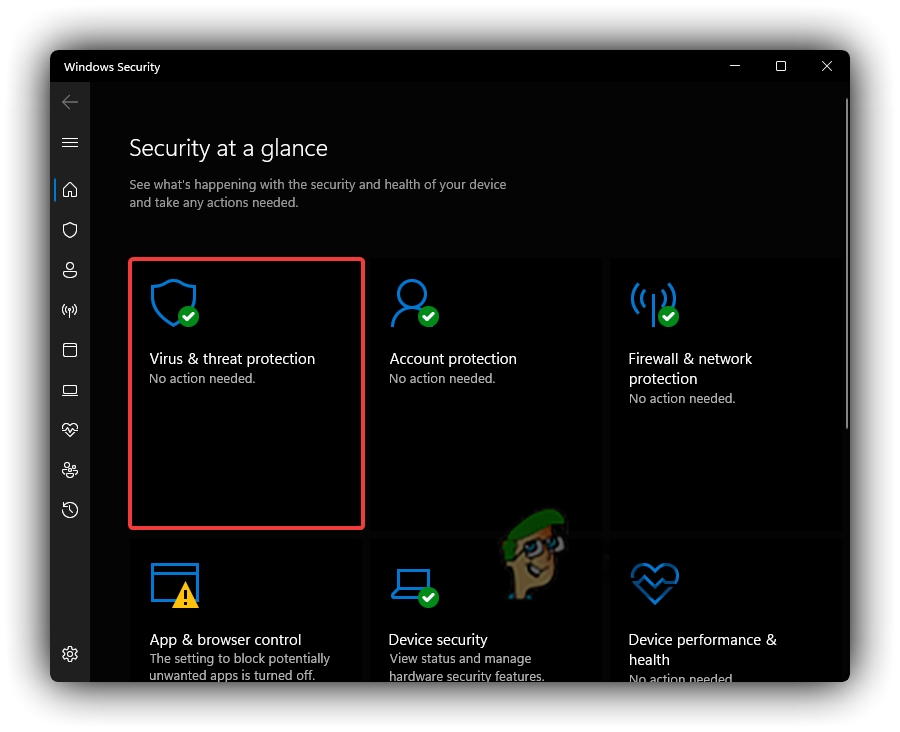
Clicking On Windows Security Virus & Threat Protection Settings - Scroll Down To Virus & Threat Protection Settings Section and click on Manage Settings
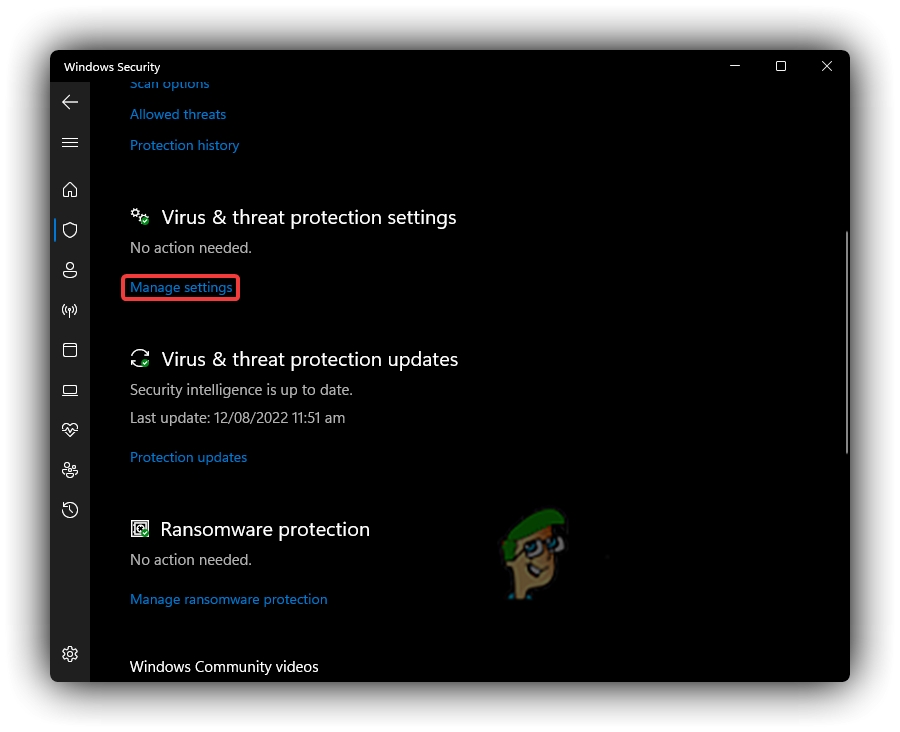
Windows Security Virus & Threat Protection Settings To Manage Settings - Turn Off Windows Security Real-time Protection
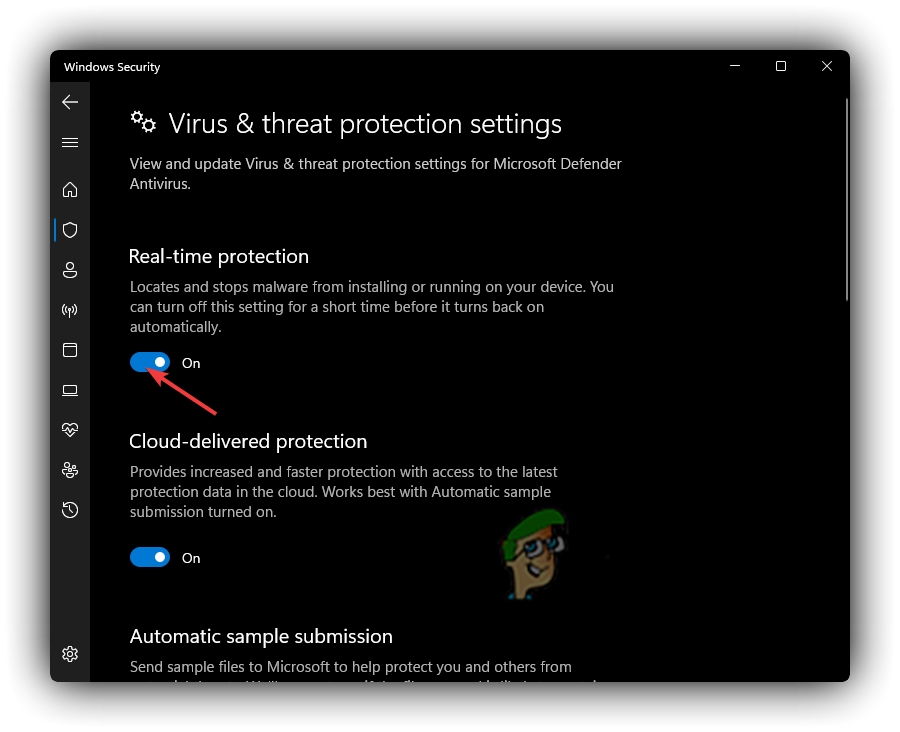
Turn Off Windows Security Real-time Protection
5. Update Outdated Network Drivers
Outdated network drivers can also lead the way for many issues in any network-related application or video game. They can often create unwanted ping spikes, crashes, or server disconnects depending on the age of the Network drivers.
You can quickly mitigate these issues by just updating your outdated Network drivers and replacing them with the updated ones by following the specific steps below:
- Open Start Menu and Type Device Manager
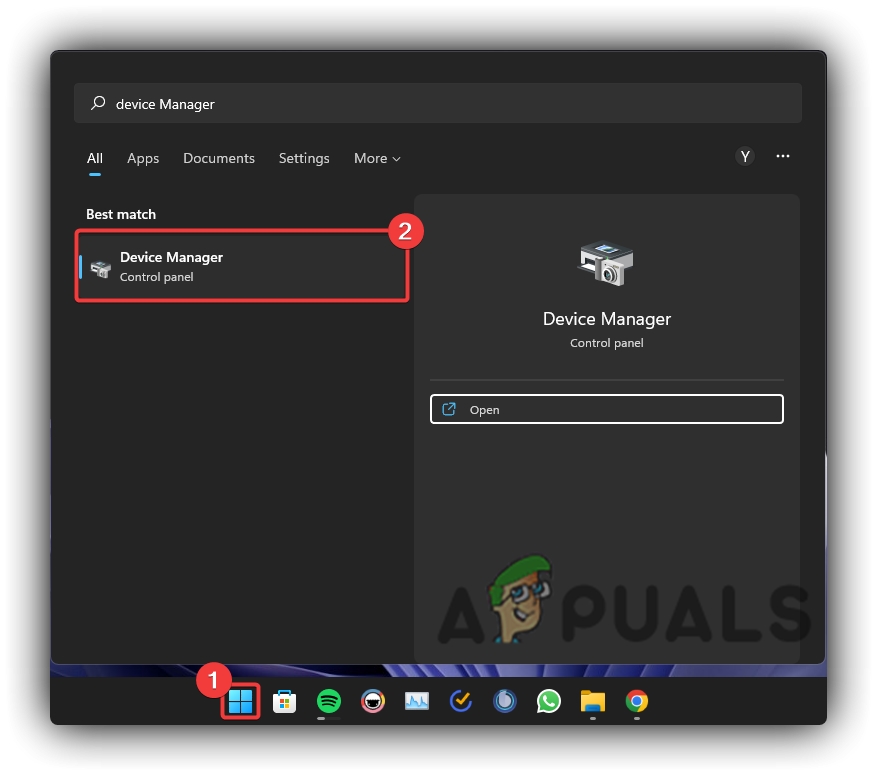
Windows 11 Opening Device Manager - Navigate to Network Adapters and click on the drop-down button
- Right-click on your active network device and select Update Driver
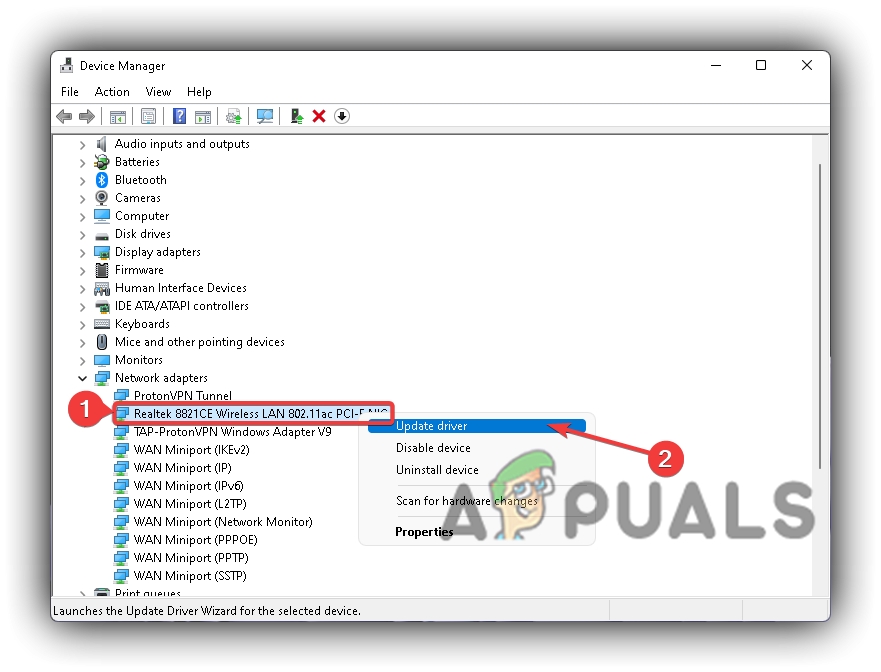
Updating Network Drivers From Device Manager - Click Search Automatically For Drivers for an automatic search over the Internet
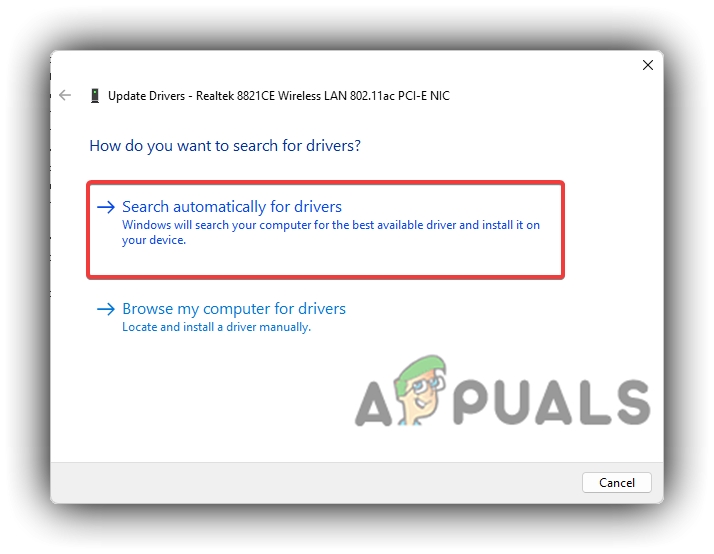
Search Automatically For Drivers In Device Manager - Or click on Browse My Computer For Drivers if you have downloaded the drivers for your particular network device from the manufacturer’s website.
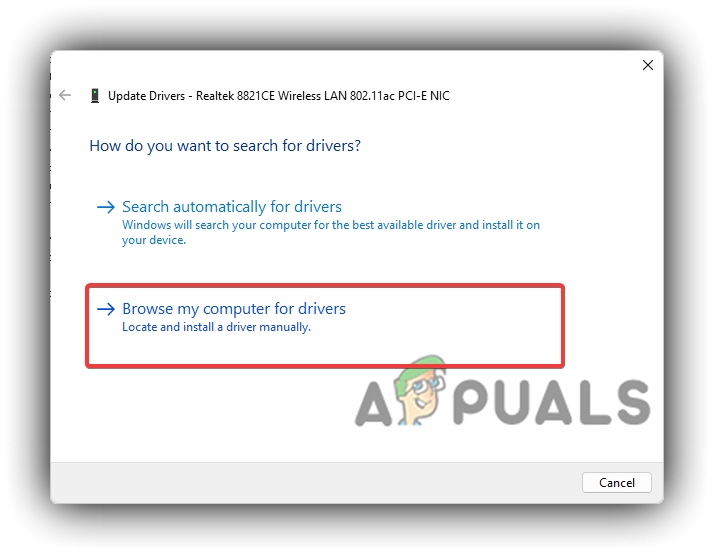
Browse My Computer For Drivers In Device Manager - Click Browse Button, navigate to your Network driver’s downloaded location, and click Next to complete the Installation.
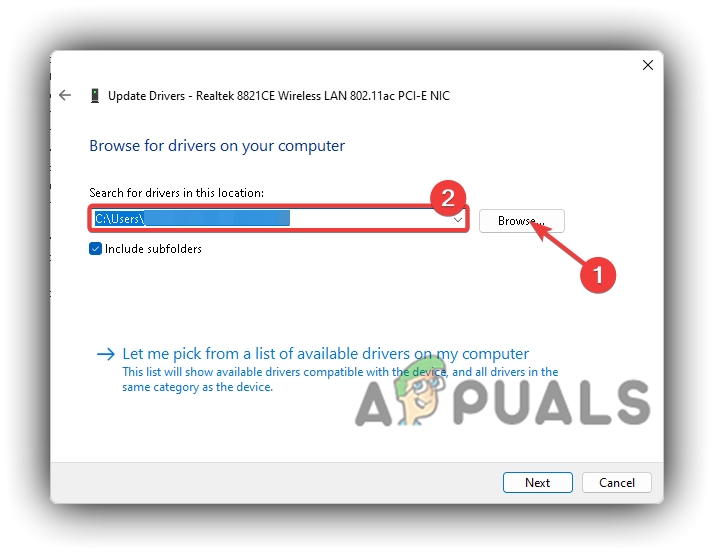
Browse For Downloaded Drivers In Device Manager
6. Disable Any Built-In Or Third-Party VPN
Many users have reported issues when they try to play Overwatch 2 or any other game on Battle.net while connected to any third-party or Windows built-in VPN.
Since online video games require a direct and uninterrupted connection from your computer to the game server, it can lead to many issues like routing you to a bad server, which makes your game unplayable due to high ping spikes, packet loss, server disconnects, or Overwatch 2 crashes. To fix this, you can turn off Windows built-in VPN by following the guide below:
- Click on Start Menu, Type VPN Settings, and open it
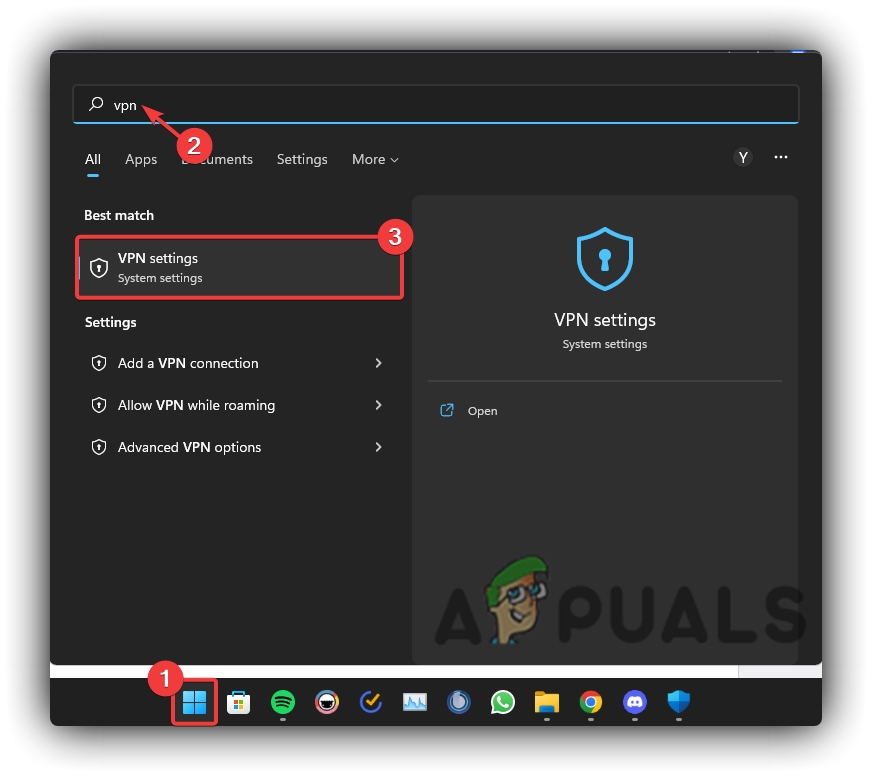
Opening Windows Built-in VPN - Click on Disconnect VPN.
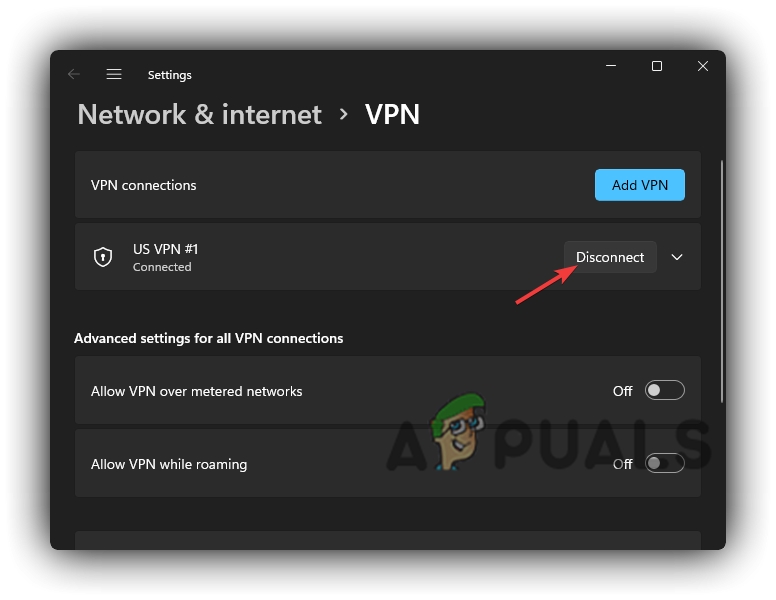
Disconnecting Windows Built-in VPN
Note: If you have any third-party VPN, you can turn it off by following the instructions from its website.
7. Apply Optimized Windows Compatibility Settings
If all of the above mentioned methods do not directly solve the Overwatch 2 crashing issue and the Overwatch 2 Unexpected Server Error persists, then you can try running the program with compatibility settings by changing Windows Compatibility Settings.
A program or video game often requires special administrative permissions to execute and work as intended. Using the Windows Compatibility settings, you can allow the particular program or video game to access those special administrative permissions along with troubleshooting options. To do so, follow the steps below:
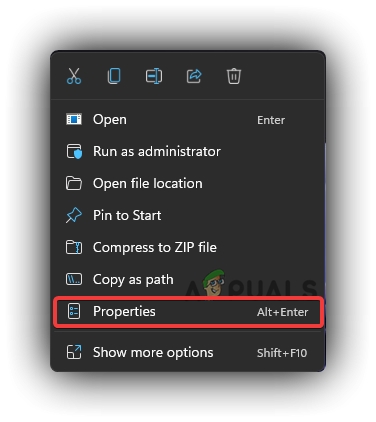
- Go to the Overwatch 2 installation location, Right click on it, and select Properties
Right Click To Program Properties - Go to Compatibility Tab, tick Disable Fullscreen Optimizations, and Run This Program As An Administrator.
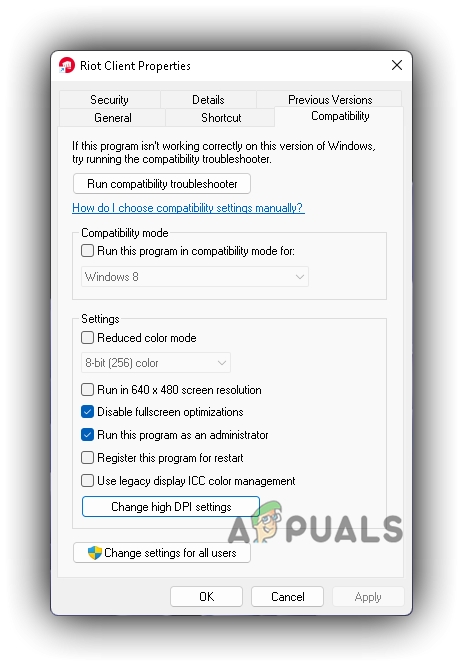
Change Program Compatibility Settings - You can also tick Run This Program In Compatibility Mode For and select Windows 7 or 8.
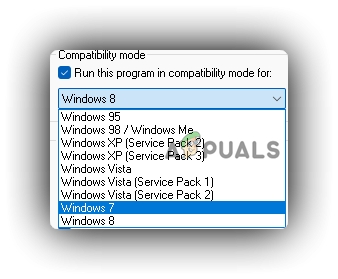
Change Program Compatibility Windows Mode
8. Update Windows To The Latest Version or Build
Outdated Windows OS can also create many conflicts when an application or video game tries to launch or connect to the game server through its online services. Keeping your Windows OS updated to the latest stable build from the official Microsoft Windows Check for Updates Tool is always a good idea.
Many latest applications or video games require Microsoft Windows to be updated to the latest stable build to execute and function appropriately as the developers of that particular application or video game intended. So, updating your Windows to the latest stable build is always a good option than using an outdated build of Microsoft Windows. To update Microsoft Windows, follow the instructions mentioned below:
- Click on Start Menu and open Settings
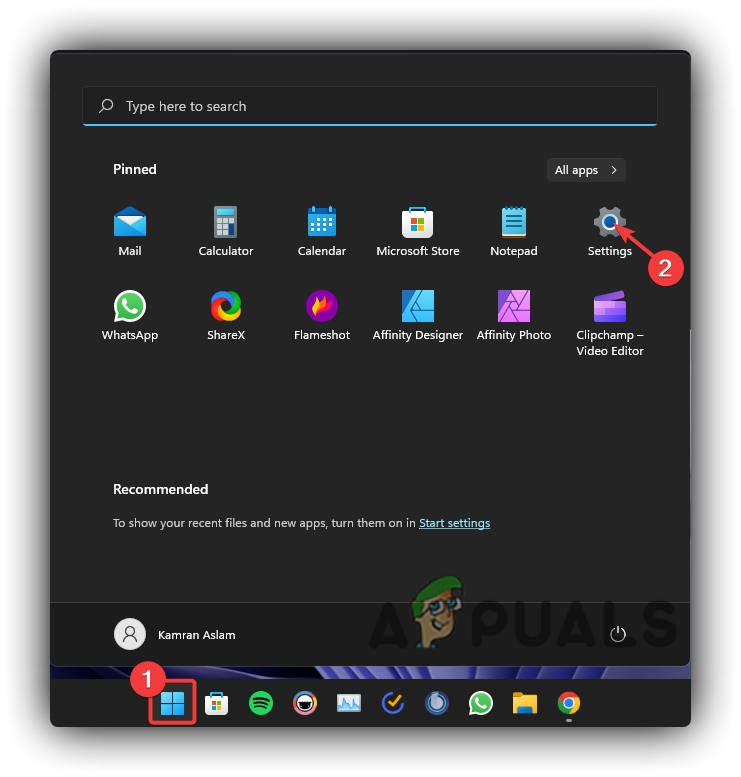
Opening Windows 11 Settings From Start Menu - Scroll down and click Windows Update from the sidebar
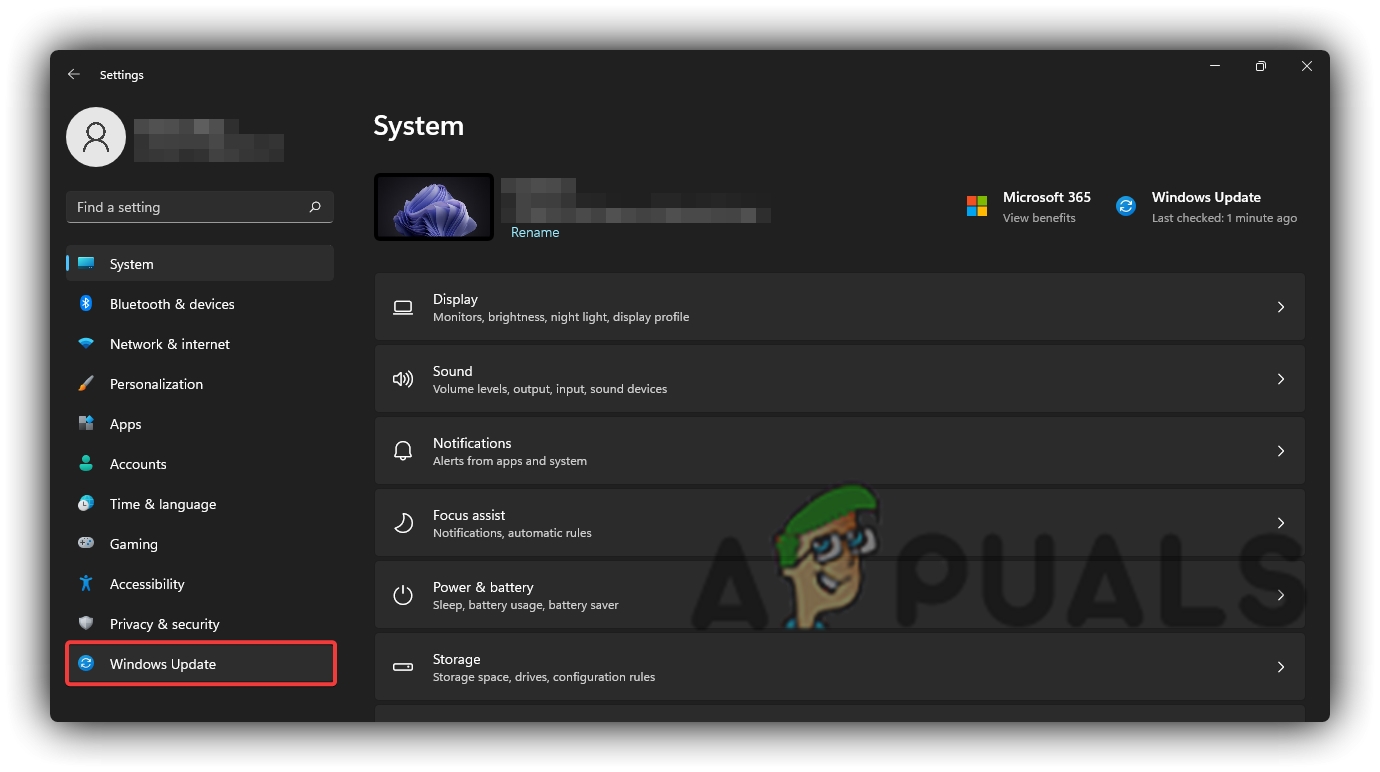
Clicking On Windows Update In Windows Settings - Click on Check For Updates and let it install any available updates.
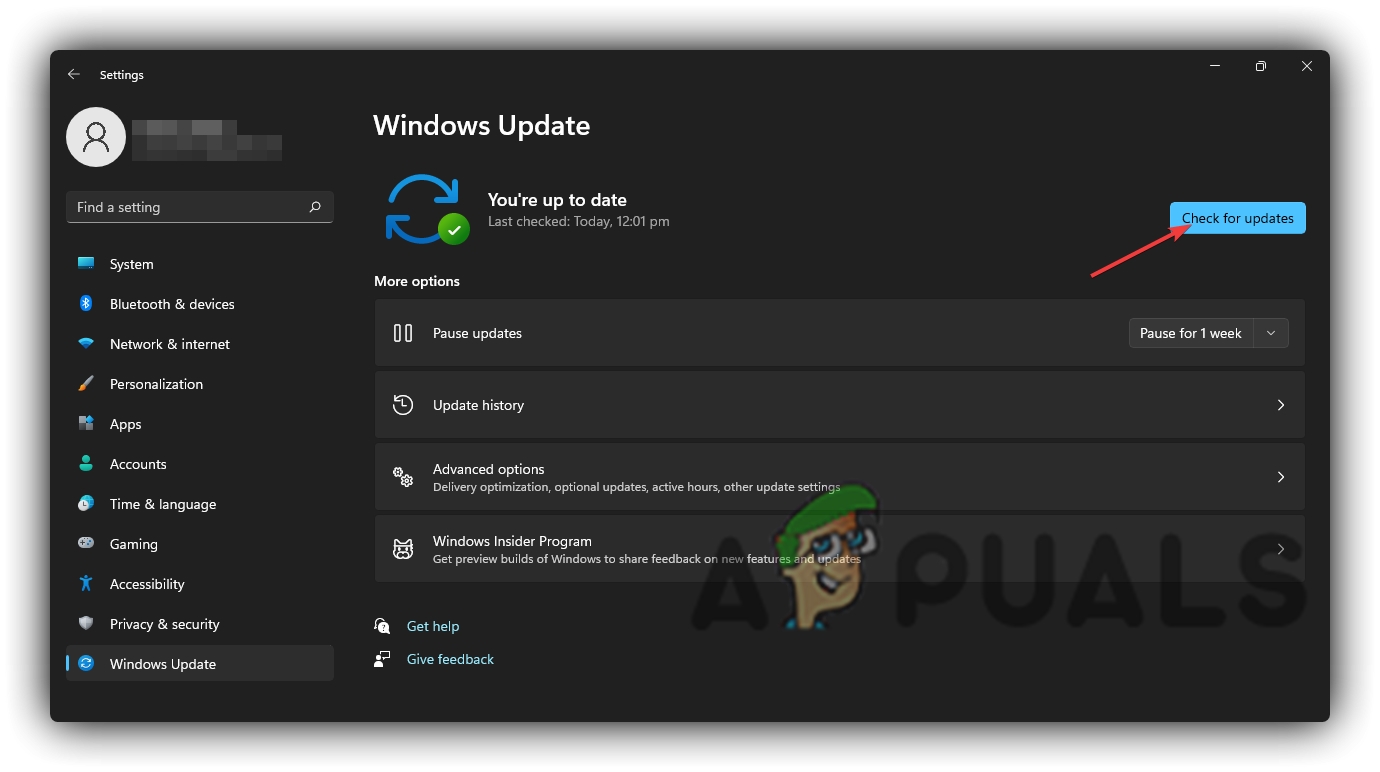
Clicking On Check For Updates
9. Network Port Forwarding
Many video games communicate to their specific servers through unique Network ports for speedy and uninterrupted service to provide the user with the best possible experience. These applications or video games require these particular ports to be unblocked so that they can access them without any issue.
Port forward is a more advanced form of Windows Firewall, and you can block or unblock these specific ports manually by following the steps below:
Opening Inbound And Outbound TCP Ports
- Open Start Menu and type Windows Defender Firewall
Start Menu To Windows Defender Firewall - Open it and click on Advance Settings
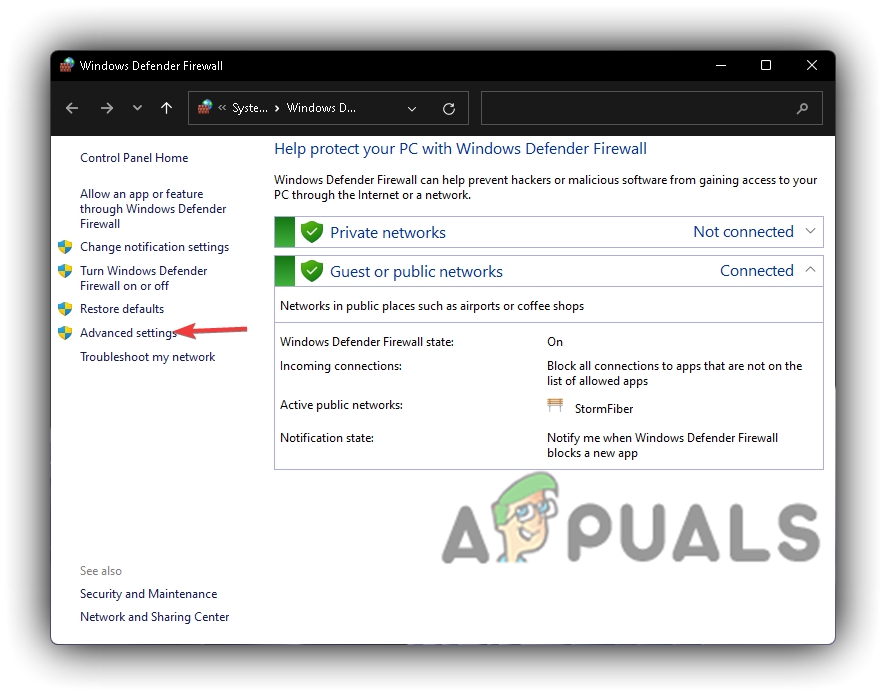
Windows Defender Firewall Advanced Settings - Go to Inbound Rules and click on New Rule
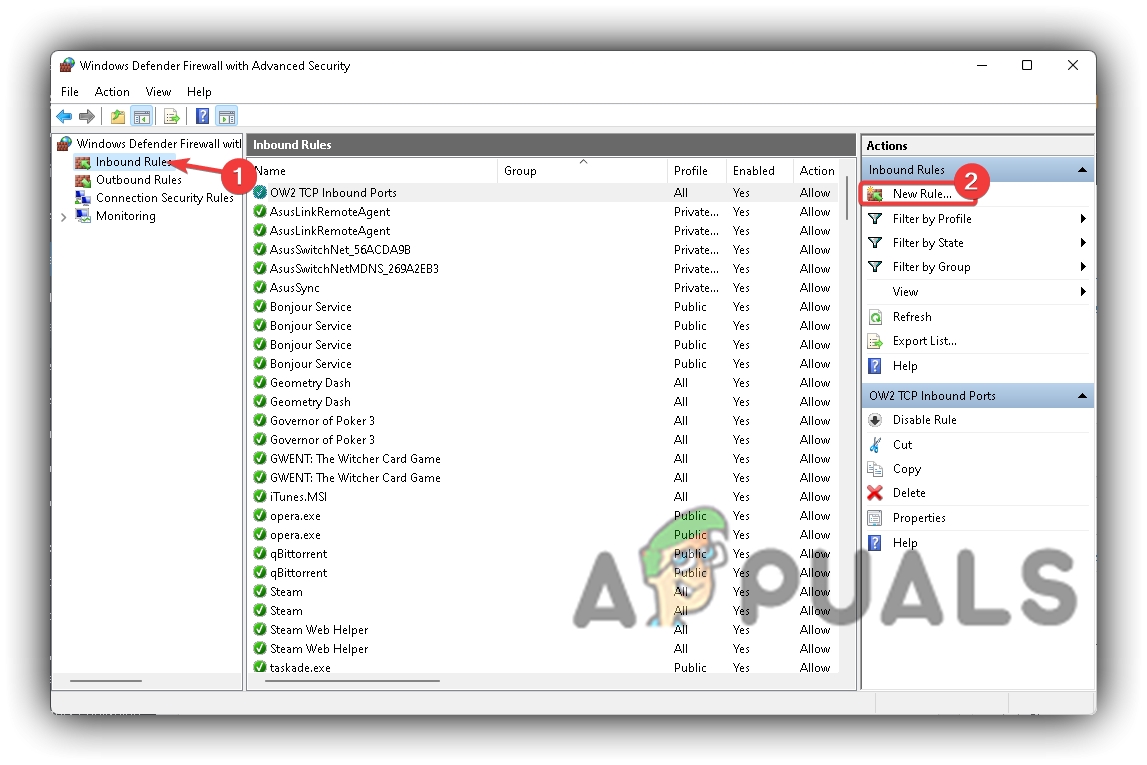
Windows Defender Firewall Inbound Rule To New Rule - Select Port and click Next
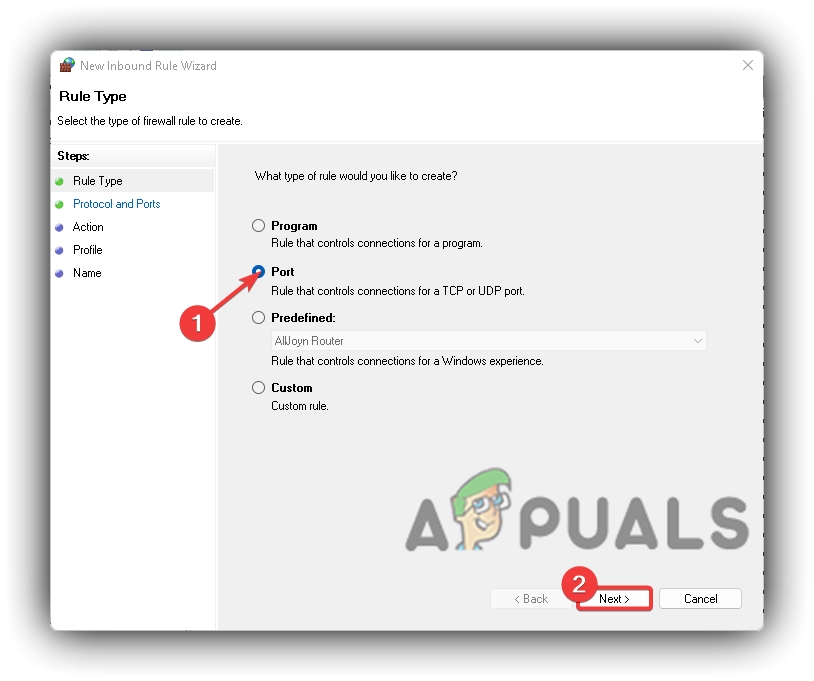
Windows Defender Firewall TCP Inbound Rule Type - Tick TCP, then tick Specified Local Ports, type the following ports: 1119, 3724, 6113, and press Next.
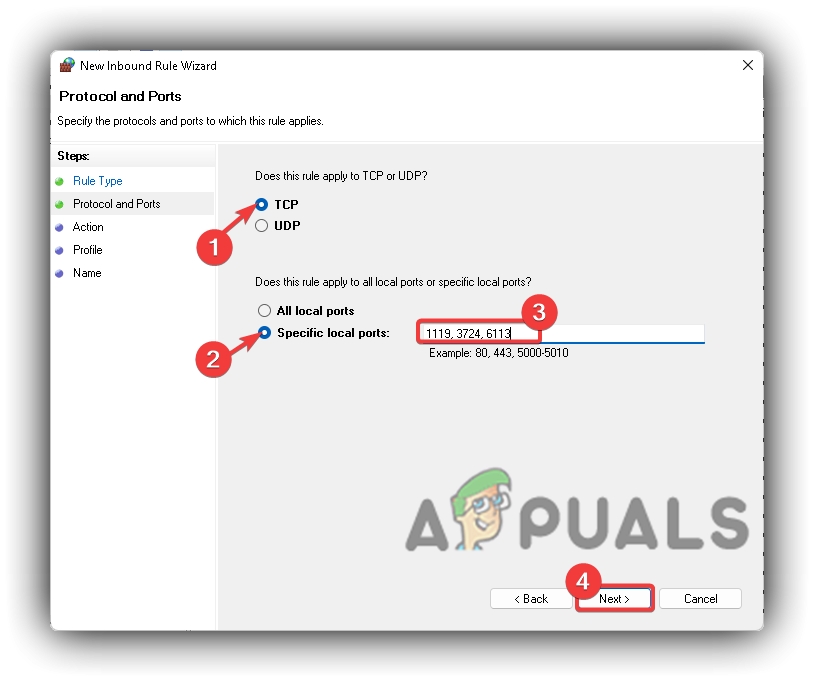
Windows Defender Firewall TCP Inbound Rule Ports - Tick Allow The Connection and press Next
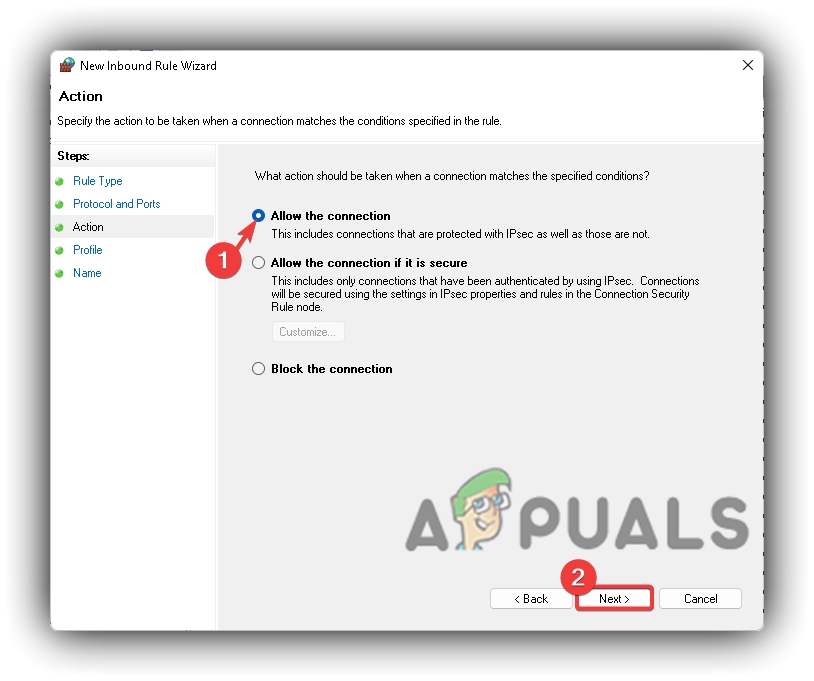
Windows Defender Firewall TCP Inbound Rule Action - Tick Domain, Public, Private, and press Next

Windows Defender Firewall TCP Inbound Rule Profile - Name it OW2 TCP Inbound Ports and click Finish
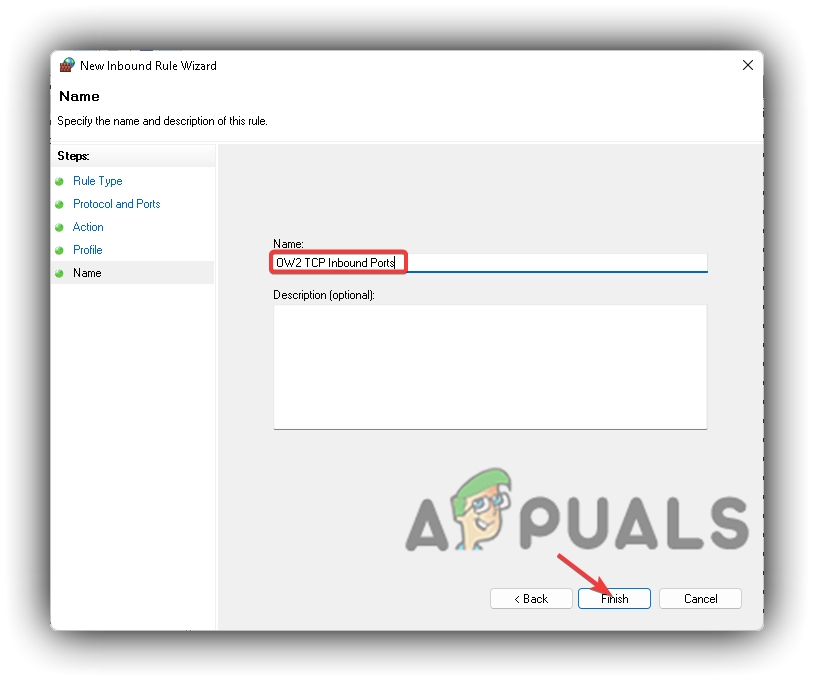
Windows Defender Firewall TCP Inbound Rule Name - Now go to the Outbound Rules, repeat the same process there, and name that OW2 TCP Outbound Ports.
Opening Inbound And Outbound UDP Ports
- Go to Inbound Rules and select the New Rule
Windows Defender Firewall Inbound Rule To New Rule - Tick Port and click Next
Windows Defender Firewall TCP Inbound Rule Type - Tick UDP, then tick Specified Local Ports, type the following ports: 3478-3479,5060,5062,6250,12000-64000, and press Next.
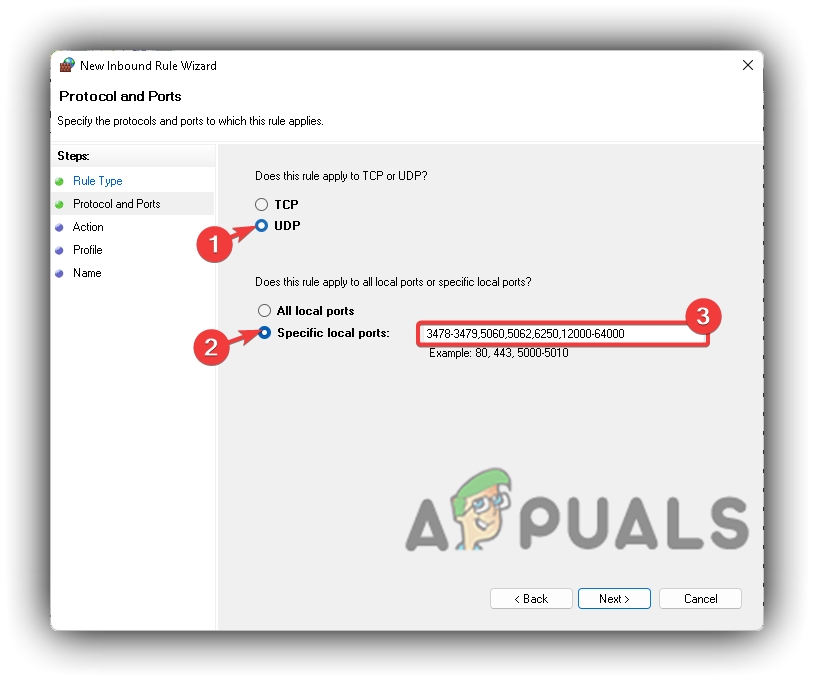
Windows Defender Firewall UDP Inbound Rule Ports - Check Allow The Connection and click Next
Windows Defender Firewall TCP Inbound Rule Action - Tick all three Domain, Public, Private, and press Next
Windows Defender Firewall TCP Inbound Rule Profile - Name it OW2 UDP Inbound Ports and click Finish
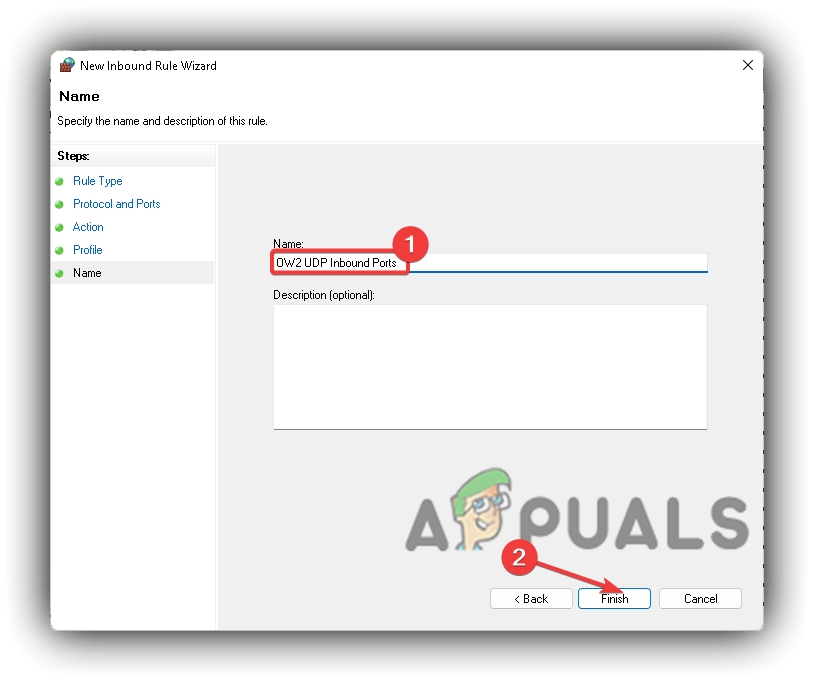
Windows Defender Firewall UDP Inbound Rule Name - Repeat the same process for Outbound UDP Ports as well.
10. Change DNS Server
Windows OS automatically allocates a default DNS address based on your location and internet preferences to provide you with the best possible route to access the Internet. But more often than not, it’s not the correct one.
Changing your DNS manually to either Google DNS or Cloudflare DNS is a better practice. It should be encouraged to be performed on any device that needs to be connected to the Internet, regardless of its type or configuration. To change your DNS to Google or Cloudflare, follow the instructions below:
- Click on Start Menu and open Settings
Opening Windows 11 Settings From Start Menu - Click on Network and Internet, then navigate to Advanced Network Settings
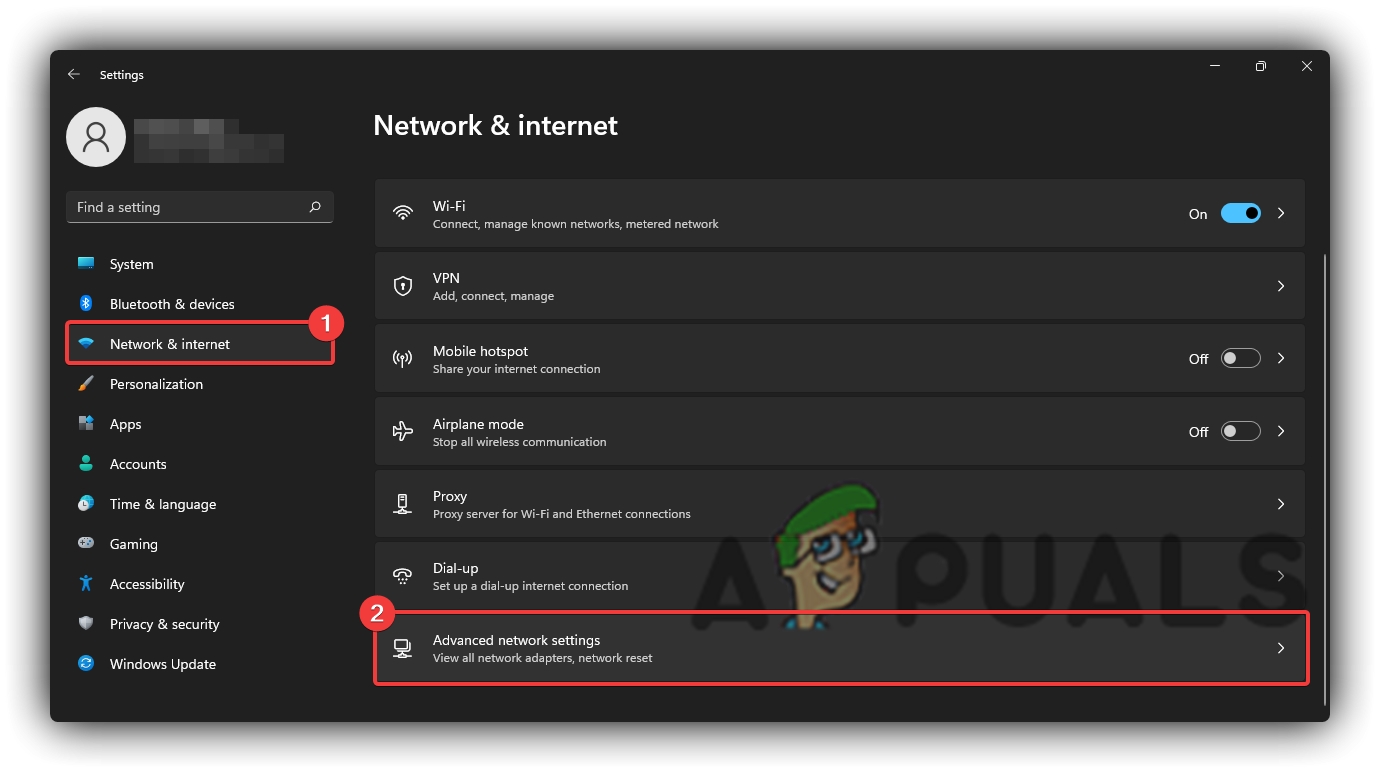
Network and Internet To Advanced Network Settings - Scroll Down and click More Network Adapter Options
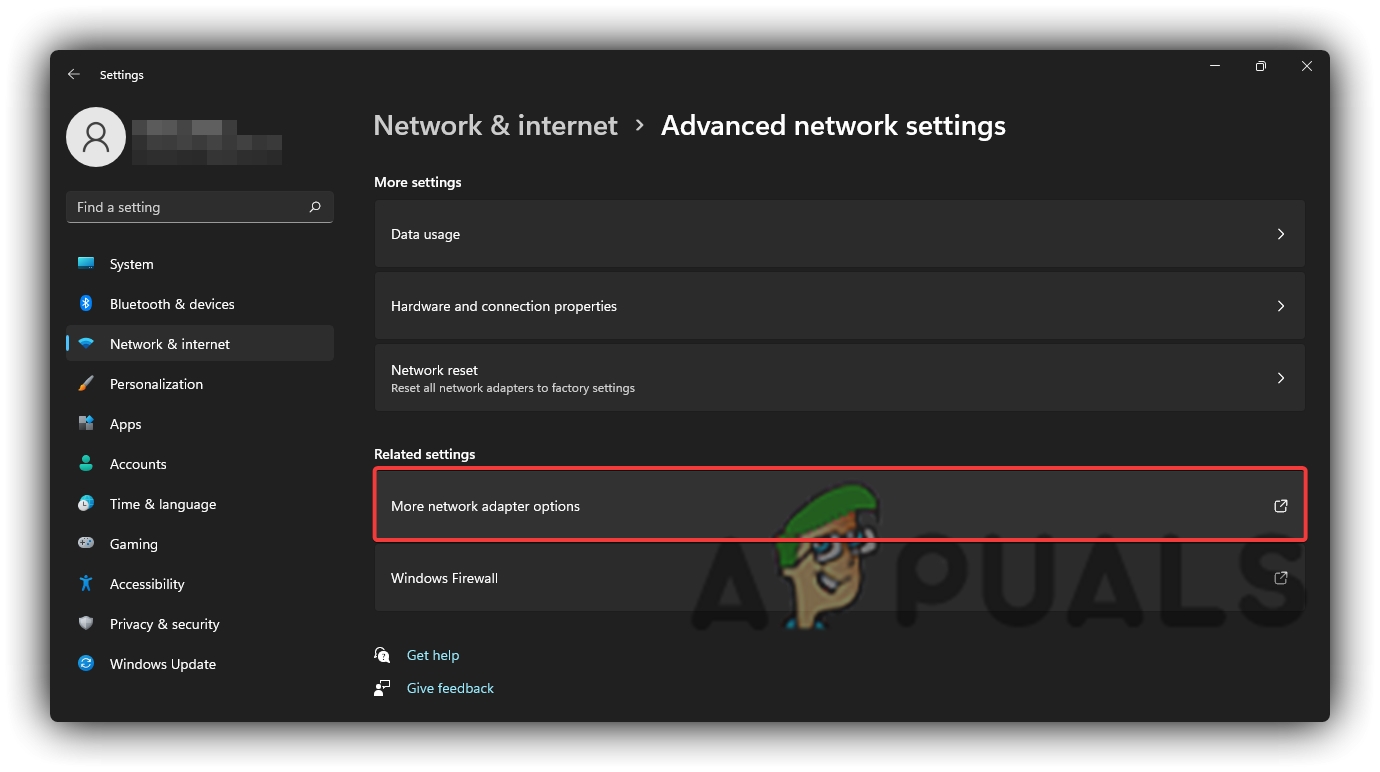
Opening More Network Adapter Options - Right-click on your active Internet connection and click Properties
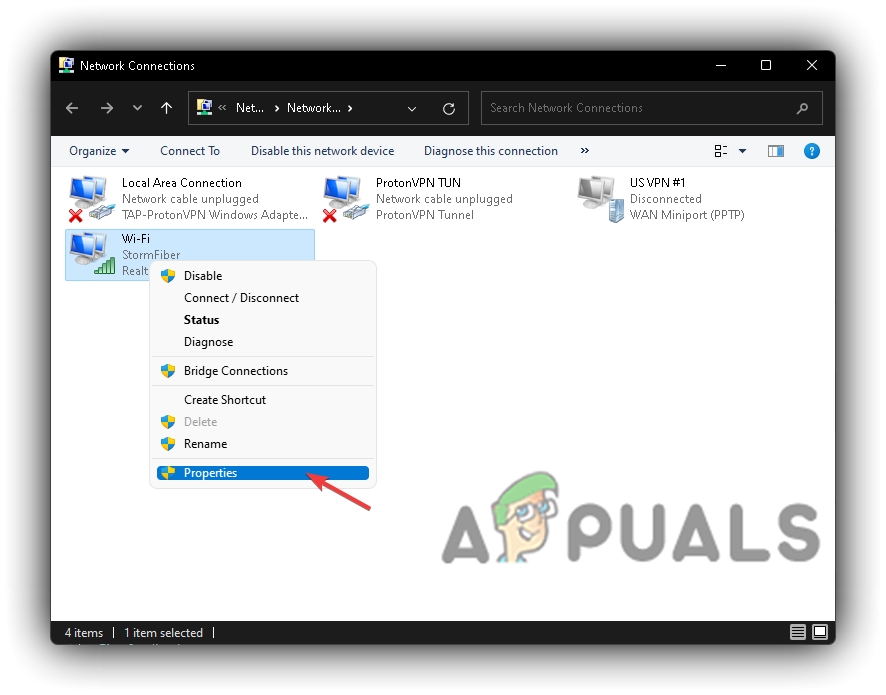
Opening Network Connections Properties - Select Internet Protocol Version 4 (TCP/IPv4) and click on Properties
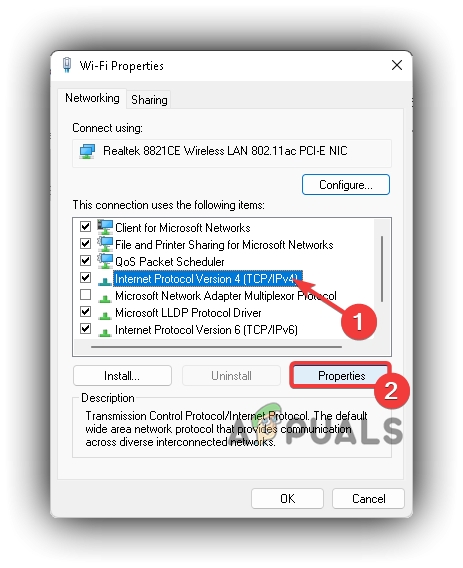
Opening Internet Protocol Version 4 (TCP IPv4) Properties - Turn on Use The Following DNS Server Addresses Manually; Insert either Google DNS (8.8.8.8 – 8.8.4.4) or Cloudflare DNS (1.1.1.1 – 1.0.0.1) and click OK.
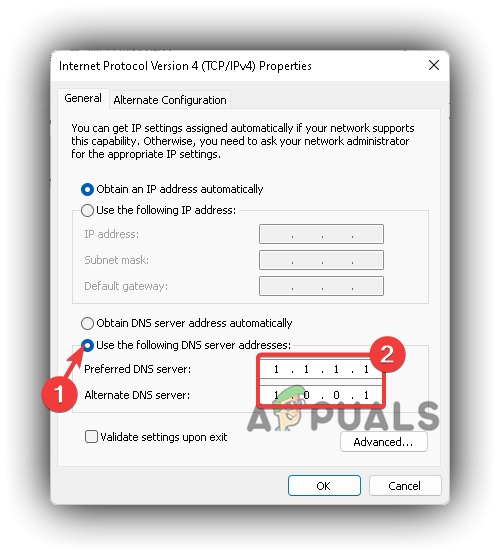
Change Automatic DNS Server To Cloudflare DNS Server
11. Turn On Static IP
Your Router always allocates you the different IP addresses depending on the number of devices connected to your Router hence the name “Dynamic IP Address.” A Static IP Address allocates a unique set of IP addresses to all your devices and doesn’t change when that particular device is shut down or disconnected from the Internet.
You can change your IP address from Dynamic to Static IP Address by requesting it to your Internet Service Provider, but that usually costs extra in most scenarios. An advanced solution can allocate your Windows-based PC a Static IP address without extra cost. Follow the steps below to change your Windows-based PC from Dynamic to Static IP Address:
- Open Start Menu and click Settings
Opening Windows 11 Settings From Start Menu - Select Network and Internet from the left sidebar and click Advanced Network Settings
Network and Internet To Advanced Network Settings - Navigate to the bottom and click More Network Adapter Options
Opening More Network Adapter Options - Right-click on your working Internet connection and select Properties
Opening Network Connections Properties - Go to Internet Protocol Version 4 (TCP/IPv4) and click on Properties
Opening Internet Protocol Version 4 (TCP IPv4) Properties - Now press Win+R, type CMD and press OK
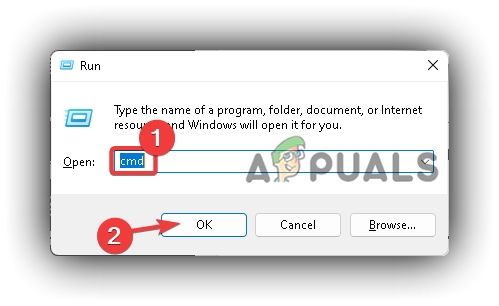
Windows Run CMD Command - Type ipconfig in the Windows Command Prompt and press Enter
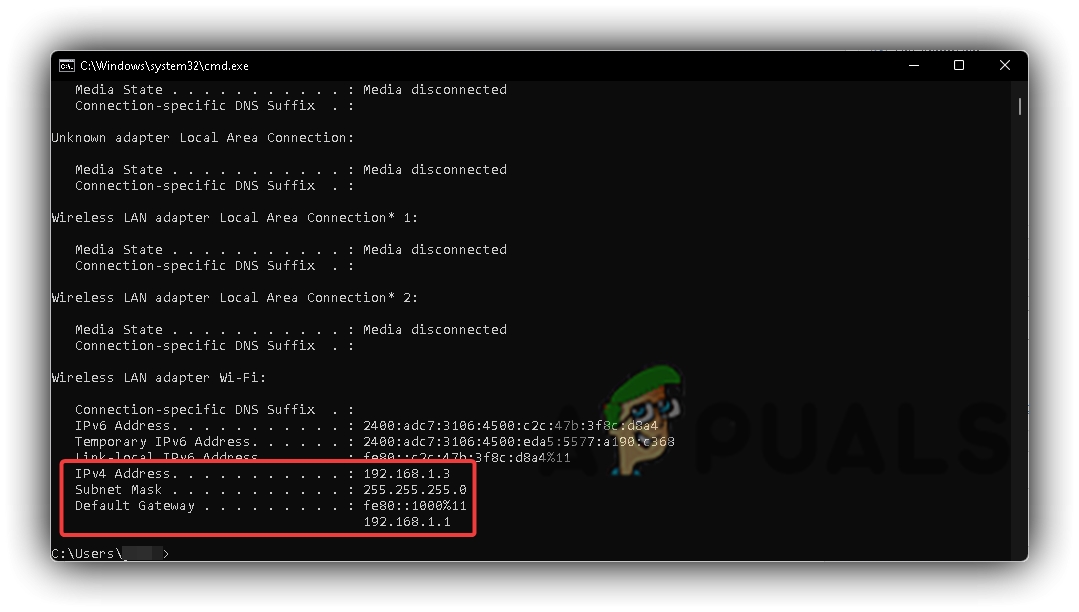
Windows Command Prompt IPCONFIG Addresses - Copy the IP Address, Subnet Mask, and Default Gateway into the Internet Protocol Version 4 (TCP/IPv4) properties, and press OK.
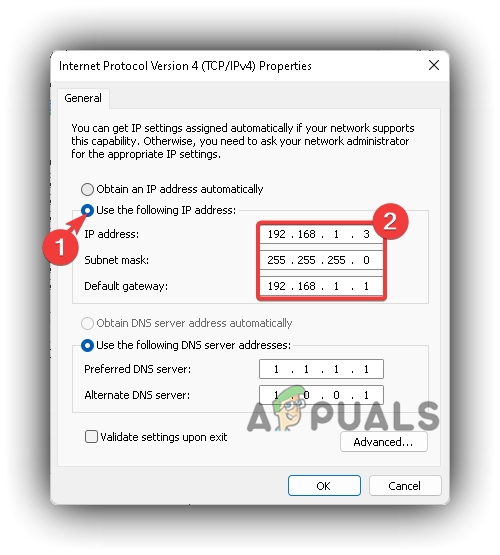
Internet Protocol Version 4 (TCP IPv4) Static IP
12. Change Router Settings
Since every Router contains different settings, you should consult your router manufacturer or a professional technician to help optimize the Router to your desired settings. It will provide the best quality of uninterrupted Internet connection to your PC so you can enjoy your favorite titles in peace.
13. Reinstall Battle.net and Overwatch 2
If all else fails to solve the Overwatch 2 Unexpected Server Error along with the other numerous issues that you are facing while trying to play Overwatch 2 or any other Battle.net title, then as a last measure, what you can try is to completely uninstall and then reinstall the fresh copy of Battle.Net and Overwatch 2.
Reinstalling has proven to be very useful in various situations as it resets the configuration files for the launcher and games alike, which will help minimize or completely eliminate the errors you are facing. Follow the step-by-step instructions below to do so:
- Open Battle.net Launcher
- Navigate to Overwatch 2 and click Uninstall
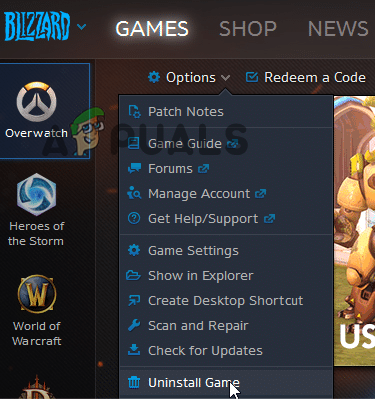
Click on Uninstall in Battle.net - Select Yes, Uninstall and let it finish uninstalling
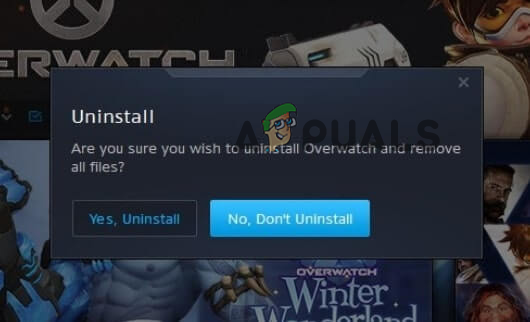
Confirm To Uninstall Overwatch 2 - Then open Start Menu and go to Settings
Opening Windows 11 Settings From Start Menu - Select Apps from the left sidebar and click on Apps and Features
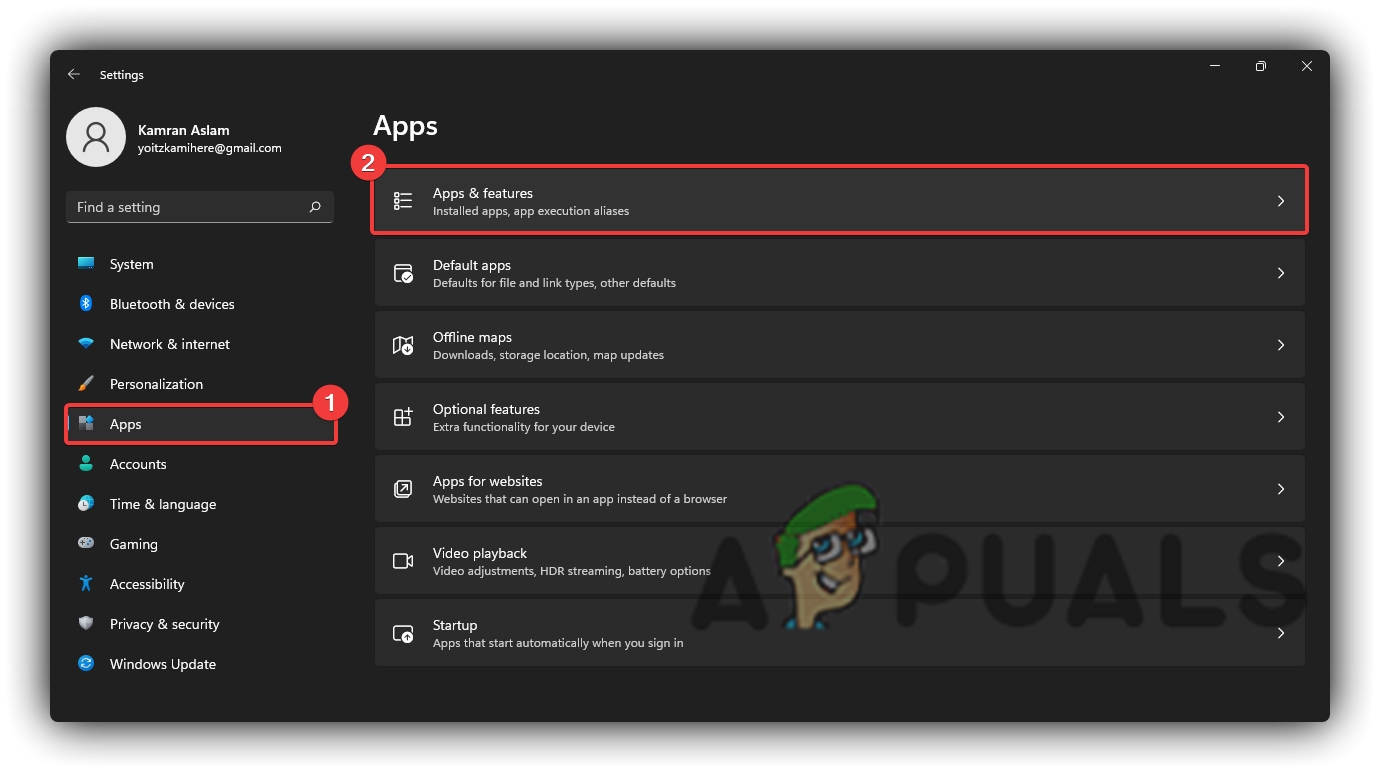
Windows 11 Apps and Features Settings
- Type Battle.net in the search bar and click on the three dots button and click Uninstall
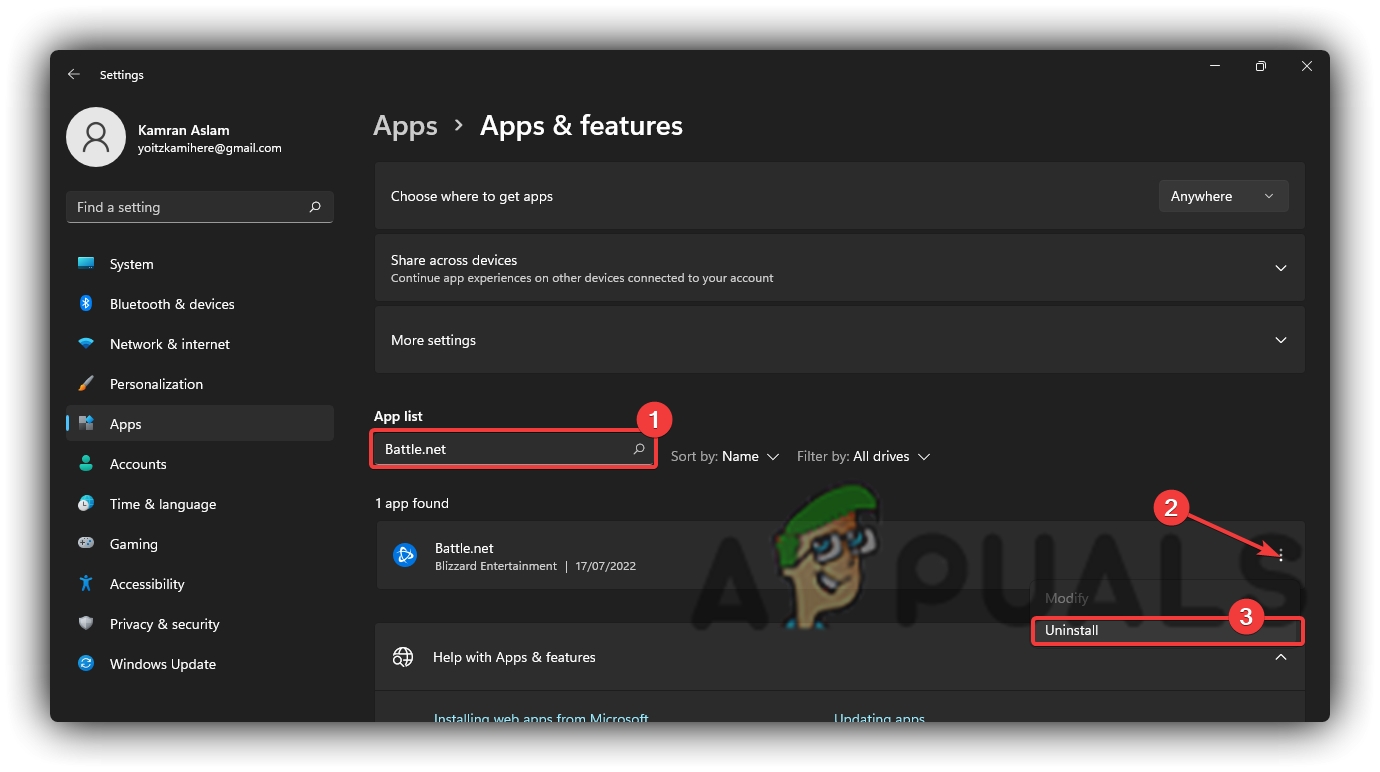
Uninstalling Battle.Net Launcher
Above, we have compiled a list of the most probable solutions that are sure to fix the Overwatch 2 Unexpected Server Error for you. If everything mentioned above fails to fix the problem for you by any chance, then you should try contacting Battle.Net support and report the problem to them and the logs so they can troubleshoot and fix it for you.


