What is OpenShell and How to Customize Windows using it?
Windows 11 introduced a new user interface to its users with little to no customization options. With many changes introduced in the newer version of Windows, almost everything has been changed visually, from the Start Menu to the Task Bar, the File Manager, and more. If you are not a fan of the new user interface in Windows 11, making the switch may not be welcoming.
Initially, there were a number of Windows Registry tweaks that allowed users to customize the design choices in Windows 11, such as changing the size of the taskbar. However, they have long been removed, and there is no official option for making these tweaks. With that said, thanks to Windows’ large user base and the community, there is a third-party option that can be utilized to customize the look of Windows 11 to your liking.
Open Shell, formerly known as Classic Shell, is a third-party, free program that enables users to customize the interface of various Windows elements, such as the Start Menu, Windows Task Bar, the File Explorer window, and more. Open Shell is a new project that builds on the Classic Shell development, which has been abandoned by the previous maintainers.
In this article, we will show you how to use Open Shell on Windows 11 to customize the default user interface offered by Microsoft.
1. Download and install Open Shell.
The first thing you need to do to get started with Open Shell is to download it from the official GitHub repository and install it on your computer. This is quite easy to do; simply follow the instructions below:
- First of all, head to the official GitHub repository for Open Shell by clicking here.
- After that, click on the latest release under the Releases option on the right-hand side.
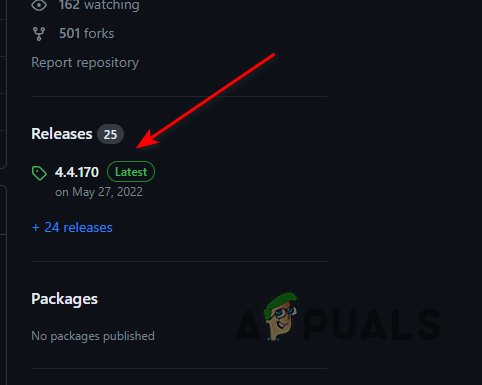
Open Shell Releases - Then, click on the OpenShellSetup_VERSION.exe file to download the setup.
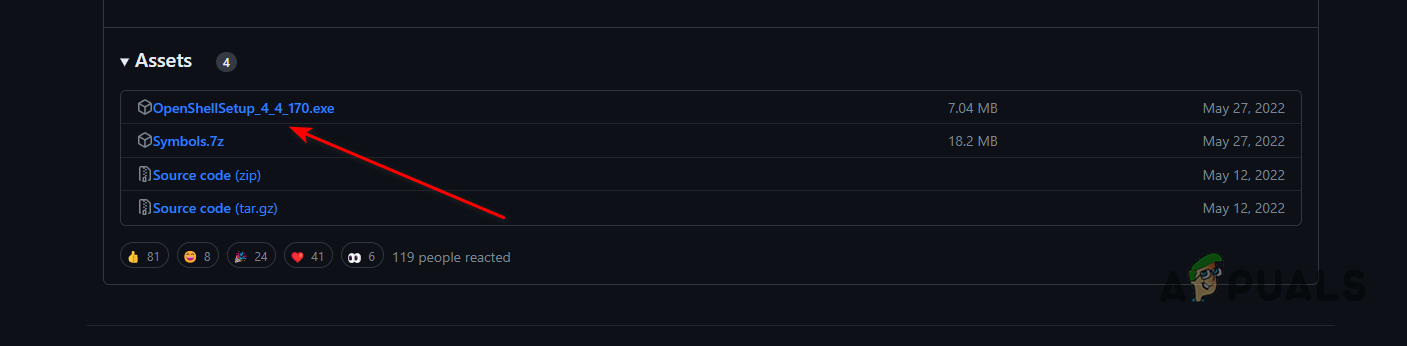
Downloading Open Shell Setup - Once you do that, navigate to the Downloads directory and run the file.
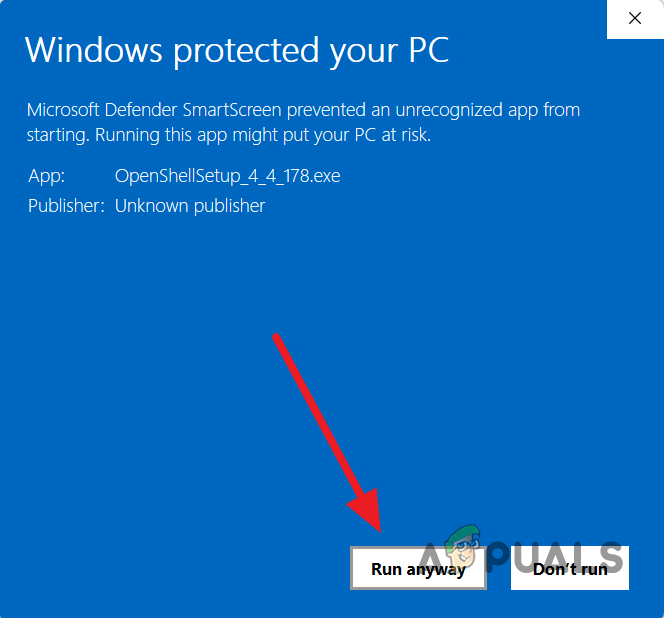
- In some cases, Windows Defender will display a warning message and block the setup file. However, Open Shell is completely safe, and this warning message can be ignored.
- Click the More info option on the warning message to reveal other options.
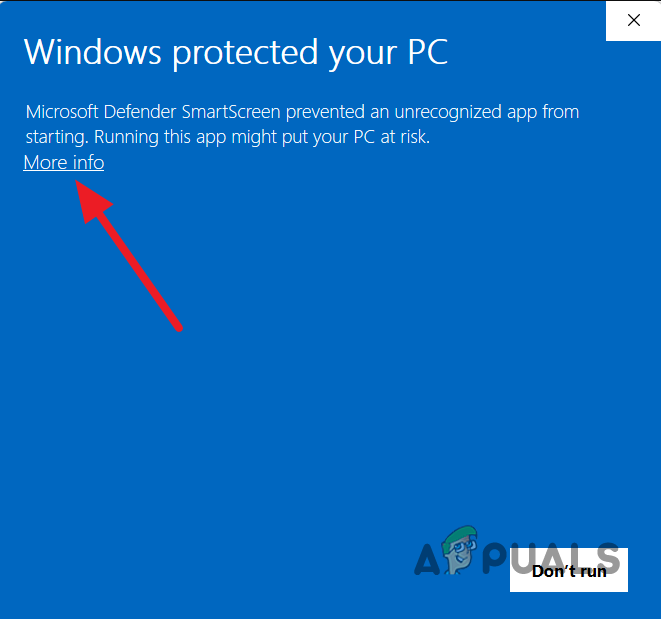
Windows Defender Warning Message - Finally, click Run anyway to start the setup.
Running Open Shell Setup - After that, follow the on-screen prompts to complete the installation. You will not need to make any changes or configurations. Simply proceed with the default options to install Open Shell.
2. Customize the Start Menu using Open Shell.
Now that you have installed Open Shell on your computer, you can customize a number of features on your PC. Let’s start by showing you how to customize the Start Menu using Open Shell in Windows 11.
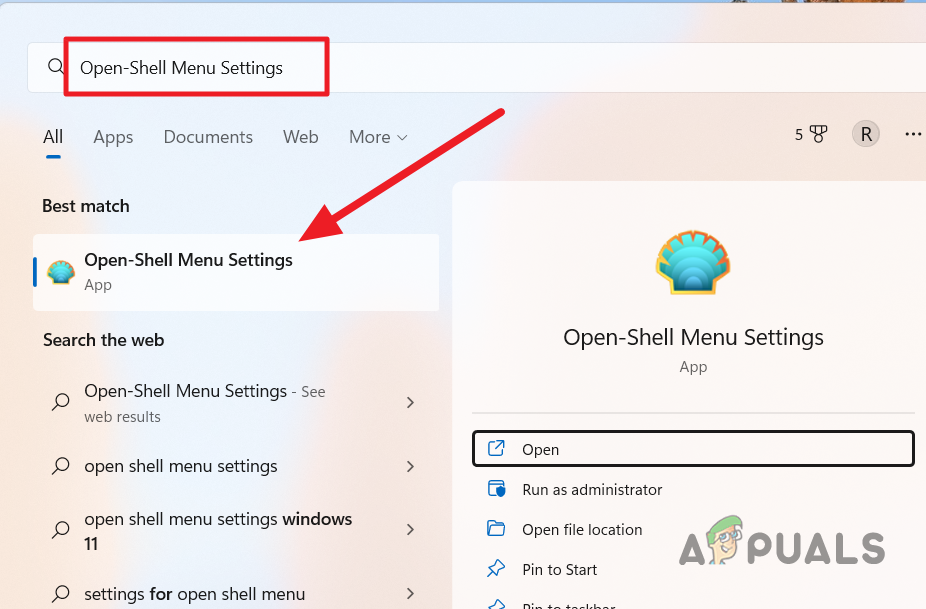
- First of all, open the Start Menu and search for Open-Shell Menu Settings. Then, open it.
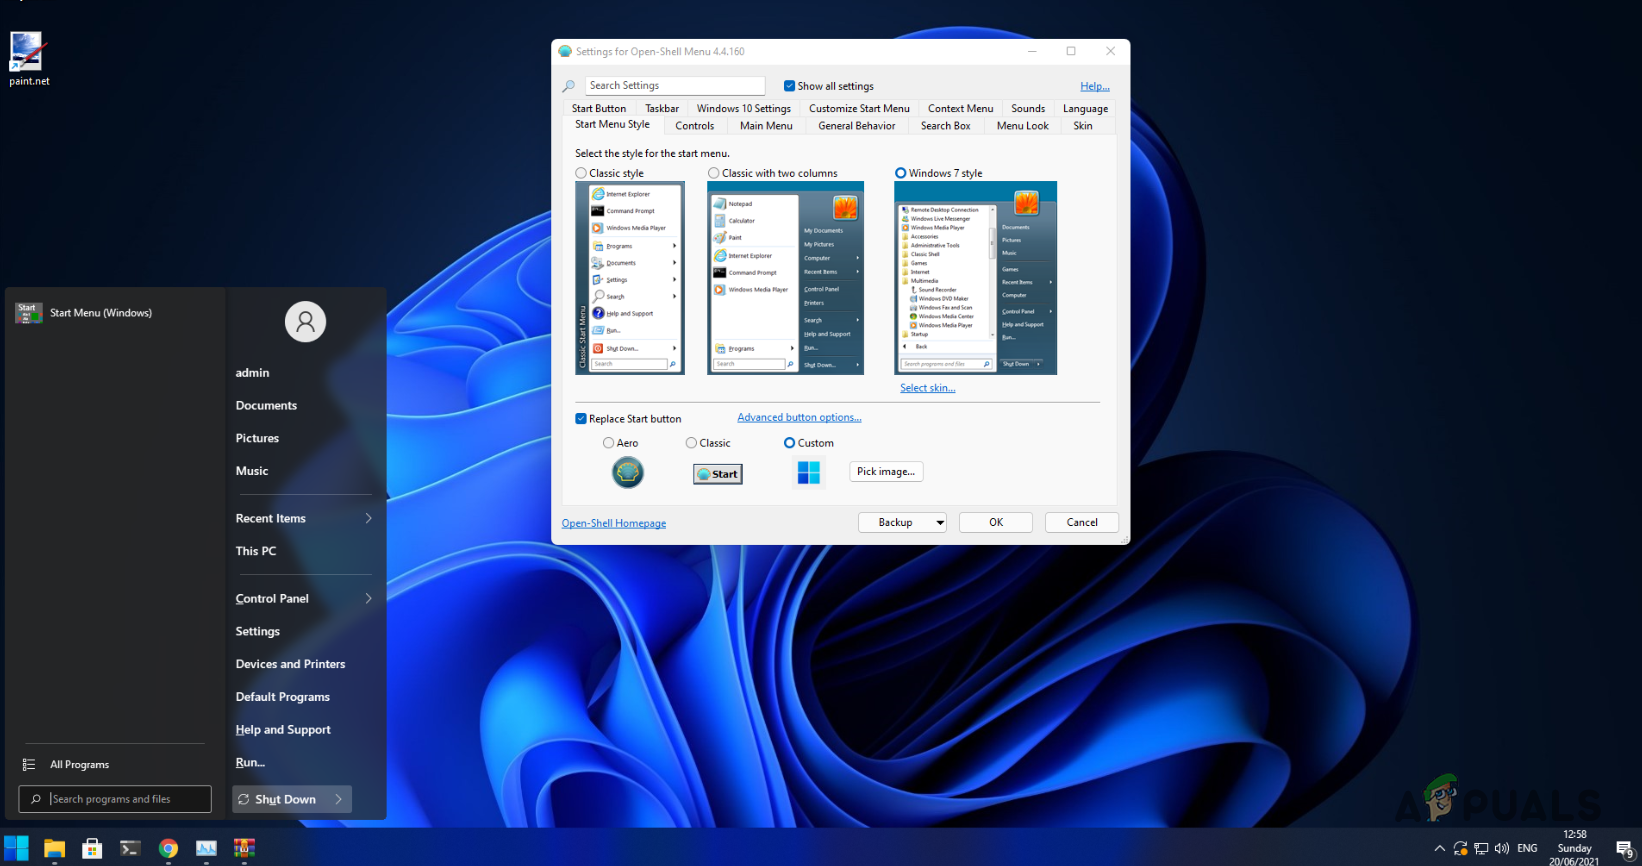
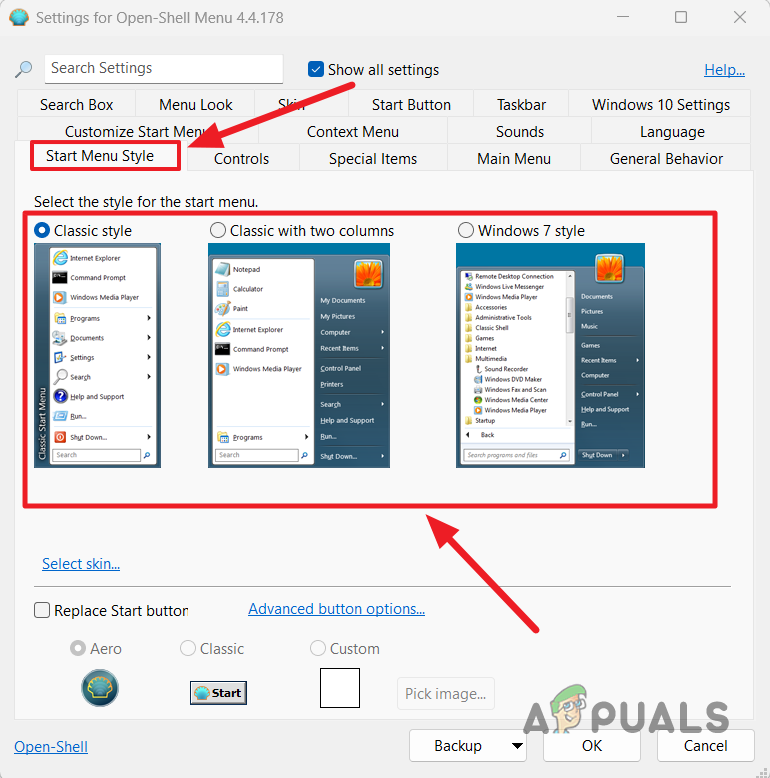
Opening Open Shell Menu - Once the Open Shell Menu window opens, switch to the Start Menu Style tab.
- There, you can choose from a total of three classic styles for the Start Menu. Choose whichever fits your liking more.
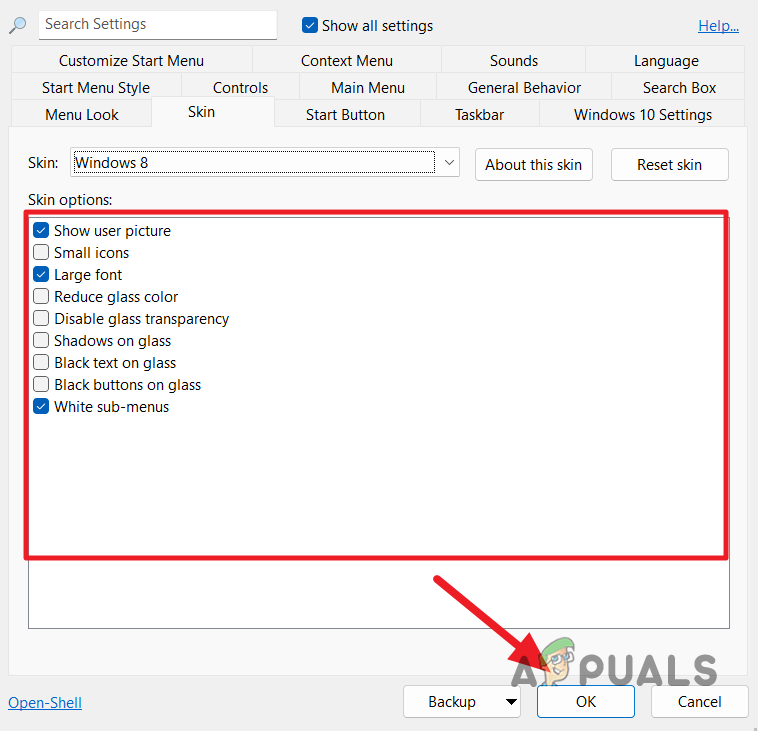
Customizing Start Menu Style - You can also change the skin of the Start Menu, which can be referred to as the theme. To do this, click the ‘Select skin‘ option.
- There, you can explore various settings and customize the skin of the Start Menu according to your preference. You have the option to use the skin of a specific Windows version if you desire, by selecting from the Skin drop-down menu.
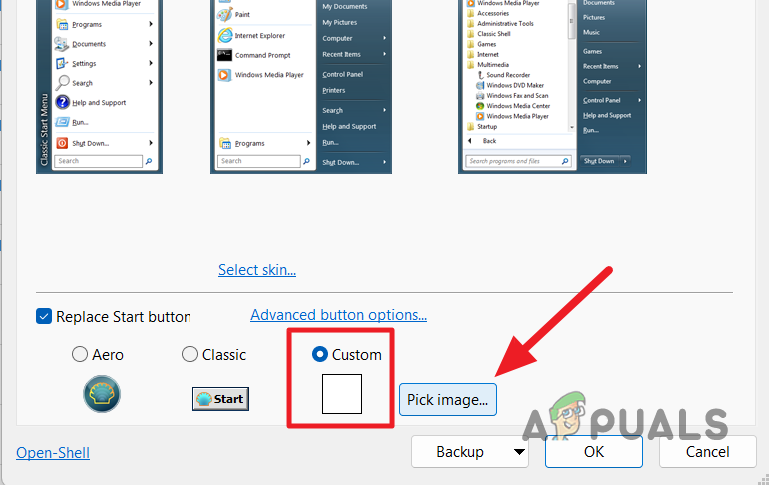
Changing Start Menu Skin - Additionally, you can also change the Start Menu icon with Open Shell. Tick the “Replace Start Button” checkbox, and then choose one of the provided options.
- If you wish to use a custom icon for the Start Menu, select the Custom option and click the Pick Image option.
Changing the Start Menu Button - You can also change the items in the Start Menu. To do this, switch to the Customize Start Menu tab.
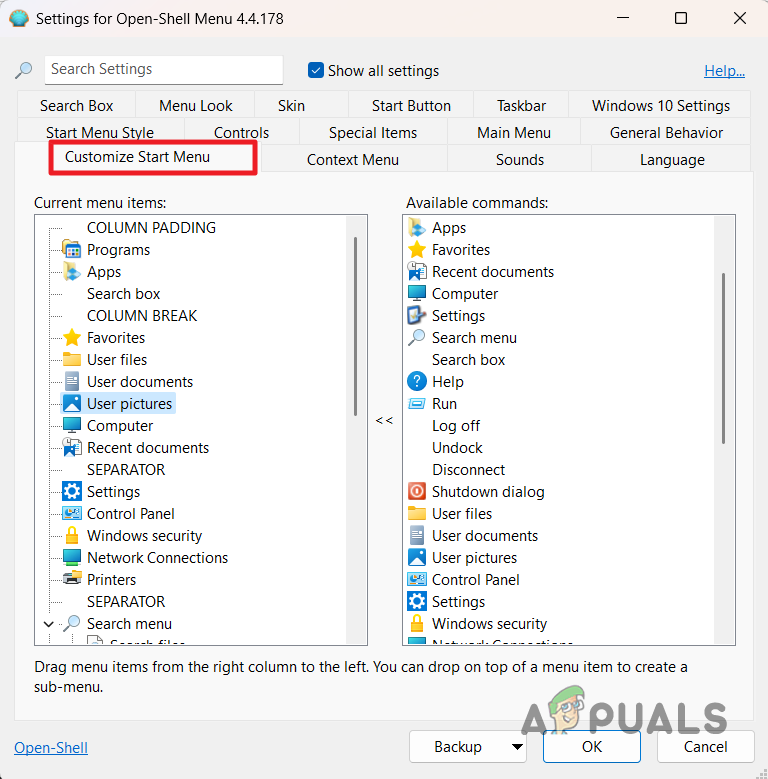
Customizing Start Menu Items - There, you can customize the items that are visible in the Start Menu. You can also add more items to the Start Menu and much more. Simply drag the items from the right menu to the left to add them to the Start Menu.
- Open Shell also lets you customize the general behavior of the Start Menu. Switch to the General Behavior tab to reveal these options.
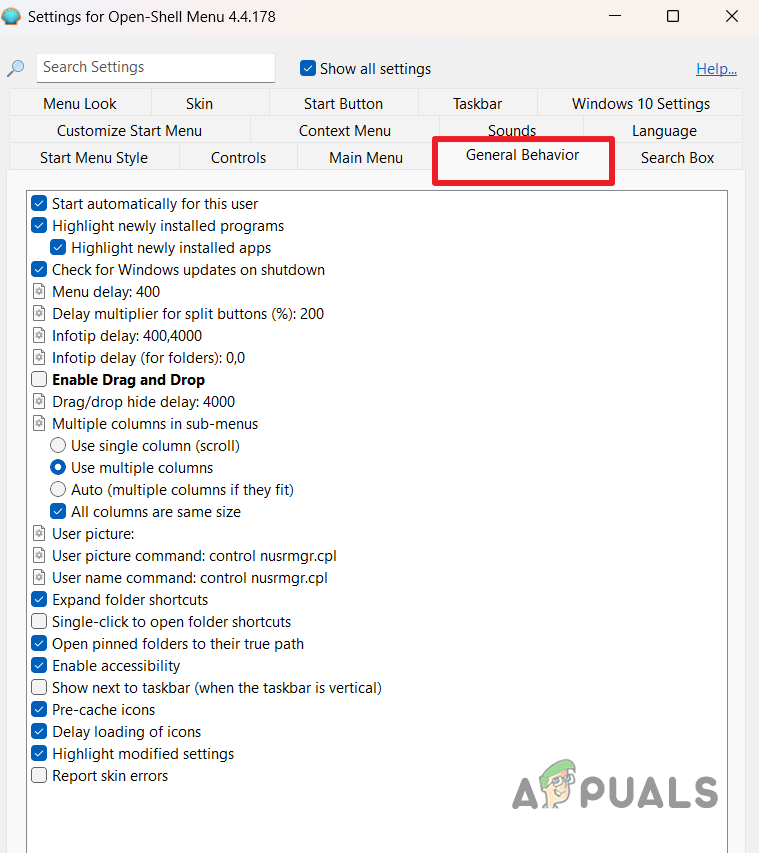
Open Shell General Behavior - Make sure the “Start automatically for this user” checkbox is ticked here.
3. Customize the Taskbar with Open Shell.
Open Shell allows for a few customizations to the taskbar, such as changing the color, altering the appearance of the taskbar, and more. To customize the Windows 11 taskbar with Open Shell, follow the instructions below:
- In the Open Shell Menu window, navigate to the Taskbar tab.
- Start by checking the “Customize Taskbar” checkbox at the top.
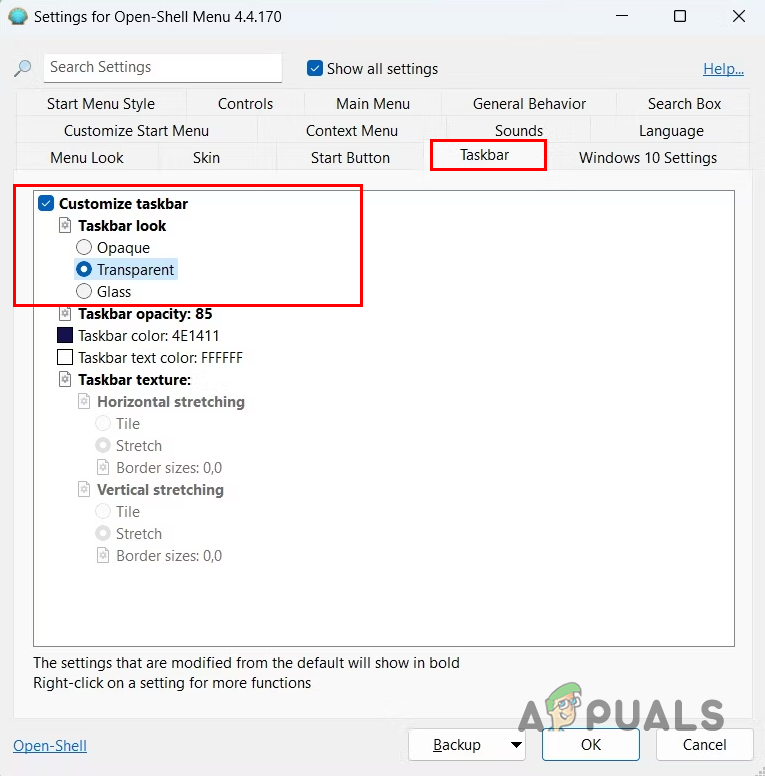
Customizing Taskbar - After that, you can change the appearance of the taskbar by choosing one of the three provided options.
- If you wish to change the transparency of the taskbar, use the Taskbar opacity option.
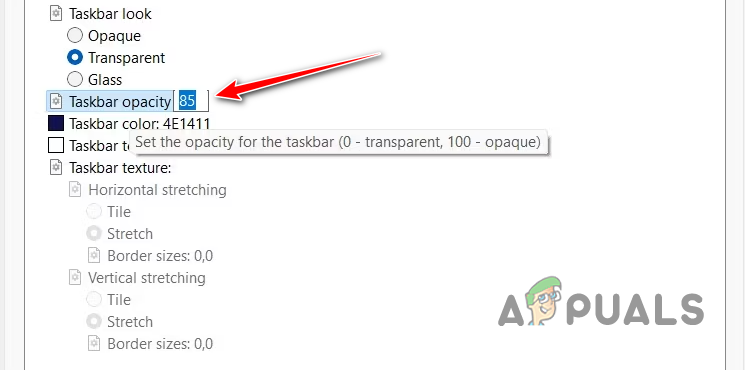
Changing Taskbar Opacity - The color of the taskbar can also be changed via the Taskbar color option.
- After that, you will also need to change the font color on the taskbar if you use a custom taskbar color. Use the “Taskbar Text Color” option to do so.
4. Automatically update Open Shell.
Open Shell offers an automatic update feature, which saves you the trouble of downloading and installing a new version when it becomes available. To enable automatic updates for Open Shell on your system, follow the instructions below:
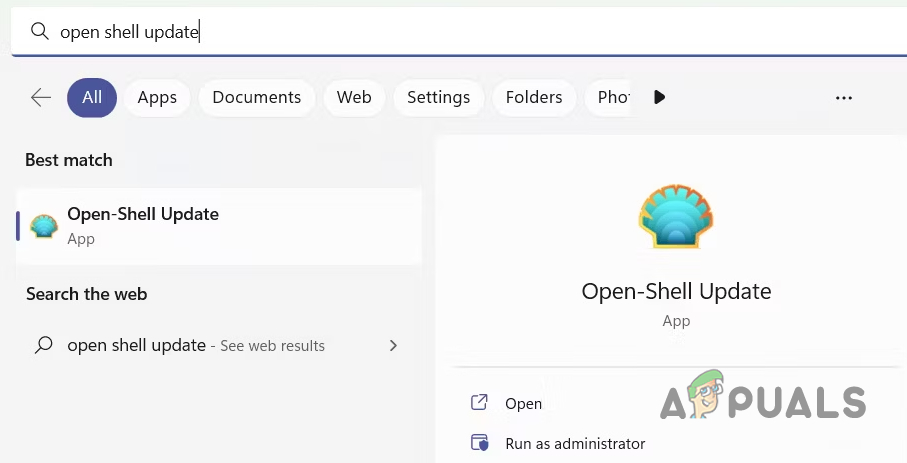
- First, open the Start Menu and search for Open Shell Update. Then, open it.
Opening Open Shell Update Menu - In the Open Shell Update window, check the “Automatically check for new version” checkbox.
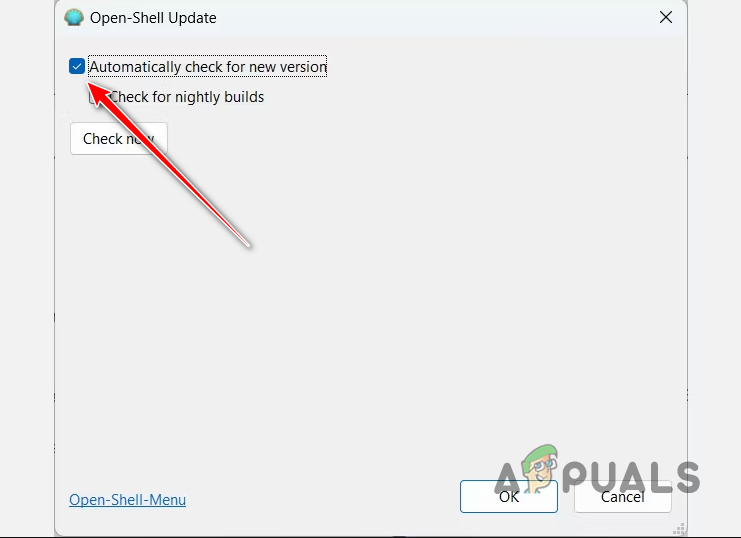
Enabling Open Shell Automatic Update - Finally, click OK.
- Once you do that, the program will automatically check for any available updates and download new versions as they are released.


