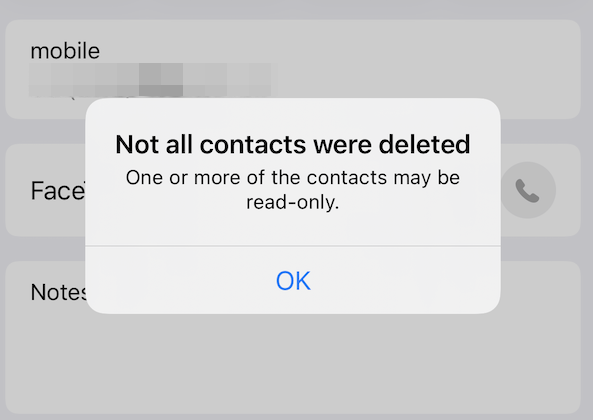
Fix: “Not all contacts were deleted” Error in iPhone
The ‘Not all contacts were deleted’ error on your iPhone indicates that the iPhone was unable to delete one or more contacts because they were read-only.
What are read-only contacts?
Read-only contacts are those that are saved to the phone book by a third-party app such as WhatsApp, Telegram, etc. These contacts cannot be deleted directly from the phone book; instead, you must first delete them from the app itself.
How can I fix this issue and proceed to delete the contacts?
In this article, we have mentioned specific ways to deal with this iPhone error and delete all the desired contacts successfully. Let’s take a detailed look at each of the methods.
1. Delete contacts from iCloud.
The contacts you want to delete have been synced to your iCloud account. Because of this, you are not able to delete them from your iPhone. Unlike some Android devices, the contacts on an iPhone are neither saved on the device nor the SIM card.
Therefore, you need to delete them from the account that you are using, as the contacts are associated with them. However, you need to check which email account you are using on your device. Most likely, the contacts have been synced to the Apple account.
When you delete a contact in Contacts on iCloud.com, it will be deleted on every device that has the ‘Contacts’ feature turned on in iCloud settings.
Here’s how you can delete all the contacts from your iPhone and turn off iCloud syncing:
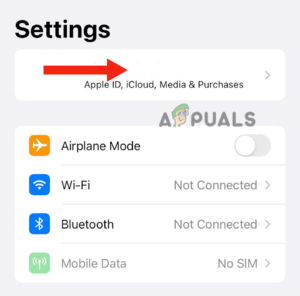
- Go to Settings and tap on your Apple Profile.
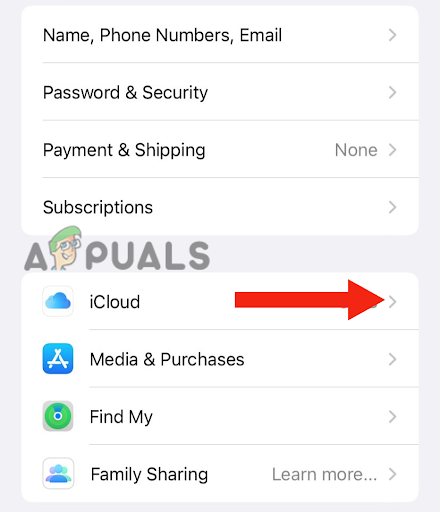
Tap on your Apple Profile - Then, tap on iCloud.
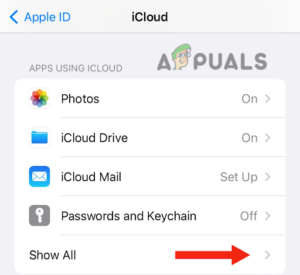
Go to iCloud - After this, tap on Show All under Apps Using iCloud.
Hit the Show All button - Turn off the Contacts toggle.

Turn off the Contacts toggle - Lastly, tap on “Delete from My iPhone” to confirm.
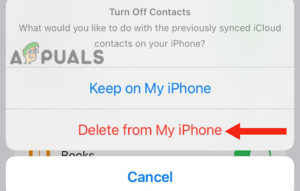
Tap on Delete from My iPhone
2. Restart iPhone
After you have followed the above steps, restart your device to ensure that the settings have been applied.
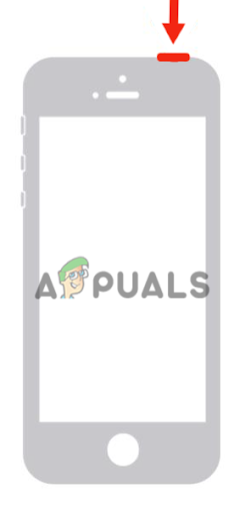
Restart the iPhone SE (1st generation), 5, or earlier models:
- Begin by pressing the top button and holding it until the power-off slider appears on the screen.
- Then, drag the slider and wait for about 30 seconds for your iPhone to turn off.
- Lastly, press the top button and hold it until you see the Apple logo to turn on your device.
Restart an iPhone SE (2nd or 3rd Generation), 6, 7, or 8.
- Press the side button and hold it until the power-off slider appears on your iPhone.
- Drag the slider to turn it off and wait for approximately 30 seconds.
- Lastly, turn on your device by pressing the side button and holding it until the Apple logo appears on the screen.

Press and hold the side button, slide the power-off slider, then hold the side button again
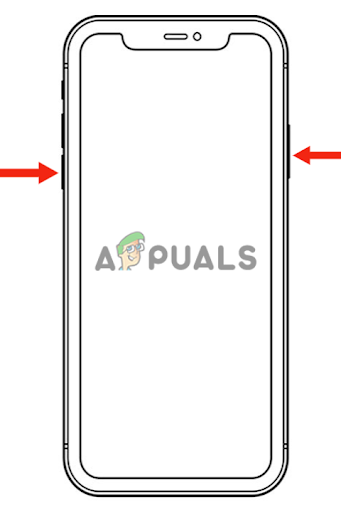
Restart the iPhone X or later versions:
- Press the volume up or down button, along with the side button, until the power-off slider appears on the screen.
- After this, drag the slider to turn off your iPhone, and wait for approximately 30 seconds.
- Lastly, press the side button until the Apple logo appears on your screen to turn it on.
Press and hold the volume button, slide the power-off slider, then press the side button to turn it back on
After restarting your iPhone, open the Contacts app, and you will see that all the contacts have been deleted.
However, if you do not want to delete every contact from your iPhone or iCloud, you can also delete them manually. Here’s how you can do it:
- Log into iCloud.com on your PC.
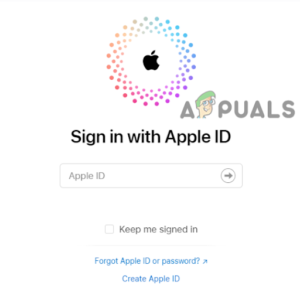
Sign in with your Apple ID - Scroll down and click on Contacts.
Click on Contacts - Next, click on the contact that you want to delete.
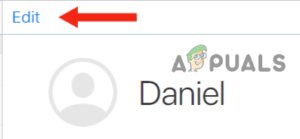
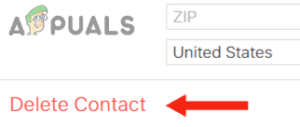
- Then, click on “Edit.
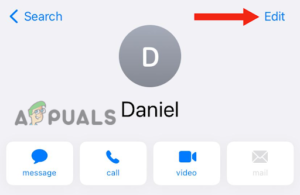
Hit the Edit button - After this, click on ‘Delete Contact‘ to delete the selected contact.
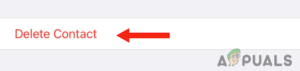
Click on Delete Contact - Click on “Delete ‘Contact Name'” to confirm.
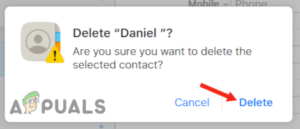
Click on Delete “Contact Name” to confirm
3. Delete the contact from WhatsApp.
Another reason why you are unable to delete the contact from your device is that you have saved it in a third-party app instead of the default Phone app. The app can be any messaging app, such as Telegram or WhatsApp.
Thus, if you use any of them (or both), try deleting the contact from the app first, as this will immediately resolve the issue. Follow the steps below to delete the contact from WhatsApp:
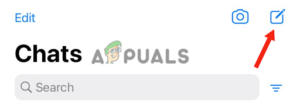
- Go to WhatsApp and tap on the new chat icon in the top right corner.
Tap on the new chat icon - After this, scroll down and tap on the contact you want to remove from your device.
- Next, tap on the contact’s name at the top of the chat.

Tap on the contact’s name - Then, tap on “Edit” in the top right corner.

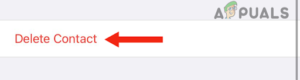
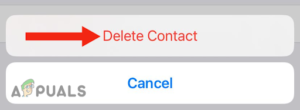
Go to Edit - Tap on “Delete Contact.
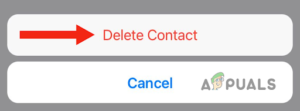
Hit the Delete Contact button - Lastly, tap on “Delete Contact” to confirm the action.
Tap on Delete Contact to confirm
You can do the same to delete contacts from other third-party apps, such as Telegram. After doing so, follow these steps to delete the contact from your iPhone:
- Go to the Default Phone app, scroll down, and tap on the contact that you want to delete.
- Next, tap on Edit in the top right corner.
Go to Edit - Scroll down and tap on “Delete Contact.
Hit the Delete Contact button - Lastly, tap on “Delete Contact” to confirm. With this, you will be able to delete the contact without encountering the error, “Not all contacts were deleted.
Tap on Delete Contact to confirm
3. Remove the contact as a ‘Siri Suggestion.’
If you have tried to delete the contact from any third-party app and turned off iCloud syncing, but the issue persists, check whether the contact is saved as a Siri suggestion. Many users have reported that they are unable to delete the contact when it is saved as a Siri Suggestion.
The cause is still unknown. However, it is assumed that when the contact is saved as a Siri Suggestion, it means that the contact is marked as “frequently used.” Therefore, you cannot delete it from your device unless you remove it as a Siri Suggestion.
Here’s how you can solve this issue:
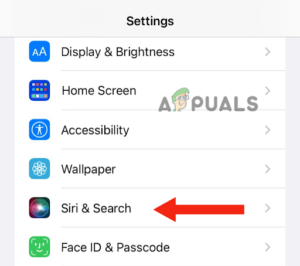
- Go to the Settings app, scroll down, and tap on Siri & Search.
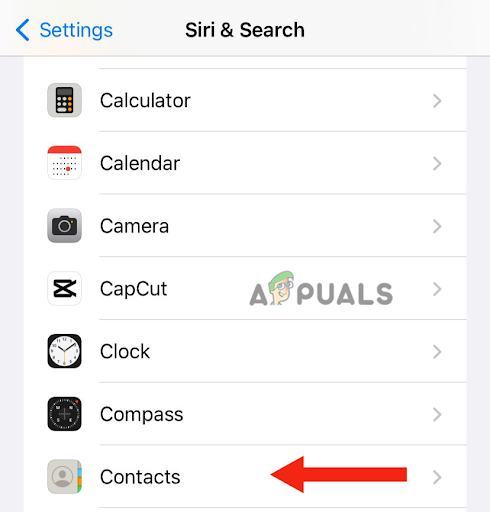
Go to Siri & Search - After this, scroll down and tap on “Contacts.
Select Contacts - Lastly, turn off “Show Contact Suggestions.
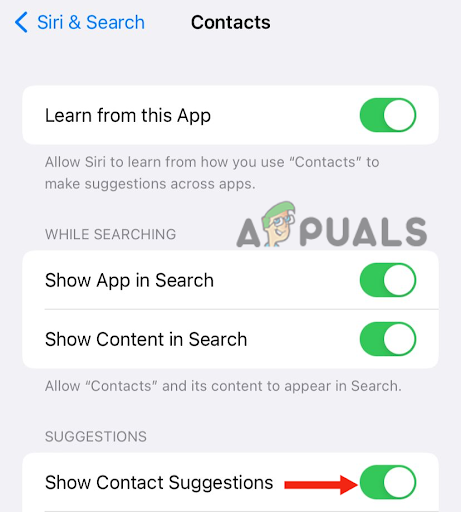
Turn off Show Contact Suggestions
You can also remove the contacts individually by going to each contact and removing it as a Siri suggestion. After this, you will be able to delete the contact without seeing any pop-up messages.
In this post, we have gone through three effective methods that will help you solve the issue of not all contacts being deleted. However, if you have tried all of them and none of the methods worked for you, contact Apple Support and inform them about the issue.